Create your Azure image with Debian 7.0
I recently had to create a custom VM based on Debian 7.0.
As Debian is not in the list of the endorsed distributions, if you want to run a Debian based VM in Azure, you have to build it yourself. The whole process is detailed on the following page but some additional guidance my help some folks: https://azure.microsoft.com/en-us/documentation/articles/virtual-machines-linux-create-upload-vhd-generic/
I'm going to walk you through the steps that I took to create my Debian 7.0 image in Azure:
- Create a virtual machine with hyper-V (or other virtualization tools) and install Debian
- Configure the VM
- Upload the VHD to azure and create your image
1- Create your VM
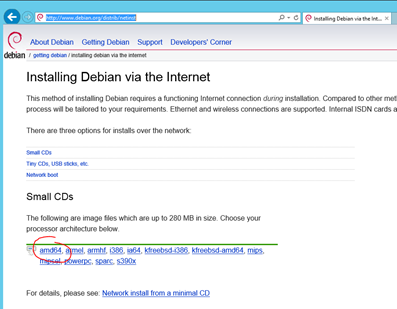
I've downloaded the network installation ISO from this location: https://www.debian.org/distrib/netinst (AMD64 version)
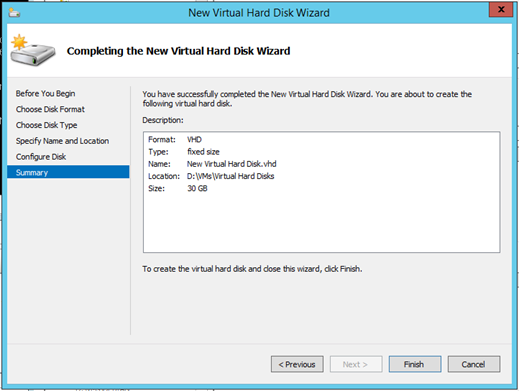
Then you need to create a VM with a fixed VHD, I'd recommend to size it at 30 GB to make is fast enough to upload and still large enough to handle any future updates but this is your call at the end of the day. The maximum that you can have is 127 GB. This is how it looks on Hyper-V.
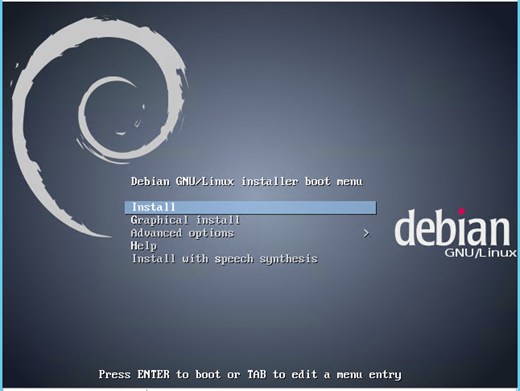
Then proceed with the installation of your distribution of Debian, including the default disk partitioning. In my case, I have selected the default configuration all the way until the selection of roles.
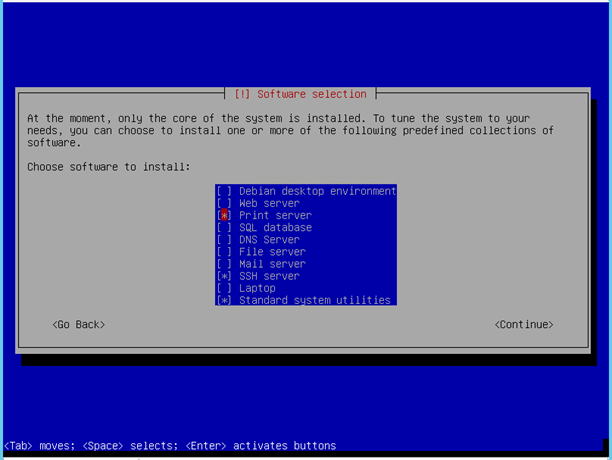
For the selection of roles, I've unselected the "Debian desktop environment" and "Print Server" and added the "SSH server". Once the VM is in Azure, SSH will be the only way to access and configure it so make sure you add this.
Wait until the end of the installation and you are ready to proceed to the next step.
2- Configure the VM
- First we need to modify the kernel configuration to ensure that the console messages are redirected to the first serial port.
Edit the /etc/default/grub file and modify the GRUB_CMDLINE_LINUX parameter as follows:
GRUB_CMDLINE_LINUX="console=ttyS0 earlyprintk=ttyS0 rootdelay=300"
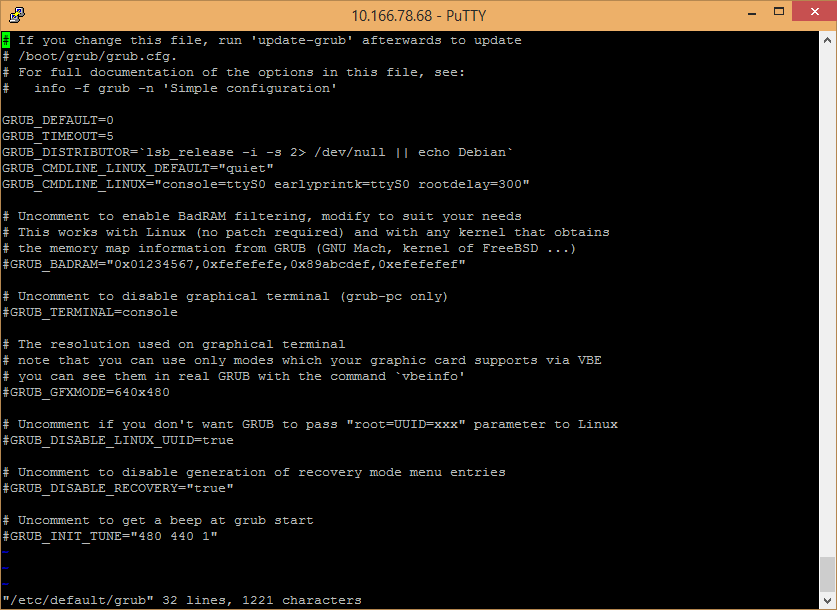
You can find additional information on the configuration of grub on this page: https://www.gnu.org/software/grub/manual/html_node/Simple-configuration.html
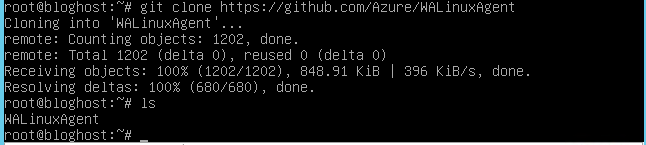
- Second we need to install the Azure Linux Agent. The official source can be found on github: https://github.com/Azure/WALinuxAgent
Before we need to install git and sudo with the following command lines from a privileged prompt:
- apt-get install git –y
- apt-get install sudo -y
Clone the github repository to the directory you like with: git clone https://github.com/Azure/WALinuxAgent
This should create a WALinuxAgent directory where you have launched the command.
Then you need to copy the waagent file to /usr/sbin/waagent
Change the execution rights and then execute /usr/bin/waagent –install

You can see the logs associated to the installation of the Azure Linux Agent in /var/log/waagent.log
Then modify the /etc/waagent.conf file to set the agent parameters as follows:
- ResourceDisk.Format=y
- ResourceDisk.Filesystem=ext4
- ResourceDisk.MountPoint=/mnt/resource
- ResourceDisk.EnableSwap=y
- ResourceDisk.SwapSizeMB=2048 ## NOTE: set this to whatever you need it to be.
Finaly, run the following commands:
- sudo waagent -force -deprovision
- export HISTSIZE=0
- logout
and then shutdown the VM.
3- Upload the disk to Azure and create the image
Ensure that on the machine where you have created the VM you have the latest Azure powershell cmdelts and run the following:
Add-AzureVhd -Destination https://mystorageaccount.blob.core.windows.net/mycontainer/debianimage.vhd -LocalFilePath 'D:\VMs\DEBIAN\debianvhd.vhd'
Make sure that you adjust according to your environment the destination url and the local file path. The upload will take some time depending on your network bandwidth.
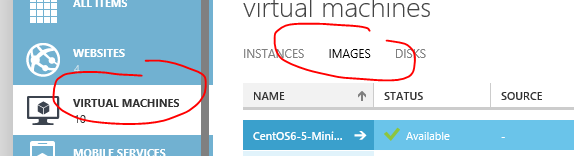
Once the vhd file has been uploaded, you can create your azure image. Under the "Virtual Machine" section, select the "Images" tab.
Then click "create" and fill the fields. The VHD URL points to the file that you have just uploaded.

4- Use the image
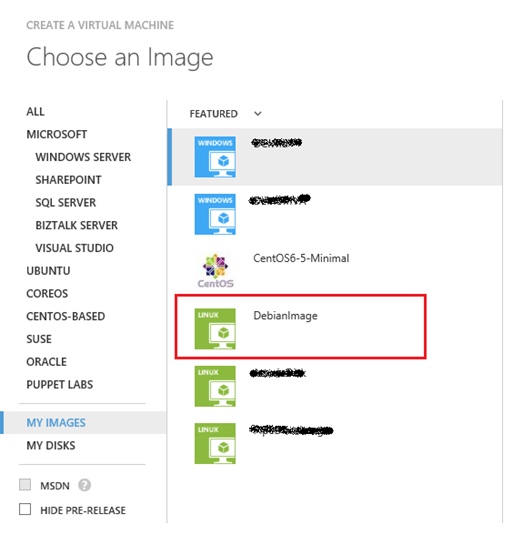
Your image is ready to be used as any supported Azure images from the gallery under "My Images" to create a new VM in Azure.
5- Additional information
You can get more information on the following links:
- Create non endorse Linux images for Azure: https://azure.microsoft.com/en-us/documentation/articles/virtual-machines-linux-create-upload-vhd-generic/
- Git repository for WALinuxAgent: https://github.com/Azure/WALinuxAgent
- Azure Linux Agent user guide: https://azure.microsoft.com/en-us/documentation/articles/virtual-machines-linux-agent-user-guide/
- Grub configuration: https://www.gnu.org/software/grub/manual/html_node/Simple-configuration.html