Replicating user pictures from Sharepoint 2010 to Exchange 2010 and Communications Server 14
Having the ability to see your correspondent's picture in Outlook 2010 is one of the things I like most about this product. It helps identifying who you are emailing with and in rather large enterprises, avoid mistakes when several people have the same first and last name. Even if they are usually differentiated with the name of their division or by using their middle name the picture helps avoiding such mistakes.
Let's see in this article how you can use the picture uploaded in the user's mysite on Sharepoint 2010 to be seen in Active Directory, Outlook 2010 and Office Communicator 14. The elements given here should carefully be used in a production environment as most of them are her to speed up processes that occur on a regular schedule.
Step 1 : Upload the user's picture on "My Site"
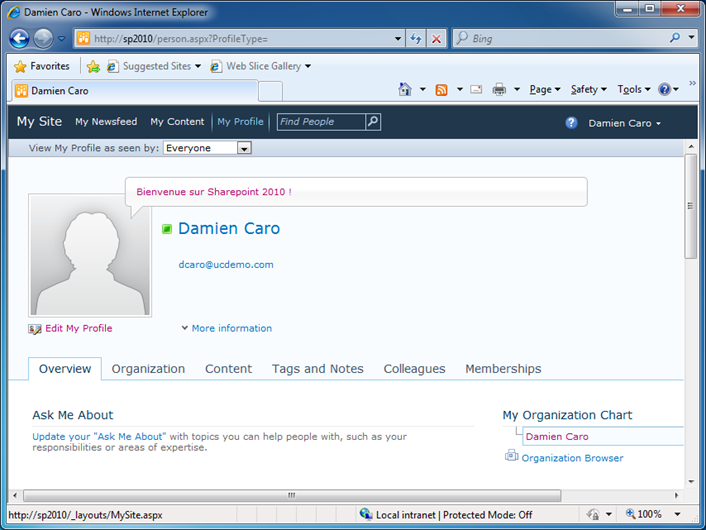
It all starts with a standard personal site on Sharepoint like the following one:
Now, go to "Edit My Profile" to upload the user picture:
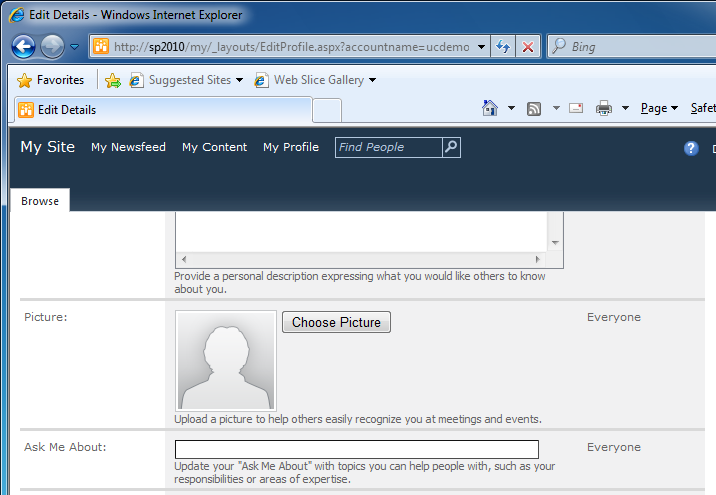
Click on the "Choose Picture" button and select the file you want to use as the profile picture.
After the file has been uploaded the "My Site" will look like this:
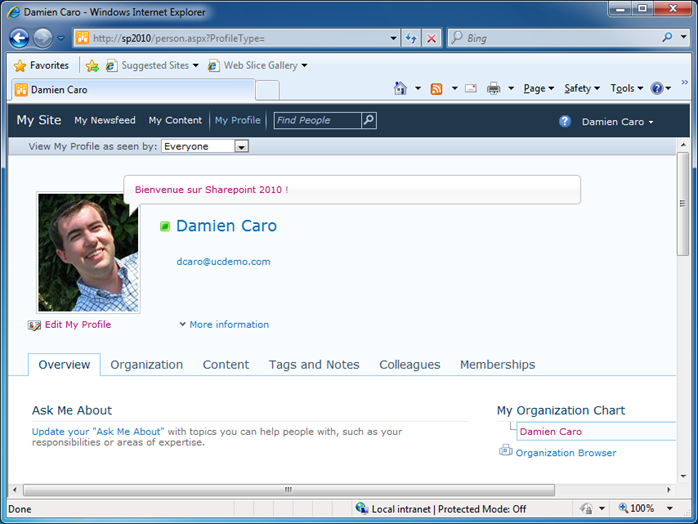
During the upload, SharePoint not only stores the picture but also generate a thumbnail of the picture that will be used in the following steps.
Step 2: Configure SharePoint 2010 to replicate the picture from the user profile to Active Directory
Before you follow the steps described below, you should have the user profile synchronization service in place. If you need help on how to configure the user profile synchronization service, you can find additional information here: https://technet.microsoft.com/en-us/library/ee721049.aspx.
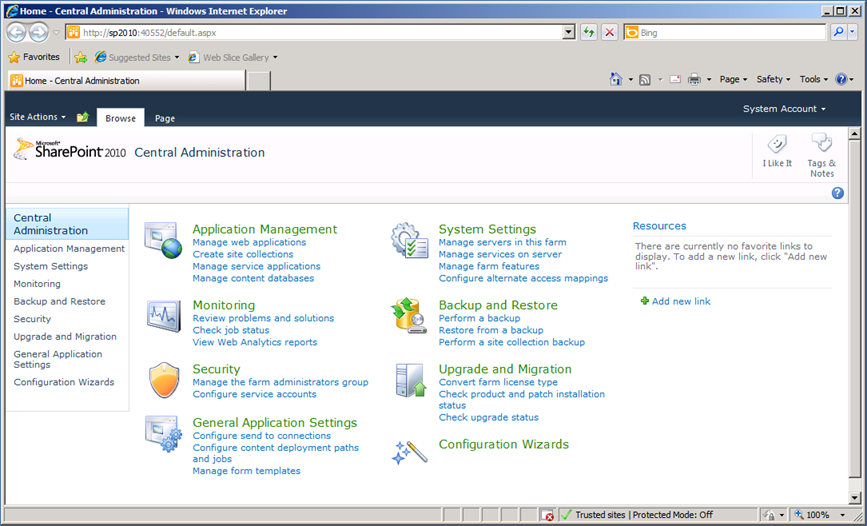
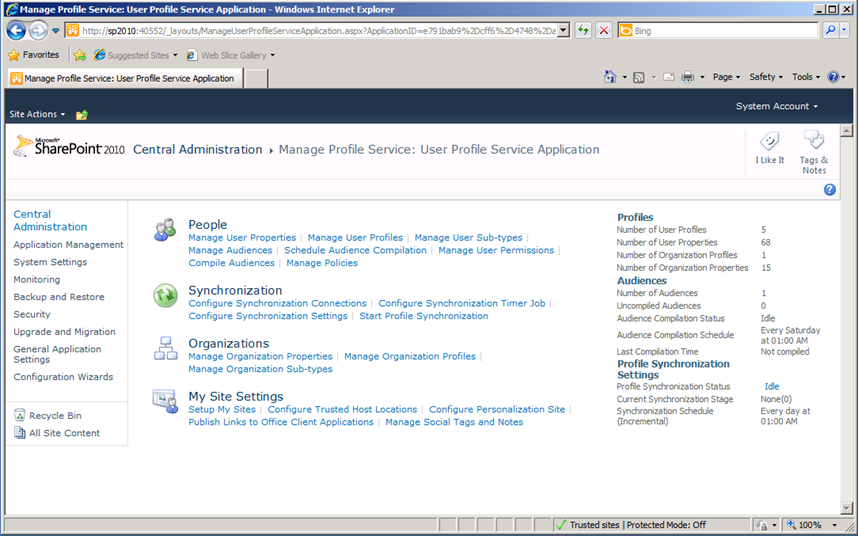
By default the user synchronization service does not replicate the picture from the user profiles to Active Directory. To enable it, you have to go to the "Central Administration" in SharePoint 2010 then "Manage Service Applications":
Select the "User Profile Service Application" service in the list and click on the "Manage" button.

From the page, select the "Manage User Properties" option. This is where you will be able to configure which fields from the SharePoint sites are replicated to Active Directory.
The following table describes the mapping between the SharePoint fields and the Active Directory user attributes.
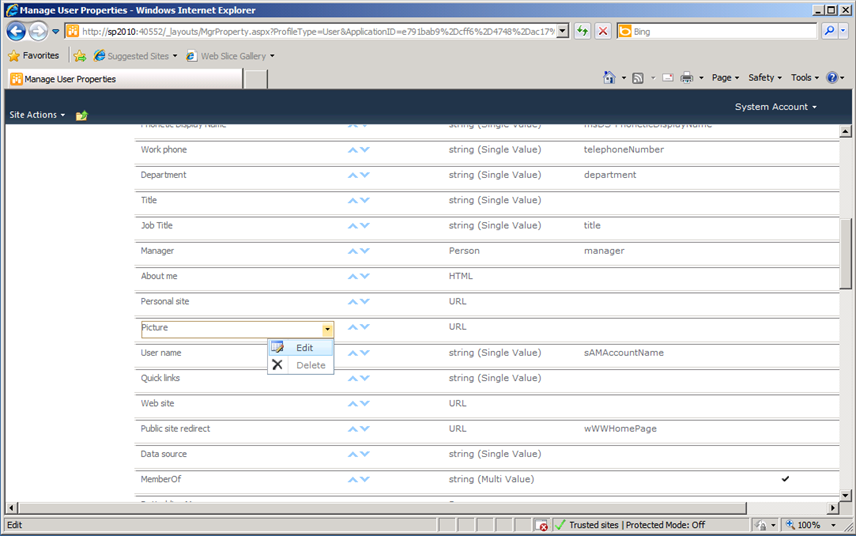
Look for the field called "Picture" and click "Edit".
Note that the field is not mapped to any AD Attribute. This is the default behavior as replicating the pictures in AD may have an impact on the size of the AD Database so make sure you do your math before you enable this replication in a production environment.
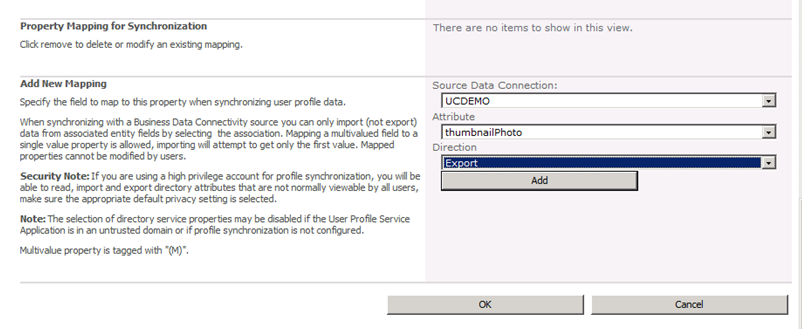
At the bottom of the editing page, you will find the opportunity to add a new mapping.
- In the "Source Data Connection" field select the name of the connection with Active Directory you have created during the configuration of the user profile synchronization service.
- Select "thumbnailPhoto" for the active directory attribute.
- Select "Export" for the direction as we want the picture to be replicated from SharePoint to Active Directory.
Click "Add" to add the field mapping and then validate the changes by clicking "OK".
Step 3: Start a full user profile synchronization
Now that we have the mapping properly configured and some user profiles populated with a picture, we can start a user profile synchronization. If you have time, you can simply wait for the regular process to be executed but be aware it may take up to 24h to be visible! So if you want to save time you can kick off the process manually.
Go back to Central Administration -> Manage Profile Service : User Profile Service Application and click "Start Profile Synchronisation". Make sure you select "Start Full Synchronization".

Wait until the user replication service has completed a full sync. It takes time and can be monitored from the management page of the user profile service application (same page from where we launched the profile synchronization).
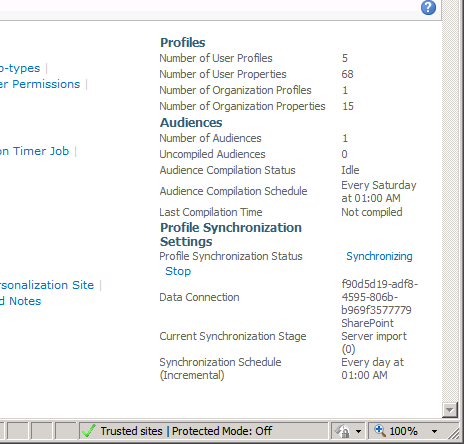
The "Profile Synchronization Status" should be in "Idle" mode before you proceed to the following steps.
At this point, the thumbnail of the picture that has been uploaded in the user profile is replicated in Active Directory and stored in the attribute "thumbnailphoto" of the user account.
Step 4: Update the Exchange Offline Address Book
Now that Active Directory has the information we want, it has to be consumed by the other user productivity applications: Outlook and Communicator 14.
This process is automatically performed by Exchange but if you don't want to wait the regular process (by default at 5 AM daily), you can speed-up the generation of the Exchange OAB.
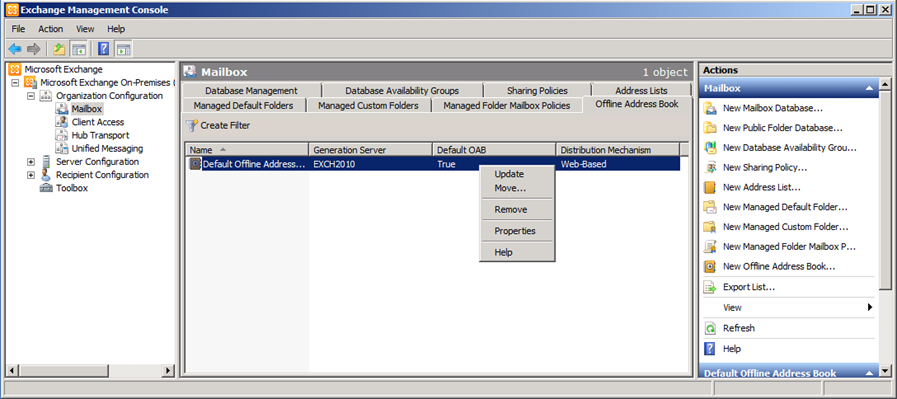
Go to the Exchange management console, under "Organization Configuration" select the "Mailbox" container, go to the "Offline Address Book" container and right-click update on the address book you want to generate.
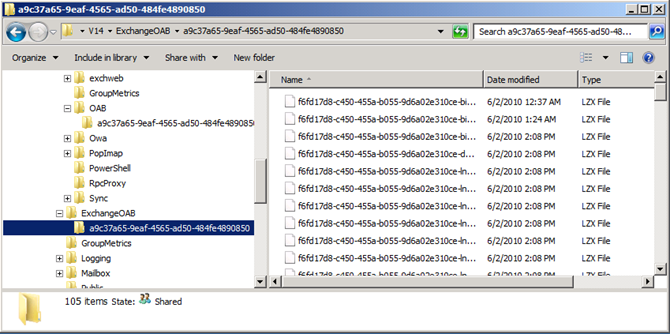
You can monitor the status of the generation of the OAB by looking at the time stamps of the files in <Exchange install directory>\V14\ExchangeOAB\<GUID of the Address Book>
Once the address book has been generated, you can speed up its distribution by forcing an update of the distribution file service, using the cmdlet Update-FileDistributionService. If you want more information on the cmdlet Update-FileDistributionService, go to the following technet page : https://technet.microsoft.com/en-us/library/bb124697.aspx
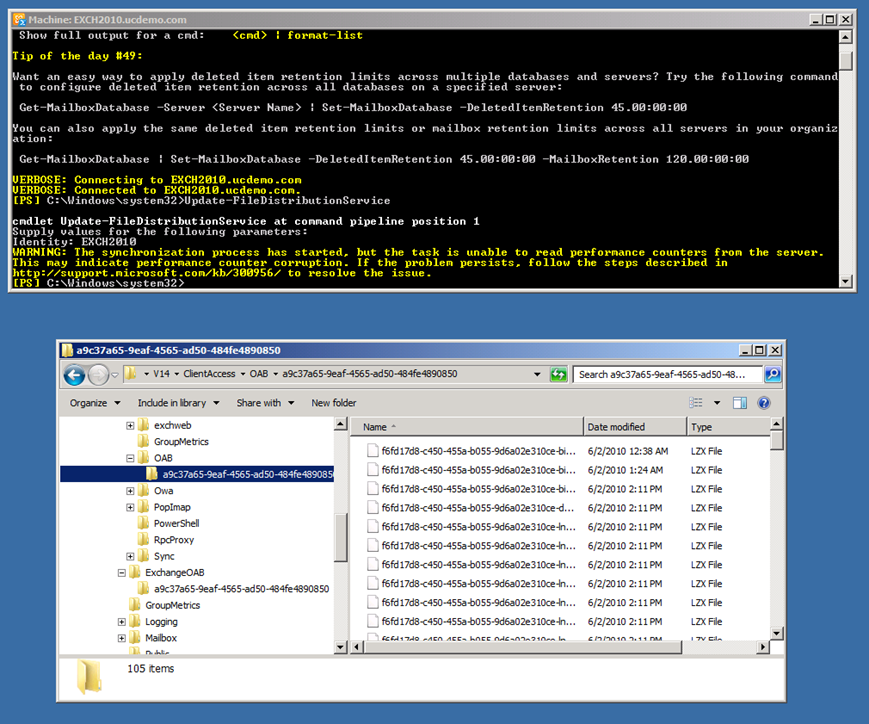
The files in <Exchange install directory>\V14\ClientAccess\OAB\<GUID of the Address Book> will be updated shortly after you ran the cmdlet.
You can find more information on Exchange 2010 and the Offline Address Book here : https://technet.microsoft.com/en-us/library/bb232155.aspx
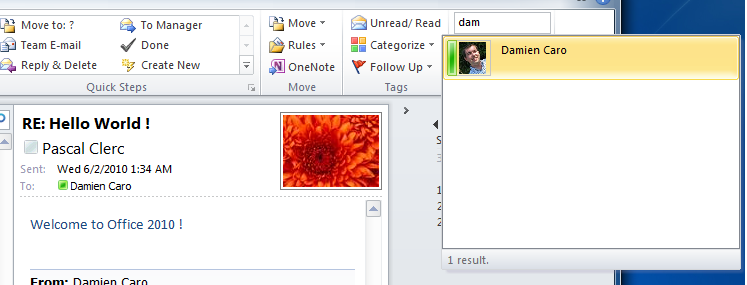
Now, you can download the Offline Address Book in Outlook 2010 and see the pictures in the client. Outlook 2010 is required to see the user pictures of a user within your company.
Outlook now has the pictures, now let's focus on Communicator 14.
Step 5: Verify the picture in Communicator 14
One of the great features of Communicator 14 is that it displays the user picture in the contact list and in the conversation window. The client obtains the picture by doing a Web Services query. So once the picture has been replicated to AD (after step 3) you should see it immediately in Communicator 14. There may be some latency / cache so if you don't see it immediately in you test environment, don't hesitate to logoff / logon again.
There is more about the photos in the address book from the Exchange point of view here: https://msexchangeteam.com/archive/2010/06/01/455005.aspx.
Thanks for reading and enjoy pictures in the address books!