Azure Key Vault Integration for SQL Server in Azure VMs
Earlier this year we announced a service called Azure Key Vault (AKV), a cloud-hosted Hardware Security Module (HSM) backed service for managing cryptographic keys and other secrets used in your cloud application. This summer, that service became generally available. Around the same time, the SQL Server Connector was also released (available on the Microsoft Download Center). This connector enables SQL Server encryption to use the Azure Key Vault as an Extensible Key Management (EKM) module for more secure key protection. Today we are announcing the Azure Key Vault Integration feature that simplifies the process of setting up your SQL Server VM to take advantage of AKV.
Azure Key Vault provides the convenience of managing your cryptographic keys within one service that is secure and highly available. This provides an alternative to managing the storage, protection, and sharing of those keys yourself. The SQL Server Connector allows your SQL Server machine to connect to Azure Key Vault in order to access the cryptographic keys that are protecting your encrypted databases or backups.
If you are unfamiliar with Azure Key Vault, HSMs, or SQL Server encryption, the links above are a good place to start.
Configuring Your Machine for AKV
Before using Azure Key Vault, there are several steps to go through to configure your SQL Server machine. You need to download and install the SQL Server Connector, configure the EKM provider, and create the credential that allows you to connect to your key vault from your machine. If you need to do this for multiple machines, the time quickly adds up.
To save time, we have created the Azure Key Vault Integration feature that automates this entire setup for your SQL Server Virtual Machines in Azure. This feature, when enabled, automatically configures your SQL VM so that you can access the keys in your key vault and use them to encrypt your databases and backups. This is a one-time setup, providing you the option to access keys in your key vault at any time from your VM. All you need to do is execute a few PowerShell cmdlets.
Note: These steps are provided in this blog post for convenience. However, when there are updates to the feature, the instructions may change. Please refer to the product documentation page for the most current outline of the steps to use this feature if you are reading this sometime after the post date of this blog.
Prerequisites for Using this Feature
Before taking advantage of this feature, you will need the following:
- Have a Microsoft Azure subscription
- Install the latest Azure PowerShell SDK
- Have Azure Active Directory (AAD)
You will then need to create a key vault and register an application with AAD that has access to your key vault. The provided links include detailed steps for how to accomplish these tasks. While completing these steps, there are some pieces of information you will need to gather which will be required parameters for AKV Integration.
When registering an application with AAD, you will need to save the Service Principal name and secret as you go through the steps. The Service Principal name will be the client ID and the Service Principal secret will be the key that is created.
Service Principal name:

Service Principal secret:
When creating the key vault, you will need to save the key vault URL.
e.g. if you named your key vault ContosoKeyVault, your key vault URL would be https://contosokeyvault.vault.azure.net/
You will then need to authorize the application to access the key in the vault by using the Set-AzureKeyVaultAccessPolicy cmdlet.
Automating AKV Integration with SQL Server Virtual Machines
Once you have completed these steps, you will be able to enable this feature via Microsoft Azure PowerShell. The PowerShell cmdlet to enable this feature requires some parameters. Several of the parameters you collected while completing the steps above.
A list of the parameters is provided below with examples of how to use the parameters in PowerShell. You can change each of these strings to match your resources.
1. The URL of your key vault
$akvURL = “https://contosokeyvault.vault.azure.net/”
2. Service Principal name
$spName = “fde2b411-33d5-4e11-af04eb07b669ccf2”
3. Service Principal secret
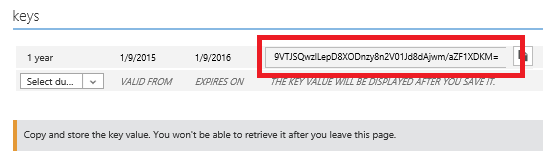
$spSecret = “9VTJSQwzlFepD8XODnzy8n2V01Jd8dAjwm/azF1XDKM=”
4. Credential name: This feature will create a credential within SQL Server, allowing the VM to have access to the key vault. You specify what you would like the name of this credential to be.
$credName = “mycred1”
With these parameters defined, you simply execute the cmdlets, as shown in the example below.
$vmName = “yourvmname”
$serviceName = “yourservicename”
$secureakv = $spSecret | ConvertTo-SecureString -AsPlainText -Force
$akvs = New-AzureVMSqlServerKeyVaultCredentialConfig –Enable –CredentialName $credname –AzureKeyVaultUrl $akvURL –ServicePrincipalName $spName –ServicePrincipalSecret $secureakv
Get-AzureVM –ServiceName $serviceName –Name $vmName | Set-AzureVMSqlServerExtension –KeyVaultCredentialSettings $akvs | Update-AzureVM
The cmdlet New-AzureVMSqlServerKeyVaultCredentialConfig captures the parameters for this feature. Then, Set-AzureVMSqlServerExtension sends the settings to the SQL IaaS Agent extension within your VM in order to enable the feature. The VM is then updated with this change.
After these cmdlets have completed running, the AKV Integration feature will have installed the latest version of the SQL Server Connector, configured the EKM provider to use Azure Key Vault, and created the credential to access your key vault. Now, you have saved yourself an hour! You can then start enabling encryption for your databases or backups as you normally would using the keys in your key vault.
Enabling Encryption after Setup Completes
In order to begin encrypting your databases or backups, you will need to create an asymmetric key in your key vault, and a symmetric key in SQL Server. Then, you will be able to enable transparent data encryption (TDE), encrypted backups, or column level encryption (CLE) for any database in your SQL VM using T-SQL statements, as shown here.
See the documentation page for more detailed steps to enable this feature and enabling encryption for your databases and backups.
If you are interested in this feature and do not have an Azure Subscription, you can try it out today.