
Using SSDs in Azure VMs to store SQL Server TempDB and Buffer Pool Extensions
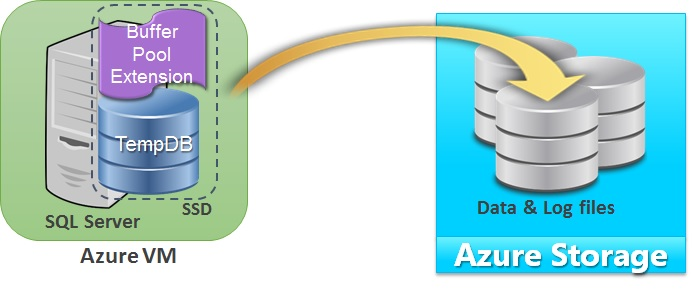
A common practice on-premise to improve the performance of SQL Server workloads is storing TempDB and/or Buffer Pool Extensions (SQL Server 2014) on SSDs. The former improves the performance of workloads that use temporary objects heavily (e.g. queries handling large recordsets, index rebuilds, row versioning isolation levels, temp tables, and triggers). The latter improves the performance of read workloads which working set doesn’t fit in memory.
Now you can do the same in Azure VMs using the new D-Series VM Sizes.
Important: The SSD drive is transient
The SSD drive (D:\) is not persistent, so its contents and permissions will be lost if the VM moves to a different host. This can happen in case of a host failure or a VM resize operation.
- Do not store your data or log files there. Use (persistent) drives from Azure Storage.
- If using TempDB and/or Buffer Pool Extensions, SQL Server requires accessing the directory specified to store them. The following section describes how to store SQL Server TempDB and/or Buffer Pool Extensions on the SSD drive and automatically recreate directory if the VM moves to a different host.
Configuration Steps
1) Create a folder in the D:\ drive
This is the folder that you will store TempDB and/or Buffer Pool Extensions in, for example as “D:\SQLTEMP”.
2) To move TempDB to the SSD
Using SSMS connect to your SQL Server instance. Execute the following T-SQL commands to change location of the TempDB files:
USE MASTER
GO
ALTER DATABASE tempdb MODIFY FILE (NAME= tempdev, FILENAME= ‘D:\SQLTEMP\tempdb.mdf’)
GO
ALTER DATABASE tempdb MODIFY FILE (name = templog, filename = ‘D:\SQLTEMP\templog.ldf’)
GO
2) To configure Buffer Pool Extensions in the SSD
Using SSMS connect to your SQL Server instance. Execute the following T-SQL commands to configure the Buffer Pool Extension, specifying the location and size of its file. The general recommendation is to set the size to 4-6 times the size of the VM memory. For more details read the documentation.
ALTER SERVER CONFIGURATION
SET BUFFER POOL EXTENSION ON
( FILENAME = ‘D:\SQLTEMP\ExtensionFile.BPE’ , SIZE = <size> [ KB | MB | GB ] )
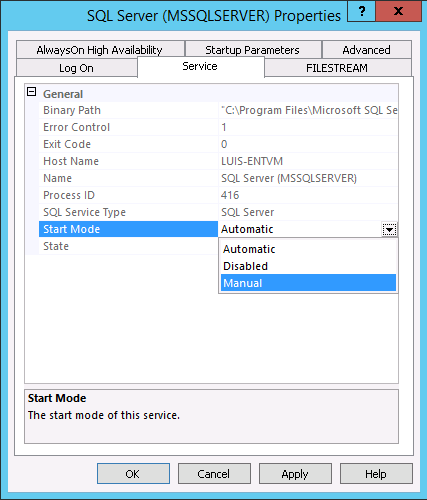
3) Configure the Start Mode of SQL Server and SQL Agent startup as Manual
Using Configuration Manager set the Start Mode of SQL Server and SQL Agent as Manual.
4) Create a Powershell script to recreate the folder in D:\ if needed and start SQL server
Copy and paste the following script and save it as a Powershell file in the C:\ drive (OS drive), for example as “C:\SQL-startup.ps1”. If needed, modify the D:\ folder to the one you specified in Step 1.
$SQLService=”SQL Server (MSSQLSERVER)”
$SQLAgentService=”SQL Server Agent (MSSQLSERVER)”
$tempfolder=”D:\SQLTEMP”
if (!(test-path -path $tempfolder)) {
New-Item -ItemType directory -Path $tempfolder
}
Start-Service $SQLService
Start-Service $SQLAgentService
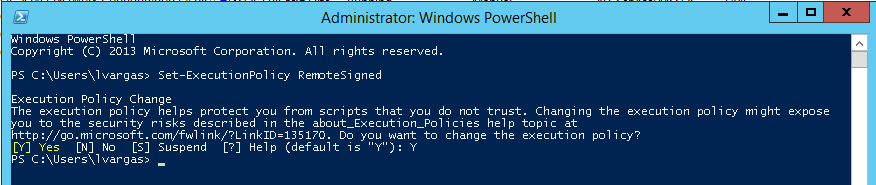
5) Change the Powershell Execution Policy to allow the execution of signed scripts
From the Powershell console execute Set-ExecutionPolicy RemoteSigned
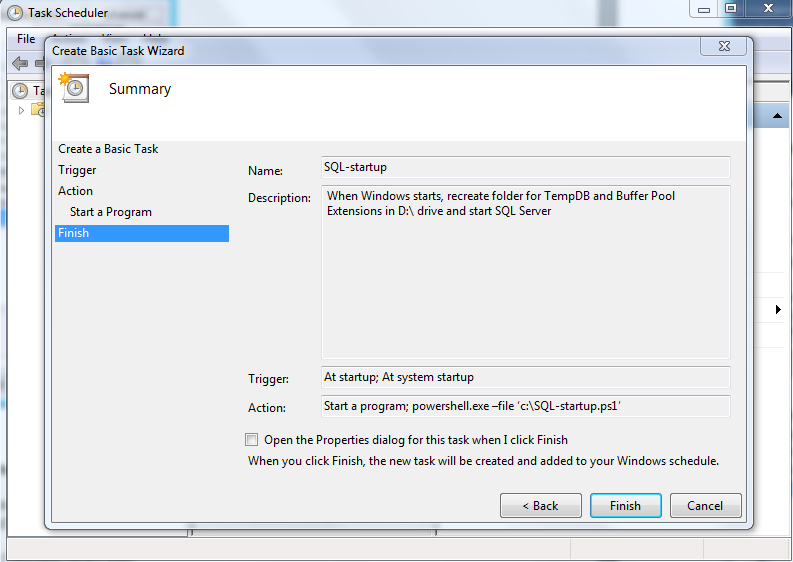
6) Create a schedule task at system startup to execute the Powershell script
Using Task Scheduler create a Basic Task that executes when the computer starts and executes the script in the Powershell file. For this, specify:
- Program/script: powershell
- Arguments: –file ‘C:\SQL-startup.ps1’
7) Test the setup
Restart the VM and verify using Configuration Manager that the SQL Server service is started.
This guarantees that if the VM moves to a different host SQL Server will start successfully.
Try the D-SERIES VM SIZES at the AZURE PORTAL today.