Step by Step - Creating Shielded VMs
[This post is authored by Dean Wells, Principal Program Manager for the Windows Server Security Product Team]
In this blog, we’ll walk through the steps necessary to create a shielded VM and briefly discuss each of the prerequisite pieces. For the purposes of the blog, we’ll walk through the end-to-end experience from the perspective of a tenant as it appears in Azure Pack (formerly Windows Azure Pack).
Step 1 – Connect to and logon to the tenant portal
Let’s start with the easy part: We’ll need to browse to the tenant portal and log on—enough said about that step.
Step 2 – Kick off the process of creating a new Shielded VM
Creating a new shielded VM begins with the same steps as creating a regular VM: New -> Standalone Virtual Machine -> From Gallery 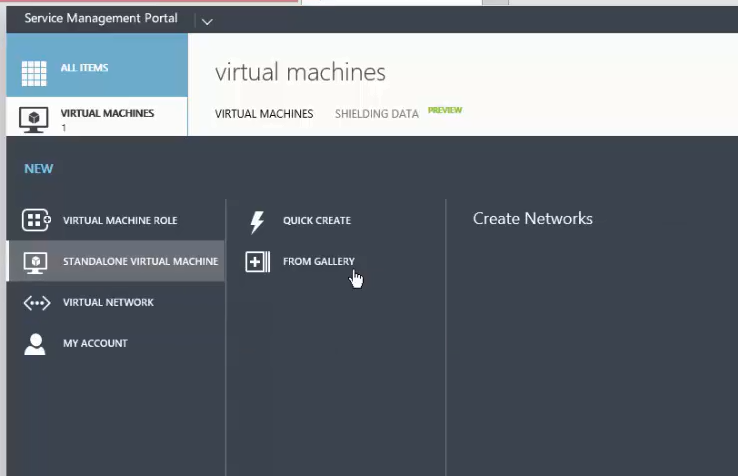
Step 3 – Select the appropriate template
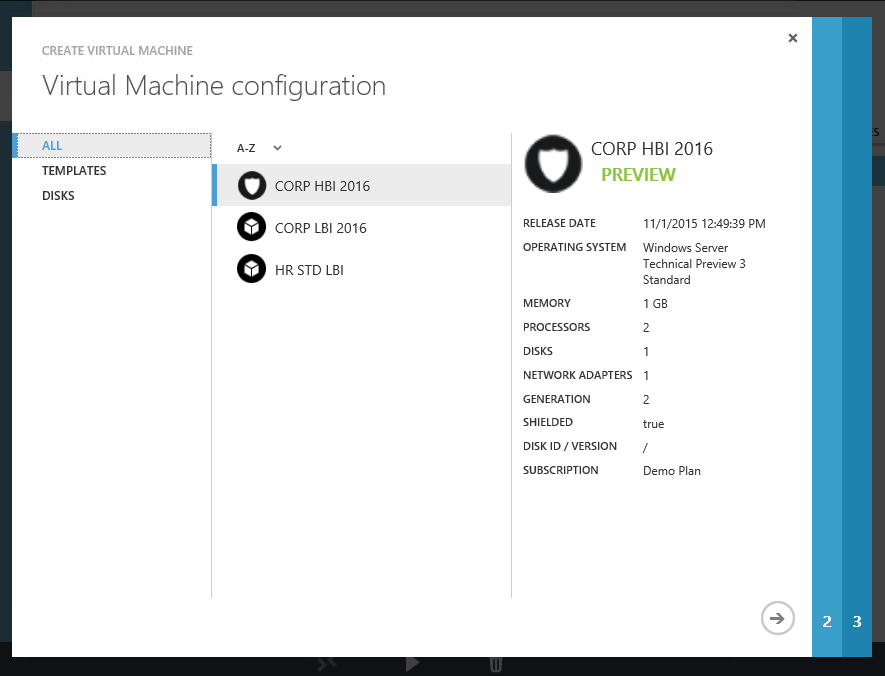
In the same way that regular (non-shielded) VMs are created from regular templates, shielded VMs are created from Shielded Templates. A Shielded Template is similar in nature to a regular template but there are important differences. To illustrate, when you create a regular VM using a regular template, you will be prompted to enter the new VM’s administrator credentials. In the case of a Shielded Template, all of these kind of secrets live inside something called shielding data which you, as the tenant, create and encrypt on-premises and upload to the hoster. We’ll come back to how create shielding data in a little while.
Back to the creation process—we’re at the point in the process where things start to differ a little compared to creating regular VMs. In order to create a shielded VM, we need to choose a Shielded Template. They’re rather cleverly distinguished from regular templates with an icon that depicts a shield as highlighted below—so we select an appropriate Shielded Template and continue on.
Sidebar
At this point, it makes sense for us to segue into two related topics both of which are prerequisite to deploying shielded VMs in a hosted environment. The two topics are:
- What is a Volume Signature Catalog?
- What is Shielding Data?
1. What is a Volume Signature Catalog?
When deploying a new VM from template, whether it be shielded or not, a template disk is used as the basis for the VM’s operating system disk. Template disks for Windows operating systems are typically prepared using a tool called sysprep—sysprep (de)configures the OS to a generalized (unnamed, unconfigured, etc.) state. At deployment time, the generalized template disk is copied, then specialized and a new VM is born. These template disks are stored in a configurable location on the fabric. Fabric and/or storage admins are likely to have administrative permissions to the template disks. Given this, consider which of the following two attack vectors represents the least path of resistance when attempting to maliciously gain access to a shielded VM:
1) attack existing shielded VMs and attempt to subvert the array of protections that shielding affords
2) add malware to a template disk that will be used to deploy future (not-yet-created) shielded VMs
Clearly, #2 is by far the simpler of the two and a vulnerability that we needed to eliminate. Here’s how we handle that: template disks that will used as the basis of new shielded VMs (shielded template disks) require one additional preparation step—they must be signed. To sign a shielded template disk, a trusted admin performs the following steps:
- Build and prepare a new template disk in the normal manner (or copy an existing one)
- Run a new tool called the “Template Disk Signing Wizard”
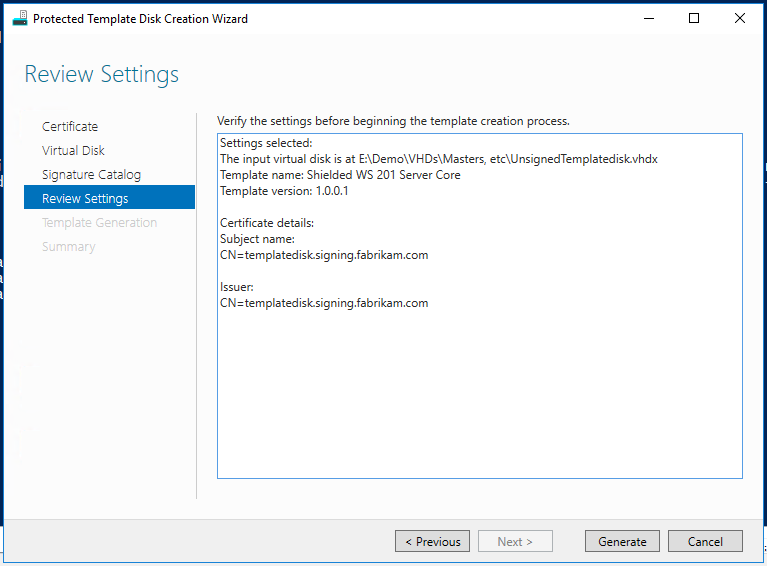
As you can see, the wizard requires the following inputs:
- A certificate used to sign the disk
- Needs to support RSA encryption and 2048 bit keys
- The path to the template disk you want to sign
- Note that this disk will be modified in-place, so you may wish to make a copy first
- A friendly name and a 4-part version number, e.g.
- Shielded WS 2016 Server Core
- 1.0.0.1
… once you click Generate, the wizard will work on the disk for some time and save the volume signature catalog (.VSC file) to the VHDX.
One final step remains—you need to extract the volume signature catalog from the now-prepped VHDX and save it as a .VSC file which you will later add to Shielding Data. To do that, run the following cmdlet:

2. What is Shielding Data?
Shielding Data (stored as PDK files) can be thought of as a bunch of encrypted secrets. You’ll use Shielding Data both when provisioning new shielded VMs as well as when converting regular VMs to shielded VMs. Remember, the hoster can’t read the contents of the Shielding Data because its encrypted using keys that are not available to the hoster’s administrators. Shielding Data is securely decrypted at provisioning time by a trusted provisioning component that is also isolated from administrators.
Among others, Shielding Data contains secrets such as:
- Administrator credentials
- An RDP certificate to secure remote desktop communication with your newly provisioned VM
- A Key Protector (or KP) that defines which guarded fabrics a shielded VM is authorized to run on
- A volume signature catalog (.VSC files) that contains a list of trusted, signed template-disks that a new VM is allowed to be created from
NB: All new VMs created from the same Shielding Data will share all of the secrets contained therein. Stated another way, if two or more VMs are deployed using the same Shielding Data, their initial administrator credentials will be the same and they will use the same RDP certificate to secure communication, etc.
Shielding Data is created using the Shielding Data Wizard as shown below, and the resulting PDK file is then uploaded by you/the tenant to the hoster’s guarded fabric.
The Shielding Data File Wizard
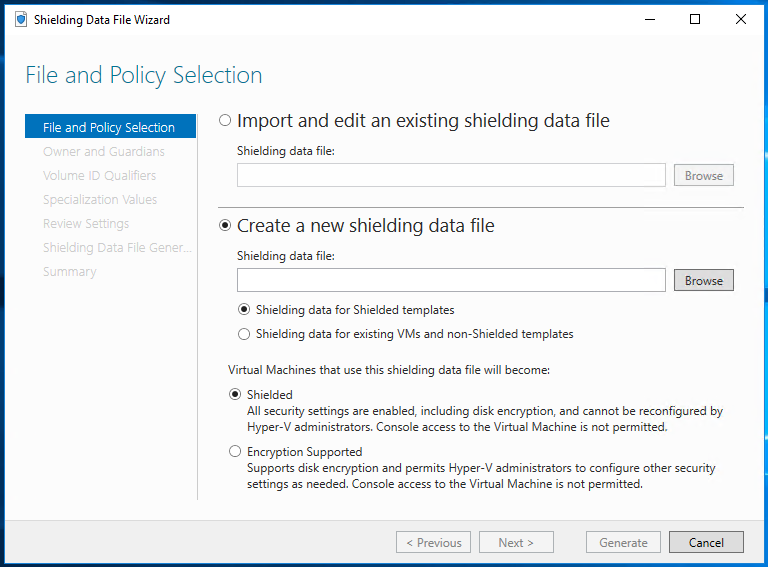
For a step-by-step description of exactly how to create Shielding Data, please see the Shielded VMs and Guarded Fabric deployment guide.
Step 4 – Selecting your Shielding Data
Next, we need to name the VM as usual and then select the Shielding Data that we mentioned briefly earlier on. Here’s how you do that: 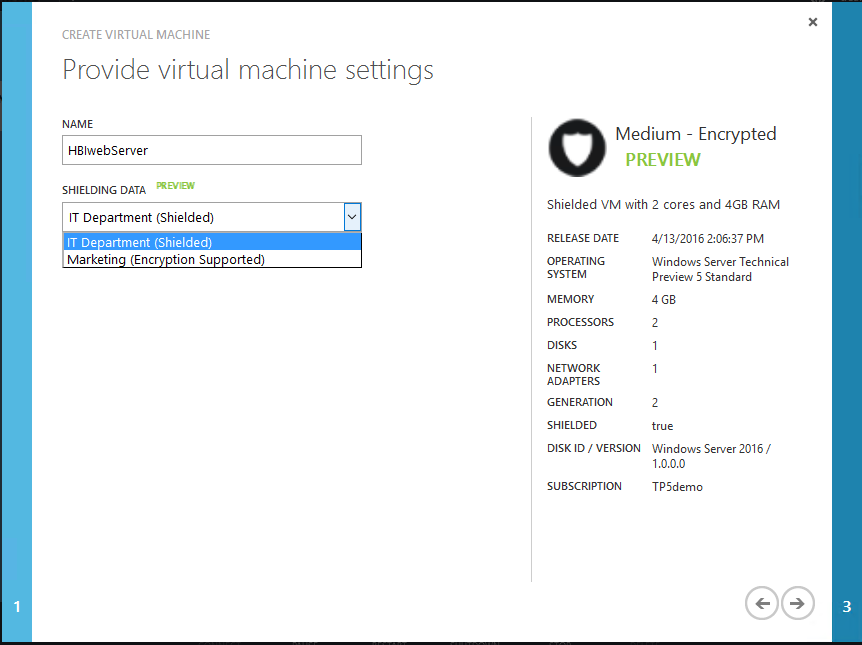
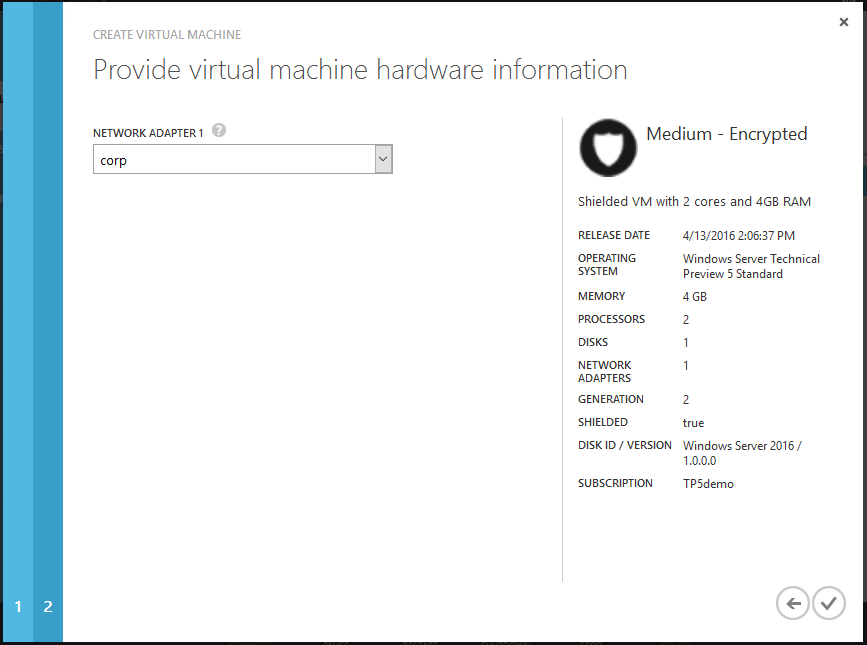
Step 5 – Connect the new Shielded VM to a network
In the final step, select the Network to which the Shielded VM should be connected to.
That’s all there is to it. Simple, huh!