How to create a dynamic group of Computers objects hosting a specific service
Some customers are asking for dynamic groups that contains all computer objects that are hosting specific instances.
As Example: You need a dynamic group that contains all windows computers where a windows service "xyz" is installed.
Such a containment group can't be created via OpsMgr UI.
You can create a group of specific instances itself, but it's not possible to search all computer objects that are hosting this specific instances (e.g. service).
Nevertheless there is a way to create such a group by using the Authoring Console or by modifying the MP xml.
Many customers are not familiarly with developing MPs by using Authoring Console, so I'll describe the xml method here.
The quick and easy way without using the authoring console (Example: for Computers hosting specific Windows service):
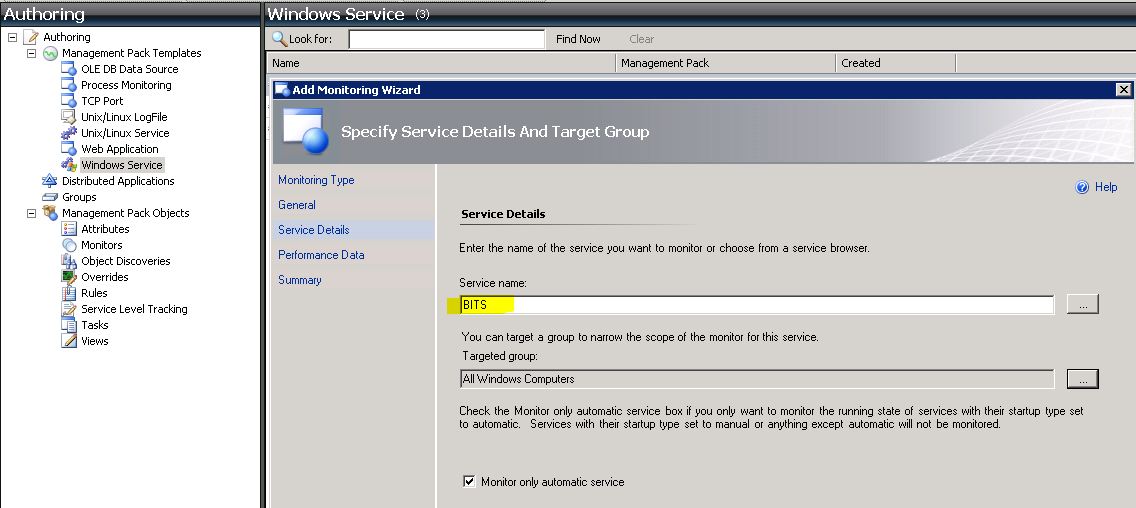
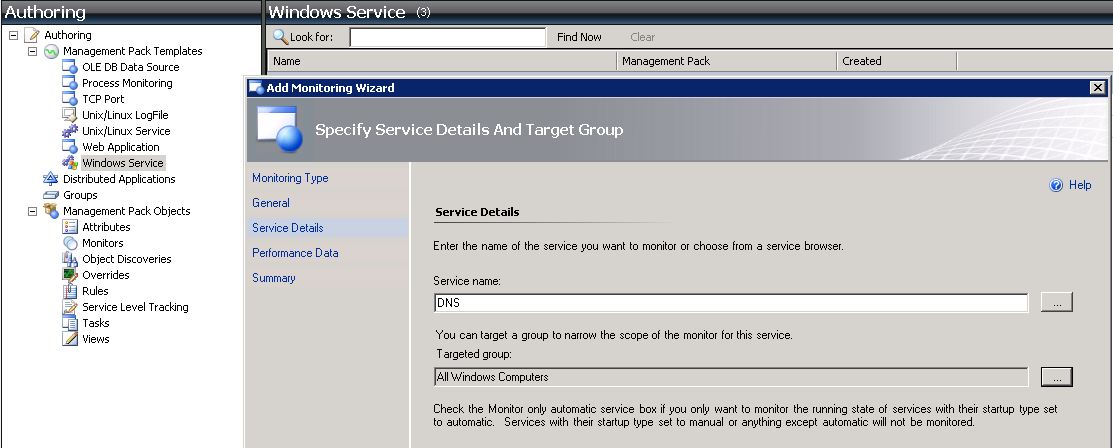
First of all you need to discover the specific service you want to look for.
Use the Windows Service Template to discover the service on your agents. In this example I'll use BITS service.
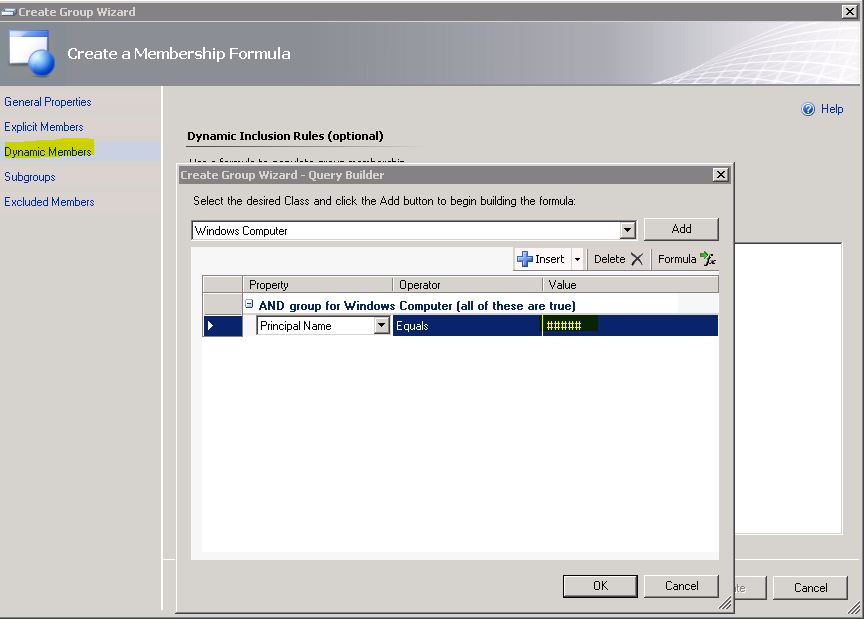
Now you need to create a new group using the OpsMgr Console. Please store the group in the same MP where you stored the services template before.
Remember: Creating a group via UI will generate a GroupID with a GUID (like UINameSpacee1bb42b5fc114d91ac4fa985886d35f3.Group). It is not easy to find the corresponding group discovery inside the xml.
To make it a bit easier to find the discovery rule please put in any noticeable value (like "####") as filter.
Once you've created the group please export the unsealed MP where you stored the new created group and the service template.
Open the xml file and search for your service discovery <ServiceName>BITS</ServiceName>
<Discovery ID="ServiceStateProbePage_fb07b209c8a2443dbb86a8f00bcddcd0.DiscoveryRule" Enabled="false" Target="MicrosoftWindowsLibrary6172210!Microsoft.Windows.Computer" ConfirmDelivery="false" Remotable="true" Priority="Normal">
<Category>Discovery</Category>
<DiscoveryTypes>
<DiscoveryClass TypeID="ServiceStateProbePage_fb07b209c8a2443dbb86a8f00bcddcd0" />
</DiscoveryTypes>
<DataSource ID="DS" TypeID="MicrosoftWindowsLibrary6172210!Microsoft.Windows.Win32ServiceInformationProviderWithClassSnapshotDataMapper">
<ComputerName>$Target/Property[Type="MicrosoftWindowsLibrary6172210!Microsoft.Windows.Computer"]/NetworkName$</ComputerName>
<ServiceName>BITS</ServiceName>
<Frequency>60</Frequency>
<ClassId>$MPElement[Name="ServiceStateProbePage_fb07b209c8a2443dbb86a8f00bcddcd0"]$</ClassId>
<InstanceSettings>
<Settings>
<Setting>
<Name>$MPElement[Name="MicrosoftWindowsLibrary6172210!Microsoft.Windows.Computer"]/PrincipalName$</Name>
<Value>$Target/Property[Type="MicrosoftWindowsLibrary6172210!Microsoft.Windows.Computer"]/PrincipalName$</Value>
</Setting>
<Setting>
<Name>$MPElement[Name="MicrosoftSystemCenterNTServiceLibrary!Microsoft.SystemCenter.NTService"]/ServiceName$</Name>
<Value>$Data/Property[@Name='Name']$</Value>
</Setting>
<Setting>
<Name>$MPElement[Name="MicrosoftSystemCenterNTServiceLibrary!Microsoft.SystemCenter.NTService"]/ServiceProcessName$</Name>
<Value>$Data/Property[@Name='BinaryPathName']$</Value>
</Setting>
<Setting>
<Name>$MPElement[Name="MicrosoftSystemCenterNTServiceLibrary!Microsoft.SystemCenter.NTService"]/DisplayName$</Name>
<Value>$Data/Property[@Name='DisplayName']$</Value>
</Setting>
<Setting>
<Name>$MPElement[Name="MicrosoftSystemCenterNTServiceLibrary!Microsoft.SystemCenter.NTService"]/Description$</Name>
<Value>$Data/Property[@Name='Description']$</Value>
</Setting>
<Setting>
<Name>$MPElement[Name="System!System.Entity"]/DisplayName$</Name>
<Value>BITS</Value>
</Setting>
</Settings>
</InstanceSettings>
</DataSource>
</Discovery>
Once you found your discovery you need to copy the class ID.
Here it is: ServiceStateProbePage_fb07b209c8a2443dbb86a8f00bcddcd0 (Hint: My ClassID is valid in my sample only, this GUID will not work in your MP. ;-)
Now search inside the xml file for your group marker (e.g. "####")
<Discoveries>
<Discovery ID="UINameSpacee1bb42b5fc114d91ac4fa985886d35f3.Group.DiscoveryRule" Enabled="true" Target="UINameSpacee1bb42b5fc114d91ac4fa985886d35f3.Group" ConfirmDelivery="false" Remotable="true" Priority="Normal">
<Category>Discovery</Category>
<DiscoveryTypes>
<DiscoveryRelationship TypeID="MicrosoftSystemCenterInstanceGroupLibrary6172210!Microsoft.SystemCenter.InstanceGroupContainsEntities" />
</DiscoveryTypes>
<DataSource ID="GroupPopulationDataSource" TypeID="SystemCenter!Microsoft.SystemCenter.GroupPopulator">
<RuleId>$MPElement$</RuleId>
<GroupInstanceId>$MPElement[Name="UINameSpacee1bb42b5fc114d91ac4fa985886d35f3.Group"]$</GroupInstanceId>
<MembershipRules>
<MembershipRule>
<MonitoringClass>$MPElement[Name="MicrosoftWindowsLibrary6172210!Microsoft.Windows.Computer"]$</MonitoringClass>
<RelationshipClass>$MPElement[Name="MicrosoftSystemCenterInstanceGroupLibrary6172210!Microsoft.SystemCenter.InstanceGroupContainsEntities"]$</RelationshipClass>
<Expression>
<SimpleExpression>
<ValueExpression>
<Property>$MPElement[Name="MicrosoftWindowsLibrary6172210!Microsoft.Windows.Computer"]/PrincipalName$</Property>
</ValueExpression>
<Operator>Equal</Operator>
<ValueExpression>
<Value> ##### </Value>
</ValueExpression>
</SimpleExpression>
</Expression>
</MembershipRule>
</MembershipRules>
</DataSource>
</Discovery>
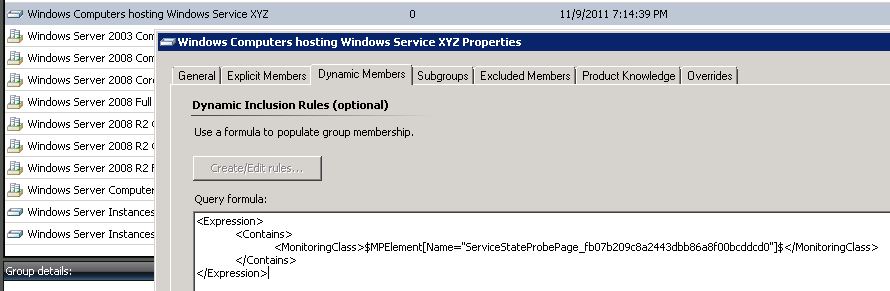
Replace the whole Section between <Expression> and </Expression> by the following lines. Please use as ClassID your own ClassID copied above.
<Expression>
<Contains>
<MonitoringClass>$MPElement[Name="ServiceStateProbePage_fb07b209c8a2443dbb86a8f00bcddcd0"]$</MonitoringClass>
</Contains>
</Expression>
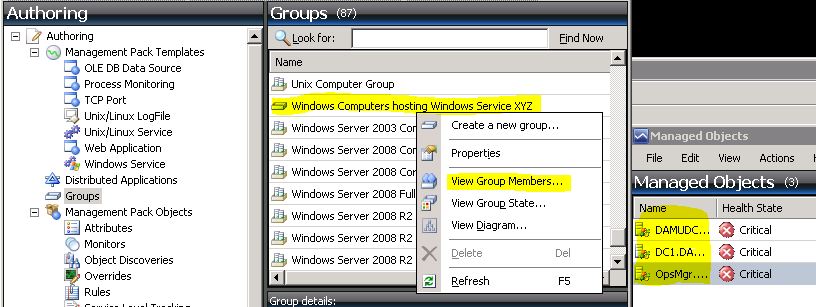
Save the MP file and import it again into your Management Group.
Now you will find all Windows Computer Objects hosting the "BITS" service.
There is one disadvantage on this group type. You'll not be able to change these groups via OpsMgr UI anymore.
Opening this group in OpsMgr UI you will see only the xml code. Any future change needs to be made in xml file again.
Another example:
Group containing all windows computers hosting a specific service but only computers with a host name matches wildcard DA*
<Expression>
<And>
<Expression>
<RegExExpression>
<ValueExpression>
<Property>$MPElement[Name="MicrosoftWindowsLibrary6172210!Microsoft.Windows.Computer"]/PrincipalName$</Property>
</ValueExpression>
<Operator>MatchesWildcard</Operator>
<Pattern>DA*</Pattern>
</RegExExpression>
</Expression>
<Expression>
<Contains>
<MonitoringClass>$MPElement[Name="ServiceStateProbePage_fb07b209c8a2443dbb86a8f00bcddcd0"]$</MonitoringClass>
</Contains>
</Expression>
</And>
</Expression>