Creating Your Own GUI Application
Creating Your Own GUI Application
(Création de Votre Propre Application GUI)
This might come as a shock to many of you, but there was a time – a time long, long ago – when people didn't have cell phones. What could that even mean not to have cell phones? Well, for one thing, that meant that, if you left your house or your office, there might be a few minutes when people wouldn't be able to get hold of you! (Quelle horror!) If you had to run to the store you couldn't update your Facebook page while browsing through the produce section, and you couldn't read Ashton Kutcher's latest tweet while standing in the checkout line. You couldn't even call your wife to tell her, "I'm turning into the driveway right now." Zut alors!
Note. As you can see, the author of this article is taking an introductory French class. So what does "Zut alors!" mean? Well, if he knew that he wouldn’t have to take introductory French, now would he?
Shocking? You bet. But you know what's really shocking? Here's what really shocking: back in those days, hardly anyone ever moped around lamenting the fact that no one had invented cell phones yet. Because no one had ever seen a cell phone no one really gave the idea of having a portable phone a second thought. It wasn't until people actually saw a cell phone that they suddenly realized one thing: they couldn't possibly live without one.
We mention this only because the same notion applies to things other than cell phones. For example, up until recently many of you might not have known that you can write GUI "applications" using Windows PowerShell; considering the fact that PowerShell is a command-line tool why would you know that? But now, having seen the Deleteomatic application created by the authors of the Lync Server PowerShell blog, you're probably thinking this: I can't possibly live without knowing how to create my own GUI application using Windows PowerShell. Fortunately for you, the authors of the Lync Server PowerShell blog are here.
Note. Come to think of it, it is unusual to see the phrases "Fortunately for you" and "the authors of the Lync Server PowerShell blog are here" in the same sentence, isn't it? Tres bizarre!
So how do you write a GUI "application" using Windows PowerShell? Good question, and one that we're going to try to answer for you. (Just don’t expect the entire answer to come in this one article.) What we thought we would do is essentially walk you through the process of building your own Deleteomatic, or at least something vaguely similar to the Deleteomatic. We won't necessarily cover everything we did when creating the Deleteomatic, and we'll definitely go off on a few tangents every now and then in order to make a point. However, by the time we finish with this series you should be fully capable of sitting down and creating your very own Deleteomatic.
And, if not, well, hopefully by then someone will have written an app that will allow your cell phone to create a Deleteomatic for you. Either way you should be good to go.
Step 1: Creating a Windows Form
To begin with, we should point out that there are no tricks involved here, nor do you need any special software or equipment to create the application we're going to create. In fact, all you really need is:
· Windows PowerShell 2.0 (which you already have)
· Notepad, or any other text editor (which you also already have)
· A computer that has the Lync Server core components installed, or, at the least, a computer that can make a remote connection to a Lync Server computer and then import the Lync Server PowerShell module. Either way, you have to run the application on a computer that can run the Lync Server PowerShell cmdlets at the same time.
Note. We should probably clarify that you don't need Lync Server in order to create a GUI application using Windows PowerShell; all you really need is PowerShell and a text editor. However, if you want to create the application we're going to create in this series of articles, then you will need Lync Server. Why? That's easy: because this application is designed to help you manage Lync Server, and it can't do that unless it can access Lync Server. Make sense?
Or, as we French speakers like to say: un sens?
OK, technically you'll also need one other thing (which, again you already have): the .NET Framework. As it turns out, in order to create a GUI application using Windows PowerShell, we need to tap into the mysteries of the .NET Framework. Not that we're going to tap too deep: to be honest, we're not going to come anywhere near exploring all the different things you can do with the .NET Framework. That's more than we can cover in this series and a bit outside our area of expertise, to boot.
So then what will we do in this series? Things like this:
# Set up the form ===========================================================
[void] [System.Reflection.Assembly]::LoadWithPartialName("System.Windows.Forms")
[void] [System.Reflection.Assembly]::LoadWithPartialName("System.Drawing")
$objForm = New-Object System.Windows.Forms.Form
$objForm.Text = "Microsoft Lync Server 2010 Practice Application"
$objForm.Size = New-Object System.Drawing.Size(1200,800)
$objForm.StartPosition = "CenterScreen"
$objForm.KeyPreview = $True
What exactly is that? Well, that's Windows PowerShell code that creates a Windows form, the window where our GUI application will reside. What you need to do (if you're playing along at home) is copy that code exactly as-is, paste it into a text editor, and then save the code as a file with a .PS1 file extension (we saved ours as C:\Scripts\Practice.ps1). In other words:

So what did we just save? Well, let's break that opening hunk of code down a bit. Ignoring the comment found in the first line of code, that hunk of code kicks off with these two lines:
[void] [System.Reflection.Assembly]::LoadWithPartialName("System.Windows.Forms")
[void] [System.Reflection.Assembly]::LoadWithPartialName("System.Drawing")
These two lines of code are used to load the .NET Framework classes we need in order to build a GUI application. Before you ask, yes, it's true: sometimes you have to explicitly load .NET classes using syntax like this, and sometimes you can use shortcuts that make the whole process a lot easier. (PowerShell is funny that way.) For example, this line of code creates a GUID using the .NET Framework, but without all that weird System.Reflection.Assembly stuff:
$x = [guid]::NewGuid()
Why do we sometimes have to use all that weird System.Reflection.Assembly stuff while other times we don't have to use it? Well, for this introductory article we aren't' going to worry about that. For now, let's just say that you need to use the two lines of code shown above in order to gain access to the System.Windows.Forms and the System.Drawing classes. As we get a little further down the road we'll delve a little deeper into .NET.
Probably.
At any rate, that brings us to this block of code:
$objForm = New-Object System.Windows.Forms.Form
$objForm.Text = "Microsoft Lync Server 2010 Practice Application"
$objForm.Size = New-Object System.Drawing.Size(1200,800)
$objForm.StartPosition = "CenterScreen"
This chunk of code is used to create and configure our window. In the first line, we use PowerShell's New-Object cmdlet to create a new instance of the System.Windows.Forms.Form class, an instance we store in an object reference named $objForm. (By the way, a lot of the things we do in order to create our GUI application will require us to create new objects that get stashed in object references.) After that we use the next few lines of code to modify property values of our new object. For example, in the second line we set the window caption (the Text property) to Microsoft Lync Server 2010 Practice Application, and in line 3, we set the size of our window: 1200 pixels wide by 800 pixels tall. Finally, we use line 4 to ensure that, when our application starts up, that application will be centered onscreen.
Got all that? Excellent. Now, copy that code into Notepad and save the file with a .PS1 file extension. At that point, we're ready to take this baby out for a spin. To do that, from within the Lync Server Management Shell (or from your remote instance of Windows PowerShell), type the full path to your script file and then press ENTER. For example:
c:\scripts\practice.ps1
So what happened when we ran our script? Here's what happened:
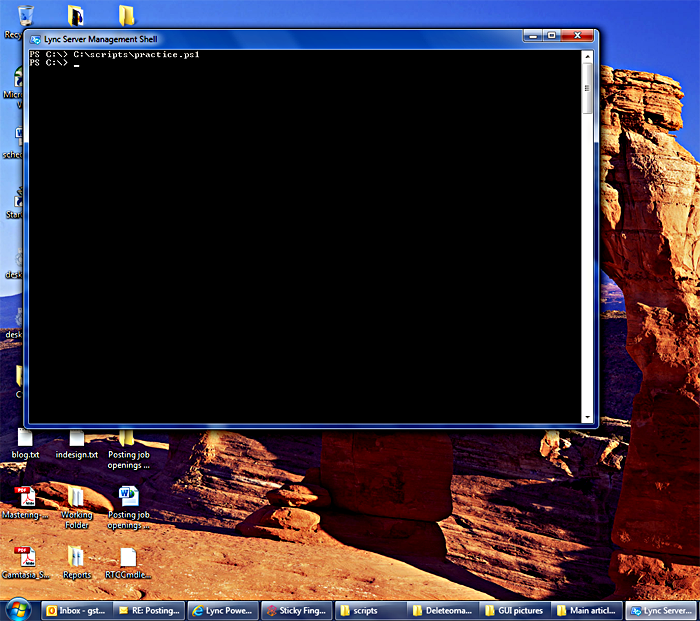
If you're thinking, "I don't get it; it doesn't look like anything happened," well, you're right: nothing did happen. Well, OK, technically the script did run, but nothing appeared on screen (let alone a GUI application). Why not? That's easy: as it turns out, simply creating a form isn't good enough. Instead, you actually have to activate the form and then explicitly tell PowerShell to display that form. If you don't, you'll get exactly what we got: nothing (rien).
Fortunately, activating and displaying a form doesn't take much effort. All you have to do is copy these lines of code and paste them at the very bottom of your script:
# Activate the form =========================================================
$objForm.Add_Shown({$objForm.Activate()})
[void] $objForm.ShowDialog()
Incidentally, when we say "the very bottom" we mean "the very bottom." (We apologize for this, but the best we can translate "the very bottom" as is "au fond," or, "at the bottom." Sorry.) These lines of code need to be the last lines in your script. That's important to keep in mind, because we're going to be adding a bunch of additional code to this script; when we do that, we have to make sure that all the code we add comes after our initial block of code (the code that creates the Windows form) but before the code that activates the form.
So what happens now if we run our script? This happens:
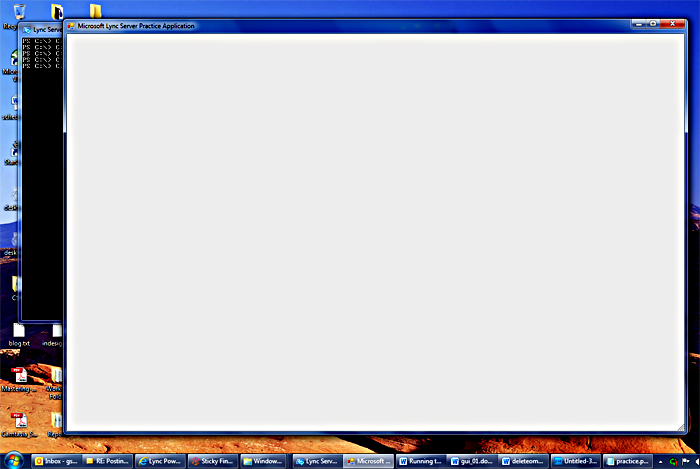
Voilá: we have a GUI application!
OK, sure, it might not be a great GUI application; after all, it doesn't really do much except show up on screen. (Although you could make an argument that software that doesn't do anything is sometimes preferable to what "real" pieces of software occasionally do.) But your point is well taken: who wants to spend their day laboring over stuff that doesn't do anything and that nobody even cares about?
Present company excepted, of course.
So let's see if we can get our application to actually do something. For starters, let's add a listbox to our application. Copy the following lines of code into your script, taking care to place these lines after the initial code block but before the code that activates and displays the form:
# Add the listbox containing the Get-Cs cmdlets =============================
$objCmdletsListbox = New-Object System.Windows.Forms.Listbox
$objCmdletsListbox.Location = New-Object System.Drawing.Size(50,40)
$objCmdletsListbox.Size = New-Object System.Drawing.Size(260,320)
$objForm.Controls.Add($objCmdletsListbox)
If you take a moment to glance at this code, it should be fairly obvious that the code is adding a new listbox to the form. (If nothing else, the comment, which starts off “Add the listbox,” should have given it away.) In line 1, we use the New-Object cmdlet to create a new instance of the System.Windows.Forms.Listbox class, storing this new instance in the variable $objCmdletsListbox. In line 2 we set the location for our listbox: 50 pixels from the left-hand side of our window and 40 pixels from the top of our window. In line 3, we configure the size of the listbox: 260 pixels wide by 320 pixels tall.
Note. So how did we know that we should make the listbox 260 pixels wide, and how did we know that the listbox should be 40 pixels from the top of our window? To be perfectly honest, we didn't know. We just started playing around with different numbers until we got what we wanted. You'll probably have to do the same sort of thing.
By the way, don't forget to include the last line of code, the one that actually adds the listbox to the Controls collection for the form. What would we get if we forgot to add that line of code? Beats us. But one thing that we definitely wouldn't get is a listbox.
So what's our application look like now? Well, assuming that we closed the original version of the application, modified our script, saved that modified script, and then restarted the application, we should now have something that looks like this:
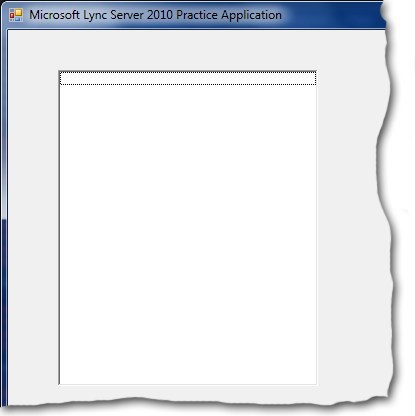
That's what we said: wow.
Note. Actually, what we said was "sante fume!" which is French (sort of) for "holy smokes!"
We see that, once again, you're not quite as impressed as we are. Granted, our application now has a listbox, but there's nothing in that listbox. And you're right: a listbox without data is like a day without sunshine.
Or pretty much like any day here in the Seattle area. (Currently 40 degrees and drizzling.)
OK, fine. If you aren't impressed yet then let's see if we can add a little zing to our listbox. Let's try this: let's see if we can retrieve all the Lync Server Get-Cs cmdlets (Get-CsAddressBookConfiguration, Get-CsExternalAccessPolicy, Get-CsServerApplication, etc.) and then add those add those cmdlets to the listbox. Do we really think we can do that? Oui!
Note. French for "yes." In case you were wondering.
Here's what we're going to do: we're going to copy the following block of code and then paste that code immediately after the lines of code that created the listbox. Here's the block of code we're talking about:
$items = Invoke-Expression "Get-Command Get-Cs*"
foreach ($item in $items)
{
[void] $objCmdletsListbox.Items.Add($item.Name)
}
Right now you're probably thinking, "Quelle est cette?" (What is this?) We'll tell you what this is: this is code that retrieves all the Get-Cs cmdlets and then adds those cmdlets to our listbox. Quelle horror!
Oh, wait; sorry. Quelle horror means "how horrible!" We should have said something like this: tres bien! (Very good!)
So how does this code do that? Well, to begin with, it uses the following command to retrieve all the Get-Cs cmdlets and stash the returned data in a variable named $items:
$items = Invoke-Expression "Get-Command Get-Cs*"
Incidentally, that line of code gives us a chance to make an important point about working with GUI applications. As you know, if we were in the PowerShell console itself we could retrieve all the Get-Cs cmdlets (and store the returned data in a variable) by using a command like this one:
$items = Get-Command Get-Cs*
But remember, we aren't in the PowerShell console: we're in our cool, new GUI application. Because of that, we can't call PowerShell commands like this one directly; instead, we need to pass those commands as strings and let Invoke-Expression call those commands. Why? Well, because – well, again, for now we aren't going to worry about the why part of this. Instead, it's just important to know that we have to take this approach whenever we call a PowerShell command: put the command into a string, then run the command (the string) using Invoke-Expression. For now, just trust us on that one.
As difficult as that is to do.
So now that we have all the Get-Cs cmdlets safely stashed away in the variable $items what do we do with these cmdlets? That's what these lines of code are for:
foreach ($item in $items)
{
[void] $objCmdletsListbox.Items.Add($item.Name)
}
What we've done here is set up a foreach loop that loops through each cmdlet stored in the variable $items. And what do we do each time through the loop? Well, each time through the loop we use this line of code to add the cmdlet Name to our listbox:
[void] $objCmdletsListbox.Items.Add($item.Name)
See how that works? A listbox has an Items property, the Items property has a method named Add. All we have to do is tell the Add method what we want to add: in this case, that's the cmdlet Name. What if we didn't want to put cmdlet Names in our listbox but, instead, we wanted to put French color names in that box? In that case, we'd just use a series of commands similar to these:
[void] $objCmdletsListbox.Items.Add("blanc")
[void] $objCmdletsListbox.Items.Add("noir")
[void] $objCmdletsListbox.Items.Add("rouge")
[void] $objCmdletsListbox.Items.Add("vert")
Etc., etc.
Note. Good question: what is that [void] thing for? Well, if we haven't made this clear yet, our GUI "application" is really just a PowerShell script. The script has to be called from PowerShell and PowerShell must be running if you want your script to run: if PowerShell should terminate unexpectedly then your script is going to terminate unexpectedly as well. (Fin … uh, well, terminate unexpectedly.) In other word, you'll always have a PowerShell window running alongside your GUI application.
So what does that have to do with the [void] thing? Well, if you leave off the [void] thing you'll get a whole bunch of junk written to the PowerShell window. It's not a big deal and it doesn't hurt anything, but it's not very elegant. And the authors of the PowerShell blog are nothing if not elegant (élégante).
So, once again, let's close our application, modify our code, save the changes, and then re-run the script. Puis? (And then)? Et puis cette: (And then this):
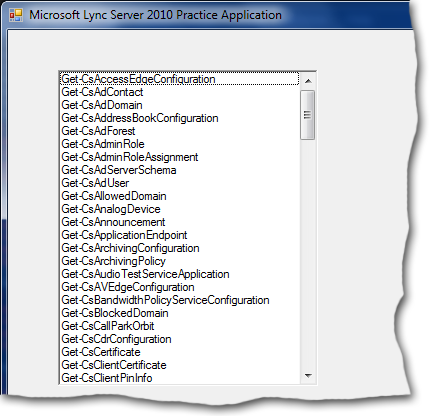
Not bad, eh? (Pas mal, eh?) Granted, you might not be terribly impressed, but take a minute to think about what we've done here. Using nothing fancier than Notepad and a few PowerShell commands, we've created an application that pops up in a real, live window. As if that wasn't cool enough, we've added a standard Windows user interface control to that window (the listbox) and then, by calling out to Windows PowerShell and running a Lync Server PowerShell cmdlet, we've managed to populate that listbox with real, live data. All things considered, that's definitely not bad, not bad at all.
But we've hardly begun to scratch the surface of what we can do here. For example, let's see if we can turn this up a notch and maybe get our little application to do something semi-useful. (Something our managers have been trying to do with us for several years now.) Here's what we're going to do: we're going to add a second listbox to our application! (That's right: zut alors!) Copy this code and paste it after the code we used to populate our first listbox:
# Add the Instances listbox ================================================
$objInstancesListbox = New-Object System.Windows.Forms.Listbox
$objInstancesListbox.Location = New-Object System.Drawing.Size(50,400)
$objInstancesListbox.Size = New-Object System.Drawing.Size(260,200)
$objForm.Controls.Add($objInstancesListbox)
Because you're now an old hand at creating listboxes we won't bother explaining what this block of code does. Instead, let's just save the script and re-run it. When we do that, our application should look something like this:

Just like we said: two listboxes in a single application!
Again, that's pretty cool in and of itself. But you know what would be even cooler? That's right: what would be even cooler is if we could populate this second listbox with some data, too. Fortunately enough, we just happened to have some code that does that very thing:
# Add the subroutine for retrieving instances ===============================
$objCmdletsListbox.Add_Click(
{
$cmdlet = $objCmdletsListbox.SelectedItem
$items = Invoke-Expression "$cmdlet | Select-Object Identity"
$objInstancesListbox.Items.Clear()
if ($items –ne $Null)
{
foreach ($item in $items)
{
[void] $objInstancesListbox.Items.Add($item.Identity)
}
}
})
So is this just your plain old, every day, fill-a-listbox-with-data code? Hardly. What we have here is a subroutine that specifies the actions that should take place when someone clicks on our first listbox. How do we know that this subroutine specifies the actions that should take place when someone clicks on our first listbox? Well, as you might recall, when we created that first listbox we also created an object reference named $objCmdletsListbox. As you can see, we're using that object reference when defining our subroutine; in fact, what we're doing is adding the Click method (Add_Click) to the listbox referenced by $objCmdletsListbox. What's the point of that? Here's the point of that: this method tells our application what to do any time someone clicks in the listbox containing our list of cmdlets.
Note. Are there other methods that we could add to a listbox? Sure; take a peek at the official listbox documentation on MSDN for more information.
And just what is our application going to do when someone clicks in that listbox? The first thing it's going to do is figure out which item in the listbox was actually clicked; that's what this line of code (and the SelectedItem property) is for:
$cmdlet = $objCmdletsListbox.SelectedItem
As you know, our listbox is filled with cmdlet names. That means that $cmdlet will contain a cmdlet name. For example, if we clicked on Get-CsExternalAccessPolicy then $cmdlet will be equal to Get-CsExternalAccessPolicy. If we click on Get-CsAdDomain then cmdlet will be equal to Get-CsAdDomain. If we – well, you get the idea.
So does any of that really matter to us? Well, it will in a moment. Take a look at the next line of code:
$items = Invoke-Expression "$cmdlet | Select-Object Identity"
What we've done here is constructed another Lync Server PowerShell command and then used Invoke-Expression to call that command. If $cmdlet is equal to Get-CsExternalAccessPolicy then that means we've constructed, and then executed, this command:
$items = Get-CsExternalAccessPolicy | Select-Object Identity
In other words, we clicked on Get-CsExternalAccessPolicy and, in response, our application has just run that very same cmdlet (Get-CsExternalAccessPolicy), returned the Identity of each our external access policies, and then stashed those Identities in the variable $items.
And yes, that is kind of nifty, isn't it?
But the next part is even niftier. What we're going to do next is take those policy Identities and display them in our second listbox; in other words, when you click a cmdlet in the first listbox, all the instances returned by that cmdlet are displayed in the second listbox. (You'll see a visual explanation of that in just a second.)
Before we do that, however, we need to clear any existing items out of listbox No. 2; that's what this line of code is for:
$objInstancesListbox.Items.Clear()
And then we use this foreach loop to methodically add each policy Identity to the listbox:
if ($items –ne $Null)
{
foreach ($item in $items)
{
[void] $objInstancesListbox.Items.Add($item.Identity)
}
Note. Don't forget to close your subroutine with these two lines of code:
}
})
Oh, and why did we check to see if $items is equal to a null value ($Null)? You're way ahead of us: if our cmdlet didn't return any instances then there's no reason to try to put those non-existent instances into our listbox. It's not going to work.
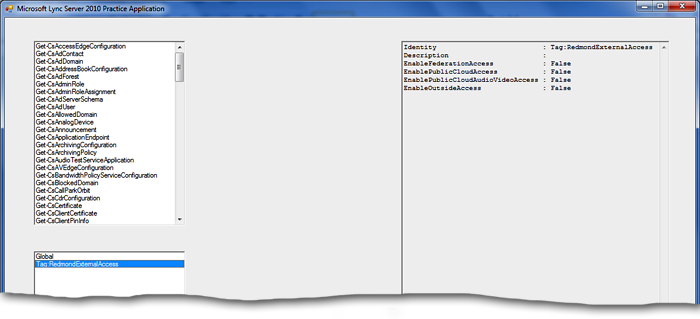
So what does all that give us? Well, after we save and restart the script, and if we then click on Get-CsExternalAccessPolicy, we should now see something like this:

As you can see, in our little test deployment of Lync Server we have two external access policies: Global, and Tag:RedmondExternalAccess. See, we told you this would be cool, didn't we?
But before we get too carried away with congratulating ourselves, and before our arms get too tired from patting ourselves on the back, let's issue one caveat. (Which kind of sounds like a French word, but actually comes from the Latin word cavere, or "let him beware.") Our application is going to work just fine for most of the Get-Cs cmdlets. How do we know that? We know that because most of the Get-Cs cmdlets will work without you specifying a particular item to be retrieved. For example, do you want information on all your external access policies? Then run this command in the Lync Server Management Shell:
Get-CsExternalAccessPolicy
What about information for all your analog devices? The run this command:
Get-CsAnalogDevice
However, (and, unfortunately), there are some exceptions. For example, try running this command:
Get-CsRgsConfiguration
Is that going to return all your Response Group configuration settings? Sadly, no, it's not. Instead, it's going to prompt you for the Identity of the settings to be returned:
cmdlet Get-CsRgsConfiguration at command pipeline position 1
Supply values for the following parameters:
Identity:
Is that a problem? Well, not if you're working in the PowerShell console; you just answer the prompt and get on with your life. But if you're working in our little application, yes, it is a problem. This prompt isn't going to appear in the application, it's going to appear in the PowerShell console. Even worse, your application is going to get all hung up, because it can't run Get-CsRgsConfiguration until it knows which Identity to use.
Now, there are things we can do to guard against this problem, but in this initial article we aren't going to worry about those things; instead, we're just going to warn you not to click on cmdlets like Get-CsRgsConfiguration. You should also avoid clicking these cmdlets:
· Get-CsAdContact
· Get-CsAdminRoleAssignment
· Get-CsAdUser
· Get-CsClientCertificate
· Get-CsClientPinInfo
· Get-CsUICulture
· Get-CsUser
· Get-CsUserAcp
· Get-CsUserPoolInfo
Note. OK, admittedly, some of these cmdlets, like Get-CsAdUser, don't require an Identity. However, if you have a really big deployment, and a whole bunch of users, they could take forever to run. For now, it's best to avoid them.
So what happens if you ignore all our warnings (as if people were going to suddenly start taking our advice) and click Get-CsRgsConfiguration anyway? Well, in that case, we recommend that you go back to the PowerShell console and press Ctrl+C to kill the current command. (You might have to do that several times to finally kill the command.) When Ctrl+C finally takes effect you should then see an error message similar to this one:
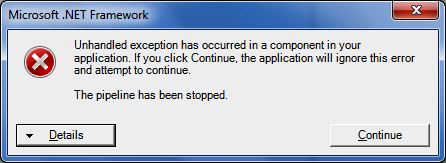
Click the Continue button to dismiss the error message, then close and restart your GUI application. That should take care of the problem. If it doesn't, you'll probably have to terminate and restart PowerShell. It's kind of a hassle but, hey, this is version 1 of our application. And since when has version 1 of any product from Microsoft ever worked?
Note. Uh, you should probably forget we ever said that. We're in enough trouble these days as it is.
Originally that was all we were going to do for this first article. When we got this far, however, we realize that we didn't want to end on such a gloomy note, what with all this talk of killing commands and unhandled exceptions. With that in mind, let's jazz this thing just a little more. First, let's toss in some code that adds a text box to our form:
# Add a text box to the form ===============================================
$objOutputBox = New-Object System.Windows.Forms.TextBox
$objOutputBox.Location = New-Object System.Drawing.Size(680,40)
$objOutputBox.Size = New-Object System.Drawing.Size(460,500)
$objOutputBox.Multiline = $True
$objOutputBox.Font = New-Object System.Drawing.Font("Courier New", "8.5")
$objOutputBox.Wordwrap = $True
$objOutputBox.ReadOnly = $True
$objOutputBox.ScrollBars = [System.Windows.Forms.ScrollBars]::Vertical
$objForm.Controls.Add($objOutputBox)
That's going to give us a form that looks like this:
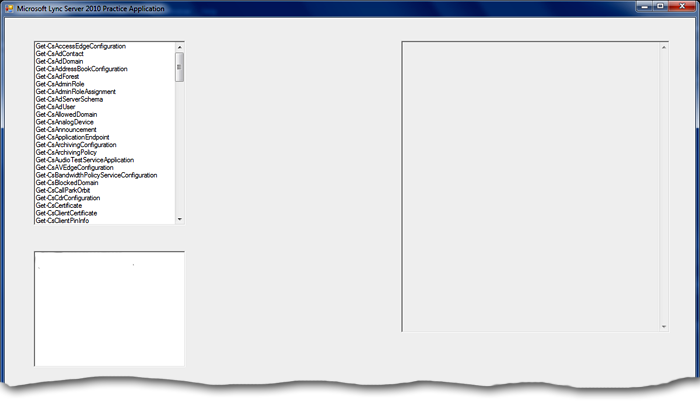
Note. And to think that there are people who don't believe Microsoft is capable of creating a beautiful, well-conceived user interface!
Our next step – as you might have guessed – is to now try and display some data in that brand-new textbox. What we've decided to do is this: when you click an item in our second listbox (the one that displays things like our external access policies) we want all the properties of the clicked item (for example, the Global external access policy) to appear in the textbox. Are we even capable of pulling off such a feat? Probably not. But that's never stopped us before:
# Add the subroutine for retrieving instance values =========================
$objInstancesListbox.Add_Click(
{
$cmdlet = $objCmdletsListbox.SelectedItem
$instance = $objInstancesListbox.SelectedItem
$objOutputBox.Text = Invoke-Expression `
"($Cmdlet -Identity $instance | Format-List | Out-String).Trim()"
})
What we've done here is add a subroutine to the instances listbox ($objInstancesListbox); this subroutine is going to tell our application what to do if someone clicks a specific instance of a policy or configuration setting. And what is our application going to do? Well, first it's going to grab the cmdlet name from the first (cmdlets) listbox; that way, it knows which cmdlet it needs to use:
$cmdlet = $objCmdletsListbox.SelectedItem
Next, it's going to grab the Identity from the second (instances) listbox:
$instance = $objInstancesListbox.SelectedItem
And once the application knows both the cmdlet name and the instance Identity it can then construct a command, run that command, and write the output to the textbox:
$objOutputBox.Text = Invoke-Expression `
"($Cmdlet -Identity $instance | Format-List | Out-String).Trim()"
That's kind of a complicated-looking command, so let's explain just exactly what it's doing, and why it's doing that. The first part is actually pretty easy: it's just using the selected Get-Cs cmdlet to return the selected instance:
$Cmdlet -Identity $instance
We next take the data that comes back and pipe it to the Format-List cmdlet; Format-List will then display the data as a list rather than a table. Does that matter? In some cases, no: typically the data will be displayed as a list anyway. However, that might not be the case when we start to add even more bells and whistles to this application; when we do that, PowerShell might try to display some of our data as a table. Because we have limited space within our text box we don't really want data displayed as a table. If we pipe everything to Format-List we don't have to worry about that.
If we look at our entire command it looks like this:
($Cmdlet -Identity $instance | Format-List | Out-String).Trim()
Why do we return the data, format it as a list, and then pipe it to the Out-String cmdlet? That's easy: if you grab PowerShell data from within an application like this and then try to display that data as-is in a textbox this is what you get:
Microsoft.PowerShell.Commands.Internal.Format.FormatStartData Microsoft.PowerShell.Commands.Internal.Format.GroupStartData Microsoft.PowerShell.Commands.Internal.Format.FormatEntryData Microsoft.PowerShell.Commands.Internal.Format.GroupEndData Microsoft.PowerShell.Commands.Internal.Format.FormatEndData
Cute, but not all that useful. The only way to work around that problem (or at least the only way that we know of) is to pipe the data to the Out-String cmdlet, which converts that weird object information to string values. And then, just to make the output a little nicer-looking, we use the Trim() method to delete any blank lines or blank spaces that might appear at the beginning or the end of that output.
So what's the net result of all that work? This:
Pretty slick, huh? Jolie … slick ….
OK, that is all we're going to do today. But don't worry: we'll back soon with the next installment in the series. What will we cover in that installment? Well, we're not really sure at the moment: to tell you the truth, our articles typically come as more of a surprise to us than they probably do to you. But you can bet (pretty much, anyway) that we'll show you how to make our GUI application even better, and even fancier.
Until then, all we can say is this: à bientôt! (See you later!)
Note. Yes, that literally is all we can say. We really should do our homework more often.
Oh, there is one last thing: here's the complete code for all the work we did today, just in case you have any questions about what was supposed to go where. Enjoy!
# Set up the form ===========================================================
[void] [System.Reflection.Assembly]::LoadWithPartialName("System.Windows.Forms")
[void] [System.Reflection.Assembly]::LoadWithPartialName("System.Drawing")
$objForm = New-Object System.Windows.Forms.Form
$objForm.Text = "Microsoft Lync Server 2010 Practice Application"
$objForm.Size = New-Object System.Drawing.Size(1200,800)
$objForm.StartPosition = "CenterScreen"
# Add the listbox containing the Get-Cs cmdlets =============================
$objCmdletsListbox = New-Object System.Windows.Forms.Listbox
$objCmdletsListbox.Location = New-Object System.Drawing.Size(50,40)
$objCmdletsListbox.Size = New-Object System.Drawing.Size(260,320)
$items = Invoke-Expression "Get-Command Get-Cs*"
foreach ($item in $items)
{
[void] $objCmdletsListbox.Items.Add($item.Name)
}
$objForm.Controls.Add($objCmdletsListbox)
# Add the Instances listbox ================================================
$objInstancesListbox = New-Object System.Windows.Forms.Listbox
$objInstancesListbox.Location = New-Object System.Drawing.Size(50,400)
$objInstancesListbox.Size = New-Object System.Drawing.Size(260,200)
$objForm.Controls.Add($objInstancesListbox)
# Add the subroutine for retrieving instances ===============================
$objCmdletsListbox.add_Click(
{
$cmdlet = $objCmdletsListbox.SelectedItem
$items = Invoke-Expression "$cmdlet | Select-Object Identity"
$objInstancesListbox.Items.Clear()
if ($items –ne $Null)
{
foreach ($item in $items)
{
[void] $objInstancesListbox.Items.Add($item.Identity)
}
}
})
# Add a text box to the form ===============================================
$objOutputBox = New-Object System.Windows.Forms.TextBox
$objOutputBox.Location = New-Object System.Drawing.Size(680,40)
$objOutputBox.Size = New-Object System.Drawing.Size(460,500)
$objOutputBox.Multiline = $True
$objOutputBox.Font = New-Object System.Drawing.Font("Courier New", "8.5")
$objOutputBox.Wordwrap = $True
$objOutputBox.ReadOnly = $True
$objOutputBox.ScrollBars = [System.Windows.Forms.ScrollBars]::Vertical
$objForm.Controls.Add($objOutputBox)
# Add the subroutine for retrieving instance values =========================
$objInstancesListbox.Add_Click(
{
$cmdlet = $objCmdletsListbox.SelectedItem
$instance = $objInstancesListbox.SelectedItem
$objOutputBox.Text = Invoke-Expression `
"($Cmdlet -Identity $instance | Format-List | Out-String).Trim()"
})
# Activate the form =========================================================
$objForm.Add_Shown({$objForm.Activate()})
[void] $objForm.ShowDialog()