The Ultimate Intune Setup Guide – Stage 4: Enable ConfigMgr 2012 R2 Management
Now that we’ve setup our Intune cloud services, it’s time to integrate the service with our on-prem Configuration Manager 2012 R2 hierarchy.
In my lab environment, I’ve got a single Primary Site with all roles installed on the one site server. In a multi-tier hierarchy, the Intune connector roles can only be installed at the CAS site.
The first thing we’ll want to do is ensure all of our prerequisites are met. If you’ve followed my previous three posts (here, here and here) you will already have Intune setup, public domains added and user accounts being synchronized. There are some outstanding steps to get our clients to work with ConfigMgr
Create required DNS entries
Our enterprise Mobile Device Management (MDM) clients will automatically look for their management services via a public URL during registration. This URL is EnterpriseEnrollment.<Your Company>.com
In my lab scenario, that would be EnterpriseEnrollment.mattslabs.com
As we want these devices to speak via Intune for management, we need to redirect the DNS requests via a CNAME record to the Microsoft Intune management services.
Open your public DNS management tools. In my example my domain is hosted with GoDaddy, so I’m using their DNS management console

You can see here I’ve got my ADFS A record defined and the TXT record required for domain verification from this postCreate a new CNAME record, name it EnterpriseEnrollment and target it at manage.microsoft.comThe CNAME record you now must create should point to enterpriseenrollment-s.manage.microsoft.com. See /en-us/intune/deploy-use/set-up-windows-device-management-with-microsoft-intune for more information.
Save your zone file and wait until the record is replicated

You should eventually be able to ping EnterpriseEnrollment.mattslabs.com which will now resolve to
manage.microsoft.comenterpriseenrollment-s.manage.microsoft.com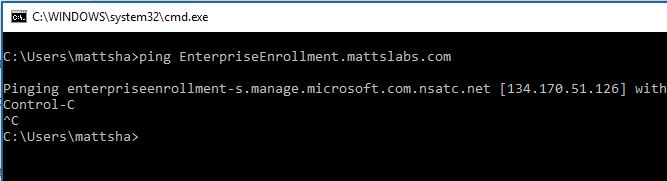
The second requirement is the certificates needed to push software to devices. In my lab I plan to manage Windows Phone, Android and iOS devices.
Acquiring the Windows Phone certificate.
To side-load software onto Windows Phone devices via Intune, a Symantec Code Signing Certificate is required. These certificates must be purchased directly from Symantec. https://www.symantec.com/en/au/code-signing/windows-phone/
As I’m not willing to spend a few hundred dollars on my lab, there is a handy tool available for lab scenarios called Support Tool for Windows Intune Trial Management of Windows Phone. You can download it from https://www.microsoft.com/en-us/download/details.aspx?id=39079
Download this MSI and leave it for later. In the next post (Stage 5), I’ll explain how to get the Support Tool working.
Acquiring the iOS Apple Push Notification certificate
To manage and deploy to iOS devices, you must have an Apple Push Notification (APN) certificate.
Open your Configuration Manager Console, and browse to Administration > Overview > Cloud Services
Right-click on Windows Intune Subscriptions and select Create APNs certificate request

Set a path for the Certificate Request to be saved to

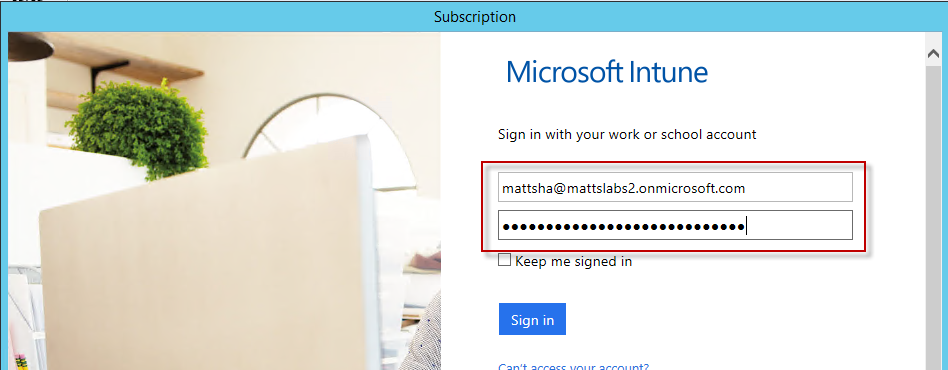
When prompted, add your Intune Administrator credentials and press Sign in

Once complete, close the window and browse to the location of the saved .csr file

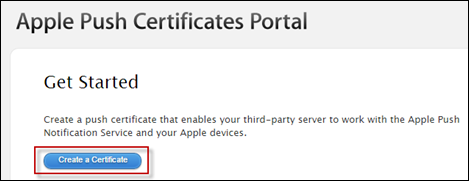
Browse to the Apple Push Certificates Portal https://go.microsoft.com/fwlink/?LinkId=269844
Sign-in or create an Apple ID

Click on Create a Certificate
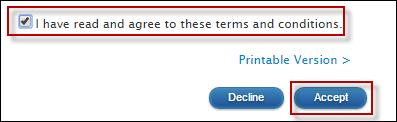
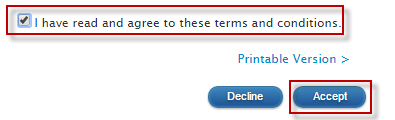
Accept the EULA
On the Create a New Push Certificate page, select the Choose File button and select the .csr file previously generated

Click Upload

After the success confirmation dialog, click the Download button to download your APN Certificate

Hold onto this file for later

Next, we can start to configure Configuration Manager. Open the Configuration Manager Console, browse to Administration > Overview > Cloud Services
Right-click on Windows Intune Subscriptions and select Add Windows Intune Subscription

You’ll be prompted with the Create Windows Intune Subscription Wizard
Press Next to start the Wizard

Click the sign-in button and enter your Intune Administrator credentials

You’ll be prompted to confirm the ownership of the Intune MDM capabilities. Essentially, if you want to use Intune for MDM, it either has to be via the Intune Web console, or via the Configuration Manager console. It is one or the other, never both.
Tick the check-box and press OK


In the General Configuration, configure the user Collection in which you want members to have the ability to enrol their devices, some Company Branding and also the Configuration Manager Site Code in which any devices enrolled will become a member

Tick the Android and iOS support buttons, and if you have a Symantec Windows Phone certificate, select Windows Phone 8

Note: For those who are going to use the Support Tool for Windows Intune Trial Management of Windows Phone to test the Windows Phone management, don’t enable the Windows Phone 8 management. We’ll do this via the tool in my next blog post (Stage 5)
Select the Apple APN certificate created earlier

Provide some contact details for your users to see in the Intune Portal

Add your Company Logo (if required)

Complete the wizard

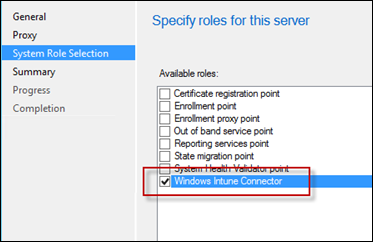
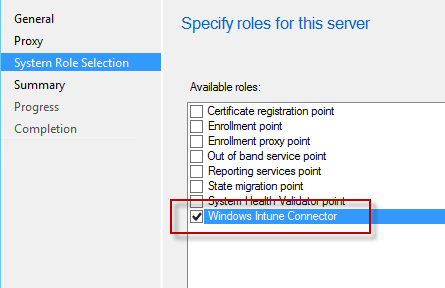
To complete the installation process, we finally have to add the Windows Intune Connector site system role. To do this, open the Configuration Manager Console, browse to Administration > Overview > Site Configuration > Servers and Site System Roles

Note here we have a manage.microsoft.com server in the list. This is where you apps/etc will be stored for your MDM devices when they’re synchronized in later
Right-click on your Primary Site Server, and select Add Site System Roles

You’ll be presented with the Add Site System Roles Wizard
Leave the General and Proxy settings default (unless you need to go through the proxy to get Internet access)


In the System Role Selection window, select the Windows Intune Connector and press Next
Press Next on the Summary screen and wait for a successful completion screen

After a few minutes the role should be up and running.
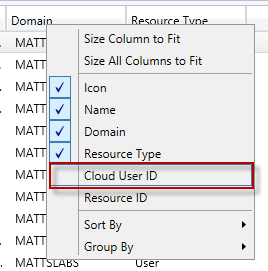
Finally, lets confirm that the integration and cloud sync is working. From the Configuration Manager Console, browse to Assets and Compliance > Overview > Users
You should see all of your users listed

Right-click on the title column, and add the column Cloud User ID
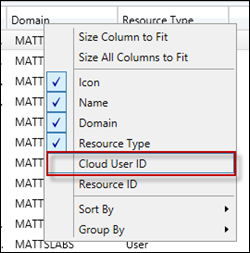 This will add an extra column and display all of the Cloud User ID’s which has come from the Intune service. If the Cloud User ID is empty, that user will not be able to enrol their device or access any of the Intune services.
Finally, browse https://portal.manage.microsoft.com to view your ConfigMgr Intune Branding


We’ve now successfully configured the Configuration Manager integration with Intune.