The Ultimate Intune Setup Guide – Stage 2: Configure Your Public Domain
We started The Ultimate Intune Setup Guide by signing up to the Intune service in the previous post. This post we’re going to configure the Public DNS required for your public Intune service to work for your clients.
Step 1 – Add your public domain to the Azure Management Portal
First, open your browser and visit https://account.manage.microsoft.com providing your Intune Global Admin credentials.
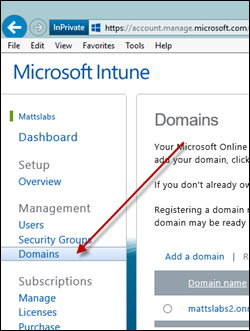
You’ll be greeted with the Account Portal. Select the Domains link under the Management subheading
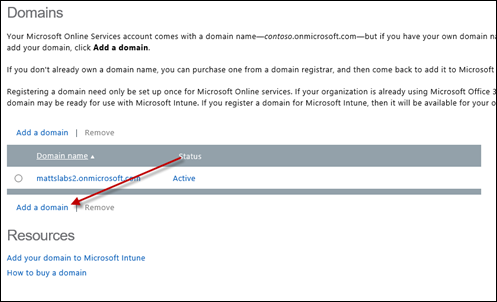
In the Domains section
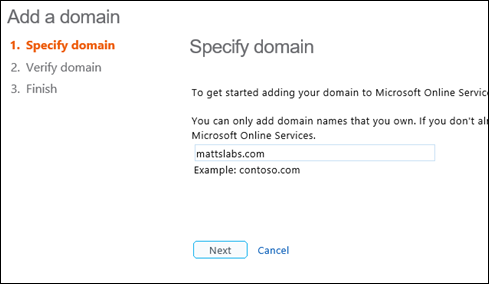
Enter your public domain
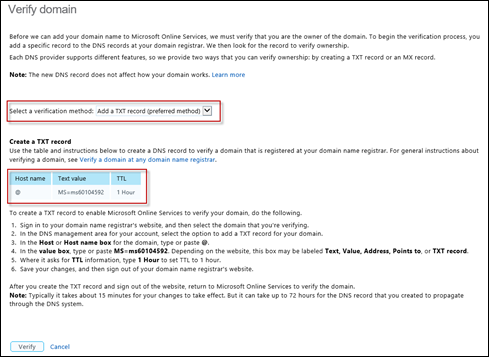
You’ll then be prompted to Verify domain. This process is required to ensure that the public domain that you’re specifying is actually owned by you.
The process requires you to add either a TXT Record or MX Record into your public DNS provider. Azure then checks the value that you’ve set to confirm that you do in fact own the domain, and have write access.
In my environment, I’ve got my public DNS hosted with GoDaddy, but the process is very similar across all DNS providers.
Step 2 – Creating DNS Verification Records and Verifying
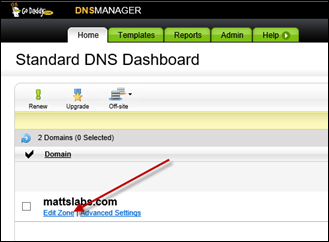
Login to your domain/DNS provider, and find the DNS management section. You’ll want to edit the zone of the domain your users will login via
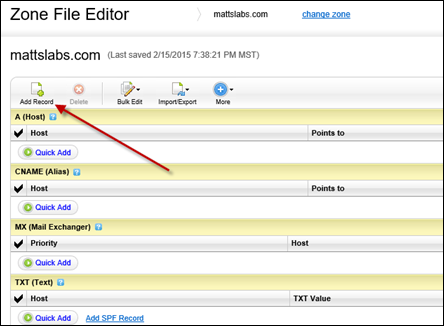
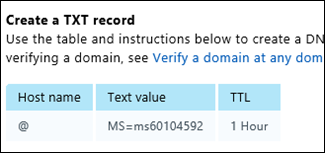
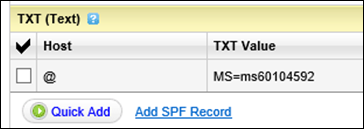
You’ll probably see a lot more records in your production DNS, but for my demo it’s a clean zone. We need to create the TXT Record as per the requested Intune Add a domain value
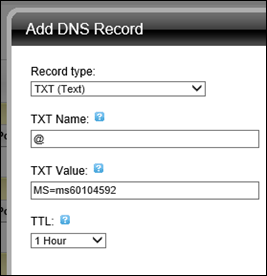
Add the value (the @ host name just means the root of that domain, in this instance it’s just .mattslabs.com (notice the extra period . )
And you can see the TXT Record has been created
Step 3 – Verify your domain in Intune
Now that we’ve created our DNS Record, we need to wait and verify! Firstly, DNS can take a while to update depending on your DNS hosting provider, as well as the DNS refresh interval in the Intune platform.
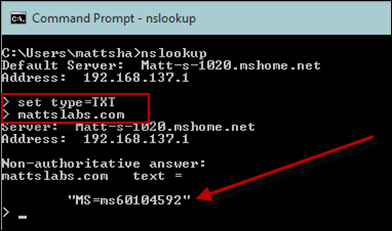
If you want to perform a manual check of the records, use nslookup
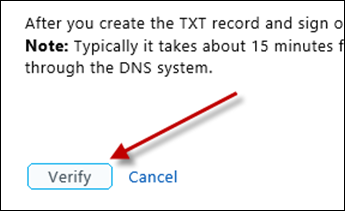
Once our DNS is up-to-date, click on the Verify button to get Intune to check for the TXT Record, and verify that it matches what it is expecting
You’ll then receive a confirmation that the domain has been added successfully
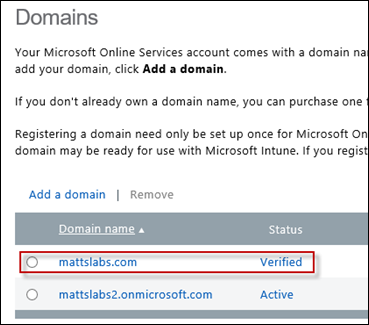
And your domain will now appear in your Domains section of the Account Portal
