Killing Sessions to a Compromised Office 365 Account
David Branscome
Partner Technical Architect
We live in a world full of nasty threats to our online environments. One of your end users might click on a link that they shouldn’t and they get sent to a location where a piece of malware is installed on their machine and it captures their user credentials. In many cases, the goal of the attacker is to compromise a user account – ANY user account – and then move forward from there. Maybe their goal is to use that email account to send spam email or access organizational data for exfiltration. Or maybe the bad guy wants to have access to the environment so that he can gather confidential information and misuse it.
If an account in your Office 365 environment is compromised in this way, what can you do?
We have to recognize that there are two basic approaches to the problem:
Watch what the bad guy does so that you can take legal action against them
In this case, the actions we take will be done on the advice of the customer’s legal team and will be designed to establish a legal framework for prosecution. For example, there may be a scenario where an employee has been fired, but he knows the CEO’s password – maybe because the CEO left it on a sticky note on his monitor? Nah. That NEVER happens. The fired employee then decides to access the CEO’s mailbox for some nefarious purpose.
What can we do in this situation? Again, on the advice of the customer’s legal team, you may want to take steps such as the following:
- Put the CEO’s mailbox on Litigation Hold so that the data in the mailbox is preserved in its entirety. https://technet.microsoft.com/en-us/library/dn743673(v=exchg.150).aspx
- Configure Exchange Transport Rules so that all incoming as well as outgoing email is also forwarded to a second mailbox for preservation. https://technet.microsoft.com/en-us/library/jj919238(v=exchg.150).aspx
- If the compromise is severe enough, it may be advisable to set up a new, temporary Office 365 tenant so that communications related to the legal case are handled out-of-band and cannot be seen by the bad actor. This tenant would be where the legal team, IT and the users whose accounts have been compromised can communicate without the risk of their email being read by the bad guy.
Kill the session to block access to all Office 365 resources
The thing to remember about this effort is that we have to do more than simply block access to the mailbox. The user’s identity can be leveraged across multiple Office 365 services, so we have to block access to all those additional services as well. The challenge is that, in order to improve performance, the services often will cache the credentials of the user for a period of time, which means that EVEN IF you change the user’s password, there will be a period of time when the bad actor can remain authenticated and do damage.
That means that we have to break the sessions that allow them to connect to any of the services. There are three ways we can accomplish this:
For the first method, we need to sign in to the Office 365 Admin portal. Then go to Users --> Active Users, and then select the account of the compromised user. Expand OneDrive Settings, go to the Sign-out area, and click on the Initiate link. Notice that this will sign out users from all Office 365 sessions across all devices, but it will still allow the user to sign in. That means the bad actor can immediately sign back in and go about his day. We’ll address password change in a moment.

When you click Initiate, the service begins killing the sessions for the user on all their devices.

At this point, it’s a good idea to also block further sign-ins for the user. Granted, it’s impactful, but so is having a compromised account.
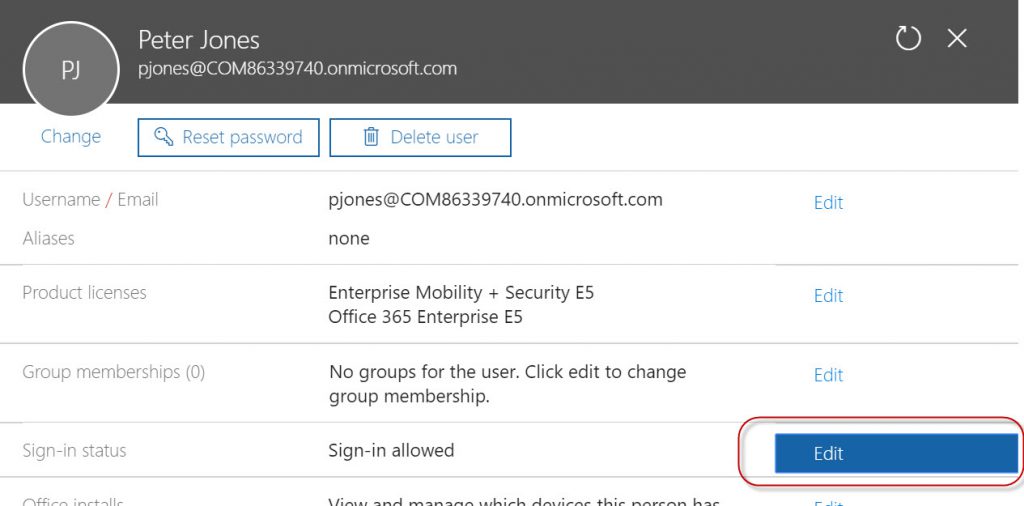
To block sign in, from the properties of the compromised user account, go up to Sign-in status and edit the status.
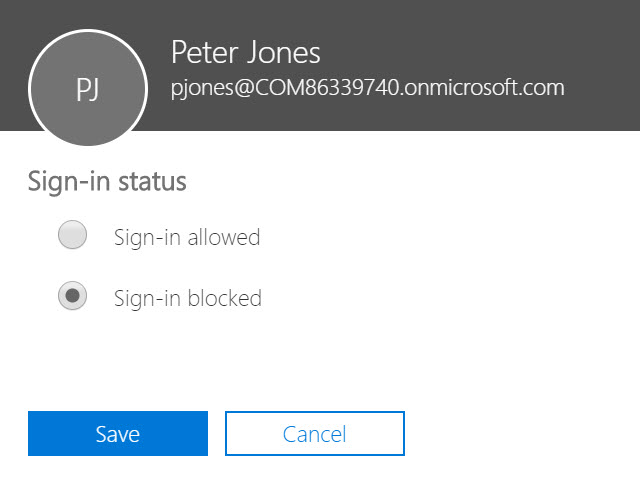
Change the status of the account to “Sign In Blocked”
With the sign-in blocked, nobody (good or bad) can re-authenticate using that account until an administrator unblocks the account. When you click Save, notice the recommendation given.
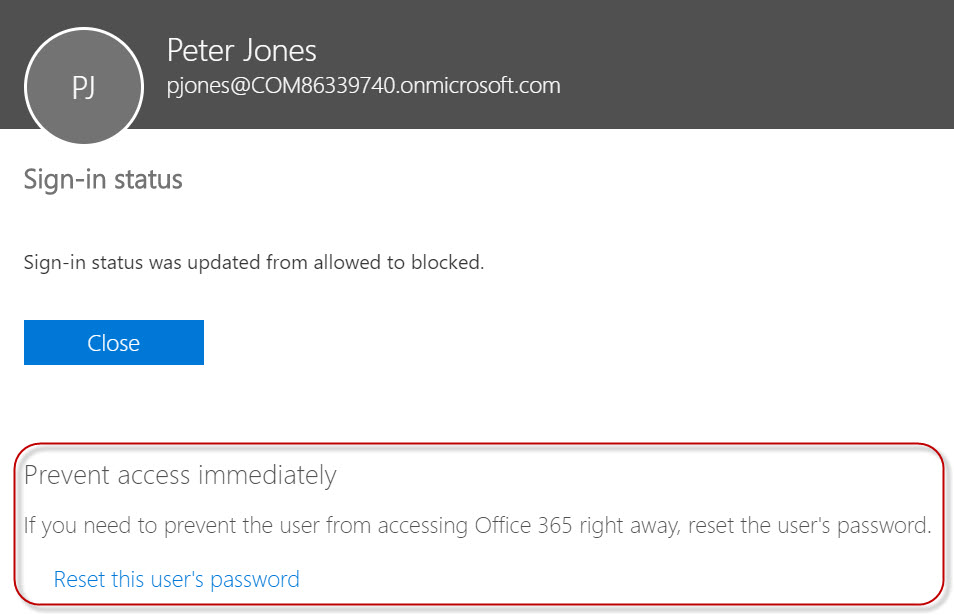
This reminds us that another good idea is to change the user’s password.
The second method is specific to SharePoint and uses the SharePoint Online PowerShell Module, which can be downloaded here: https://www.microsoft.com/en-us/download/details.aspx?id=35588 . Once you have it installed and have connected to your tenant (Steps are here https://technet.microsoft.com/en-us/library/fp161372.aspx) run the Revoke-SPOUserSession cmdlet, as shown below.

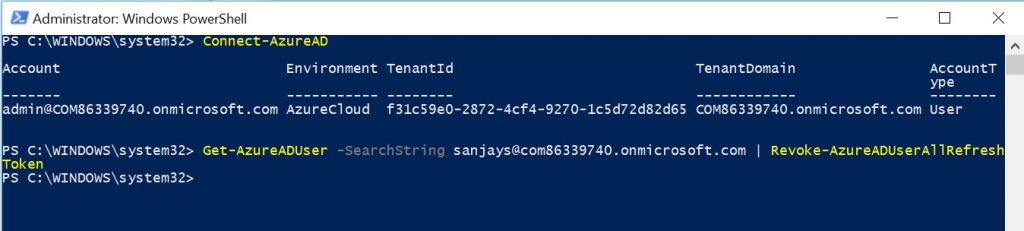
The third method actually goes beyond just the Office 365 services and kills all active user sessions in any Azure AD application. To use this method, download the Azure AD PowerShell Module here (/en-us/powershell/azure/active-directory/install-adv2?view=azureadps-2.0).
Once installed, connect to your Azure AD tenant and kill all sessions by using the Revoke-AzureADUserAllRefreshToken cmdlet, as shown below.
Changing the Password
All of this is great, but as we mentioned earlier, if we don’t change the user password, then all we’ve done is make the bad guy sign in again. This is where it can get kind of tricky, especially in a scenario where we have directory synchronization taking place between an on-premises environment and Azure AD.
Remember, it doesn’t do any good to just configure the user properties to have the user change their password at the next logon. The bad guy can try to login, get the prompt to change the password, and change it to whatever he or she wants to use!
If the password is being synchronized to Azure AD, you’ll need to use the Get-MSOLUser cmdlet to identify the LastDirSyncTime and LastPasswordChangeTimestamp value to ensure that the password change has also been synchronized to Azure AD. Make sure that, if the user changed their password in the on-premises directory, the password synchronization has taken place.
What Else Can I Do?
If none of these seem to have blocked access to the mailbox of the compromised user by the bad actor, one more thing you can do is perform a mailbox move. This would effectively break any current sessions the bad actor had open. If the password was changed and synchronized correctly, then the bad actor should not be able to log in again with the old credentials.
To move a mailbox in Office 365, use PowerShell to connect to Exchange Online using these steps: https://technet.microsoft.com/en-us/library/jj984289(v=exchg.160).aspx
Once you are connected, just run New-MoveRequest compromisedUser@contoso.com -PrimaryOnly.
Depending on the size of the mailbox, this could be fairly quick, but for very large mailboxes, it could take a couple hours to move.
One more thing! Don’t forget about mailbox delegates. If a bad actor granted Full Mailbox delegate access to another user, and the delegate user account was also compromised, then the bad actor would retain access to the original mailbox anyway! Therefore, make sure you check the mailboxes and accounts of any delegates of the compromised user so that you are removing all unwanted access to the original mailbox.
Conclusion
There aren’t many things as unnerving and disheartening to an IT admin as finding compromised accounts in your environment. When you find them, don’t panic!
Following a logical set of steps can help you clean up your environment and get things back to their natural order, where you sit back and collect accolades for a job well done, all day long!