How to create a Custom Authentication Provider for Active Directory Federation Services on Windows Server 2012 R2 - Part 3
In this series of five blog posts I want to show you how you can create your own Authentication Provider in AD FS on Windows Server 2012 R2. This Authentication Provider can then be used in AD FS for multi-factor authentication (MFA). The solution will use the users mobile device as a second factor for authentication, by sending a One-Time Password (OTP) or PIN to the device.
For those of you interested only in the AD FS related components, part 2 will be most interesting. That's where we will be creating the Authentication Provider itself. But if you are looking for a complete, working, solution, you might want to go over the entire set. So you might be interested by now what's in the other parts... or at least I hope you are. So here's a quick agenda;
- Introduction
- Creating the Authentication Provider
- Setting up Azure Mobile Services
- Creating a Windows Phone Authenticator App
- Putting it all together
Now, before we get started I have to remind you that this blog post series is only to show you how you can create this Authentication Provider. By no means is the solution we are creating an enterprise ready MFA solution. If you are looking into such an enterprise ready solution, I would recommend you take a look at the Windows Azure Multi-Factor Authentication.
Now... Let's get going with Part 3: Setting up Azure Mobile Services.
Part 3 - Setting up Azure Mobile Services.
In Part 2 - Creating the Authentication Provider we have created an Authentication Provider for AD FS on Windows Server 2012 R2. This Authentication Provider was using a hard-coded PIN (12345) to authentication users. Now obviously, that's not really adding any security to AD FS authentication nor is it true Multi-Factor Authentication. We want to extend the created Authentication Provider to be able to send random PINs to user authentication. We will do this by creating a little Windows Phone App that receives these push notifications. In order to quickly enable this functionality, we will utilize Windows Azure Mobile Services. This allows us to enable the required functionality with a few clicks of the mouse. In this part of the series, we will setup Windows Azure Mobile Services to be used with out Authentication Provider and our Windows Phone device.
Windows Azure Mobile Services allows our mobile device (Windows Phone, Android or iPhone) to register itself with the service and receive push notifications. We will be implementing a small Windows Phone 8 App, but if you're using another flavor of mobile device, try to see if you can create an app for that platform. All the information can be found on our Azure website. We will then allow the Authentication Provider to send messaged to the Windows Azure Mobile Service. The Windows Azure Mobile Service will then send a push notification (with the PIN) the user's device.
Please do remember that this implementation is merely a Proof-of-Concept. By no means is the implementation we are going to create secure. Yet, it can be made secure by properly taking into account permissions on the Window Azure Mobile Services data tables. Since I want to keep this post as small as possible, I don't pay too much attention to the security.
Prerequisites
- A Windows Azure Subscription. (Free Trial or Pay-as-you-Go work fine. No charges will be incurred.)
Creating the Windows Azure Mobile Services
In order to create an instance of Windows Azure Mobile Services, we browse to https://manage.windowsazure.com. On that page, sign-in with your Microsoft Account (formerly known as Live ID). If you don't already have a Windows Azure subscription, I recommend you sign up for a 30 day trial. If you have already been using the Azure trial for over 30 days, you can subscribe to a Pay-As-You-Go plan. Since the services we will be utilizing here are available without incurring any charges, there's no harm in doing so.
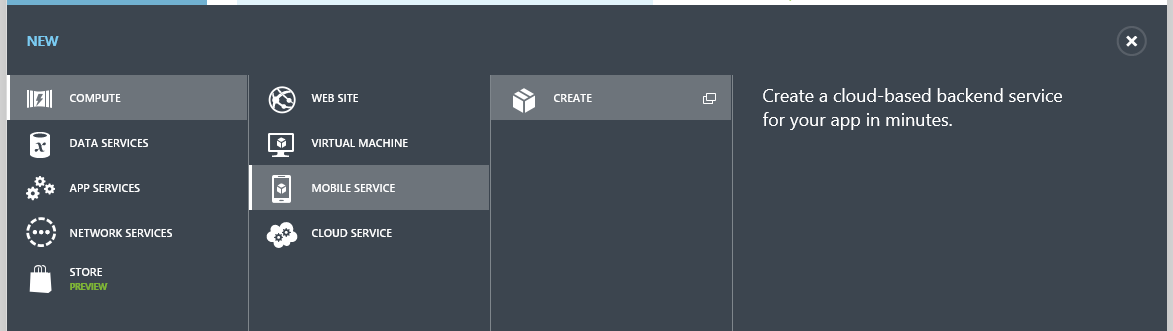
In the Windows Azure Portal, at the bottom-left, click + New and select Compute and then click Mobile Service. Then, click Create.
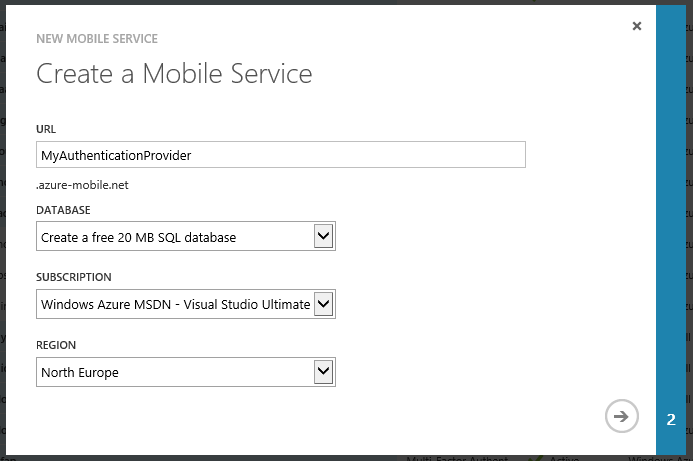
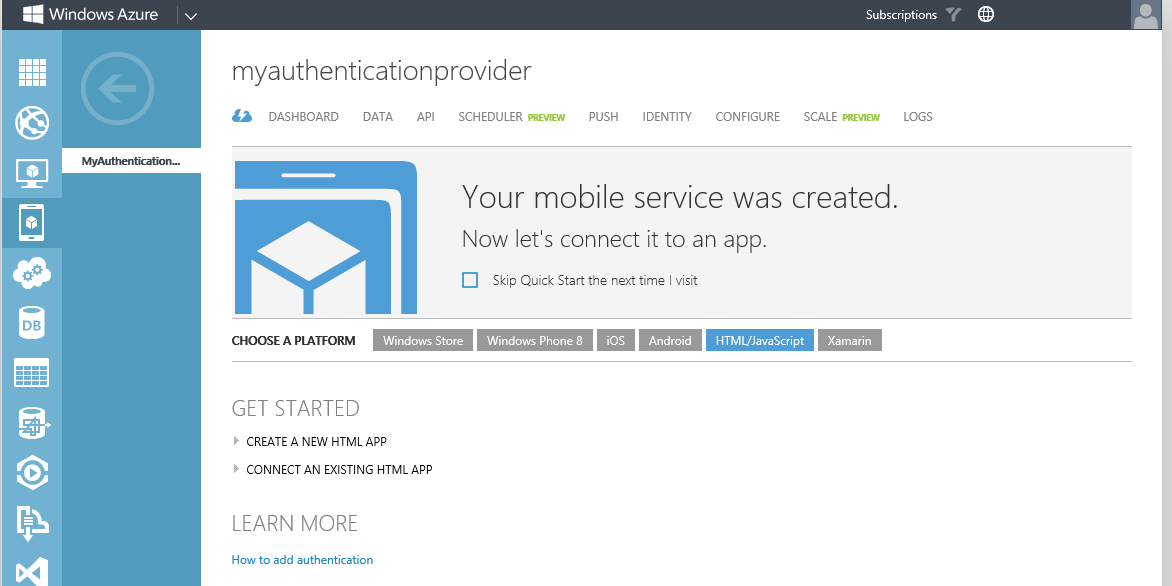
Now, we have to create a new unique name for the Mobile Service. In my case I was lucky, and MyAuthenticationProvider was free. You will have to come up with something unique. Keep in mind that the users are never actually going to see this name, so we don't really care what it reads. The full FQDN of my Mobile Service is now myauthenticationprovider.azure-mobile.net. The service also utilizes a SQL Azure Database. We can select an existing database in this dialog, but since I don't have a SQL Azure database deployed, I choose to create a new FREE 20MB database. 20MB should be plenty for our purpose. We have to choose a subscription where you want to tie the service to and a region where you want the service deployed. Choose whatever you see fit here.
Since we have chosen to create a new database, we have to configure this new database. Click on the right-arrow at the right bottom to start configuring the database.
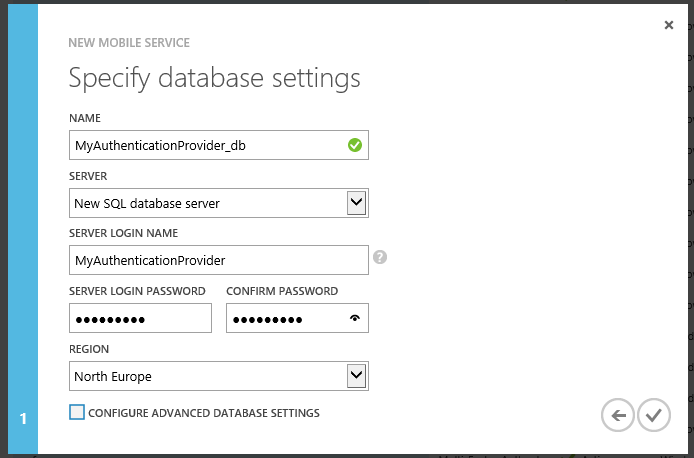
I have accepted the suggested database name, which was available. Then, we have to tell Windows Azure on which database server the database is going to land. Since we don't have a database server running in SQL Azure, we will create a new server by selecting New SQL database server from the SERVER pull-down list. Now, type in a username that you can use to manage the server and a password that you can remember. We are not going to use these credentials. Last, choose where you want the server deployed. For obvious reasons I would suggest we create the database as close to the Mobile Service as possible. There is no need to configure advanced database settings, so we complete the wizard by clicking the V in the bottom right. Windows Azure will now create a SQL Azure Database Server, create a new database in the server and create the Mobile Service.

Wait for the operation to finish, so we can start configuring the Mobile Service.

No that the service has been provisioned, let's configure it by clicking on its name in the Portal.
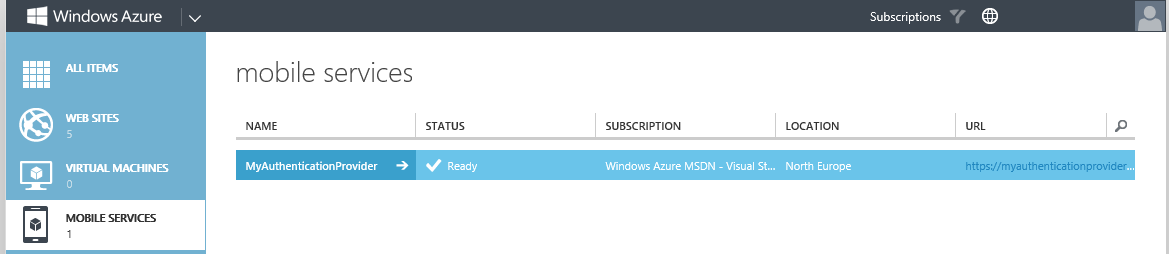
Select the Mobile Service by clicking on it's name, on my case MyAuthenticationProvider.
Creating Tables in our Mobile Service
Now what do we need to do in our Mobile Service?
First, we will create two different tables in it's database. One table will be used to hold all the mobile devices that register for push (or toast) notifications with this service. We will call this table Registrations. Second, we need a table to store the authentication requests. These will be created by our Authentication Provider in AD FS, put into this table that we need to create, and then the Mobile Service will take care of sending the provided PIN to the user's device. We will call this table Authentications. Before we start to create these tables, we need to quickly decide what will be stored in these tables. (We can change this afterwards, but let's think about this first.)
This Registrations table is the table that we should in fact use to register our mobile devices and is accessed by our mobile devices. This table provides a means for our Mobile Service to keep track of all the devices using the service. (It will record the channels used by to mobile device to connect to the service. The service needs this to send notifications to the devices.) We will add two columns to this table. The first is the column deviceid. This column will hold a unique identifier for the device. This is an identifier that our Authentication Provider aware of. The Authentication Provider looks up the users deviceid from somewhere (in our case we will be using Active Directory to store this identifier). Our Authentication Provider will then send a PIN to this specific device. The identifier that we will be using on our Windows Phone is not only unique to the device, but also to the application on the device. Since we will have to store this identifier in such a way that it is tied to a specific user, our Windows Phone app (that we will create in the next part of this five part blog series) will display the unique identifier so the Active Directory Administrator can add it to the user object. Of course, we can also create a SQL Attribute store to accomplish this. The other column is handle is required to store the notification channel URL to the device.
The second table that we want to use is actually used by our Authentication Provider. It will add entries to that table for each authentication request in AD FS. Hence, we will have to store the PIN there as well as the unique identifier for the users device (since that's where we want the PIN sent). This second table, and we already agreed upon the name Authentications, will need at least three columns; one that holds the PIN, one that holds the deviceid, and one that identifies this request. Now the last column, which would be the primary key for the table. will be created by default. Let's call the other columns pin and deviceid.
To create a table in our database, we click on DATA in the portal. Since this our first table in the service, we can only add a new table.

Click on ADD A TABLE to add a new table.
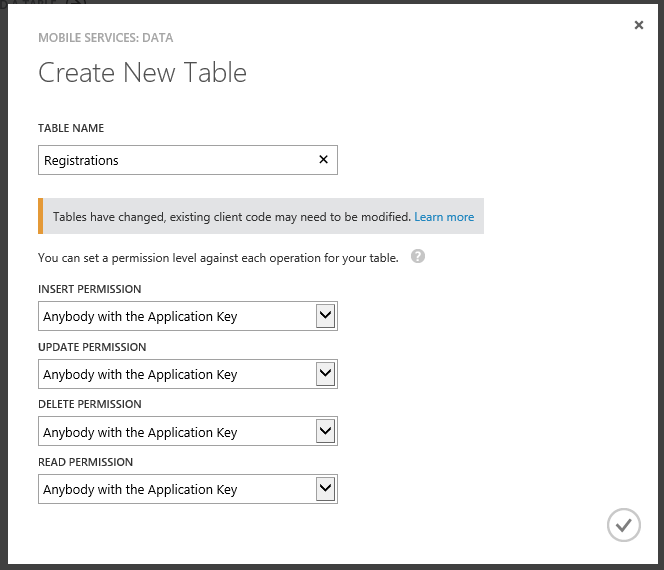
Type the table name, Registrations, in the TABLE NAME box and click the V in the right corner. Now if security is important to you, you should take some time to investigate the possible options that we have here with regards to setting permissions. For our demo purposes, we will accept the defaults, knowing that for our solution this is not be best or safest way to create the table. It is though the easiest way to create the table.

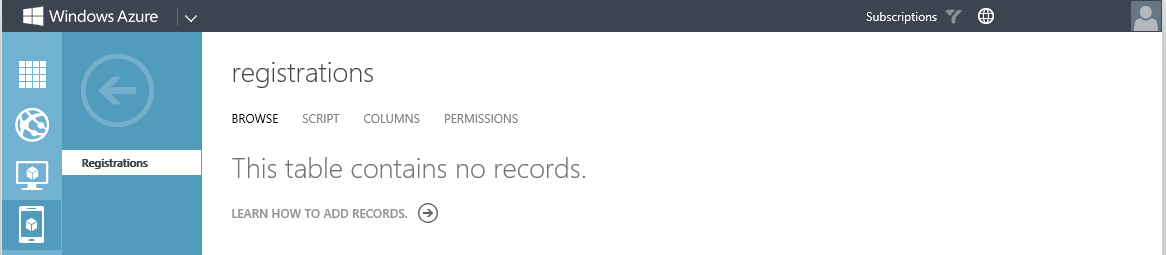
Wait for the table to be created. This shouldn't take more than a few seconds.

Once the table is created, we can select it from the portal (at the top) so we can add the one additional column (deviceid) that we want. Click on the table name (Registratons) at the top.

On the Registrations table page, click COLUMNS.
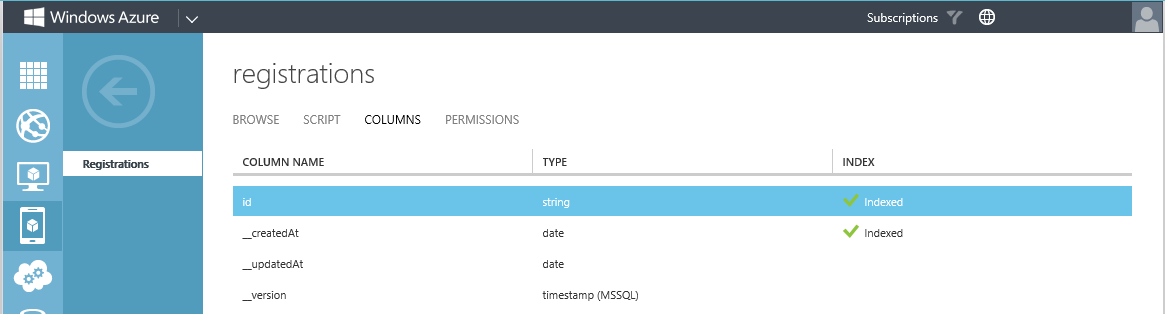
At the bottom of this page, click + ADD COLUMN.

In the Add Column dialog, type deviceid at COLUMN NAME and select String at DATA TYPE.
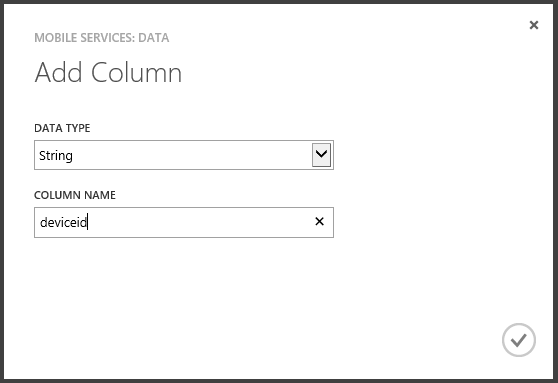
Click the V at the bottom-right to add the column deviceid of type String to the Registrations column and wait for the operation to complete.
Using the same method, add a column called handle to the Registrations table.
Your Registrations table should look like this:

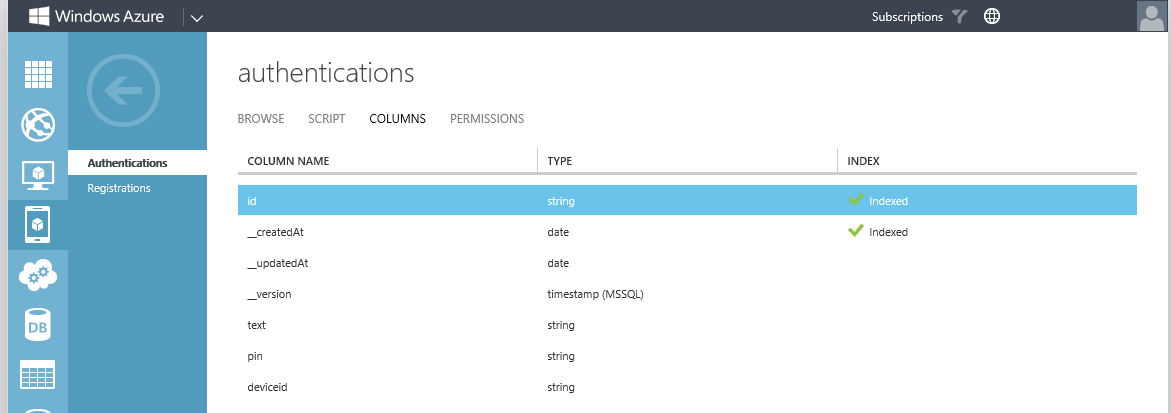
Now, go back to the service by clicking the big left-arrow on the left of the screen, and create a new table called Authentications using the exact same method you used to create the Registrations table.
In the Authentications table, add three additional columns of type String with these names; text, pin and deviceid. Your Authentications table should look like this:
Now that we have created the tables to store the information most important to us, we have to tell Windows Azure Mobile Services what to do with the data.
Creating Scripts for our Tables
We can define scripts in our Mobile Service to accomplish whatever we want with regards to data. Server scripts are registered in a mobile service and can be used to perform a wide range of operations on data being inserted and updated, including validation and data modification.
Since we are already in our Authentications table, open the SCRIPT tab on this table. If you're not on this page, please open the Authentications page first and click on the SCRIPT tab.
On the SCRIPT page, select Insert as the OPERATION and replace the code in the window with this code:
FOO11
 function insert(item, user, request) {
    request.execute({
        success: function() {
            request.respond();
            sendNotifications(item);
        }
    });

    function sendNotifications(item) {
        var registrationsTable = tables.getTable('Registrations');
        registrationsTable.where({
            deviceid: item.deviceid
        }).read({
            success: function(registrations) {
                registrations.forEach(function(registration) {
                    push.mpns.sendToast(registration.handle,
                    {
                        text1: item.text,
                        text2: item.pin
                    }, {
                        success: function(pushResponse) {
                            console.log("Sent push:", pushResponse);
                        }
                    });
                });
            }
        });
    }
}
At the bottom of the screen, click SAVE to save the script to the Authentications table.

So what does this code actually do?
The first function that we see is the insert function. This function is triggered whenever data is inserted into the table. In this case, we will actually insert the data into the table and then kick off the sendNotifications function. This function will lookup the deviceid in the Registrations table and send the text and pin (from the inserted data) to the device identified by the deviceid. It does this this by calling the push function that is available in Windows Azure Mobile Services. So this script will be triggered whenever our Authentication Provider has generated a PIN for a user and has looked up the users device in Active Directory. Our Authentication Provider then adds a new record in the Authentications table with the pin and the deviceid to send the pin to. This script will look up the communication channel the device is currently using to receive notifications from our mobile service end the send the pin to the device by means of a toast notification. Pretty cool functionality for a simple script, right?
For the Registrations table, there is also a script that we need to implement. The Registrations table is special to our solution, since it will hold the active channels to subscribed mobile devices. So, navigate to the Registrations table, click SCRIPT, select Insert for the OPERATION and replace all script code with this code:
 function insert(item, user, request) {
    var registrationTable = tables.getTable('Registrations');
    registrationTable
        .where({ handle: item.handle })
        .read({ success: insertChannelIfNotFound });
    function insertChannelIfNotFound(existingRegistrations) {
        if (existingRegistrations.length > 0) {
            request.respond(200, existingRegistrations[0]);
        } else {
            request.execute();
        }
    }
}
This script will insert data into the Registrations table. It will do that, but not after making sure that there are no duplicate handles in the tables. This makes sure that all devices registering to the service have one single channel to receive notifications. This script is triggered when data is inserted into the Registrations table. This will be done by mobile devices; whenever our Windows Phone App (from the next session) starts, it will register (or, by means of the script, update) the channel to our service.
There is one more thing we need to write down before we go to the next part of our series. We need to write down the access key to the service. Without the key one cannot access the data in the service.
Go back to the MOBILE SERVICES page in the Azure Portal that lists all mobile services.
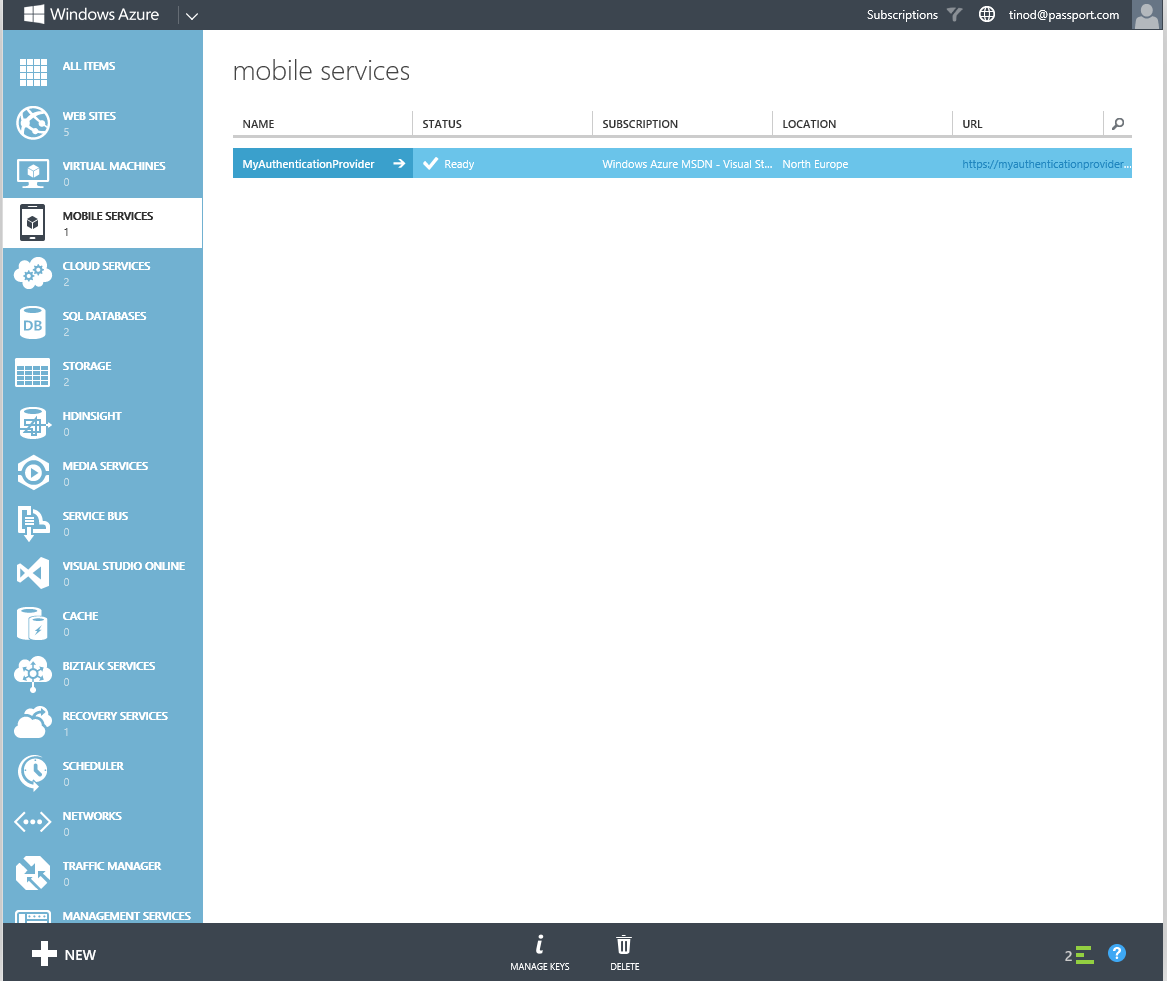
Select the created service and click on MANAGE KEYS at the bottom of the screen.
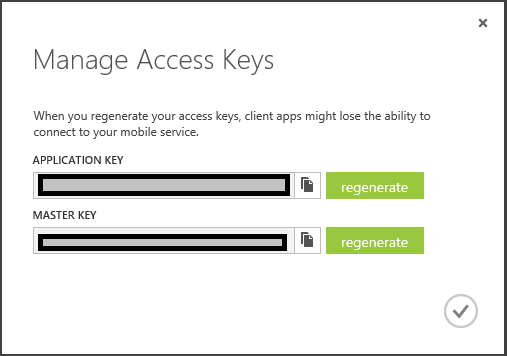
Copy the APPLICATION KEY by using the COPY button next to the key and paste it into notepad or something. We'll need this key in the Windows Phone App and in the Authentication Provider!
Take me to Part 4 - Creating a Windows Phone Authenticator App
Take me back to Part 2 - Setting up Azure Mobile Services