How to create a Custom Attribute Store for Active Directory Federation Services 3.0
Active Directory® Federation Services (AD FS) 3.0 includes built-in attribute stores that you can use to query for claim information from external data stores, such as Enterprise Active Directory, Lightweight Directory Access Protocol (LDAP) directories, and Microsoft SQL Server. You can also define custom attribute stores to query for claim information from other external data stores.
This article shows you how to create a custom attribute store for AD FS 3.0. The process for AD FS 2.x is the same, but the target .NET Framework will be different, as well as the location of the AD FS binaries.
Please keep in mind that the code that we will write, and the DLL that we will create will by NO MEANS be production-ready code. This document and its contents are provided AS IS without warranty of any kind, and should not be interpreted as an offer or commitment on the part of Microsoft, and Microsoft cannot guarantee the accuracy of any information presented. MICROSOFT MAKES NO WARRANTIES, EXPRESS, IMPLIED, OR STATUTORY, AS TO THE INFORMATION IN THIS DOCUMENT.
Prerequisites
.NET Framework 4.5 (https://www.microsoft.com/en-us/download/details.aspx?id=30653) This is installed by default on Windows 8.1
Visual Studio 2013 (https://www.microsoft.com/en-us/download/details.aspx?id=40787)
Windows Server 2012 R2 with the Active Directory Federation Services role installed and configured.
We will assume you use Windows 8.1 and Visual Studio 2013, and have a Relying Party configured in AD FS that can be used to test the custom attribute store. In this example a custom attribute store will be created using Visual C#.
Copy down the file “Microsoft.IdentityServer.ClaimsPolicy.dll” from the AD FS Server to your PC. The default location of this DLL in Windows Server 2012 R2 is “C:\Windows\ADFS”.
Building the Custom Attribute Store
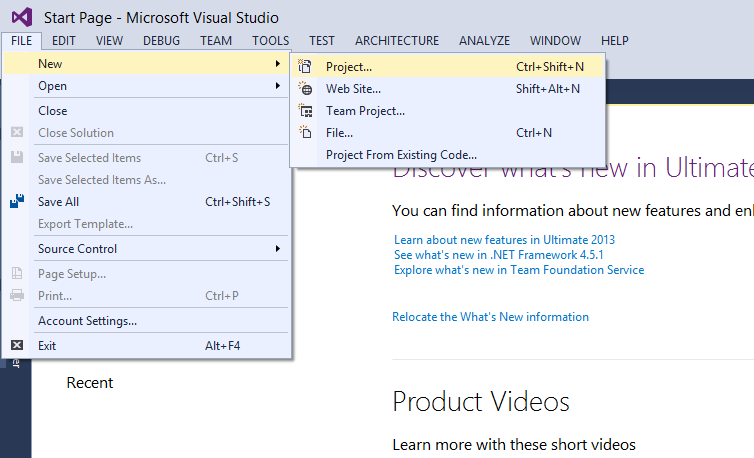
Start Visual Studio, and create a new Project by clicking “File”, “New” and then “Project”, or by hitting Ctrl+Shift+N.
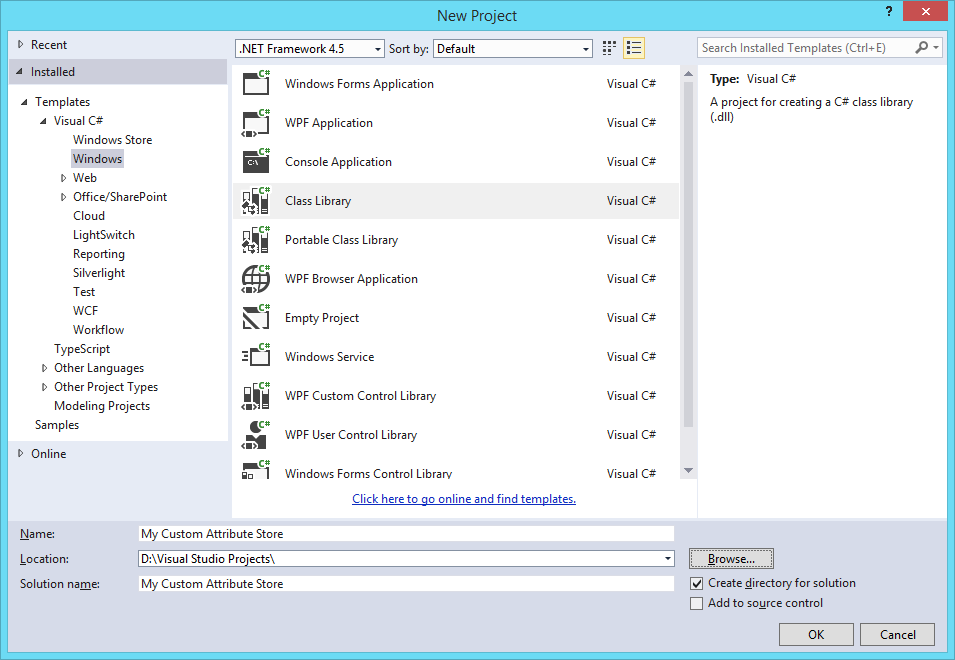
Create a Project of type “Class Library” (located in the branch “Installed”, “Templates”, “Visual C#”, and “Windows”) and make sure the target framework is the .NET Framework 4.5 (for AD FS 3.0). Give the Project a proper name, in my example “My Custom Attribute Store” and click “OK”.
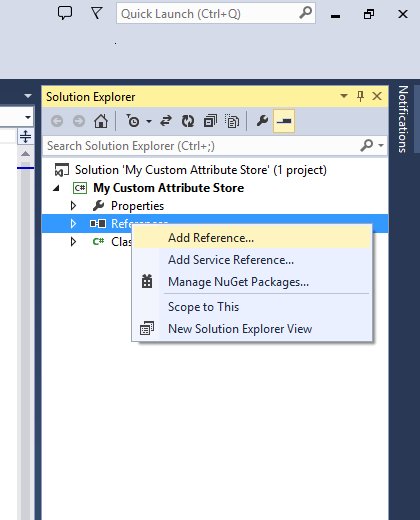
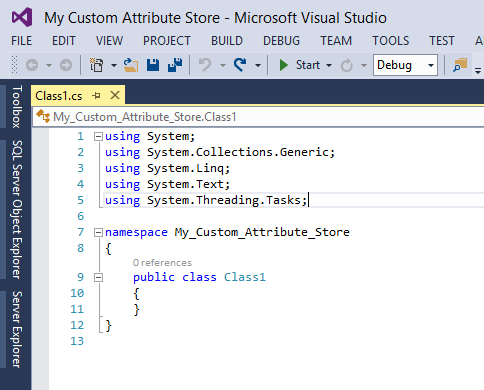
In Visual Studio, the Project should now have been created and a new Class file (called Class1.cs) should be opened. On the right side of the page, locate the “References” branch under your Project and your Solution in the Solution Explorer and right-click it. Click on “Add Reference…” to add a reference to the DLL you copied from the AD FS Server.
Select “Browse” on the left side, and click the “Browse…” button.

Now, locate the DLL you copied down from the AD FS Server, and click it.
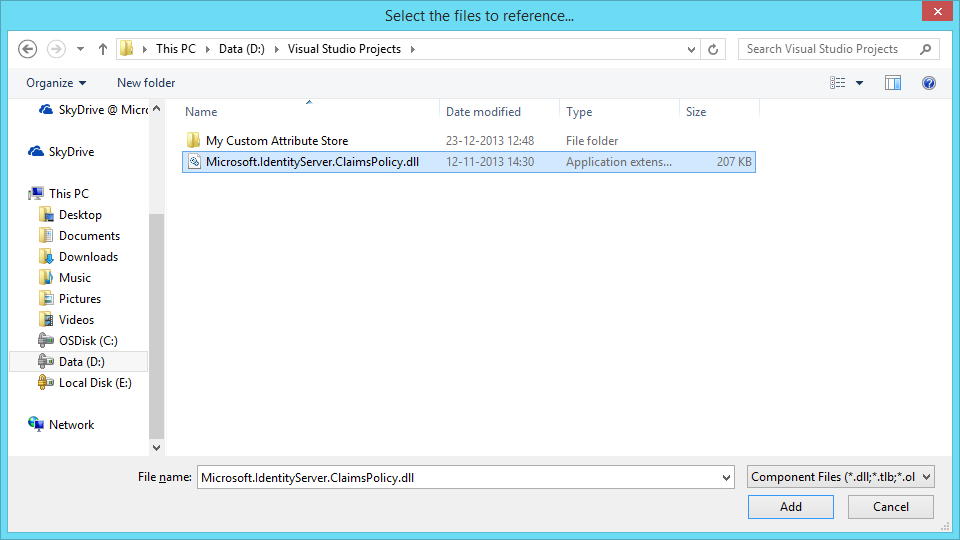
Click “Add” to select the DLL to be referenced in you project.
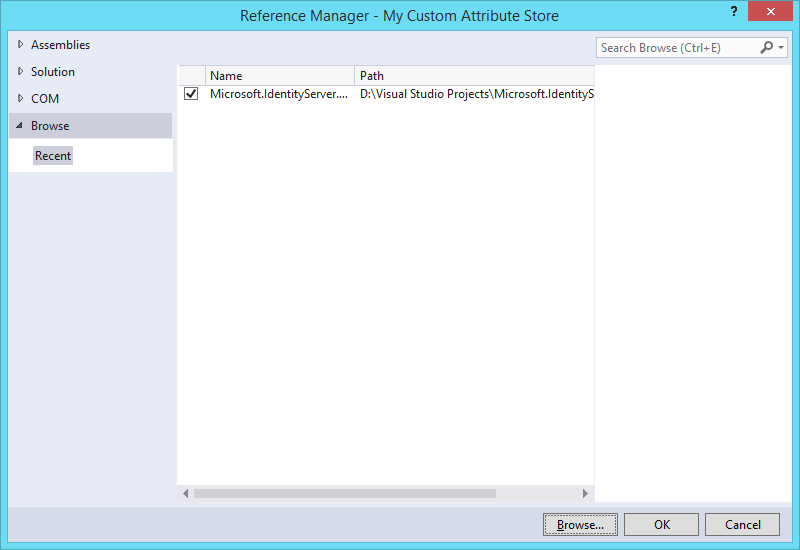
Make sure the checkbox in front of the name has been checked, and click OK.
A new reference to the DLL should now have been created in your Solution. The reference shows up as “Microsoft.IdentityServer.ClaimsPolicy”.

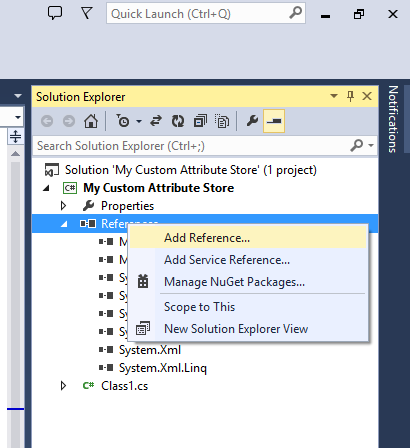
After adding this reference, we can implement a custom attribute store in our code. Yet, this custom attribute will require access to some classes not referenced by default. We need to create a reference to the proper component in order to be able to use these classes.
Again, right-click the same References branch and select “Add Reference…”.
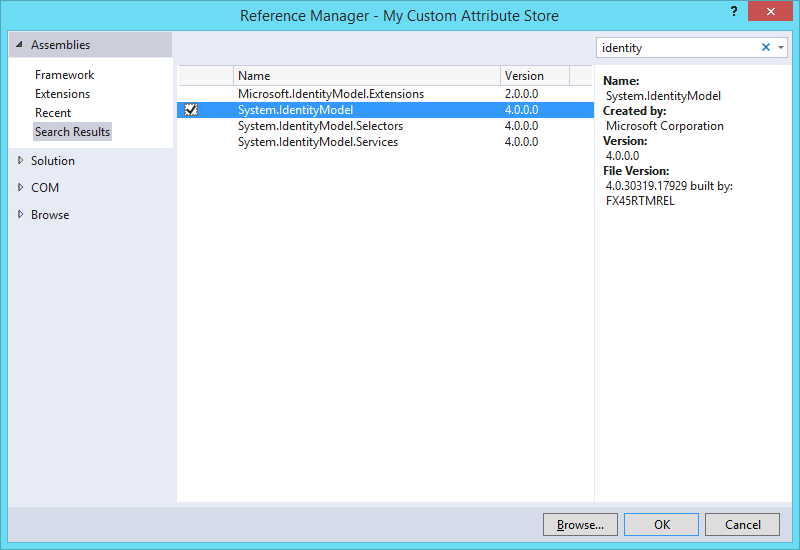
We will now add a reference to the System.IdentityModel namespace.
In the dialog box, on the right top, type “identity”. On the search results pane, in the center of the screen, check the checkbox in front of “System.IdentityModel” to select the namespace and click “OK”.
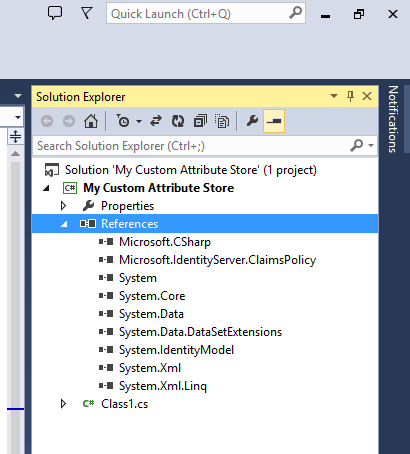
Now, in our project, we can see a reference to “Microsoft.IdentityServer.ClaimsPolicy”, which we added before by browsing to the AD FS DLL, as well as a reference to “System.IdentityModel”, that we added just now.
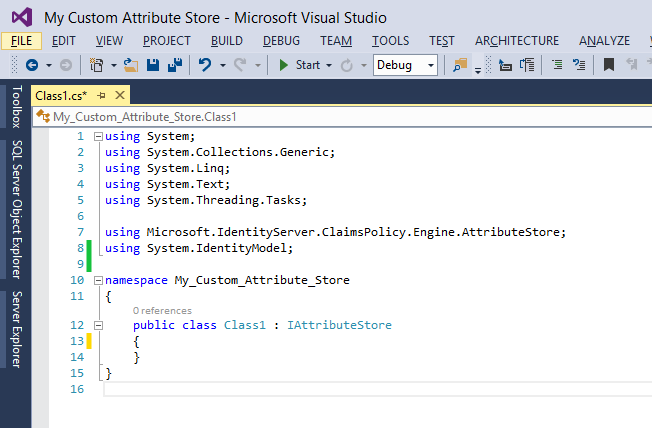
Now that all the proper references are in place, we can start building our custom attribute store in code. In the code page of the Class1.cs file that has been opened by default, we need to make sure we can easily access the namespaces we added before. Locate the “using” statements at the top of the Class1.cs file. (If the Class1.cs file was not opened by default, double-click it in the Solution Explorer.)
Underneath the existing “using” statements, type two new “using” statements;
using Microsoft.IdentityServer.ClaimsPolicy.Engine.AttributeStore;
using System.IdentityModel;
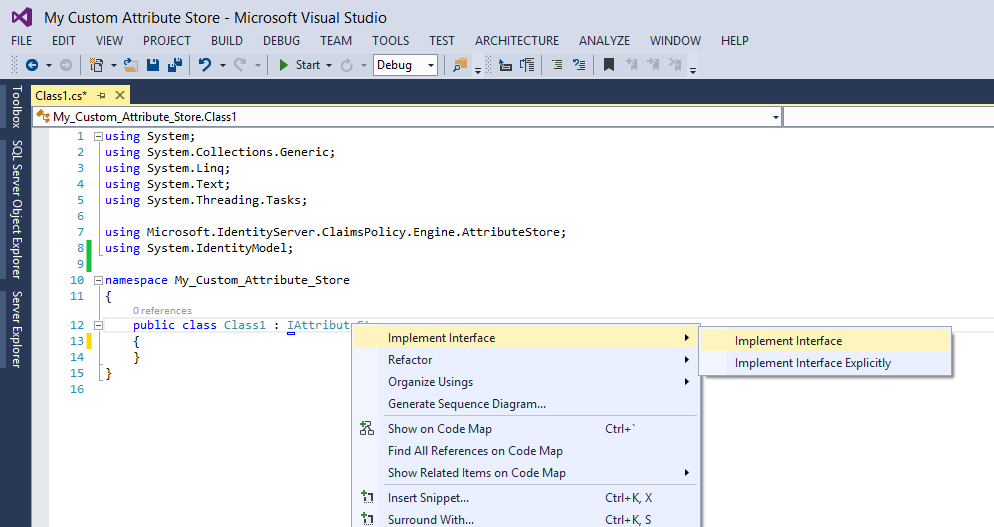
Directly after the declaration of the class, which should show like this;
public class Class1
on the same line, type:
: IAttributeStore
This way, we inform Visual Studio that this Class, called Class1, will implement the Interface “IAttributeStore” (which comes from the “Microsoft.IdentityServer.ClaimsPolicy.Engine.AttributeStore” namespace). The line should look like this:
public class Class1 : IAttributeStore
Your Class1.cs code page should now look like this:
Now, right-click on “IAttributeStore” that you typed in the last step, and select “Implement Interface” and “Implement Interface”.
Now, Visual Studio will create all the methods you need to properly implement the Attribute Store. Your code should resemble this;
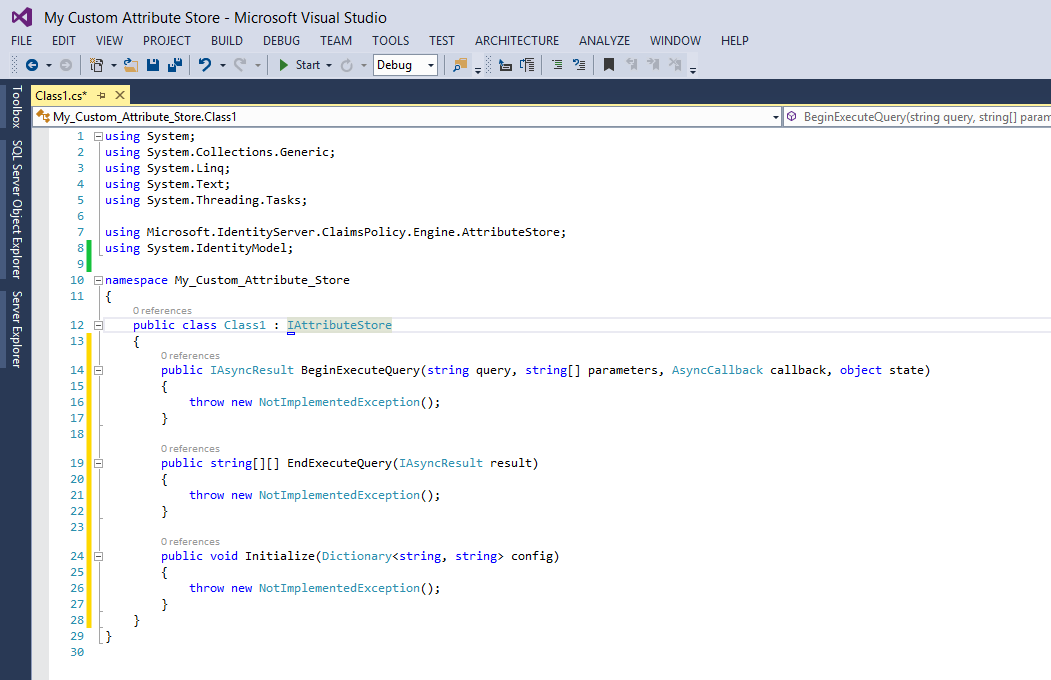
The AD FS runtime calls Initialize to initialize the attribute store with configuration parameters. These parameters are name-value pairs that are specific to the attribute store definition.
The policy engine calls the BeginExecuteQuery method to start a query request on the attribute store. The callback parameter is a reference to the callback method that the attribute store invokes at the end of the query. The state parameter is made available in the AsyncState property of the IAsyncResult reference returned by this method. It is also made available in the IAsyncResult reference that is passed to the AsyncCallback method that is specified in the callback parameter. The IAsyncResult reference that is returned by this method is passed as the result parameter of the EndExecuteQuery method.
The policy engine calls the EndExecuteQuery method to get the result of the query. This method should block until the query is over and then return the results of the query in the two-dimensional string array. The columns in the array represent claim types, and the rows represent claim values. The result parameter is the IAsyncResult reference that is returned by the BeginExecuteQuery method.
We now need to actually implement the code for the three methods.
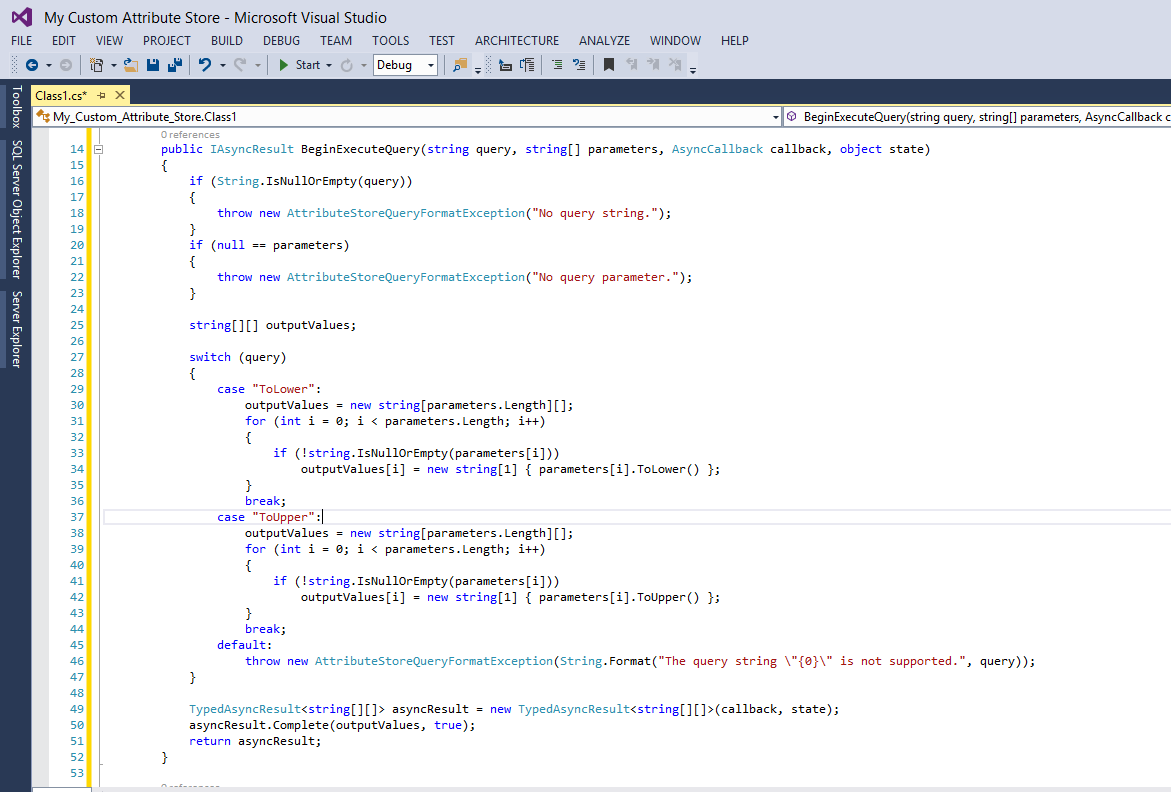
In this example we will implement two different methods (or “queries”) in the Attribute Store’s code. These queries are “ToUpper” and “ToLower” to convert any incoming value to upper- or lowercase equivalents.
Please modify the body of the BeginExecuteQuery method to match this screenshot:
Since we do not use the asynchronous nature of the call, we can directly calculate the values and return the result. Please modify to body of the EndExecuteQuery and Initialize methods to match this screenshot:
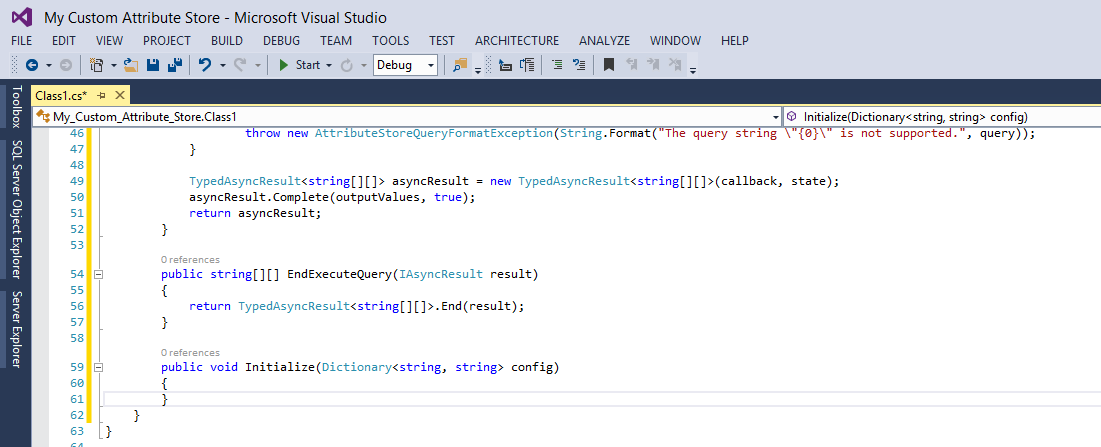
As you can see, the Initialize method is empty, because our sample Attribute Store does not require initialization, but make sure you remove the single line that was in there by default.
At this point, we are ready to compile our Solution!
Compiling the Custom Attribute Store
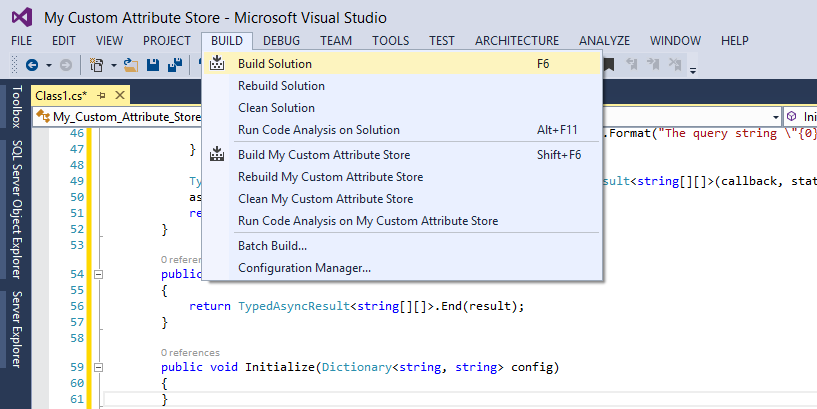
Click “Build” and then “Build Solution” (or simply hit F6) to build the solution:
Check the Output window, at the bottom of the screen, to see if any errors occurred:

If no errors occurred, we just compiled our AD FS Attribute Store (in Debug mode) and the resulting DLL should be created under you project’s directory. In this example, the DLL is called “My Custom Attribute Store.dll” and is present in the “My Custom Attribute Store\bin\Debug” folder under your project folder.
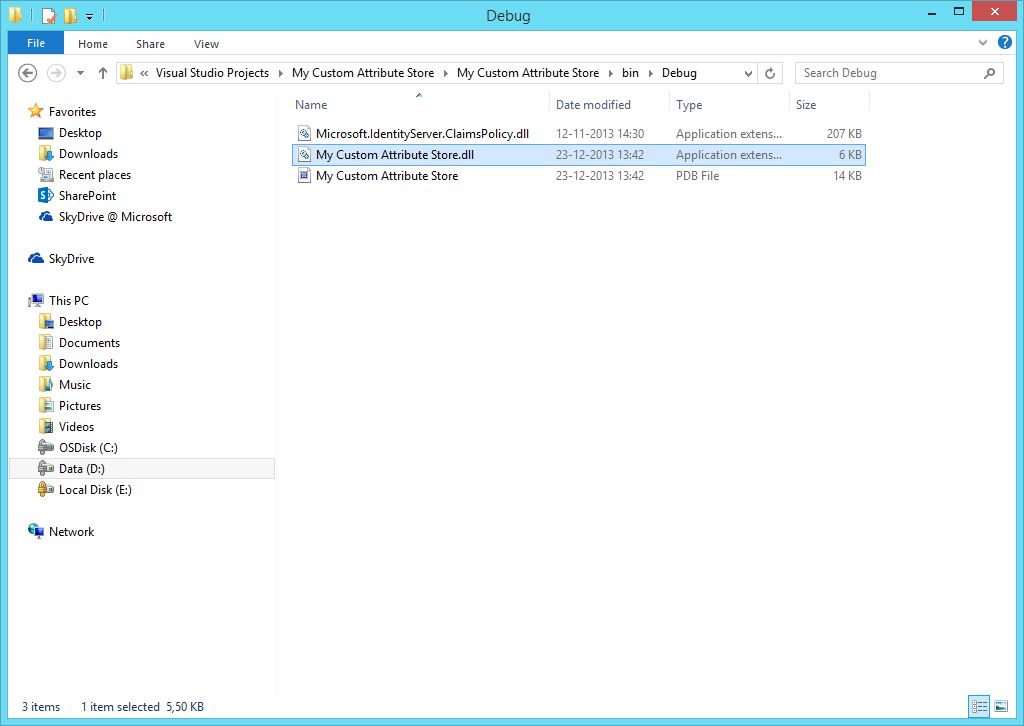
Please note that Visual Studio also copied the AD FS dll to the output directory. This is default behavior, and can be modified, but for now we can safely ignore this DLL. Visual Studio also created a PDB file. A program database (PDB) file holds debugging and project state information that allows incremental linking of a Debug configuration of your program. We do not need this file, and we can ignore it.
Creating the Custom Attribute Store in AD FS
The projects main output DLL, in my case “My Custom Attribute Store.dll” has to be copied from your development PC to all the AD FS servers in the farm. Not to the AD FS Proxy Servers (if you have any); only to all the AD FS servers in the farm.
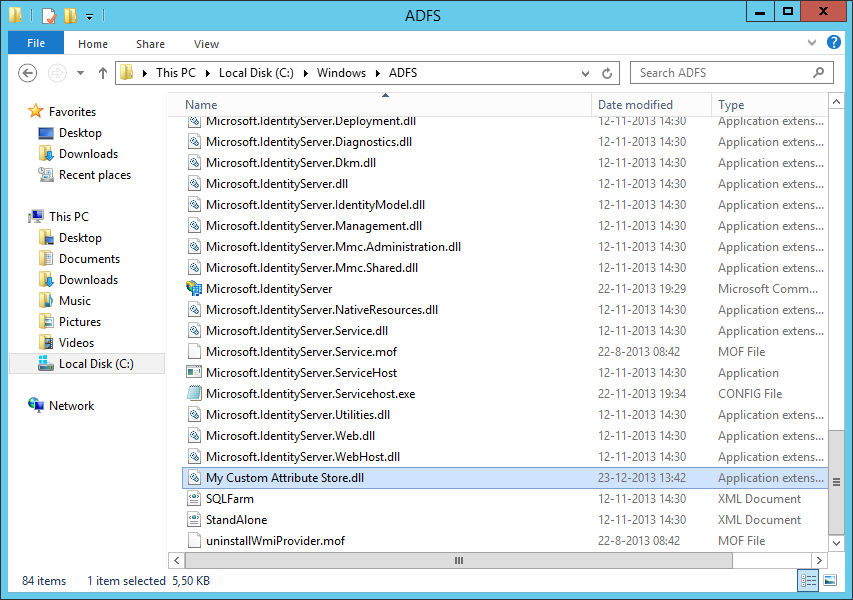
In AD FS 3.0, you have to copy the DLL to the “C:\Windows\ADFS” folder:
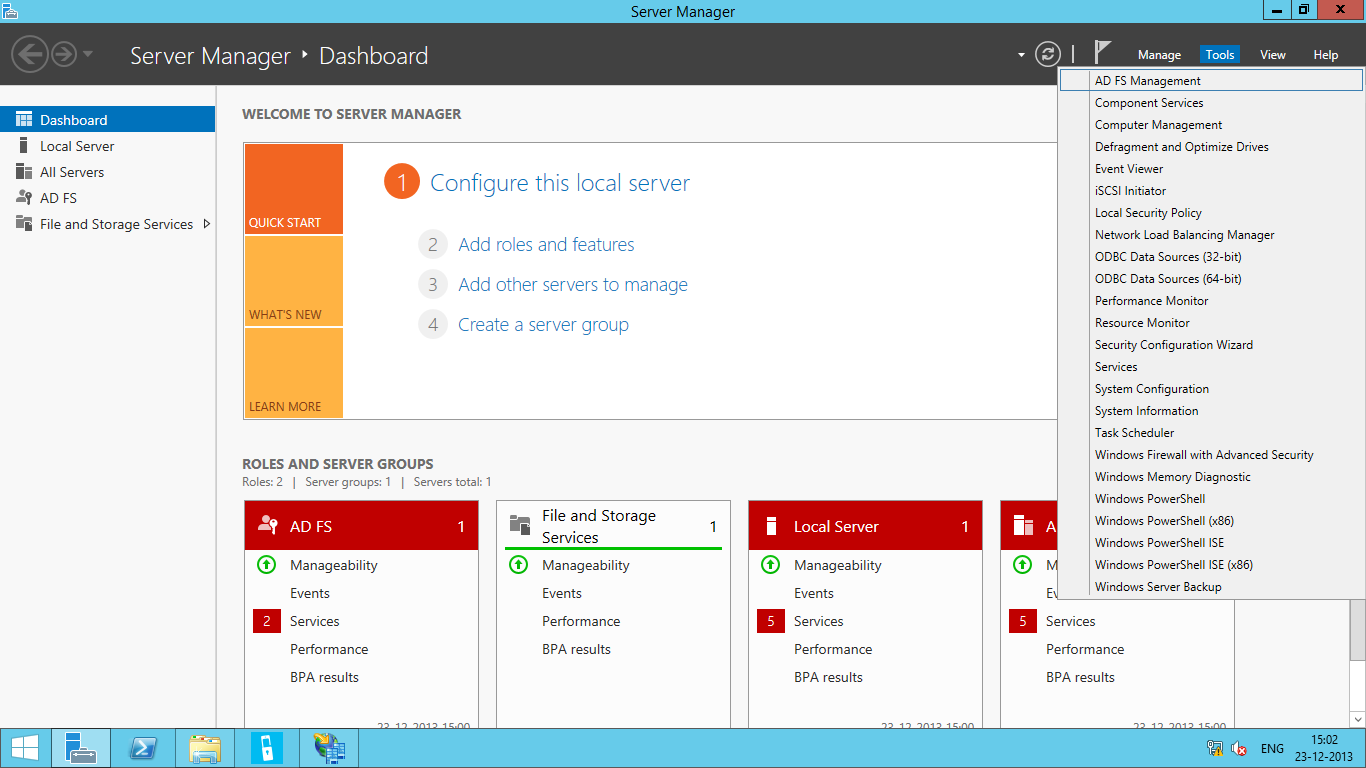
Now that the Custom Attribute Store is in place, we can configure AD FS to actually use the store. Start AD FS Management by clicking “Tools” and “AD FS Management” in Server Manager.
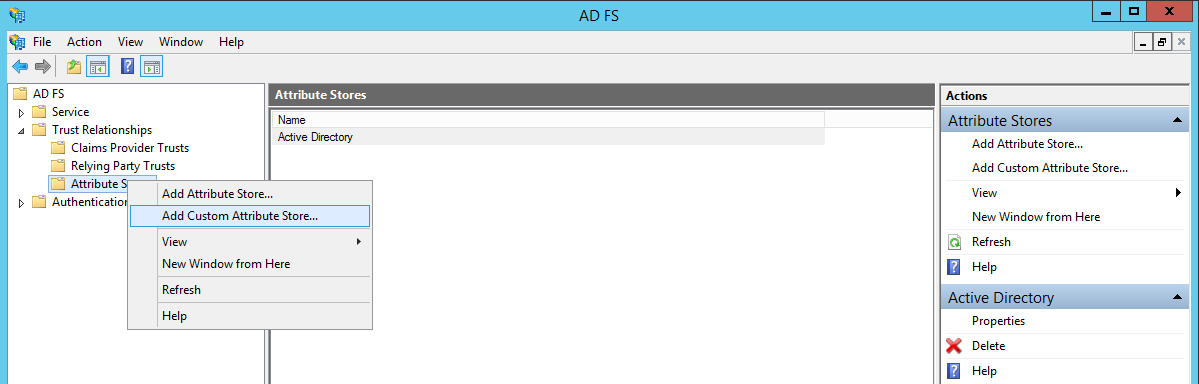
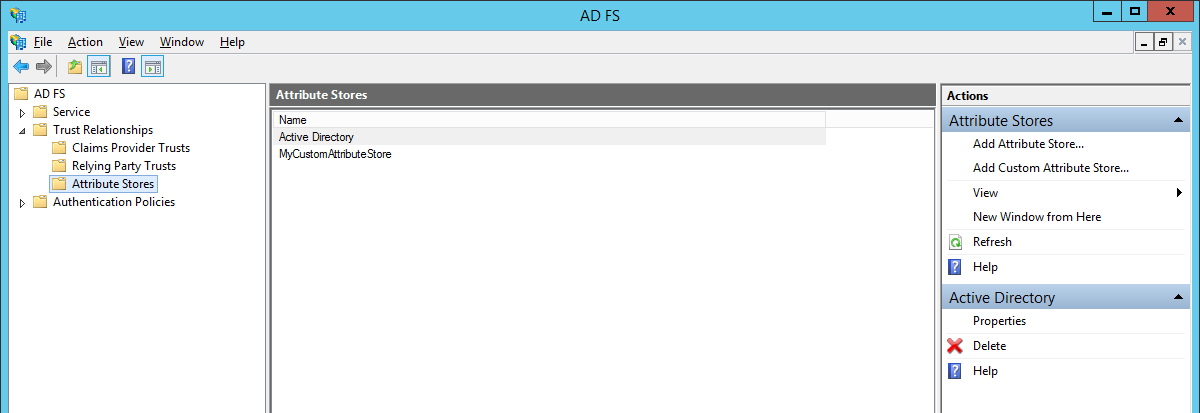
In the AD FS Management Console, expand “AD FS” and expand “Trust Relationships”. Right click the “Attribute Stores” branch and click “Add Custom Attribute Store…” or, after selecting the Attribute Stores branch, click “Add Custom Attribute Store…” on the right side of the console.
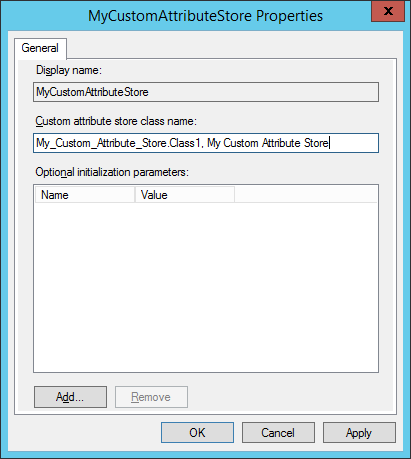
We now need to identify our Attribute Store. The display name used, in this case “MyCustomAttributeStore”, is how we will reference this attribute store later on, when we create claim rules that actually utilize the custom attribute store.
In the “Custom attribute store class name” box, we need to identify the exact namespace, class and file that we created in this way; [namespace].[classname],[filename_without_.dll]
Our namespace was “My_Custom_Attribute_Store”, as we can see in the Class1.cs code file:
namespace My_Custom_Attribute_Store
Our class name was Class1, as we can see in the same file:
public class Class1 : IAttributeStore
And the resulting DLL is called “My Custom Attribute Store.dll” (the file we copied over to the AD FS server. We could have changed this name in Visual Studio, by right-clicking the project name on the right side of the screen, in the Solution Explorer). Please for now, don’t do that, but in case you want to know how to change the resulting DLL’s filename, we will show you how to do this.
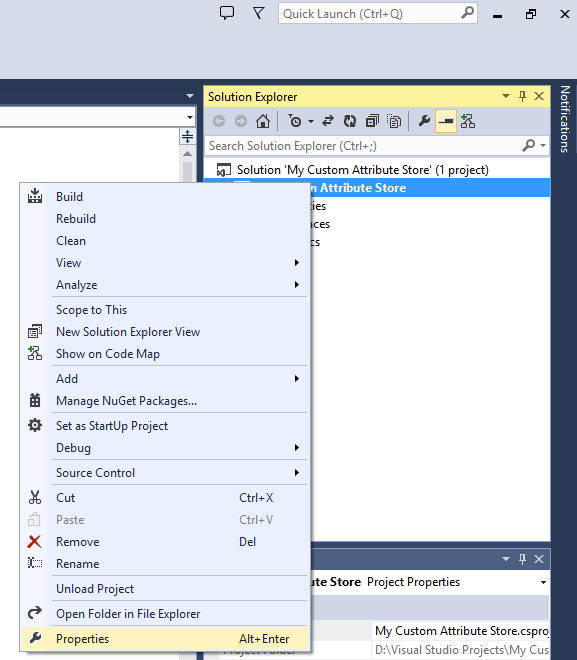
There, click Properties;
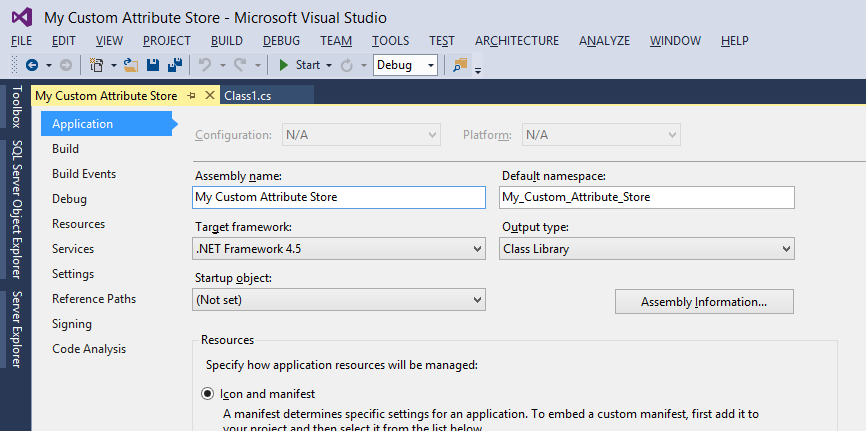
In the “Assembly name” we see how the DLL will be named, and the “Default namespace” is the indication of the default namespace new classes in our project get.
But back to the AD FS server and the Attribute Store configuration.
Since our DLL is called “My Custom Attribute Store.dll”, our namespace is “My_Custom_Attribute_Store” and our class is called “Class1”, the proper identification to AD FS that we need to type into the “Custom attribute store class name” box is:
My_Custom_Attribute_Store.Class1, My Custom Attribute Store
Click “OK” and the custom attribute store will be added to AD FS.
We can directly check the AD FS Event log to see if the attribute store loaded successfully. Start the Event Viewer, again through the Server Manager, and expand “Applications and Services Logs” and “AD FS” and click the “Admin” log.
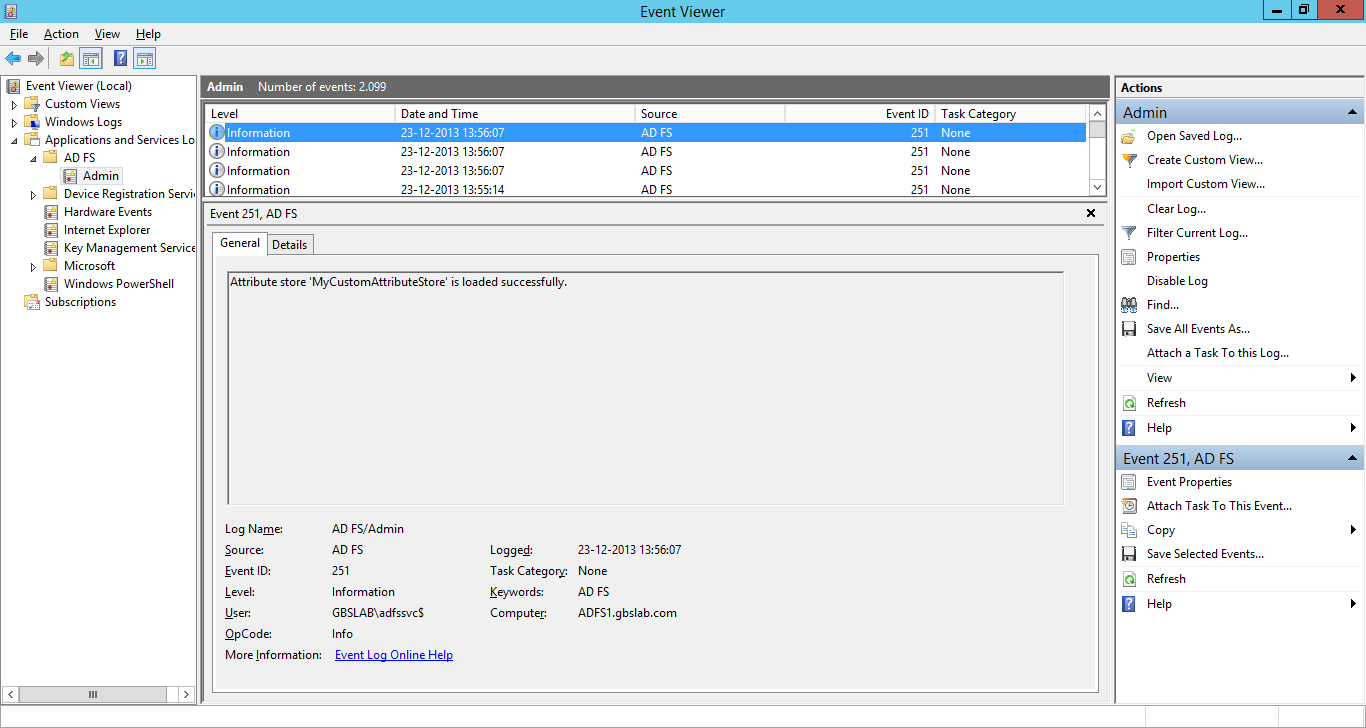
Locate the latest AD FS event with Event ID 251 and read the text in the event log;
Attribute store 'MyCustomAttributeStore' is loaded successfully.
This indicates that the DLL has been loaded properly, and that the Attribute Store can be used using it’s display name (“MyCustomAttributeStore”).
If you see any errors in the event log, most likely with Event ID 159, the attribute store could not be loaded. Here is an example;
During processing of the Federation Service configuration, the attribute store 'MyCustomAttributeStore' could not be loaded.
Attribute store type: My_Custom_Attribute_Store.Class1, My Custom Attribute Store
User Action
If you are using a custom attribute store, verify that the custom attribute store is configured using AD FS Management snap-in.
Additional Data
Could not load file or assembly 'My Custom Attribute Store' or one of its dependencies. The system cannot find the file specified.
This is an indication that either the DLL could be found, or the namespace or class name is incorrect.
Please make sure you copy the file to all AD FS servers in the farm, and check on all AD FS servers in the farm that the attribute has been successfully initialized.
Now that the custom attribute store is successfully added to AD FS, we can start using the attribute store in our claim rules.
Issuing claims using the Custom Attribute Store
In our example, we will configure a single web application called “Claimsweb” with claims issued by the custom attribute store. In order to do that, we need to add a claim rule to the Relying Party Trust.
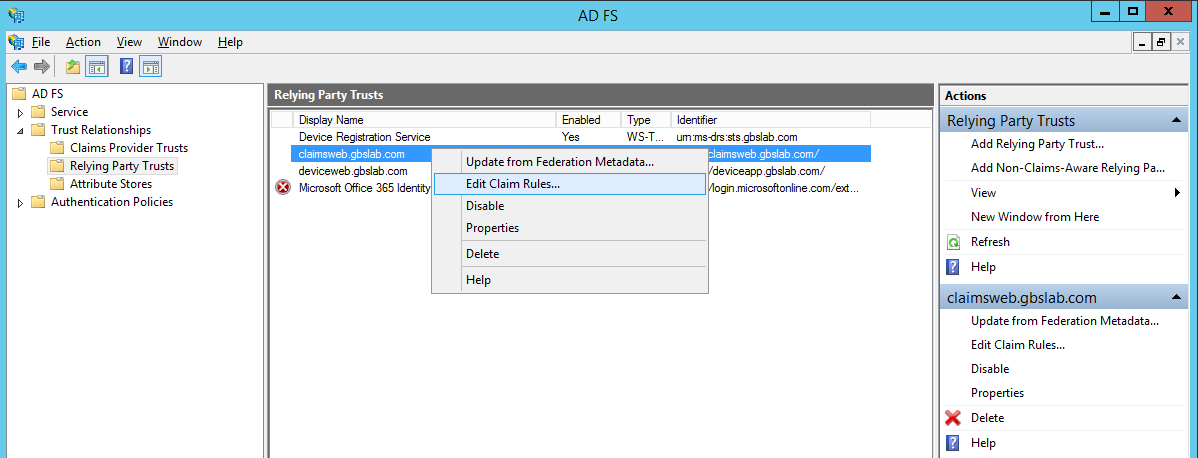
Click on “Relying Party Trusts” in the “Trust Relationships” branch on the left of the screen. Right-click the relying party trust you want to modify, in this case it’s called “claimsweb.gbslab.com”, and click “Edit Claim Rules…”. You can also click on the relying party trust, and click on “Edit Claim Rules…” on the right of the management console.
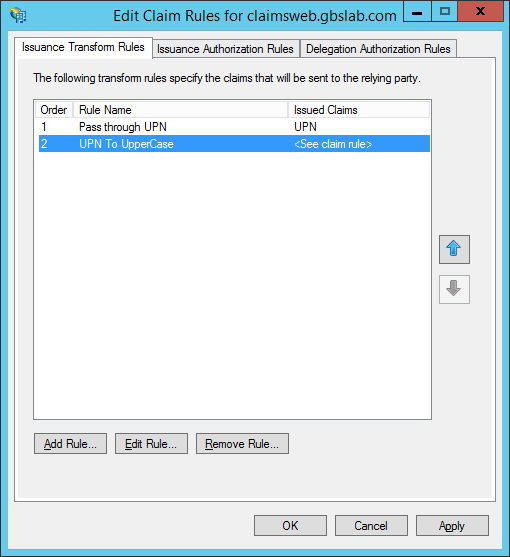
This relying party currently has a single claim rule defined, that passes through a UPN claim.
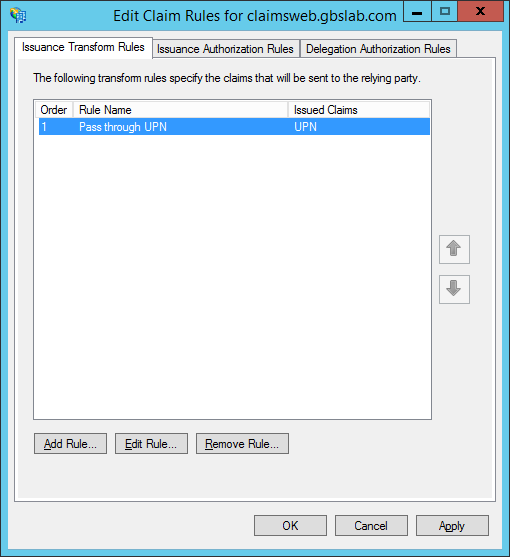
We will use the UPN value to calculate the upper-case equivalent of this UPN and issue it as a “Common Name”. In order to do so, click “Add Rule…” to add a new claim rule.
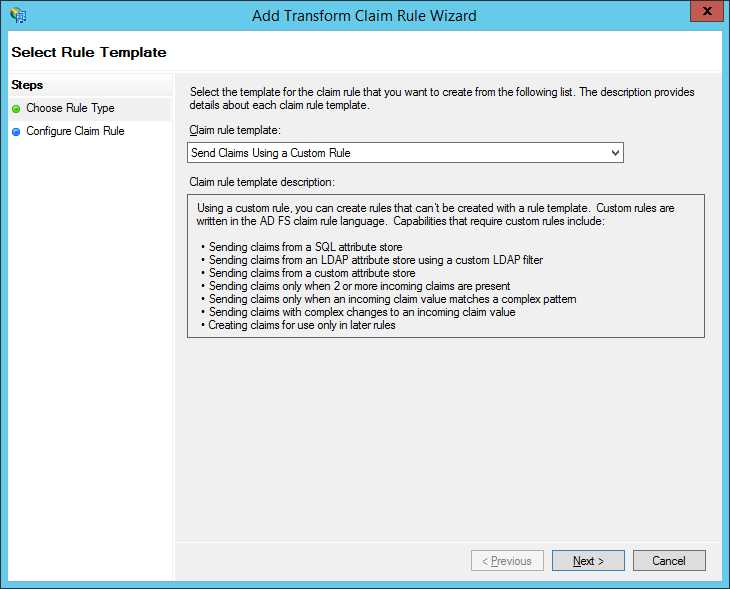
Select “Send Claims using a Custom Rule” from the “Claim rule template” drop-down and click “Next”.
In the “Add Transform Claim Rule Wizard” type a friendly name for the rule in the “Claim rule name” text box (for example “UPN To UpperCase”), and type this text in the “Custom rule” text box:
c:[Type == "https://schemas.xmlsoap.org/ws/2005/05/identity/claims/upn"]
=> issue(store = "MyCustomAttributeStore", types = ("https://schemas.myorganization.com/identity/uppercaseupn"), query = "ToUpper", param = c.Value);
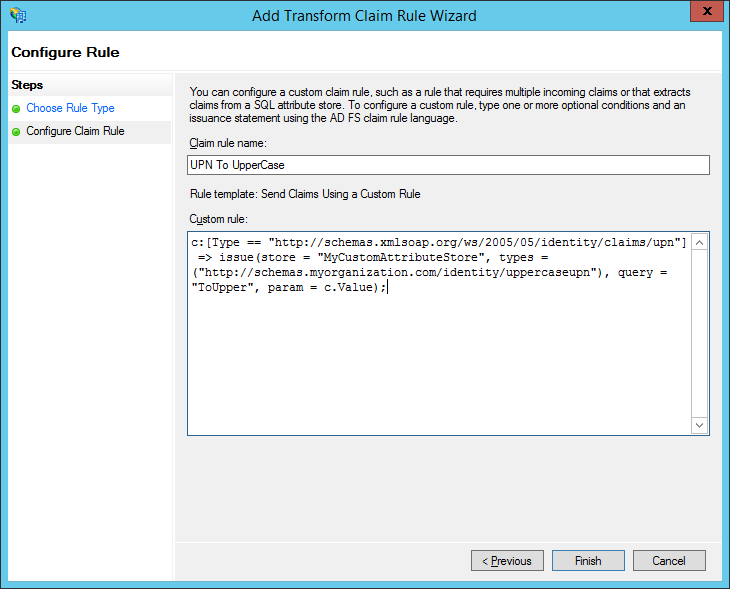
This claim rule will get the UPN claim from the previous claim rule, and issue a new claim of type https://schemas.myorganization.com/identity/uppercaseupn by passing the UPN-claim value to the custom attribute store (MyCustomAttributeStore). It will call the ToUpper query in the attribute store and issue the resulting value as the https://schemas.myorganization.com/identity/uppercaseupn claim.
Please keep in mind that if no UPN claim exists in the claim set, this claim rule will not execute.
Click “Finish” when finished. The new claim rule is now part of the claim rule set for the relying party.
Click “OK” to close the dialog. We are now ready to test the new claim rule!
Testing the Custom Attribute Store
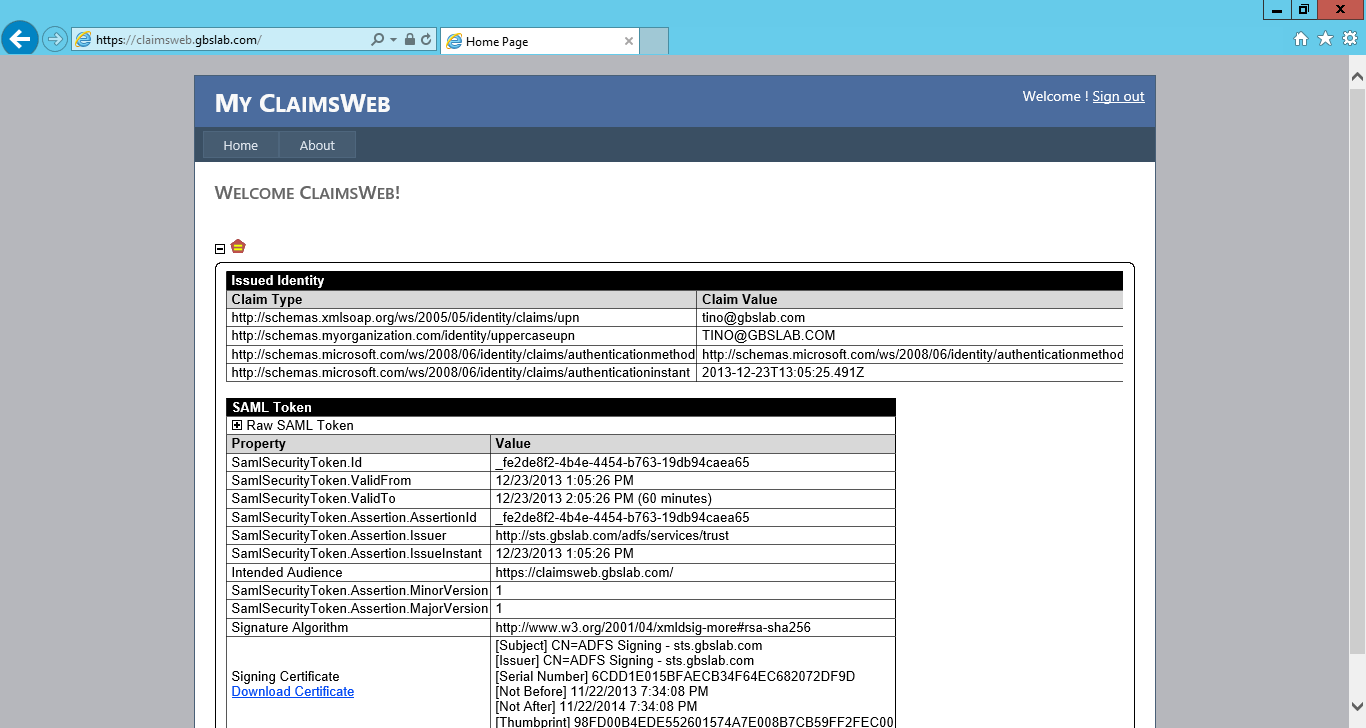
In my case, the sample application called “claimsweb.gbslab.com” will show me exactly what claims were issued, as well as the raw SAML 2.0 token:
Note: This sample web application uses the Saml2TokenVisualizer from the Identity Developer Training Kit which can be downloaded from https://www.microsoft.com/en-us/download/details.aspx?id=14347
Please note that there is a new claim of type https://schemas.myorganization.com/identity/uppercaseupn in the claim set, and it contains the exact same value as the UPN claim, only now in upper-case.
The SAML 2.0 token contains this attribute statement:
<saml:Attribute AttributeName="uppercaseupn" AttributeNamespace="https://schemas.myorganization.com/identity">
<saml:AttributeValue>TINO@GBSLAB.COM</saml:AttributeValue>
</saml:Attribute>
Exactly what we were looking for!
Hope this helps you create your own Custom Attribute Store in AD FS 3.0!