Migrating my home network to Azure - Part 4a – Begin migration of my Web Server to Azure
I know this is a little confusing….the Parts aren’t synced with the Steps below. I have corrected the flow for this post and will correct it on other posts shortly. Until then Focus on the titles and the content and not my numbering scheme. ![]()
In the first two parts we cleaned things up in preparation for migrating workloads then installed the Azure Command Line tools/PowerShell that will enabled us to manage Azure remotely from the command line. In this post, we are going to start the actual migration of my web server. I sat start because it will take a while to complete. Since I run all of this on my own servers at home, I am constrained by the speed/bandwidth of my Internet connection which is 768k up.
Part 1 – Migrating my Home Network to Azure – Why I am doing it
Part 2 – Basic Prep…Clean up, patch, backup and prepare machines for migration
Part 3 - Install and using the Azure CMD line tools
Part 4a – Migrate Azjol-Nerub (web server) – Backup and Begin copy <—This Post
Part 4b – Migrate Azjol-Nerub (web server) – Verify Server Migration and test web site connectivity
Step 5 – Deploy new VM’s to support personal projects
Step 6 – Start planning secondary support domain for cloud based lab (this will get broken into several distinct posts)
Part 4a – Migrate Azjol-Nerub (web server) – Backup and Begin copy
It has now been a little over two weeks since I did the basic prep of patching, cleaning up and backing up. So I am going to refresh those items quickly them begin the migration to Azure. Here is what we will be doing in this post -
Check Update Status – Apply Critical Updates and other updates as needed
I have been patching this machine as the updates have been released over the last two weeks, so I only had a couple of updates this morning. They were applied and a reboot was requested which I have done. Everything came up and we are now 100% Patched.
Check the Event Logs – Clean up any critical errors
A quick glance at the events logs confirms that things are still clean from the last check I did.
Clean up Files – Delete unnecessary files to speed up copy of machines to Azure (Be Sure to Empty the Recycle Bin!)
My Web server most redirects to other sites so there is very little content on this machine. This is one reason why I changed my plan and decided to migrate this one first because it is the smallest VM that I have. But it is still going to take considerable time to copy 21gigs up to Azure with a 768k upstream cap so I have cleaned up as much as I can on this machine including reducing the pagefile size to zero and ensuring there is no HYBRFIL.SYS file taking up space.
Perform a Full Backup
Simple enough. Just shut down the virtual machine and make a copy of the folder containing the VM files…..wait a sec!
Merge snapshot into main VHD
When backing up, I realized that had an old snapshot file and sure enough, a closer look at the Hyper-V Manager shows that I made a snapshot almost 9 months ago. To clean things up even more, I am going to merge the snapshot into the main VHD. I am going to do this manually which is actually a very straightforward process -
Manually Merge Snapshots in Hyper-V
- Power off the Virtual Machine that has the snapshot(s) you wish to merge.
- Make a copy of the VHD and its corresponding AVHD files. I recommend copying the entire folder.
- Open the folder containing the .VHD and .AVHD files for the VM in question. Rename the AVHD extensions to VHD.
- Make note of the order of the disks from newest to oldest (the oldest should be the root VHD). Look at the “Date Modified” column time stamp on the original AVHD files.
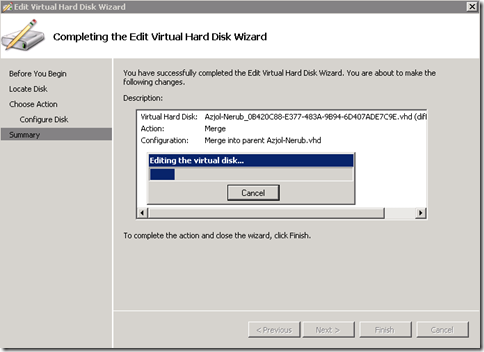
- In Hyper-V Manager, launch the Edit Disk wizard. Browse to the newest VHD in the chain, choose “Merge” to point to the next newest disk.
- Then repeat the process until you have only a single VHD.
Compact the VHD file
Since I have a very small uplink pipe (768k), I want this VHD file to be as small as possible. So I am going to do one last thing to shrink the size of the file. Using the Edit Disk Wizard, I am going to compact the VHD file. This process removes all of the white space in the file that remains after I have delete files within the running image. The current size of the VHD file is about 26.7 gigs.
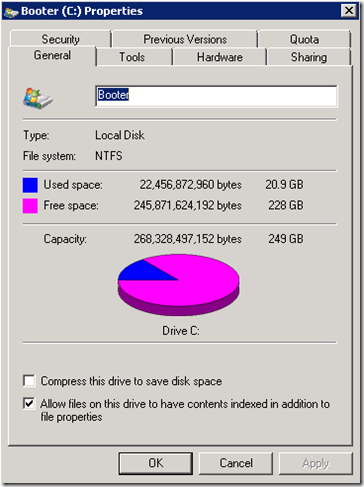
It took 5 minutes to compact and this is what I ended up with……24.2 gigs.
I think I have trimmed the VHD file down as far as I can go now…..I decided to make one more backup just in case.
Use Azure CMD Line Tools/PowerShell to copy VHD to Azure
Since it is going to take a very long time to copy this file up, and the file has to be offline to do the copy, I am going use the Azure CMD line tools/PowerShell to copy the BACKUP copy of my web server up to Azure. This allows me to use the original VHD to run the VM and keep my web sites up and running during the Migration. This scenario may not work for everyone though. It really depends on what changes you make to the system or if you will be changing data on the web server. in my case I am doing mostly redirects and have static content so no changes will be taking place.
Upload the VHD file to Azure
To upload the VHD file to azure, we will use the Add-AzureVHD cmdlet in the Windows Azure PowerShell tools we installed from the previous post. The exact syntax is as follows -
Add-AzureVhd -Destination <BlobStorageURL>/<YourImagesFolder>/<VHDName> -LocalFilePath <PathToVHDFile>
Once you have executed this command, it is just a matter of waiting (and hoping the upload doesn’t fail!). I won’t be starting my upload until later this evening so I can still have usable Internet for the day. I suspect it is going most if not more than the weekend to upload this file so you won’t see a confirmation post from me for several days. But once it is finished, I will let you know!
-Cheers!


