Using WinPE Creator to Create Virtual Hard Drive (VHD) of your physical server
In the past two posts, I’ve focused on the first two capabilities provided in the Configuration Manager Physical-to-Virtual Migration Toolkit. The primary scenario for this toolkit is to offer customers the ability to virtualize their physical servers when they don’t readily have System Center Virtual Machine Manager available. As mentioned, our P0 scenario was to ensure that users could do this virtualization without requiring any additional hardware. Beyond this, the goal was to ensure that at completion the end-user would utilize the same server for their hosting of the newly created VHD.
In today’s post, I will talk about a second feature available to users of the P2V toolkit – ability to virtualize without harming the physical server. This feature allows administrators to essentially clone the entire disk and does so offline to ensure the integrity of the image. This is done using a feature we called “Windows PE Creator”. This feature got it’s name through the fact that we utilize Windows PE to boot into Windows and virtualize the disk(s).
Using P2V Toolkit Action Pad to Create Bootable Media
The first step is to obtain either a USB flash drive or to use CD/DVD media as this is required to create the bootable media. Beyond this, the process is fairly simple overall. Let’s step through it…
To create a non-task sequence based bootable media, select from the action pad the following option-
This will launch the Windows PC creator wizard that will aid you in creating bootable media that includes all the tools needed to successfully virtualize your physical server.
To create your bootable media, do the following:
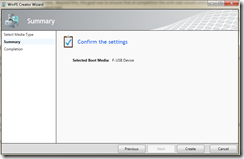
- Select the bootable media to use from the dialog and Click Next
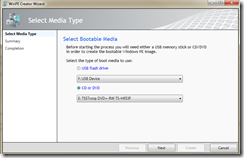
- Click Create. It’s really that easy…
- During the process, it will show you the progress and the steps it is doing …
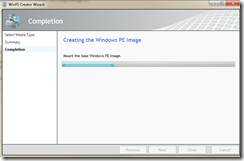
When it is completed, remove your media and let’s talk about how to utilize what you just created.
Creating Your Virtual Hard Drive using Bootable Media
The next step is to utilize the USB/DVD you created and push that to your server/client. After adding it, you will be able to boot and will see the Windows loader as we use the Windows 7 WAIK tool ISOBURN.exe to create the burn. This bootable image will automatically load the VHDCaptureWizard.exe (will talk about more in a later post) that allows you to select your drives to virtualize, the path to store the VHD, and actually create the disk.
Prior to starting, here is the information you will need to know:
- What physical volume you are interested in virtualizing in the server/client
- What location you would like to save the VHD to (e.g. USB, separate volume)
NOTE: You cannot create the VHD to the same location as the drive you virtualizing (duh!)
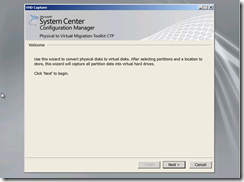
The first screen is simply a welcome screen sharing what we are about to do with the virtualization process.
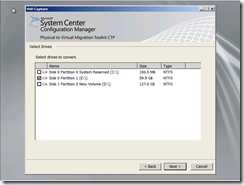
In this screen, you are asked to select the volume, or volumes you’d like us to virtualize. You can select a minimal of one disk or multiple disks. You will not need to provide us disk names, instead, we automatically create them in order as disk0.vhd, disk1.vhd, etc.
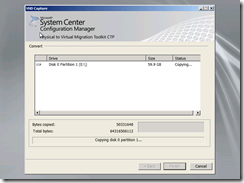
The last screen asks you to select the location to create the VHD and then, after clicking Next, the convert process will start. This will provide you a status of the Bytes copied, the total Bytes, and then a progress bar as the creation is occuring. After this convert process is completed, the VHD file is now available to you to use.
That’s it. When completed the actual results are a VHD that emulates the physical drive that is Hyper-V ready.
NOTE: The physical disks volumes cannot be larger than 2 TB as this isn’t supported by Hyper-V in Windows Server 2008/R2. Beyond this, the volumes should be MBR-based and not GPT as we currently do not support GPT disks.
Summary
In today’s post, I focused on an additional scenario that comes about when you would like to virtualize your server/client though the server is unable to re-host using Hyper-V. This is common for older servers that don’t have the requirements necessary.
Using the ConfigMgr P2V Migration Toolkit’s Windows PE creator, we automate the ability to create a offline copy of your VHD so that you can host it on Hyper-V. This is useful for moving legacy systems to a Windows Hyper-V server that is hosted elsewhere. All you have to do is provide us the volumes, the location to create the VHDs, and you are set!
Enjoy!
Thanks,
-Chris

