Enlightenment for SCVMM - Defining Network Locations & Tags
The primary thing that took some digging up when starting to use System Center Virtual Machine Manager 2008 was understanding of Network Locations & Tags. There is a great blog on this topic but I want to make sure that we extend this a bit taking into account yesterday’s post of enabling of VLAN trunking.
Let’s get started with some basics…
No Stars – Why no hosts are optimized for my new Virtual Machine
You have the opportunity to try out SCVMM so you spin it up and you install your agents on your Hyper-V hosts and you are off an running. You kick-off the New Virtual Machine wizard and you answer the pertinent questions until you get to a screen like this:
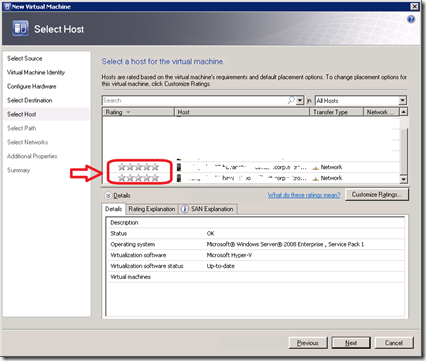 What? There are no hosts that are “optimized” for the creation of the virtual machine? Let’s talk about just one of the variables that goes into this selection of the right “Host” – Network Location & Tags.
Network Location
The network location attribute is, as Cheng points out in his post, using the Windows Network Location Awareness (NLA) feature and often times this feature isn’t working as expected or is, as in our case, “broken” on purpose. The reason we are broken is that our SCVMM instance is obviously integrated into Active Directory (it’s a requirement) but the location of our hosts are vastly different than what is returned by NLA. Thus, we override the settings to be customized so that we can intelligently architect our templates, profiles, etc.
Where do I find and configure Network Location?
You might think this is actually known and obvious but in my opinion it wasn’t. The user interface doesn’t provide any “feedback” after installing VMM that you should configure your Host properties nor how to do it.
To configure the network locations for your Hyper-V hosts, do the following:
- Open the VMM Administrator Console
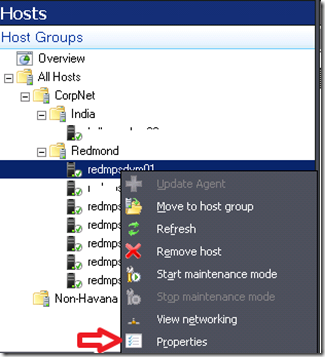
- Locate the target Hyper-V host you would like to configure, right-click and select properties
- Under properties, select the Hardware tab and locate the Network Adapters section
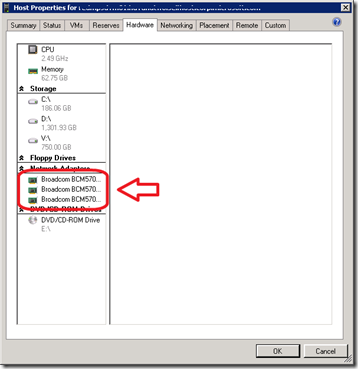
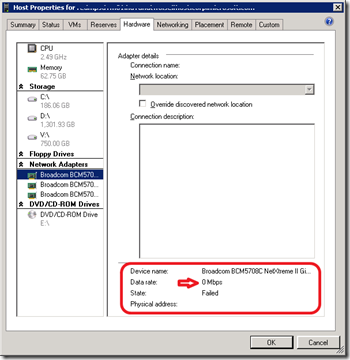
- If you are like us, you will have quite a few selections in there as most servers are multi-homed. Before you spend all this time locating the “right” one to use, check the following to verify connectivity is “Hot”
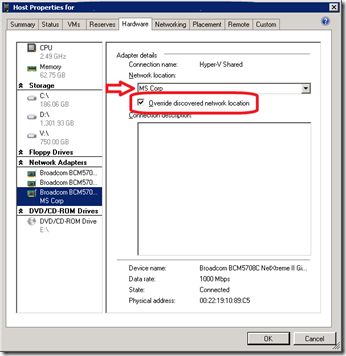
- After selecting the hot adapter that is trunked, click ‘Override discovered network location’ and in the Network Location section type the name for your network
- Click OK
Configuring SCVMM Network Tags
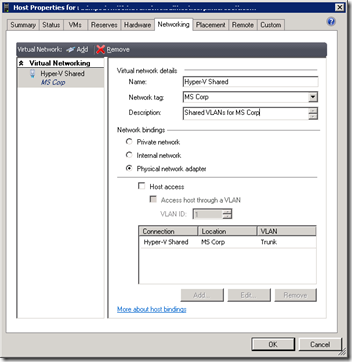
After configuring the location, the next step is to ensure that you configure the tags because it is possible that you have multiple hosts that are part of the same location – lets say in the scenario where you have HR & Purchasing hosts but hosted out of the same datacenter.
Thus, you configure the correct settings for location such as you say “MS Corp DataCenter – Modena” as this is the data center where the hosts exists. However, this physical hosts are a “shared” resource that is spread among HR, Purchasing, IT, and some business units. The location doesn’t help in this case because what will occur is that every host is considered an option for placement (e.g. unless you disable it for placement such as Start Maintenance Mode)
Thus, you need to create Network tags whereby your managed hosts that are part of this location are distriguished by business unit or some other method. To create network tags, do the following:
- Open the VMM Administrator Console
- Right-click the host in question, select the Networking tab
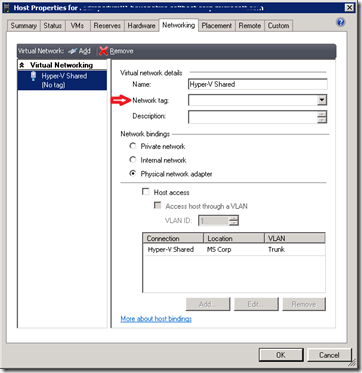
- In the Network tag: field type the unique name for this host such as HR, purchasing, etc.
That’s it. All you have to do now is create the virtual machine that matches your connection requirements and you are set.
Using Network Tags Effectively
The power of Networking Tagging nor trunking really isn’t “uncovered” until you implement VLAN trunking whereby now, using SCVMM hardware profiles and templates, you can direct placement “dynamically” with little or no overhead. This is certainly the case where we have dedicated NICs for our Hyper-V hosts that are used for management (we do not override the discovered network) but also have dedicated NICs for our VM communication (where we override using the above method the network location and tag).
After you have implemented your router to pass VLANs to the hosts and configured the host, you can move to the next step of creating customized templates\profiles that meet the needs of your entire infrastructure so that you can easily and effectively do nothing manual anymore. This is the goal of moving to a “dynamic” datacenter where resources are never a concern from the hardware or people side and SCVMM 2008 is a marked step in the right direction.
In tomorrow’s post, I will outline some key wins you can make with building your Hardware & OS profiles and how to pull this altogether using networking for a great deployment strategy.
-Chris
