如何使用 Service Manager Base Webpart 编写自定义的 Webpart
本文由 System Center 工程团队的高级开发人员之一 Martha Amirzadeh 撰写。谢谢 Martha!
=========================================
在我们开始介绍如何编写一个自定义的 Webpart 之前,让我们先来了解一下您创建此类 Webpart 的原因。以下列出了您利用 Service Manager Base Webpart 可获得的一些开箱即用功能:
- Webpart 与被引用的 Silverlight 模块之间的消息传送组件
- 包含 SharePoint 中编辑窗格的可自定义的 Webpart(可选)
- 读取 SharePoint Web.Config 中应用程序设置的配置组件
- 面向被引用的 Silverlight 模块和编辑窗格的本地化管道
- 有关呈现 Webpart、被引用的 Silverlight 模块和编辑窗格的详细日志
- 用于故障排除的包含不同级别的跟踪组件
- 在被引用的 Silverlight 模块中启用 QueryString 分析
Service Manager 推出了 Base Webpart,并将其作以下程序集中的一部分:
Microsoft.EnterpriseManagement.ServiceManager.Portal.BaseWebPart
为了访问此程序集及其相关组件,您需要安装 Service Manager SharePoint 站点。您之后将不再需要使用此 Service Manager SharePoint 站点,您只需使用该站点来访问之后步骤中所需的文件。
当您完成 Service Manager SharePoint 站点的安装后,请遵循以下步骤来使用 Service Manager Base Webpart 创建自定义的 Webpart:
1) 创建您的 Webpart
a. 使用“空 SharePoint 项目”模板添加一个新的 SharePoint 项目
b. 在您的 SharePoint 项目中添加对“Microsoft.EnterpriseManagement.ServiceManager.Portal.BaseWebPart.dll”的引用。此程序集已采用 GAC 的方式部署于您的计算机中安装 Service Manager 门户的位置。
以下将介绍如何将此程序集从 GAC 复制到您的本地文件夹。使用以下命令为您的计算机上的 GAC 位置创建一个快捷方式:
SUBST G: C:\WINDOWS\ASSEMBLY
然后导航到 G 驱动器,并搜索“Microsoft.EnterpriseManagement.ServiceManager.Portal.BaseWebPart.dll”,然后将文件复制到您的本地文件夹。
c. 添加一个新类,作为您名为“您的 Webpart.cs”的 Webpart 类
d. 将这些 using 语句添加到您的 Webpart 类
 using System.Web.UI.WebControls.WebParts;
using Microsoft.EnterpriseManagement.ServiceManager.Portal.BaseWebPart;
using Microsoft.SharePoint.WebPartPages;
e. 在 Microsoft.EnterpriseManagement.ServiceManager.Portal.BaseWebPart.dll 中,从 Service Manager“BaseWebPart”类派生出您的 Webpart 类
f. 覆盖以下方法,以指定您希望引用的 Silverlight 模块的名称:
 protected override String GetXAPName()
{
     return "YourSilverlightModule.xap";
}
g. 如果您希望将参数传递给您的 Silverlight 模块,则覆盖以下方法:
 protected override void AddInitialParameters()
{
StringBuilder queryString = new StringBuilder();
                        queryString.Append(BuildQueryString("PageTitleVisibility", this.PageTitleVisibility));

this.SilverlightCotrol.InitParameters =  this.SilverlightCotrol.InitParameters +
                  queryString.ToString();
}
请注意,如果您希望利用将在下一步骤中解释的布局自定义,则您需要添加新的参数。
2) 利用您 Webpart 中的布局自定义功能(可选)
a. 从 IWebEditable 中派生出您的 Webpart 类
 [ToolboxItemAttribute(false)]
public class KnowledgeArticleWebPart : BaseWebPart.BaseWebPart, IWebEditable
b. 实施 IWebEditable 成员
   EditorPartCollection IWebEditable.CreateEditorParts()
 {
// add you code here
                                 }
 object IWebEditable.WebBrowsableObject
 {
     get { return this; }
}
c. 为您希望在 Webpart 的编辑窗格中显示的字段添加新的属性
 [WebBrowsable(true), WebPartStorage(Storage.Shared), Localizable(true)]
public String PageTitleVisibility
{
     get;set;
}
d. 添加名为“您的 Webpart EditorPart.cs”的新类e. 在 Microsoft.EnterpriseManagement.ServiceManager.Portal.BaseWebPart.dll 中,从 Service Manager“BaseWebpartEditorPart”类中派生出您的“WebpartEditorPart”类
public class KnowledgeArticleEditorPart : BaseWebPartEditorPart
f. 在“WebPartEditorPart”类中,覆盖以下方法,以添加一个新的编辑窗格属性
 protected override void CreateAdditionalChildControls(ControlCollection controls)
{
        PageTitleEditorPart = new LabelEditorPart(LocalizationManager.GetLocalizedString(“PageTitle”));
        controls.Add(PageTitleEditorPart.RootControl);
}
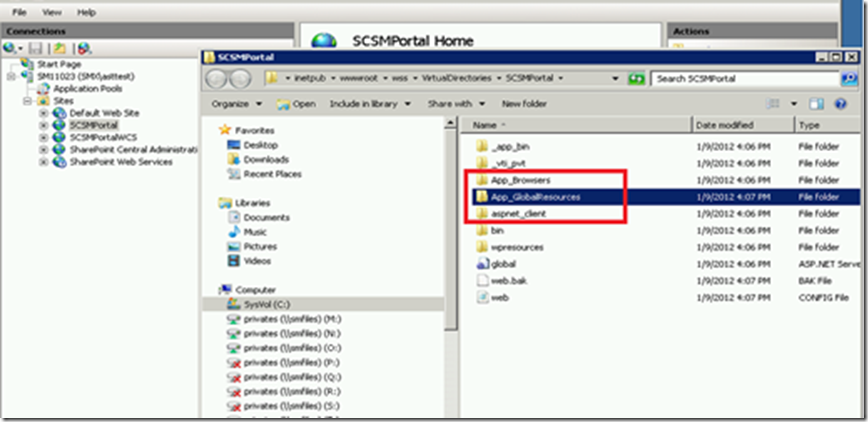
请注意您正在使用 LocalizationManager 类,该类将使用提供的键查询字符串资源(上述示例:“PageTitle”。)您可将您的字符串添加到 Sharepoint 站点的父级站点的 AppGlobalResources 文件夹中的 StringResources 文件中。
要查找您 SharePoint 站点的父级站点的 AppGlobalResources 文件夹位置,请在 IIS 中浏览父级站点,系统应将您定向到类似以下的路径:“C:\inetpub\wwwroot\wss\VirtualDirectories\(number)\App_GlobalResources”
(注意:以上路径中的 (number) 是为 SharePoint 站点随机生成的数字。)
g. 在“WebPartEditorPart”类中覆盖以下方法,以同步新的属性
 protected override void SyncAdditionalChanges(WebPart webPartToEdit)
{
     KnowledgeArticleWebPart knowledgeWebPartToEdit = (KnowledgeArticleWebPart)webPartToEdit;
 if (knowledgeWebPartToEdit != null)
     {
          EditorPartHelper.SetVisibility(PageTitleEditorPart.Visibility, webPartToEdit.PageTitleVisibility);
     }
}
h. 在“WebPartEditorPart”类中覆盖以下方法,以应用更改内容
 protected override void ApplyAdditionalChanges(WebPart webPartToEdit)
{
    KnowledgeArticleWebPart knowledgeWebPartToEdit = (KnowledgeArticleWebPart)webPartToEdit;
 if (knowledgeWebPartToEdit != null)
    {
         webPartToEdit.PageTitleVisibility = EditorPartHelper.GetVisibility(PageTitleEditorPart.Visibility);
    }
}
3) 配置您的 Webpart
a. 将您的 Webpart 标识添加到您 SharePoint 站点的父级站点的 web.config 内的 SafeControl 列表中。
<SafeControl Assembly="your SharePoint assembly name, Version=7.0.5000.0, Culture=neutral,
PublicKeyToken=your SharePoint assembly public key token” Namespace="Your Webpart Namesspace"
TypeName="your Webpart class name" Safe="True" SafeAgainstScript="True" />
注意:请确保您的 SharePoint 程序集版本和 PublicKeyToken 与您将在稍后步骤采用 GAC 的方式部署于计算机中的 SharePoint 程序集匹配。
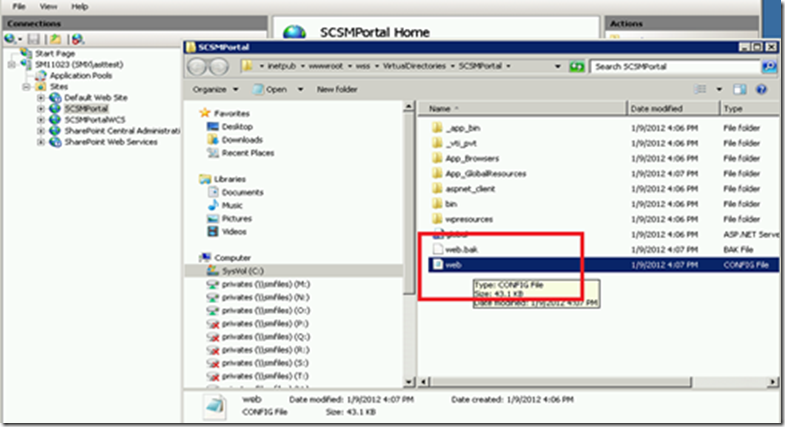
b.
创建一个名为“yourwebpart.webpart”的新文件 webpart 定义文件,并按照以下显示的方式进行编辑,以向您已编译的程序集添加引用:
 <?xml version="1.0" encoding="utf-8"?>
<Webparts>
 <Webpart xmlns="https://schemas.microsoft.com/Webpart/v3">
      <metaData>
         <type name="Your Webpart class name, YourWebpartAssemblyName, Version=7.0.5000.0, Culture=neutral, PublicKeyToken= your SharePoint assembly public key token" />
<importErrorMessage>$Resources:core,ImportErrorMessage;</importErrorMessage>
     </metaData>
<data>
        <properties>
 <property name="Title" type="string">Your Webpart</property>
 <property name="Description" type="string">Your Description</property>
 </properties>
   </data>
</Webpart>
</Webparts>
注意:请确保您的 Sharepoint 程序集版本和 publicKeyToken 与您将在稍后步骤采用 GAC 方式部署于计算机中的 SharePoint 程序集匹配。
4) 部署您的 Webpart
a. 在此处添加您编译的 SharePoint 程序集,以采用 GAC 的方式部署以下 MSDN 指令:https://msdn.microsoft.com/zh-cn/library/ex0ss12c.aspx
b. 将您的 Webpart 的字符串添加到 SharePoint 站点的父级站点的 GlobalResources 文件夹中的 StringResources 文件中。
要查找您 SharePoint 站点的父级站点的 GlobalResources 位置,请在 IIS 中浏览父级站点,系统应将您定向到类似以下的路径:“C:\inetpub\wwwroot\wss\VirtualDirectories\(number)\App_GlobalResources”
(注意:以上路径中的 (number) 是为 SharePoint 站点随机生成的数字。)
c. 向 SharePoint 站点部署您的新 Webpart
要部署您的 Webpart,请导航到您 SharePoint 站点的父级站点的 Webpart 库,首先选择父级站点的“站点操作”->“站点设置”,然后导航到“库/Webpart”。然后单击文档,系统应将您定向到此处:

然后单击“上载文档”以将您的 Webpart“yourWebpart.webpart”添加到 SharePoint Webpart 库中。当您部署了 Webpart 之后,您可将其添加到 SharePoint 站点或 SMPortal SharePoint 站点中的任何页面。
太棒了!您已经创建、配置并部署了一个自定义的 Webpart。然而,以下还将向您介绍一些有关如何在您的 Webpart 中创建、配置和部署供引用的新 Silverlight 模块的详细内容。
5) 创建、配置和部署一个新的 Silverlight 模块
a. 使用“Silverlight 应用程序”模板在 Visual Studio 中创建一个新的 Silverlight 项目。
b. 向您的项目中要求的程序集添加引用
要查找必须的程序集,请导航到 Service Manager Web Content Server 的安装位置:“C:\inetpub\wwwroot\SMPortal\ContentHost\ClientBin\”,然后将以下程序集复制到本地文件夹。
- 将任何“.xap”文件(如“KnowledgeArticleSilverlightModule.xap”)重命名为“.zip”,然后打开该“.zip”文件,并复制以下文件:
- “Microsoft.Practices.Prism.dll”,
- “Microsoft.Practices.Prism.UnityExtensions.dll”,
- “Microsoft.Practicses.ServiceLocation.dll”,
- “Microsoft.Practicses.Unity.Silverlight.dll”,
- “System.Reactive.dll”,
- “System.ServiceModel.dll”,
- “ServiceReferences.ClientConfig”
- 打开“Core.zip”,并复制“Microsoft.EnterpriseManagement.Presentation.Core.dll”
- 打开“DataAccess.zip”,并复制“Microsoft.EnterpriseManagement.Presentation.DataAccess.dll”
- 打开“Instrumentation.zip”,并复制“Microsoft.EnterpriseManagement.Instrumentation.dll”
- 打开“BaseSilverlightModule.zip”,并复制“Microsoft.EnterpriseManagement.ServiceManager.Portal.BaseSilverlightModule.dll”
- 打开“BasicResources.zip”,并复制“Microsoft.EnterpriseManagement.ServiceManager.Portal.BasicResources.dll”
c. 添加引用以测试您的项目中相关的程序集(可选)
要查找这些程序集,请导航到 Service Manager Web Content Server 的安装位置:“C:\inetpub\wwwroot\SMPortal\ContentHost\ClientBin\”,然后将以下程序集复制到本地文件夹。
将任何“.xap”文件(如“KnowledgeArticleSilverlightModule.xap”)重命名为“.zip”,然后打开该“.zip”文件,并复制“Microsoft.VisualStudio.TestTools.UITest.Extension.SilverlightUIAutomationHelper.dll”
请注意,您只有在希望为您的新 Silverlight 模块编写 UI 自动化测试用例时才需要这一程序集。
d. 向样式/自定义控件程序集添加引用(可选)
要查找这些程序集,请导航到 Service Manager ContentHost 的安装位置:“C:\inetpub\wwwroot\SMPortal\ContentHost\ClientBin\”,然后将以下程序集复制到本地文件夹。
- Microsoft.EnterpriseManagement.ServiceManager.Portal.AdvancedResources.dll:打开“AdvancedResources.zip”,并从此处复制该文件。
- Microsoft.EnterpriseManagement.ServiceManager.Portal.FormControls:打开“FormControls.zip”,并从此处复制该文件。
- Microsoft.EnterpriseManagement.ServiceManager.Portal.CustomControls:打开“CustomControls.zip”,并从此处复制该文件。
- Microsoft.EnterpriseManagement.ServiceManager.Portal.ToolkitResources:打开“ToolkitResources.zip”,并从此处复制该文件。
- Microsoft.EnterpriseManagement.ServiceManager.Portal.WizardResources:打开“WizardResources.zip”,并从此处复制该文件。
- System.Windows.Controls.Layout.Toolkit.dll:将任何“.xap”文件(如“KnowledgeArticleSilverlightModule.xap”)重命名为“.zip”,然后打开“.zip”文件,并从此处复制该文件。
- System.Windows.Controls.Toolkit.Internals.dll:将任何“.xap”文件(如“KnowledgeArticleSilverlightModule.xap”)重命名为“.zip”,然后打开“.zip”文件,并从此处复制该文件。
请注意,您只有在希望使用由 Service Manager UI 定义的特定自定义控件或样式时才需要使用这些程序集,替代方式为创建您自有的特定样式和自定义控件。
e. 从 Microsoft.EnterpriseManagement.ServiceManager.Portal.BaseSilverlightModule.dll 中的“BaseApp”类中派生出您 Silverlight 项目的“App”类
f. 编辑 App.xaml 以利用 BaseApp 类
 <CommonSilverlightModule:BaseApp
xmlns:CommonSilverlightModule="clr-namespace:Microsoft.EnterpriseManagement.ServiceManager.Portal.BaseSilverlightModule;assembly=Microsoft.EnterpriseManagement.ServiceManager.Portal.BaseSilverlightModule"
x:Class="App"
g. 编辑您 Silverlight 项目中的启动事件,并在 Microsoft.EnterpriseManagement.ServiceManager.Portal.BaseSilverlightModule.dll 中调用“Base.AppStartup”
 protected void Application_Startup(object sender, StartupEventArgs e)
{
          base.AppStartup(sender, e);
}
h. 覆盖您的 Silverlight 项目中的“CreateShell”,以提供“RootVisual”
 protected override void CreateShell()
{
this.RootVisual = new Shell();
}
i. 从 Microsoft.EnterpriseManagement.ServiceManager.Portal.BaseSilverlightModule.dll 中的“BaseShell”类中派生出您的 Silverlight 项目的“Shell”类
j. 编辑 Shell.xaml 类,以利用 BaseShell 类
 <CommonSilverlightModule:BaseShell
xmlns:CommonSilverlightModule="clr-namespace:Microsoft.EnterpriseManagement.ServiceManager.Portal.BaseSilverlightModule;assembly=Microsoft.EnterpriseManagement.ServiceManager.Portal.BaseSilverlightModule"
xmlns:local="clr-namespace:Your Silverlight Module Namespace "
x:Class=" Shell"
k. 使用以下显示的 StartupParameter 访问您的 Webpart 传递到 Silverlight 模块的参数:
StartupParameters.GetParameter("SearchCriteria");
请注意,您还可利用该类来访问从您的 Webpart 传递到 Silverlight 模块的布局自定义参数。要了解如何将参数从您的 Webpart 传递到您的 Silverlight 模块,请阅读第 1 部分的 g 章节。
l. 将您由 Silverlight 编译的“.xap”文件复制到 Service Manager 门户中的 ClientBin 文件夹。
要查找 ClientBin 文件夹,请导航到 Service Manager Web Content Server 的安装位置:“C:\inetpub\wwwroot\SMPortal\ContentHost\ClientBin\”