Red Hat client when ConfigManager 2012 SP1/R2 on HTTPS
Linux client installation is straight forward when the site is on HTTP, https://blogs.technet.com/b/chandanbharti/archive/2013/06/26/package-deployment-amp-hardware-inventory-for-linux-in-configmanager-2012-sp1.aspx
I have illustrated Linux client installation when the site is on HTTPS.
Before you go for client install, Make sure you have PKI in place. Refer https://technet.microsoft.com/en-us/library/gg682023.aspx
Create a Linux template by duplicating Workstation template. Make the private key exportable, also make the Subject "Supply in the request".Issue the new template. This part doesn’t have a section in the above document like the Windows and Mac clients do.
Important note: Linux client should always be named with FQDN. It cant be short name. DomainHostName command should return the domain name info.
Lets Start,
STEP 1: Generate host.key and host.csr on linux client.
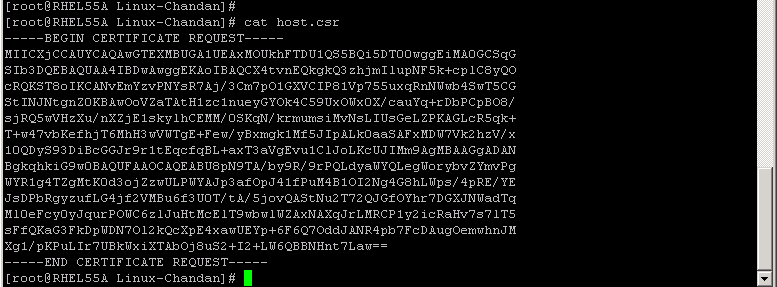
openssl req -newkey rsa:2048 -nodes -keyout host.key -out host.csr -subj /CN=RHEL55A.AB.COM

You have host.csr file available at the same location, open the file and you should see below content.
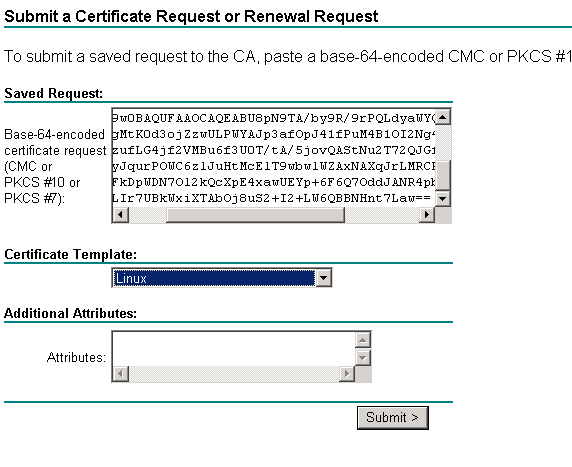
STEP 2: Issue a cert using the contents of the CSR on the Windows CA Cert Server website, using the new Linux template. Copy the content and paste it at the request page to generate the certificate.
Navigate to below path on the page.
https://Servername/certsrv --> Request a certificate--> advanced certificate request --> Submit a certificate request by using base-64-encoded
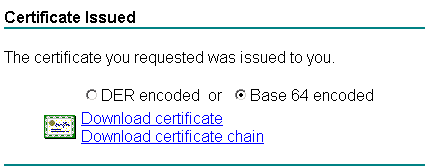
Choose base64 when you download or you will have to convert the DER separately. You can save it as host.cer
Save the certificate as host.cer.
STEP 3: Copy host.cer from step 4 to the Linux host and combine host.key, host.cer, and your CA chain (all of it if you have a subordinate CA as well, mine was provided as base64) to create a .pfx file :
openssl pkcs12 -export -in host.cer -inkey host.key -certfile RootCA.cer -name host -passout pass:1234 -out host.pfx
I get .pfx file that I can use with installation of client. 1234 is going to be the password of .pfx file.
-name is the friendly name that can be the name that you like.

Now that I have it,

STEP 4:
Download the Configmanager client for Linux, extract and place it at same location where I have other certificate. It's not mandatory to have same path, but was convenient for me
Now let's try installing the client using .PFX file that we created last.
./install -mp pri.ab.com -sitecode PRI -UsePKICert host.pfx -certpw 1234 -httpsport 443 -NoCRLCheck ccm-Universalx64.1.0.0.4580.tar
And this is what you should see once the installation completes.
=======================================================================================
Checking Prerequisites...
Checking existence of /lib/libssl.so.0.9.8e-fips-rhel5 and /lib/libcrypto.so.0.9.8e-fips-rhel5 ...
Checking existence of /lib/libssl.so.0.9.8--5 and /lib/libcrypto.so.0.9.8--5 ...
Checking existence of /lib/libssl.so.0.9.8e and /lib/libcrypto.so.0.9.8e ...
Found /lib/libssl.so.0.9.8e and /lib/libcrypto.so.0.9.8e ...
Running preinstall validator
All pre-install tests succeeded!
Beginning installation of Config Manager in /opt/microsoft/configmgr
Creating install directory...
Extracting archive file to /opt/microsoft/configmgr...
Installing OMI
Generating a 2048 bit RSA private key
.+++
..............................................+++
writing new private key to '/opt/microsoft/omi/etc/ssl/certs/omikey.pem'
-----
Successfully installed OMI under: /opt/microsoft/omi/.
Checking existence of /lib/libssl.so.0.9.8e-fips-rhel5 and /lib/libcrypto.so.0.9.8e-fips-rhel5 ...
Checking existence of /lib/libssl.so.0.9.8--5 and /lib/libcrypto.so.0.9.8--5 ...
Checking existence of /lib/libssl.so.0.9.8e and /lib/libcrypto.so.0.9.8e ...
Found /lib/libssl.so.0.9.8e and /lib/libcrypto.so.0.9.8e ...
Setting CM_HOME in omiserver...
Disabling HTTP Ports...
Modifying install scripts for OMI
Registering Providers...
Created /opt/microsoft/omi/./etc/omiregister/root-cimv2/scxcmprovider.reg
Performing post installation cleanup...
Linking startup script...
Initializing data store. This may take a few minutes...
Importing the Client Signing certificate...
CRL validations will be ignored.
Loading & validating the certificate
Successfully verified the Client certificate.
Imported the issued certificate to the store.
Installing boot-time scripts...
Starting Configuration Manager...
Installation complete.
[root@RHEL55A Linux-Chandan]#
=======================================================================================
And you should see the machine in the Configmanager console.
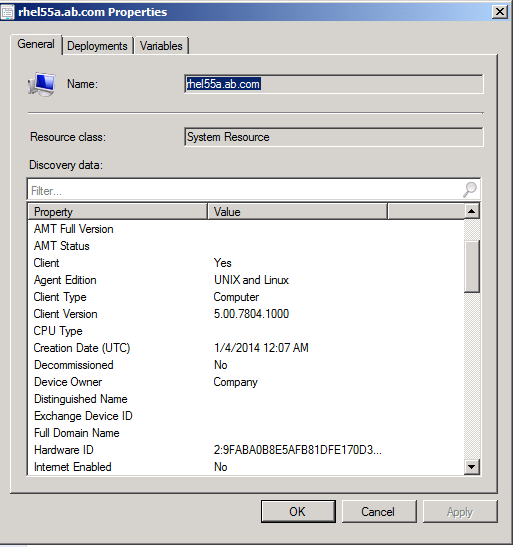
Remember, you don’t need to approve the client manually as you have while you install the client on HTTP.
In 5-10 min, you should see the inventory available in the resource explorer.
Linux client is ready to communicate to site on HTTPS :)
-Chandan