Move VM’s between Hyper-V and Windows Azure
One of the benefits when working with Hyper-V and Windows Azure is the portability of Virtual Machines. For example when Virtual Machines are created in Windows Azure, you have the option to pull them down and run them on your Hyper-V servers or you have the option to push Hyper-V Virtual Machines to Windows Azure.
To demonstrate how this is done, I’ll walk through how to move an OS image of Windows Server 2012 R2 to and from Windows Azure.
Technologies supported:
Windows Server 2008 R2 and Windows Server 2012 all versions
For a list of supported Microsoft applications within Windows Azure please visit: https://support.microsoft.com/kb/2721672
UPLOADING A VIRTUAL MACHINE TO WINDOWS AZURE
Assumption: A Windows Server (2008 R2 or 2012) is created and running as a virtual machine in Hyper-V.
Log onto the Windows Server hosted in Hyper-V you’d like to upload to Windows Azure and open and command prompt (I’m using Windows Server 2012 R2).
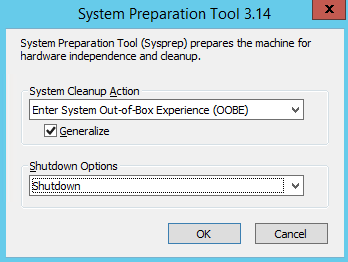
Navigate to c:\Windows\System32\Sysprep

Type in sysprep.exe and select enter:

Navigate to here to install Window Azure PowerShell: https://www.windowsazure.com/en-us/documentation/articles/install-configure-powershell/
Open the Windows Azure PowerShell and connect to your Windows Azure subscription.
Note: Navigate to the following link to learn about how to connect to your Windows Azure subscription: https://blogs.technet.com/b/cbernier/archive/2013/08/22/working-with-azure-storage.aspx
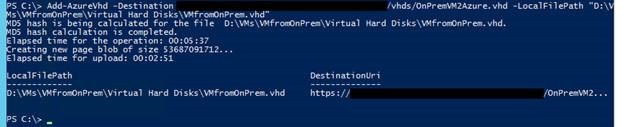
Type in the following command:
Add-AzureVhd –Destination “https://your windows azure storage account/directory/file_name” - LocalFilePath “path to the directory where the .vhd to upload is located” and press enter.

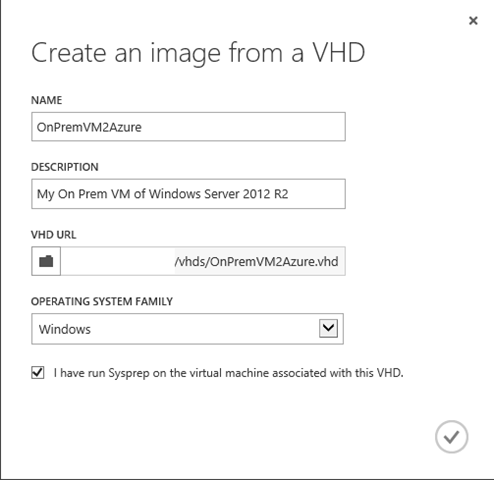
Once the .vhd is uploaded navigate to the Windows Azure Portal and select VIRTUAL MACHINES, IMAGES, and then CREATE at the bottom of the page.

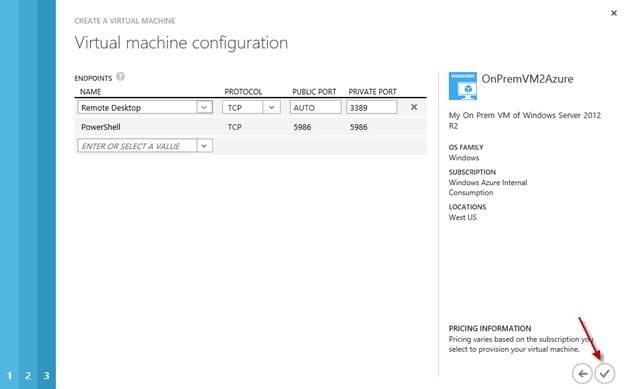
The following prompt will open, fill in the necessary information as I have below, choose the .vhd unloaded in the previous steps, and select the check to complete the process:

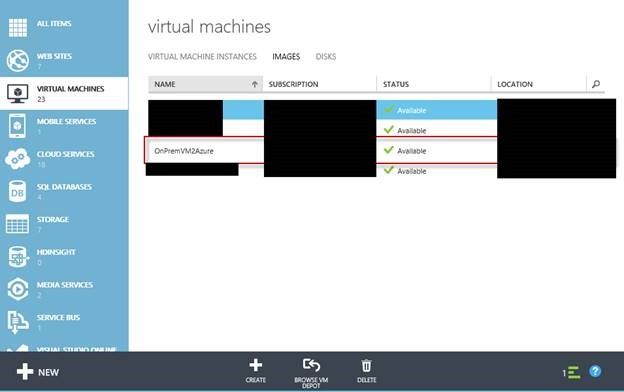
Once the .vhd image creation process is created it will show up under IMAGES:

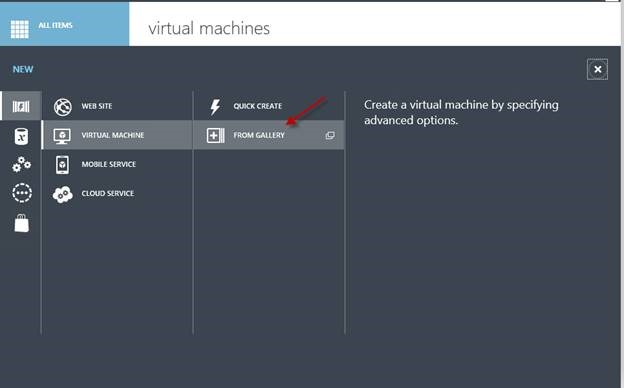
Select NEW at the bottom of the page:

Select VIRTUAL MACHINE, and then select FROM GALLERY:

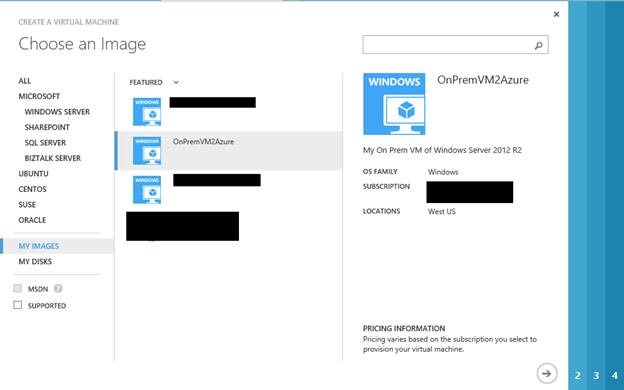
Select MY IMAGES from the menu on the left, and select the image you created:

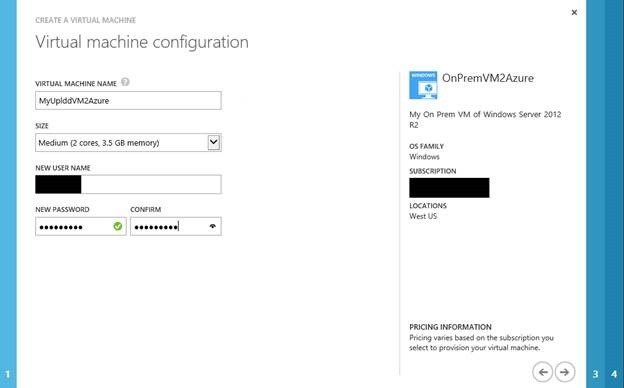
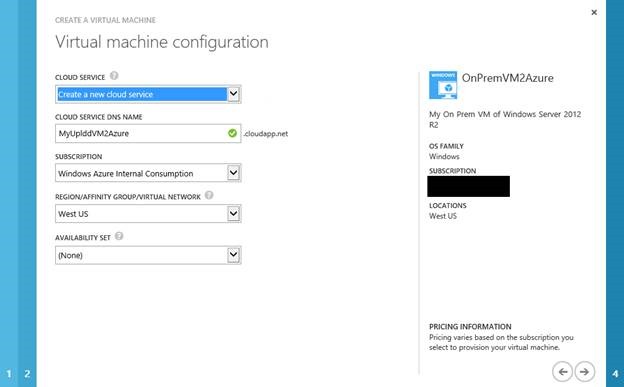
The next few steps show the Virtual Machine creation process:


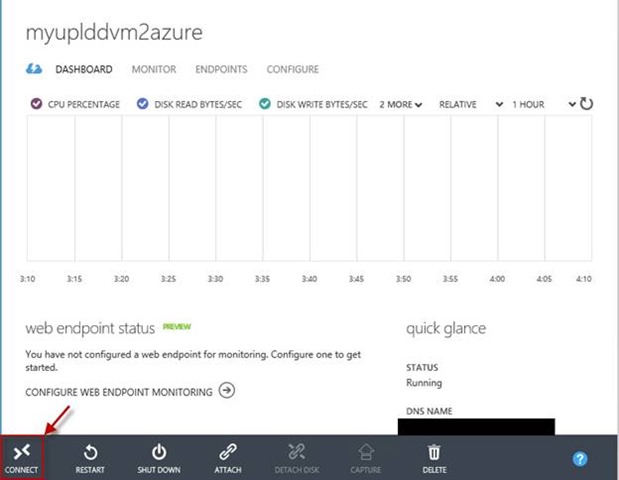
Once you’ve finished the Virtual Machine creation process it will show up in VIRTUAL MACHINES:


To prove the process out, connect to the Virtual Machine by selecting CONNECT at the bottom of the page:

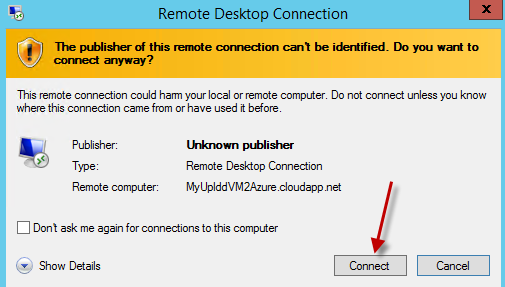
Open up the .rdp file:

Connect via RDP:

Type in your credentials when prompted. If the machine was not scripted to join a domain use the machine name as the domain and use the credintials there were input during the VM creation process, e.g. Machine-Name\username.

Because Windows Azure only supports .vhd at this time, if you have a VM that is in .vhdx format reference my other post to learn about how to quickly convert the VM: https://blogs.technet.com/b/cbernier/archive/2013/08/29/converting-hyper-v-vhdx-to-vhd-file-formats-for-use-in-windows-azure.aspx
Reference another one of my posts for tools to work with Windows Azure Storage and upload a VM: https://blogs.technet.com/b/cbernier/archive/2013/08/22/working-with-azure-storage.aspx
DOWNLOADING VMs FROM WINDOWS AZURE TO RUN ON PREMISIS
If you’re interested in going in reverse, that is, taking a Virtual Machine from Azure and migrating it to Hyper-V on premises, do the following:
RDP into the Windows Azure VM and run sysprep:
Navigate to c:\Windows\System32\Sysprep

Type in sysprep.exe and select enter:
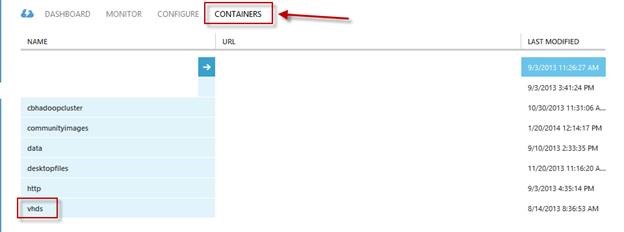
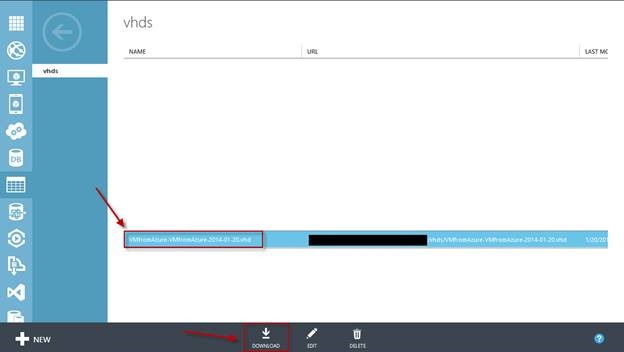
After the machine is shut down, within the Windows Azure portal navigate to STORAGE and select the storage container where the .vhd lives, mine lives in vhds:

Select the .vhd and then select DOWNLOAD at the bottom of the page:

Once the .vhd is downloaded, add a new Virtual Machine to Hyper-V and use the .vhd as the disk.
Alternatively, you can utilize the following 3rd party tools to download and upload .vhds referenced here (some are free): https://blogs.technet.com/b/cbernier/archive/2013/08/22/working-with-azure-storage.aspx
LICENSING
For licensing mobility questions and other licensing questions please reference: https://www.windowsazure.com/en-us/pricing/licensing-faq/ & https://www.windowsazure.com/en-us/pricing/license-mobility/