Multi-Factor Authentication… the simple way
Do you support or are you planning to implement a multi-factor authentication solution?
I have a simple, easy to set up multi-factor authentication solution for you!
First we need to define what multi-factor authentication is:
Multi-factor authentication or two-factor authentication is used to increase security around user access.
It works by requiring any two or more of the following:
- Something you know such as a password.
- Something you have e.g. a phone or device.
- Something you are e.g. thumb print, retinal scan, etc.
There are many types of multi-factor solutions available today. Some utilize hardware tokens while others utilize certificates and more increasingly phones are being utilized as an authentication method.
Microsoft offers a multi-factor authentication solution called Windows Azure Multi-Factor Authentication (MFA). Don’t be fooled by the name as Windows Azure MFA can be used for applications hosted in the cloud and on premises.
I’ll now walk through the steps to set up Windows Azure MFA as well setting up MFA for on premises applications.
Technologies/Services Utilized
- Windows Azure
- Windows Server
- Windows Azure MFA mobile app (available on Windows Phone, iOS, Android)
- Internet Information Services (IIS)
Let’s get started!
SETTING UP WINDOWS AZURE MULTI-FACTOR AUTHENTICATION
Navigate to https://manage.windowsazure.com/ and either log into your account or sign up for a trial account.
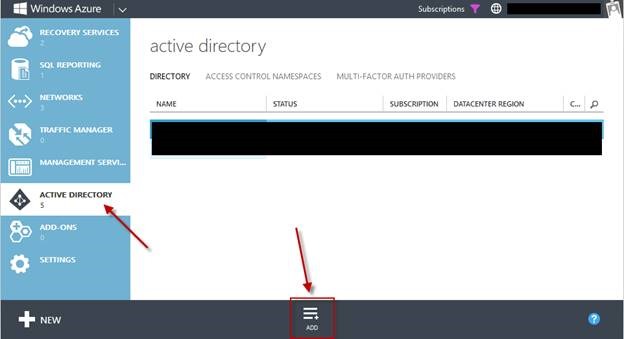
From the portal, on the left hand navigation, select ACTIVE DIRECTORY

If you’re new to Windows Azure you may not have integrated your Active Directory with Windows Azure Active Directory. If you’re interested in integration visit: https://technet.microsoft.com/en-us/library/jj573653.aspx
For the purposes of this walk-through, I’m going to start by creating a new instance of Windows Azure Active Directory (within Azure not AD on a VM).
CREATING A NEW ACTIVE DIRECTORY INSTANCE IN WINDOWS AZURE
Select ACTIVE DIRECTORY and then select ADD:

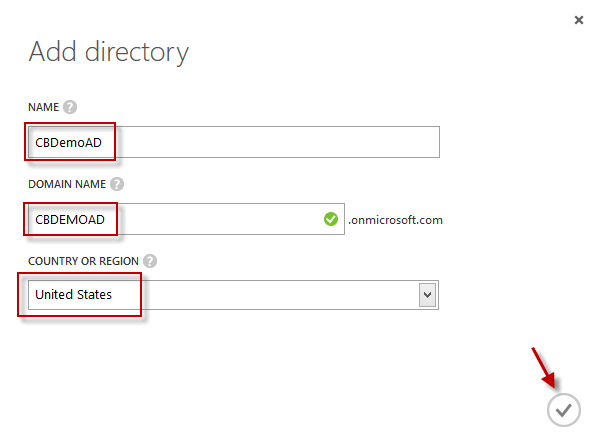
Create a NAME, DOMAIN NAME, select a COUNTRY or REGION, and select the check mark when finished.

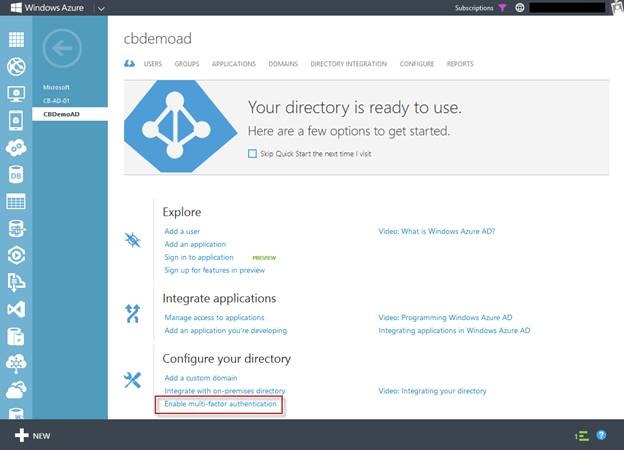
After the new domain is created select it from the list.

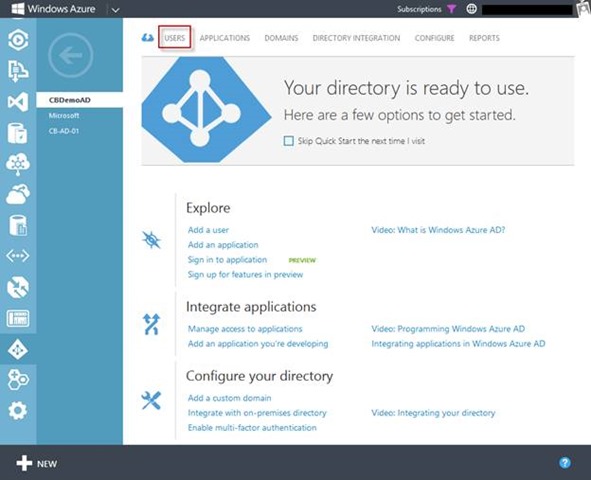
ENABLING MULTI-FACTOR AUTHENCIATION FOR WINDOWS AZURE ACTIVE DIRECTORY
From the main page of the AD instance select “Enable multi-factor authentication”

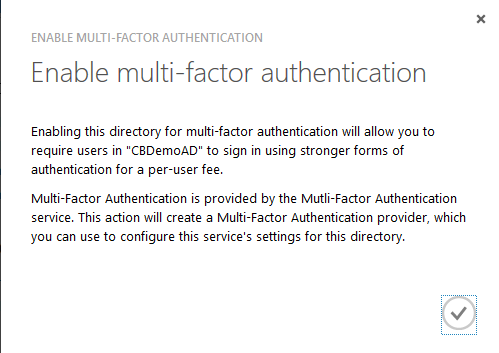
Read through the disclaimer and select the check mark:

ADDING A USER TO WINDOWS AZURE ACTIVE DIRECTORY
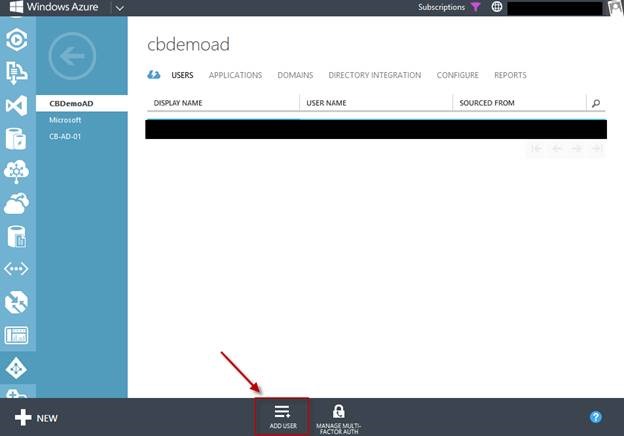
Now I’ll add a user manually by selecting USERS:

Now I’ll select ADD USER from the bottom of the page:

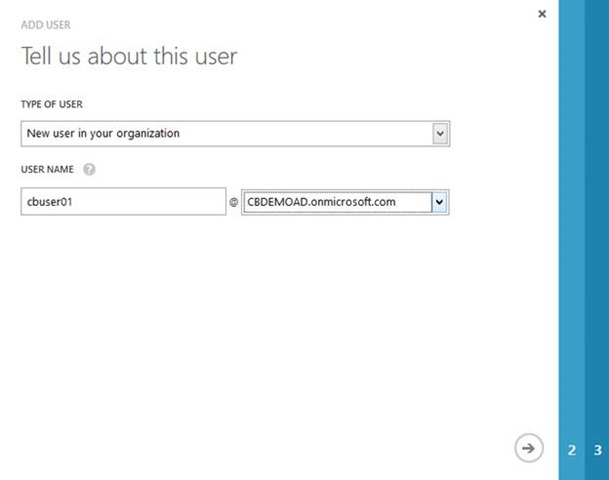
I’ll create a new user within my Windows Azure Active Directory instance:

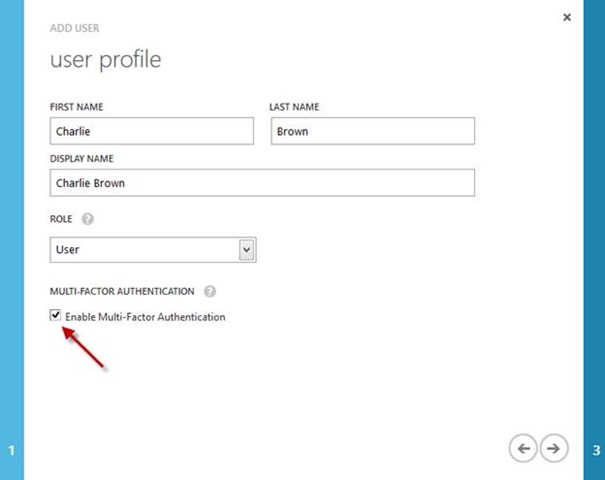
Fill in the necessary info on the User Profile page, select a role, and check the Enable MULI-FACTOR AUTHENTICATION box to enable the user to use MFA:

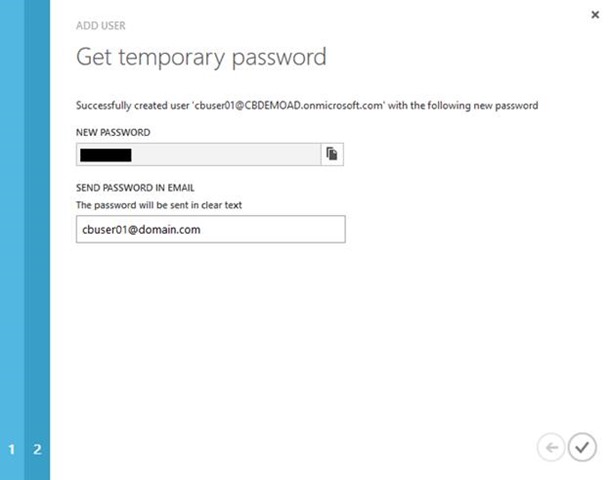
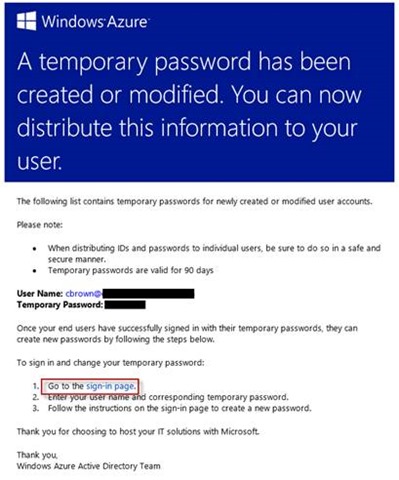
The final step is to generate a temporary password:

Copy and save the password to be referenced later:

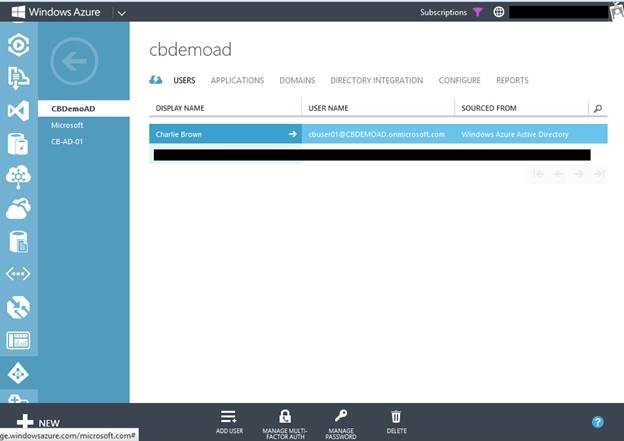
I now have a new AD user account created (e.g. Charlie Brown)

INSTALL THE MULTIFACTOR AUTHENTICATION SERVER FOR ON PREMISIS APPLICATIONS
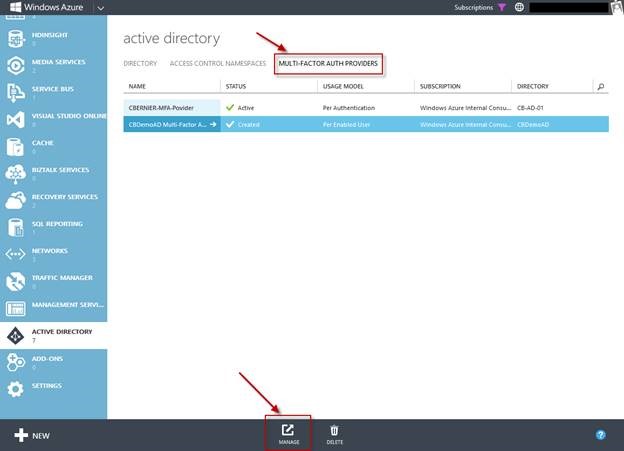
To use MFA or on premises application download and install the MFA server from the MFA portal. Select MULTI-FACTOR AUTH PROVIDERS, the AD instance, and MANAGE at the bottom of the page :

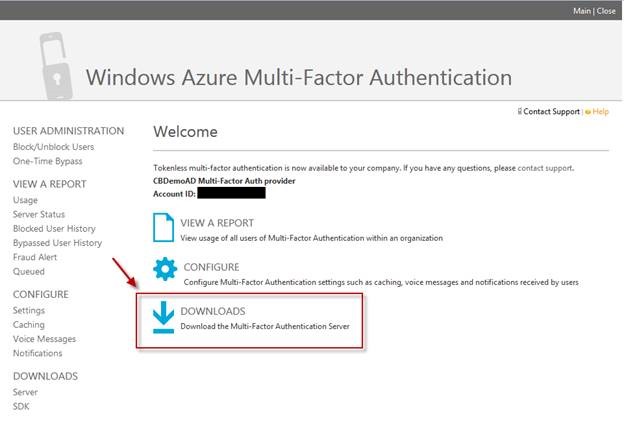
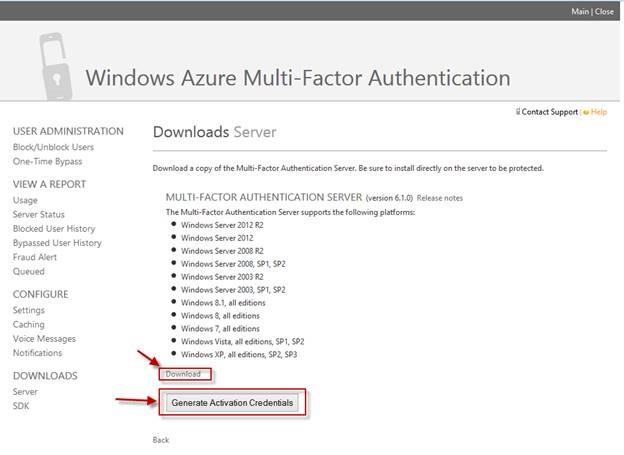
You’ll be taken to the MFA management portal where you’ll have access to reports, configuration, and downloads. Select DOWNLOADS from the main page:

Select “Download” and save the MFA Server install file to the machine you plan to host the MFA Server on and select “Generate Activation Credentials”. The activation credentials will be used to link the MFA Server with the Windows Azure MFA instance:
For example: when an on premises application such as a web site is enabled to use MFA the MFA Server hosted in your environment will communicate out to Windows Azure MFA which will then make a call, send a text, or communicate with the MFA mobile app on the user’s phone.

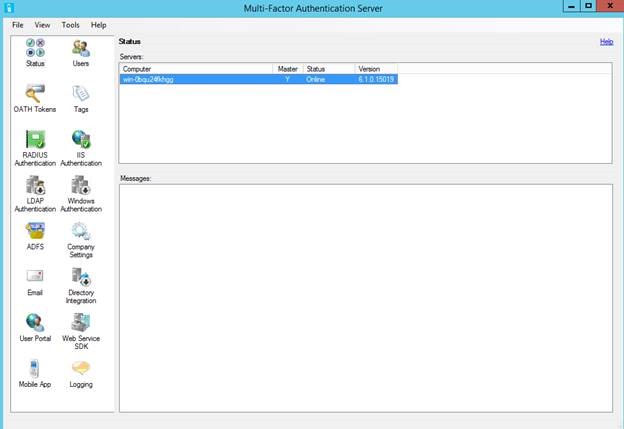
The MFA Server is very light weight so I won't go through how to install it other than double click on the file and install the MFA Server.
Here's what my MFA Server looks like:

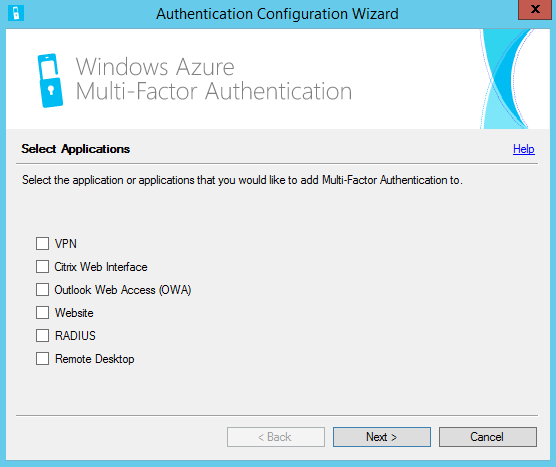
Here is the MFA Configuration Wizard for application however these are only common apps you can add whatever apps or use the SDK to incorporate MFA into your own apps.

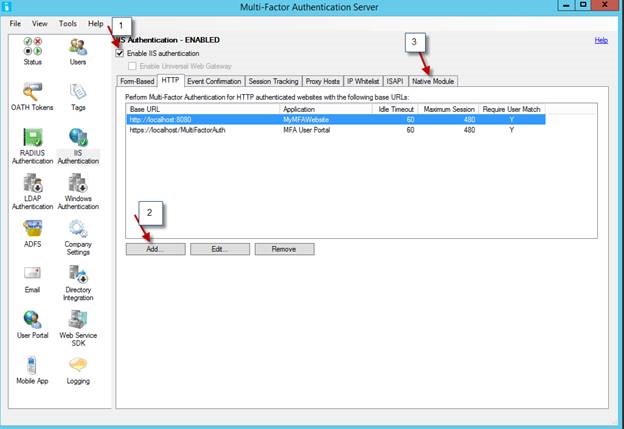
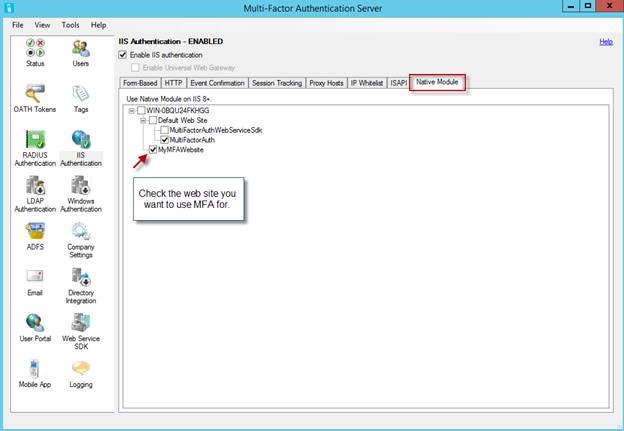
You can enable an existing web site for MFA by using the IIS Native Module within the MFA Server configuration:

Under the Native Module tab select the web site:

Let’s summarize what we did:
1. Created an Active Directory instance in Windows Azure,
2. Enabled it to use Multi-Factor Authentication,
3. Added a User,
4. Installed the MFA Server on premises,
5. Enabled an on premises hosted web site in IIS to use MFA.
WORKING WITH MULTI-FACTOR AUTHENTICATION
Now that we have MFA configured how does it work?
There are a number of options available to enable an application to use MFA as I covered in the MFA Server section. However within Windows Azure, MFA may be enabled for applications hosted in the cloud as well. There is an MFA application available for Windows Phone, iOS, and Android or MFA can simple call you’re phone or send a text.
Multi-Factor Authentication app:

(note: code and URL are accessed as the user logs in and sets up MFA as shown in the steps below)
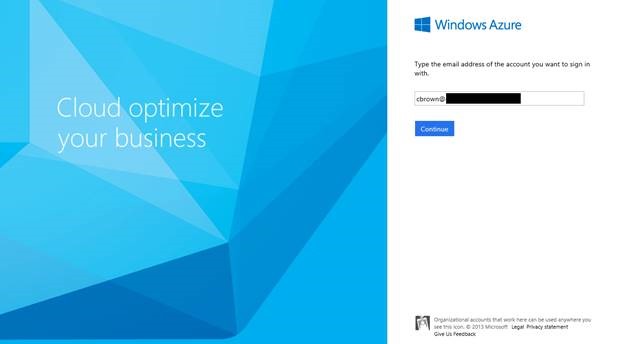
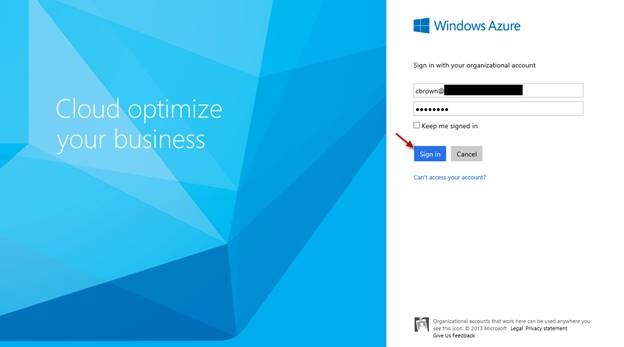
To test MFA, use the login credentials received by email and select the “sign-in page” link:

Type in the user name provided in the mail and select Continue:

Type in the temporary password provided in the emails and select Sign in:

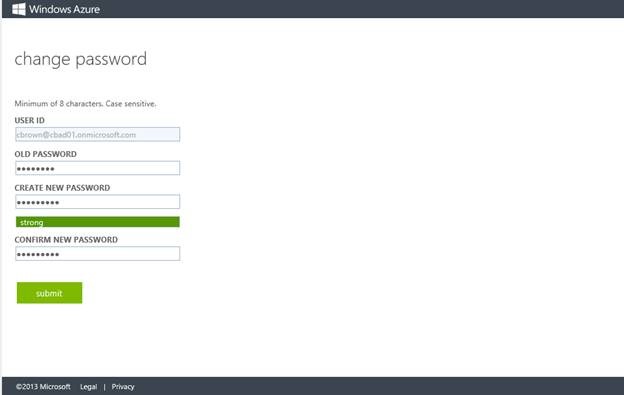
Change the password and select submit:

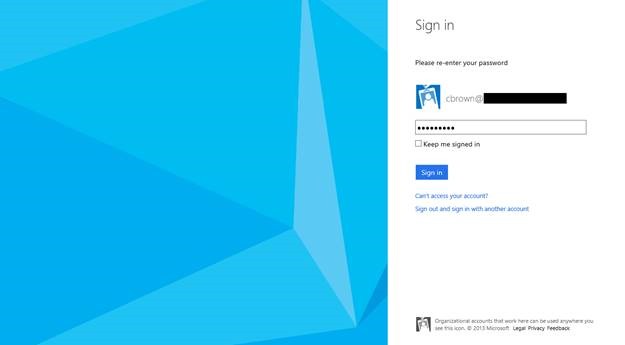
Log in with your new password:

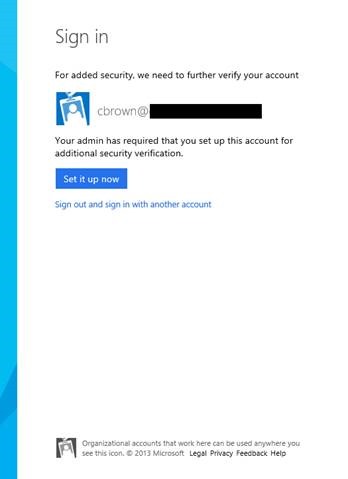
Select “Set it up now” to set up the account to use MFA:

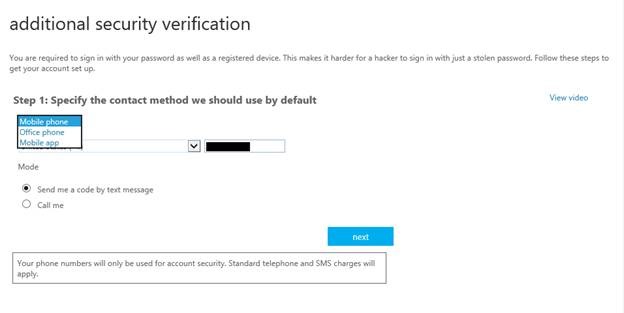
Specify your preferences for MFA:

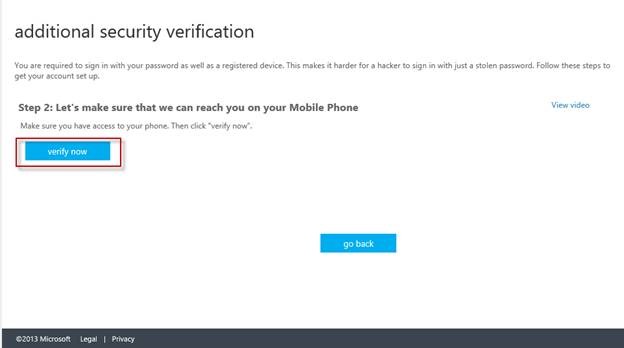
Select “verify now” and a call or text will be sent to the number specified.

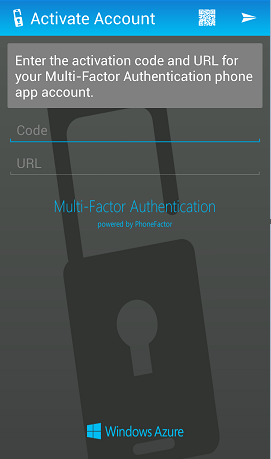
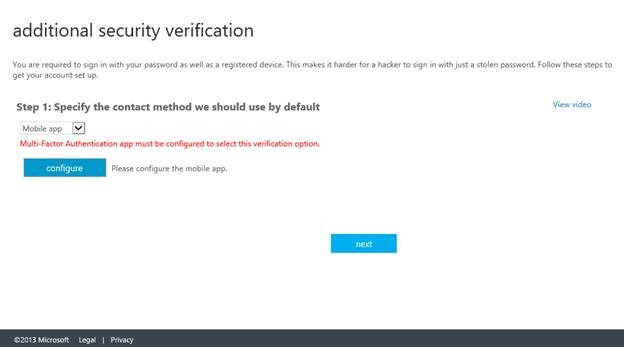
Alternatively you may configure to use the mobile app available for Windows Phone, iOS, and Android:

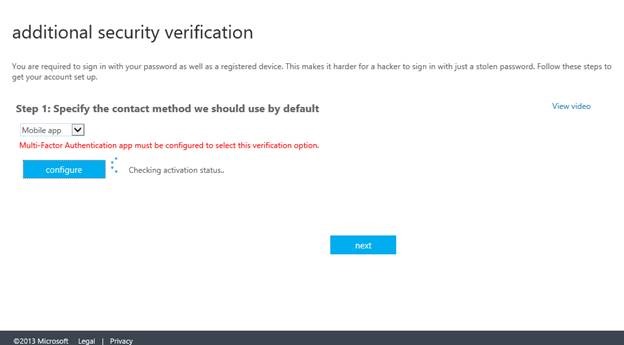
Select configure to set up the mobile app after it’s been downloaded (the code and URL are provided in this section):

After scanning the barcode (or type in the code and URL in the app) it will verify and authenticate. From that point on the MFA mobile app will prompt to verify authentication to apps. To clarify, verification can be through a text, a phone call, or through the mobile MFA app.

Congratulations, you’ve set up Windows Azure Multi-Factor Authentication in the cloud and on premises!
For detailed pricing please visit: https://www.windowsazure.com/en-us/pricing/calculator/?scenario=full
For more information on Windows Azure Multi-Factor Authentication and videos please visit: https://www.windowsazure.com/en-us/documentation/services/multi-factor-authentication/