Step-by-Step: Manage all your servers from anywhere, on any browser, for free
Hello folks,
I keep having a conversation with IT professionals about managing Windows Servers and my preference for Core and now Nano servers where it makes sense. I’ve always preferred remote management to having to login to every servers by RDP or directly to the box. And now, there is a way to start managing ALL your servers wherever they are, using any device with a browser. Nice!!
Server Management Tools (SMT) is a new Azure service that is currently in preview mode. All you need to get started is an Azure subscription. Here is how you set it up.
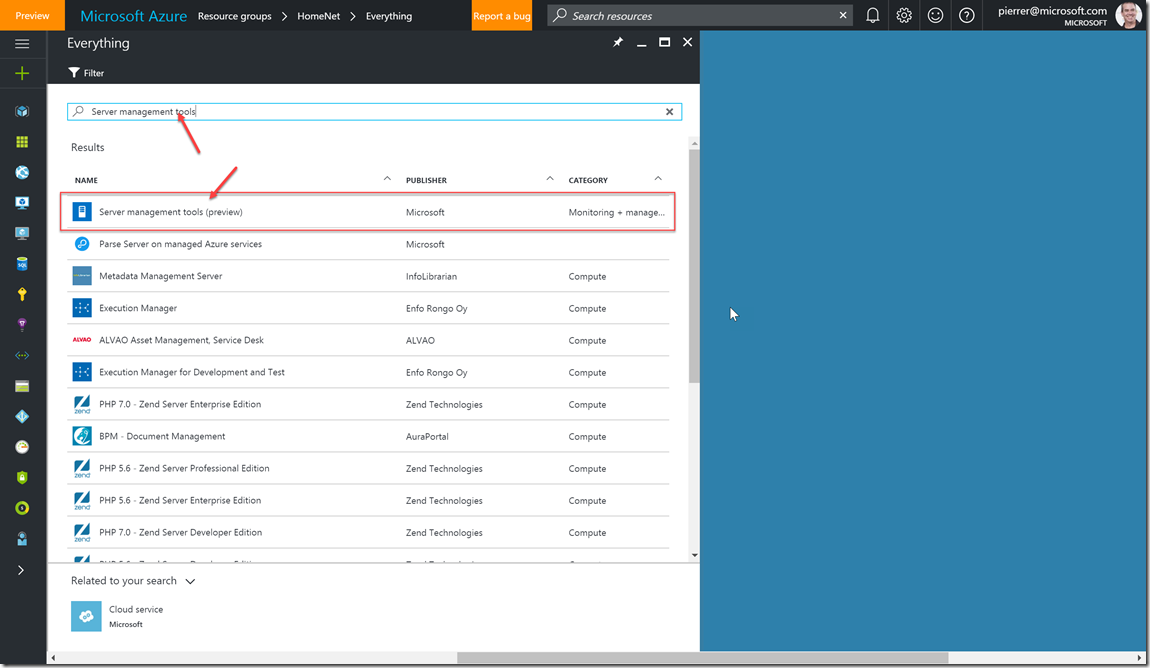
1- To deploy SMT, just search for it in the Marketplace
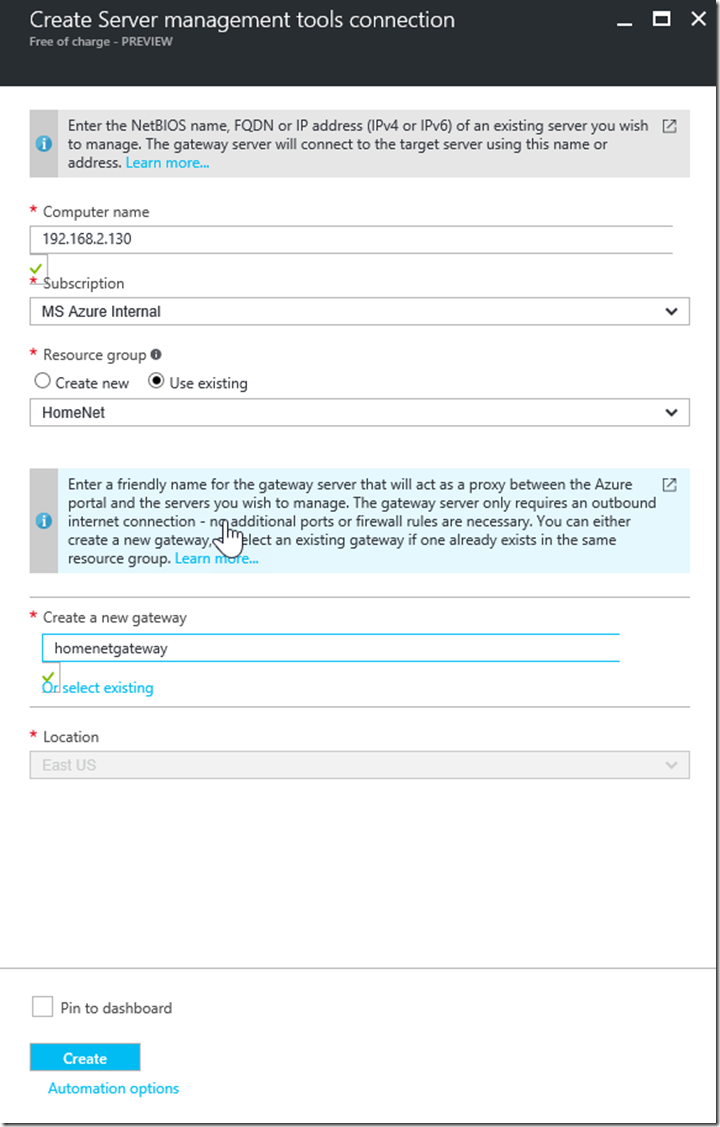
1- Once you are in the “Create Server Management Tools connection” blade, you need to fill out the info
Computer name: This is where you enter the name of the machine that you want to manage. as a FQDN, a NetBIOS name or an IP Address. I am using the IP address of one of my Windows Server 2016 test servers in my home lab.
Subscription: The SMT connection and the gateway will be associated with the Azure subscription that you choose here.
Resource group: Enter here the resource group you want to use to organize your servers. in my case I'm using an existing resource group
Location: This is the region where your resources will be hosted in Azure. I’m my case it’s the location of the resource group i selected earlier
Server management tools gateway: This is the machine that will act as a proxy between the Azure portal and the machines you want to manage. The great thing here is that there are no incoming ports required to open on your firewall for the gateway to connect to Azure.
SMT gateway setup is a two-step process (Create the gateway resource in Azure, and install the gateway software on the machine that you designate as your gateway) we will do that in the next steps.
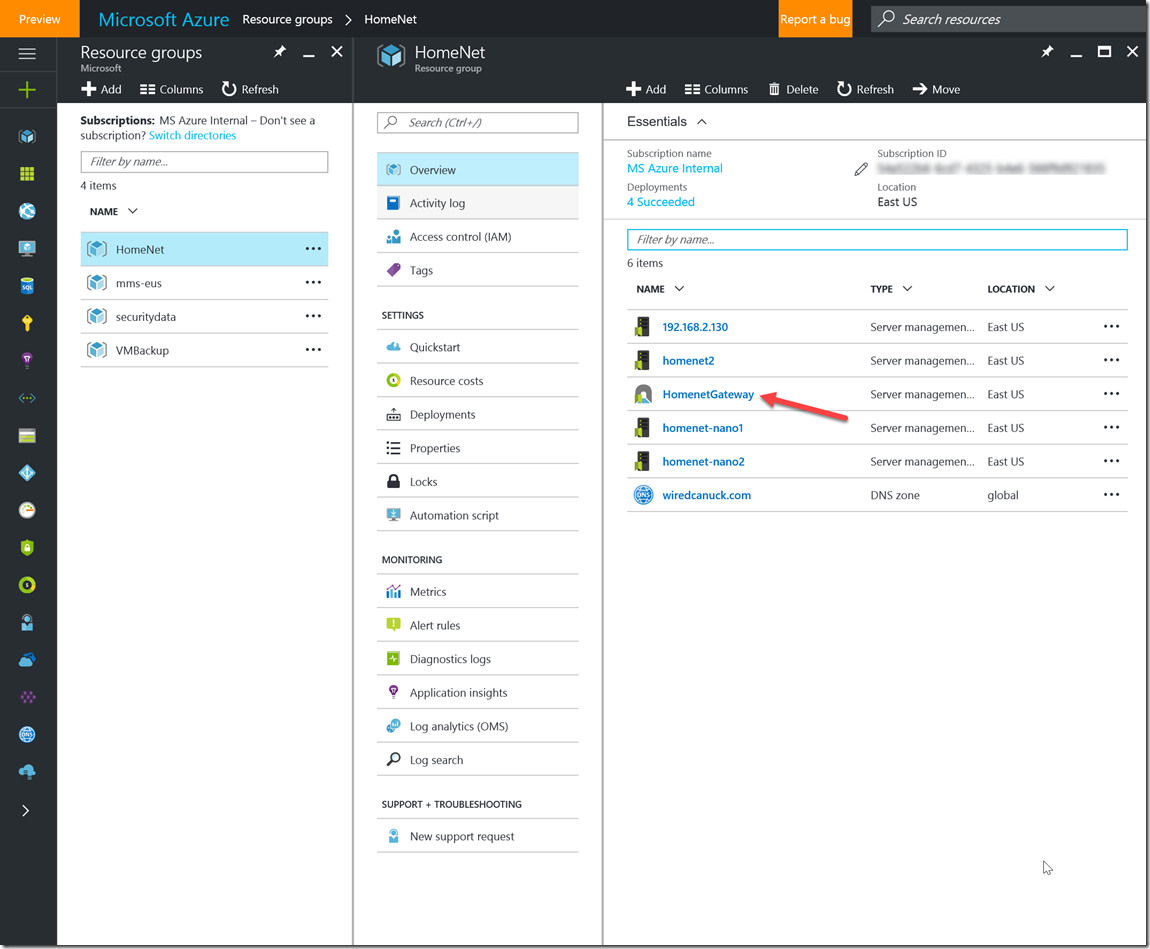
3- After you’ve filled out the form and clicked create. The deployment will proceed and you will see the Resource Group blade for the Resource Group with the Gateway created for you. (my screenshot already has other servers setup since i had forgotten to take the screenshot while i was setting it up).
Click on the gateway you created and move on to the next step.
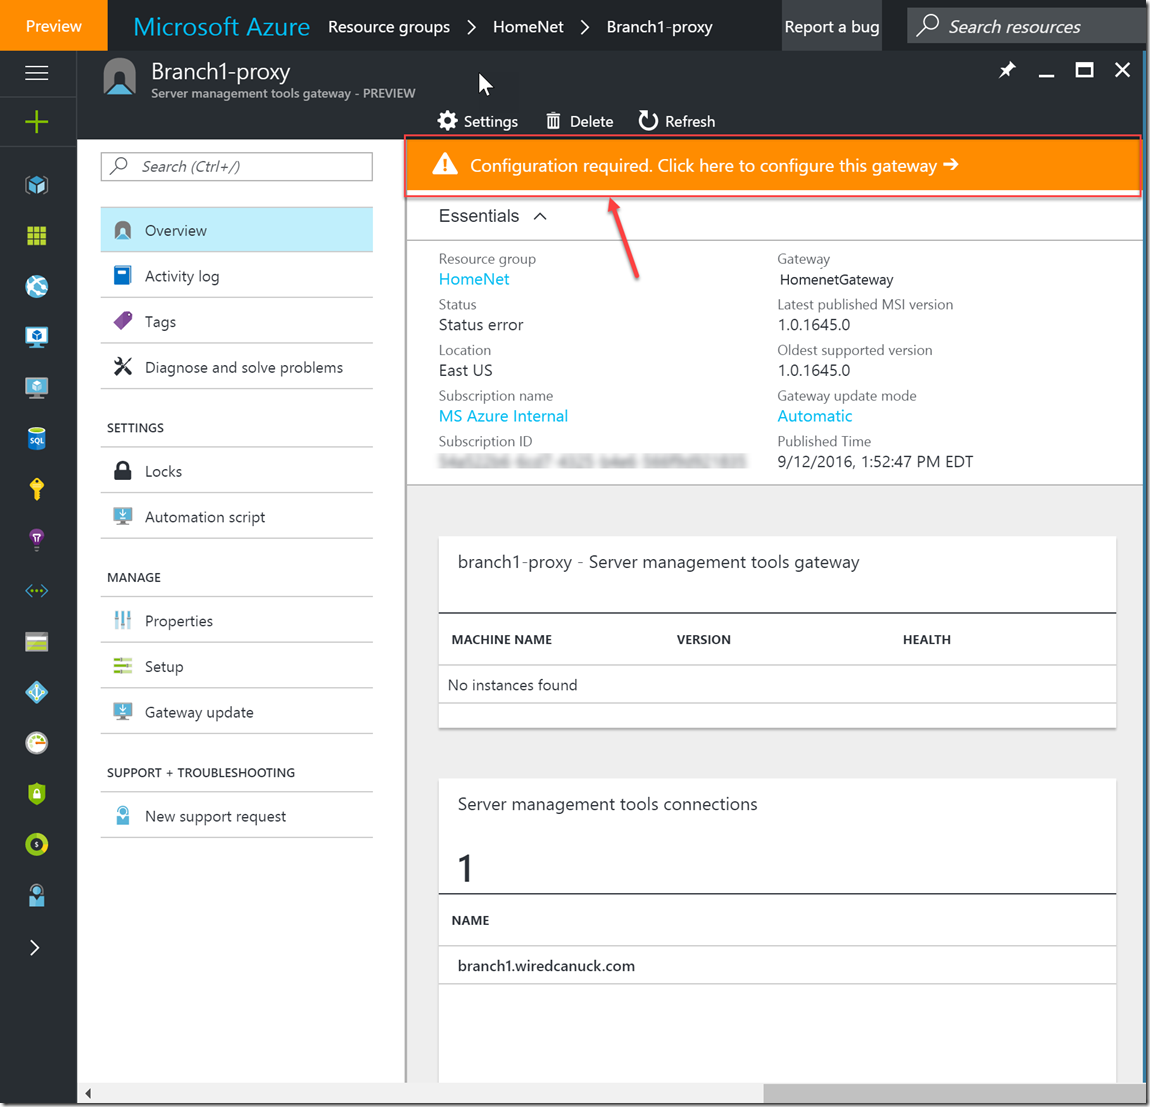
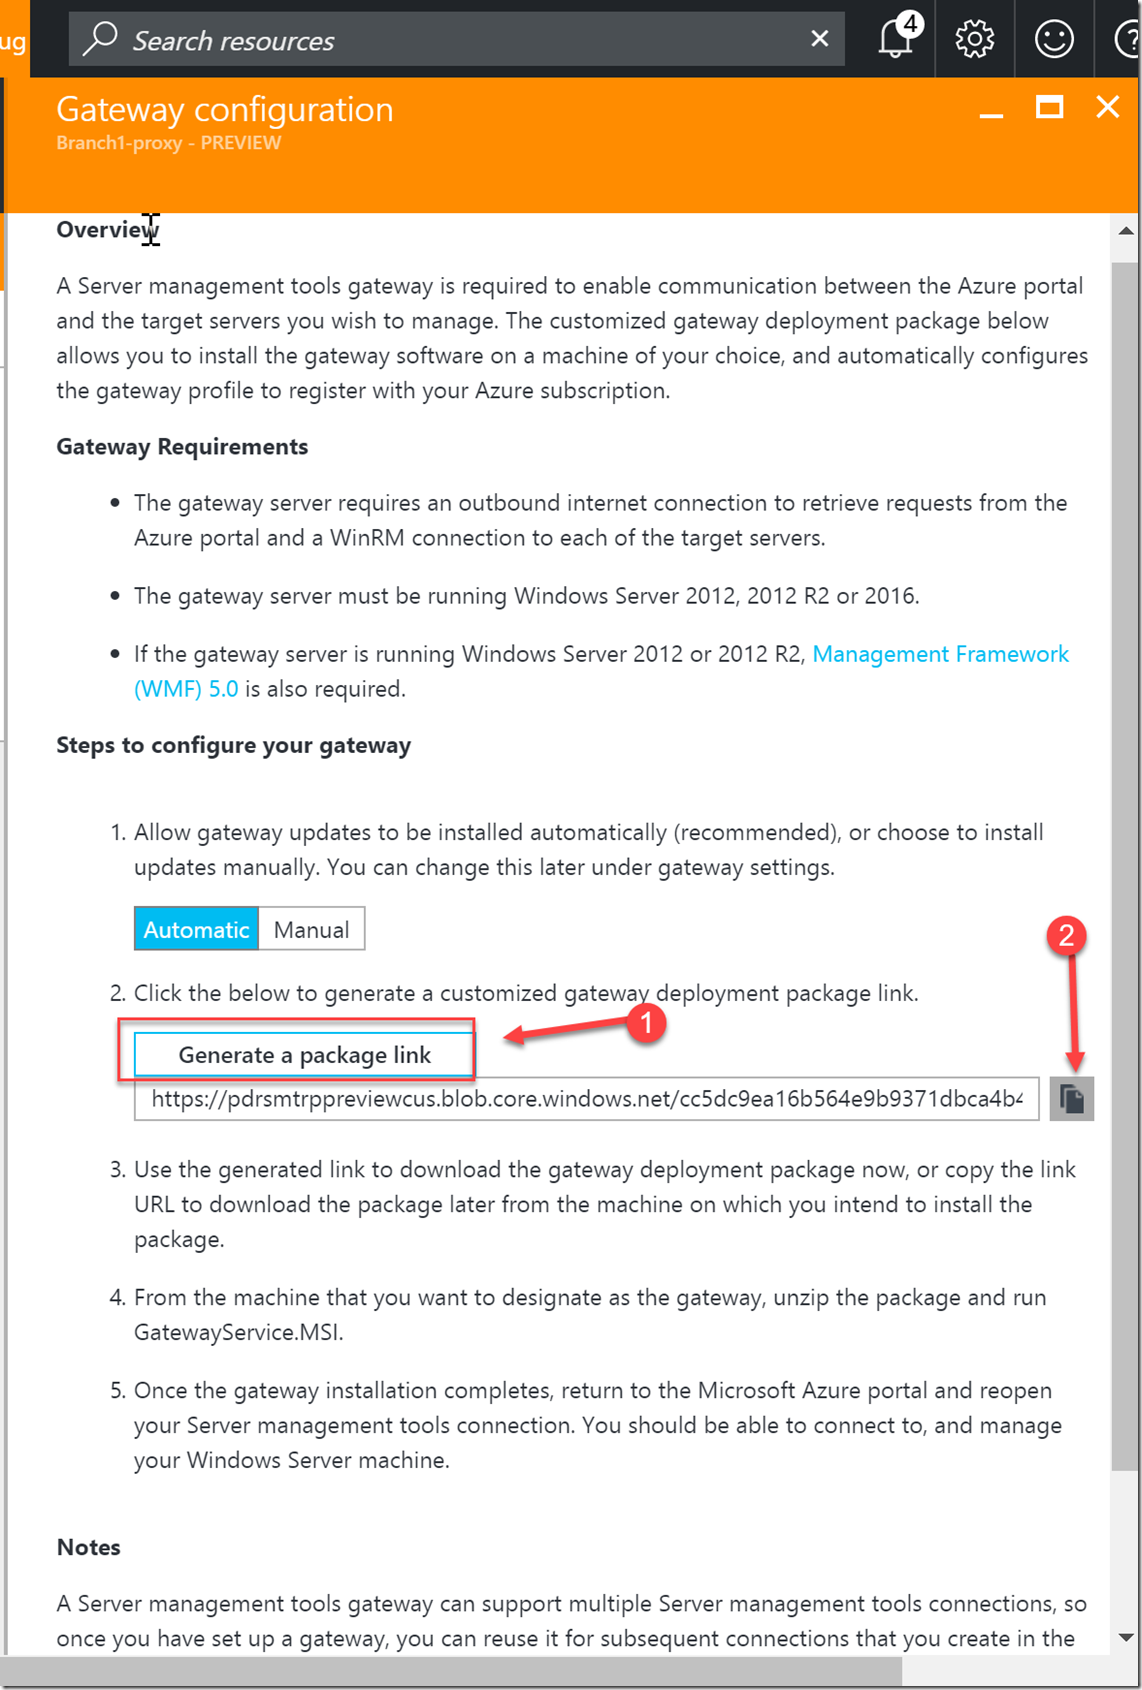
4- Once the gateway blade opens you will be notified that your gateway needs configuring. Click on the notification and follow the instructions to set up the gateway software on a server.
5- The gateway configuration screen is just a blade that gives you instructions and allows you to get the URL of a preconfigured zipped package that will have an MSI and a JSON file for installation on the actual machine that will be your gateway machine.
the JSON files includes all the info the gateway need to connect to the service.
 {
  "dataPlaneServiceBaseAddress": "https://rsmtdataplanepreview.trafficmanager.net/",
  "gatewayId": "/subscriptions/11111111-1111-1111-111111111111/resourcegroups/homenet/providers/microsoft.servermanagement/gateways/homenetgateway",
  "environment": "prod",
  "upgradeManifestUrl": "https://pdrsmtrppreviewcus.blob.core.windows.net/gatewayservice/",
  "messagingNamespace": "rsmtpreviewcus012",
  "messagingNamespaces": "rsmtpreviewcus012,rsmtpreviewcus012-fo",
  "messagingAccount": "ListenSendKey",
  "messagingKey": "not telling you my key",
  "requestQueue": "q4018856a43944f238e89515fef55d40e",
  "responseTopic": "t4018856a43944f238e89515fef55d40e",
  "autoUpgrade": "On",
  "upgradeMode": "Automatic",
  "minimumVersion": "1.0.1645.0",
  "upgradeFrequencyInMinutes": "30",
  "profileUpgradeFrequencyInMinutes": "30",
  "features": "",
  "dataPlaneServiceMetadataUrl": "metadata"
}
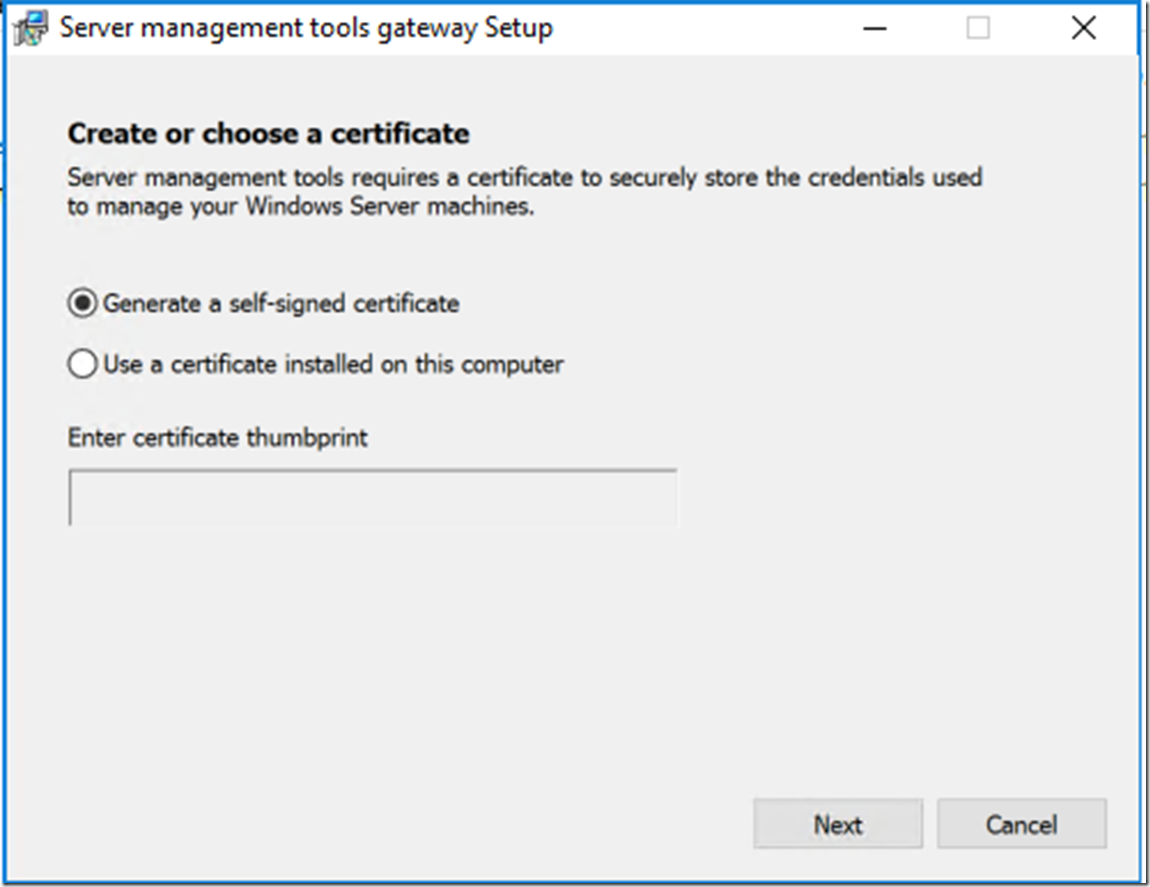
6- from the gateway download the package using the URL provided in the last step, extract the files and run the MSI. On one of the gateway setup screen it will ask you for a certificate. you can use one you already have. i elected to use a self-signed one.
7- in my case, because I'm NOT deploying this in a domain, the destination machine (our management target beyond the gateway) must be added to the TrustedHosts configuration setting on the gateway itself.
Use winrm in PowerShell to configure TrustedHosts on the gateway machine.
winrm set winrm/config/client '@{TrustedHosts="192.168.2.131"}'
Since i will be adding multiple machines, use the following command to add each additional IP to the trustedhost list.
Set-Item wsman:\localhost\Client\TrustedHosts 192.168.2.130 –Concatenate
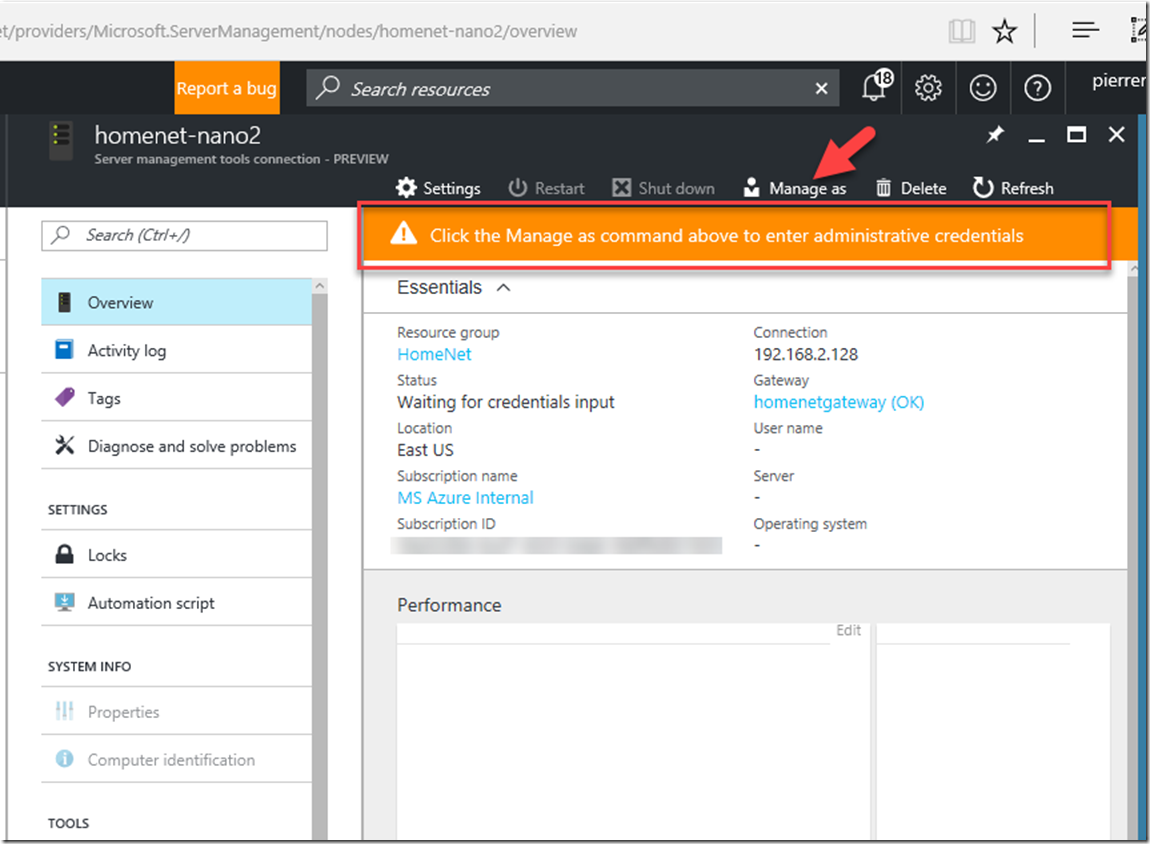
8- Once you have added all your servers to the trustedhost list. in the Azure portal as you select one of those servers, you will need to add the credentials you want to use to authenticate to those servers.
You have the option to save the credentials. If you decide to do so, the credentials are encrypted using the certificate you generated as part of the gateway setup and stored in Azure. The credentials are encrypted using standard AES encryption and the certificate is always stored on the SMT gateway. The encrypted credentials are decrypted by the SMT gateway and used to process all management requests on the target machine. Even though the credentials are securely stored in Azure, the certificate provides an additional level of security because only your gateway can decrypt the stored credentials since only your gateway has the certificate.
If the credentials you entered have the permissions to access the machine, you should start to see some performance metrics for the target server and you can continue to remotely manage it.
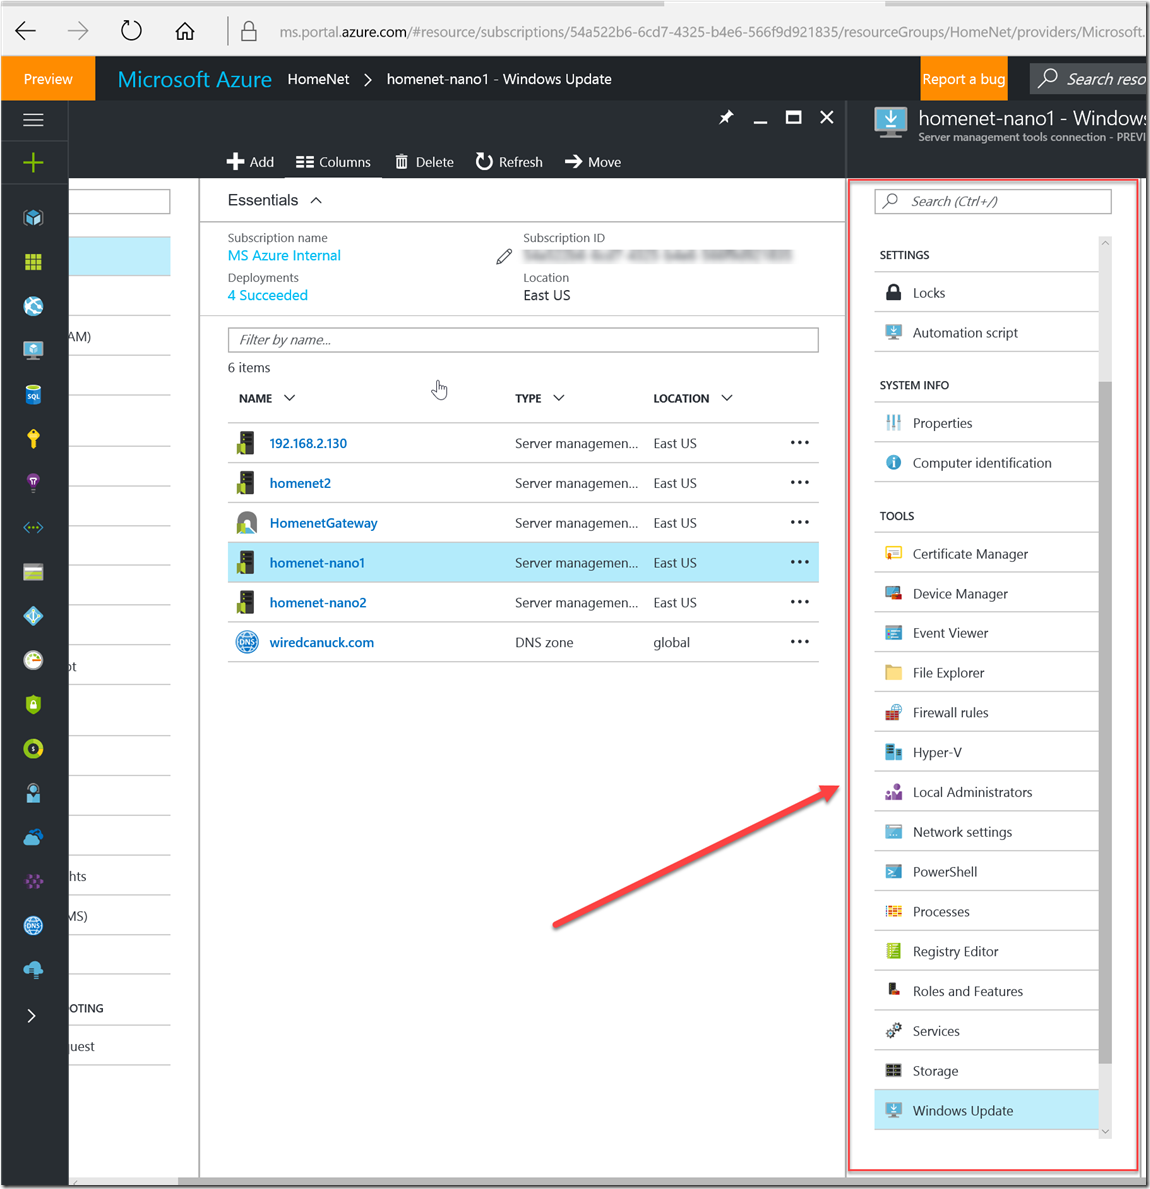
9- after that you are now able to connect and manage the servers in your environment from Azure. and the screenshot below shows some of the management tools/options you have
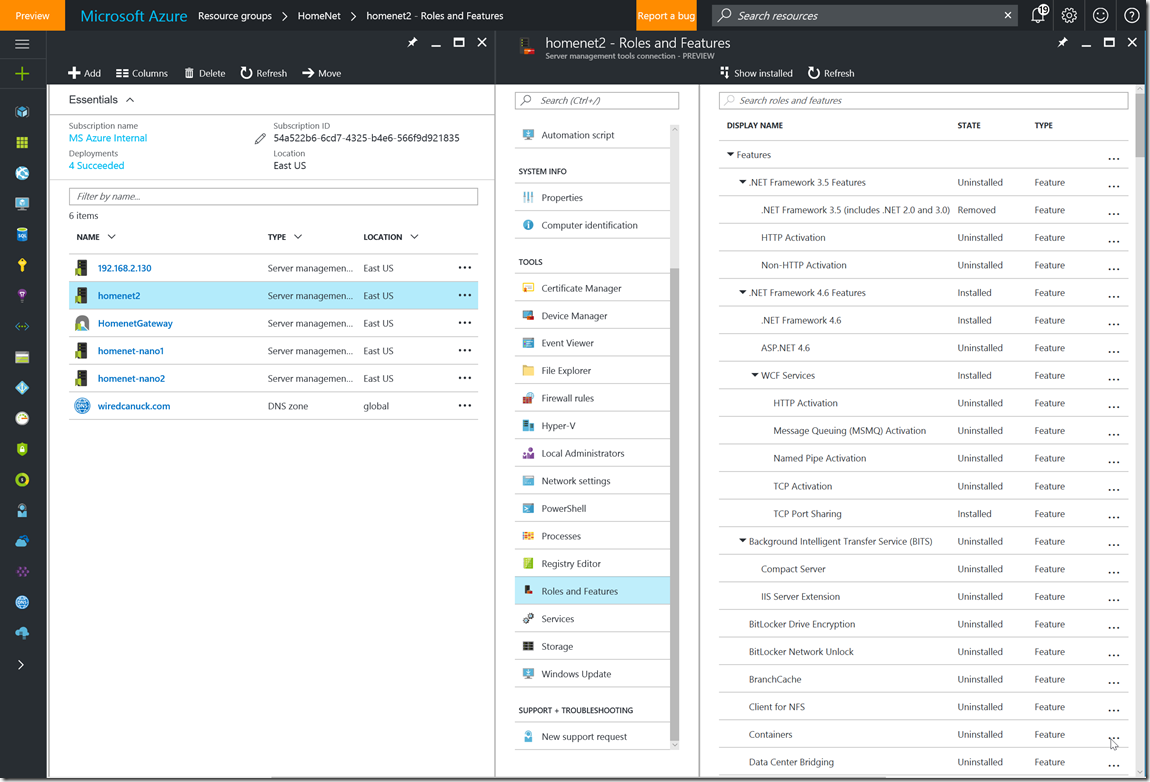
10- For example you can manage installed Roles and Features on any of the connected servers.
Give it a try, and centralize all your servers in one pane of glass.
I hope this was helpful.
Cheers!
Pierre Roman
@pierreroman
