Step-By-Step: Adding an Azure Subscription as an Endpoint in Visual Studio Team Services
Understanding the configuration of Visual Studio Team Services (VSTS) is not without it's challenges. One of the prerequisites required is the inclusion of an Azure Subscription which has been noted by some attending one of the various Microsoft DevOps Hackathons delivered. This Step-By-Step has been created to explain how to add Azure as an Endpoint in your Visual Studio Team Services subscription.
A complete walkthrough of the steps below can be viewed here:
To get started, navigate to the Azure Portal, https://manage.windowsazure.com and connect on your Azure subscription.
Microsoft Azure prerequisites
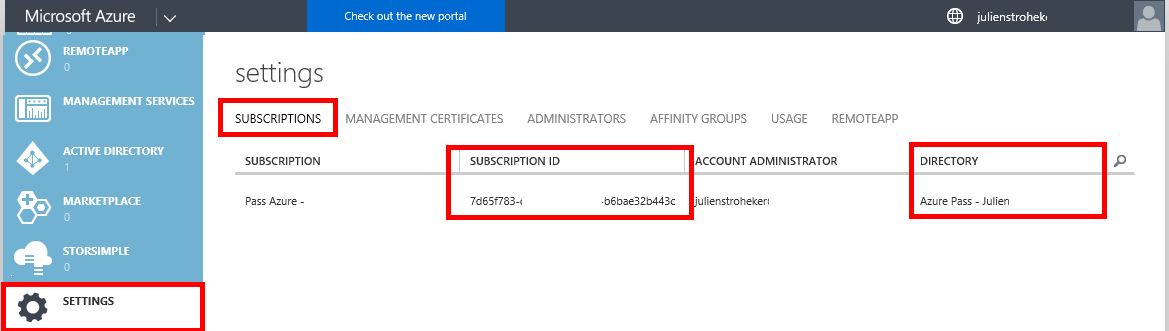
Go to the “Settings” section and from the “Subscriptions” tab, copy your “subscription ID” and the “Directory” linked to your subscription and paste it in a text file
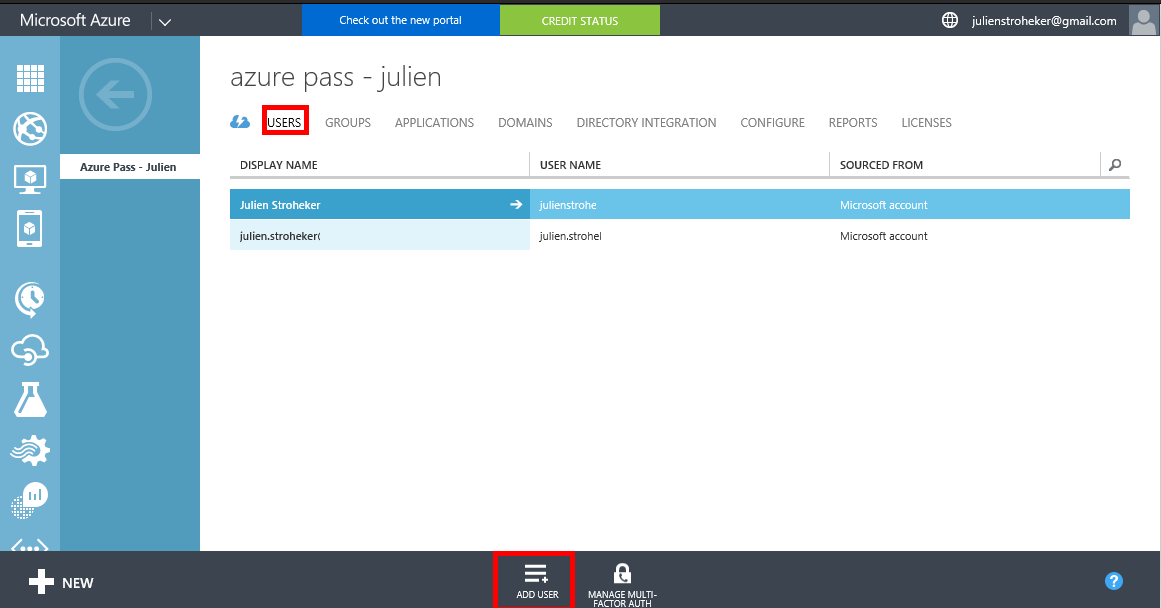
Next, go to the “Active Directory” section, click on the directory previously saved in the text file and choose the “Users” tab
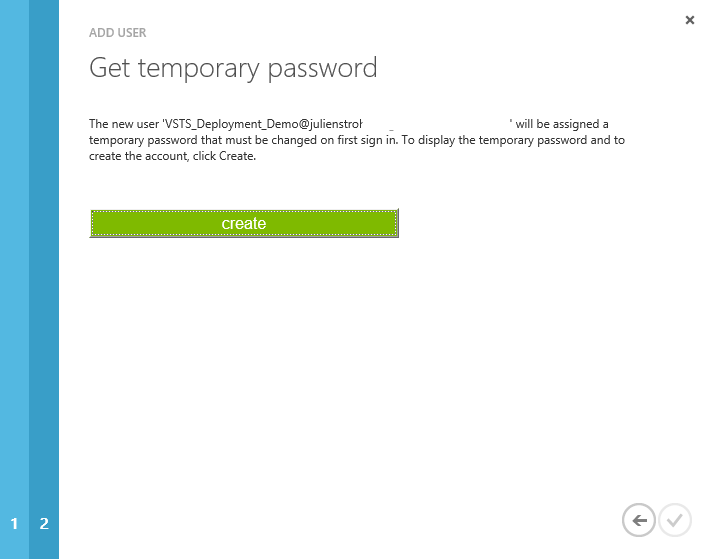
Then, click on Add user
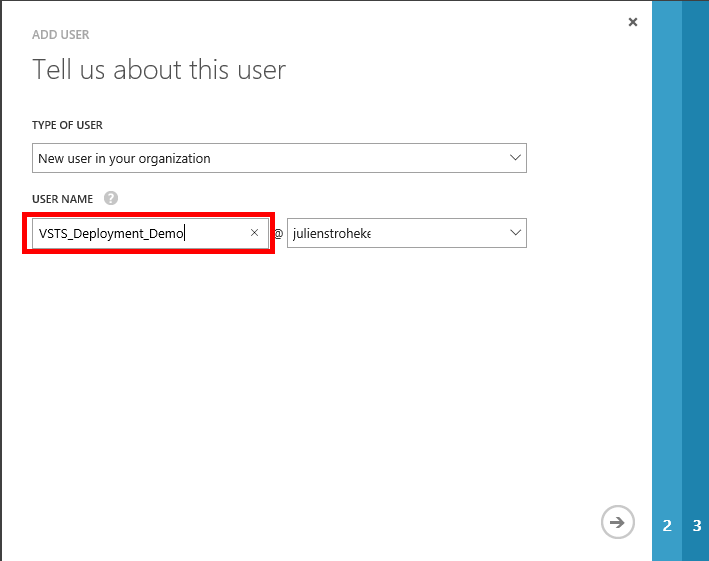
We will enter the information of the account we will use to connect VSTS and Azure. So here, I will choose VSTS_Deployment_Demo
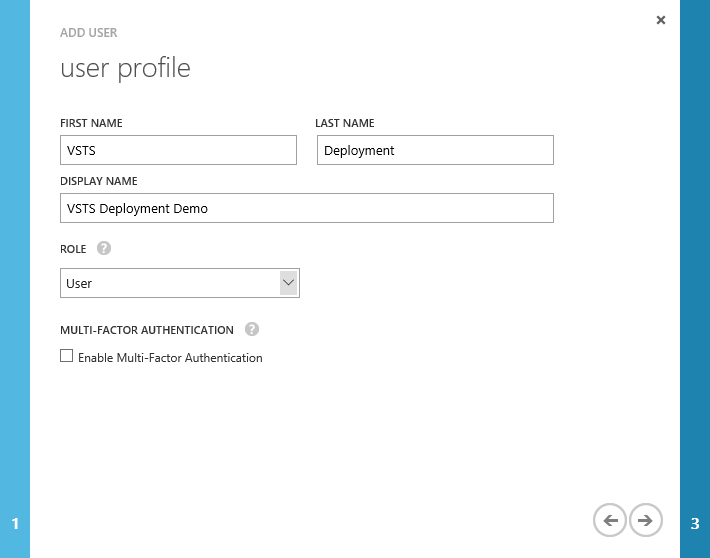
Fill in the rest of the information and let “user” as role for now
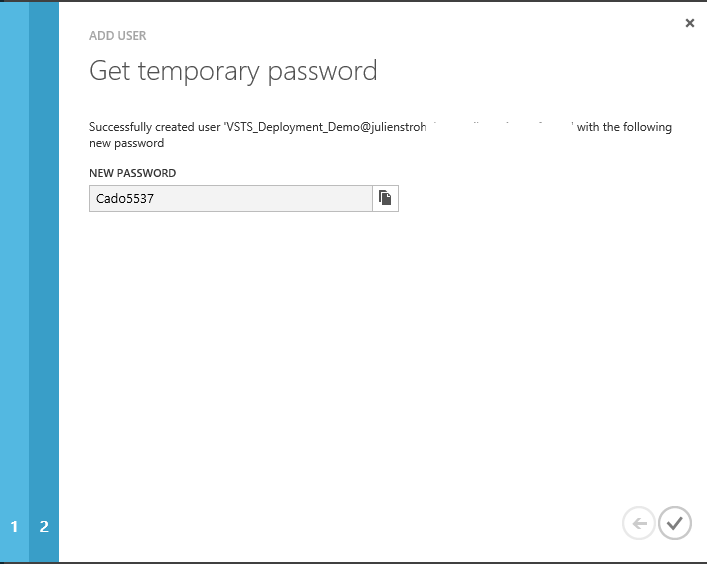
Finally we have a confirmation page, with a “create” button. We click on it
Azure gives provides a temporary password once the user is successfully created. So the next step will be to assign a new strong password
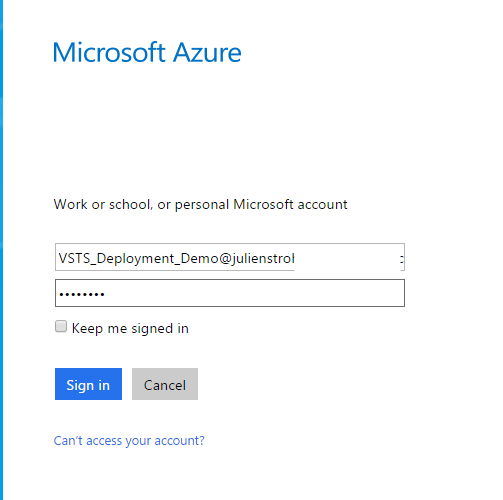
To do that, open a private page with your favorite browser
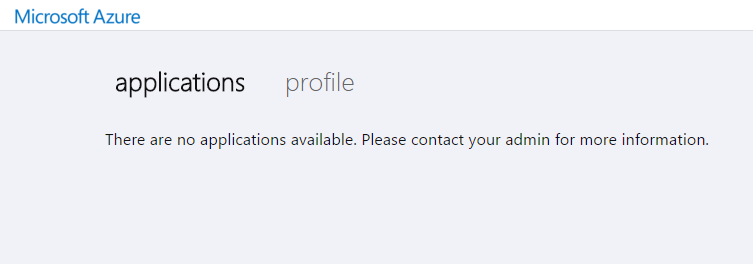
Go to https://myapps.microsoft.com and authenticate yourself with your new user and its temporary password
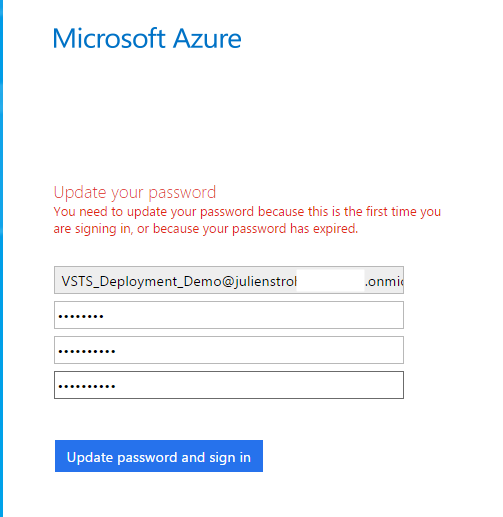
After clicking on Sign In you will need to update your password
You will see the following web page once the steps are completed
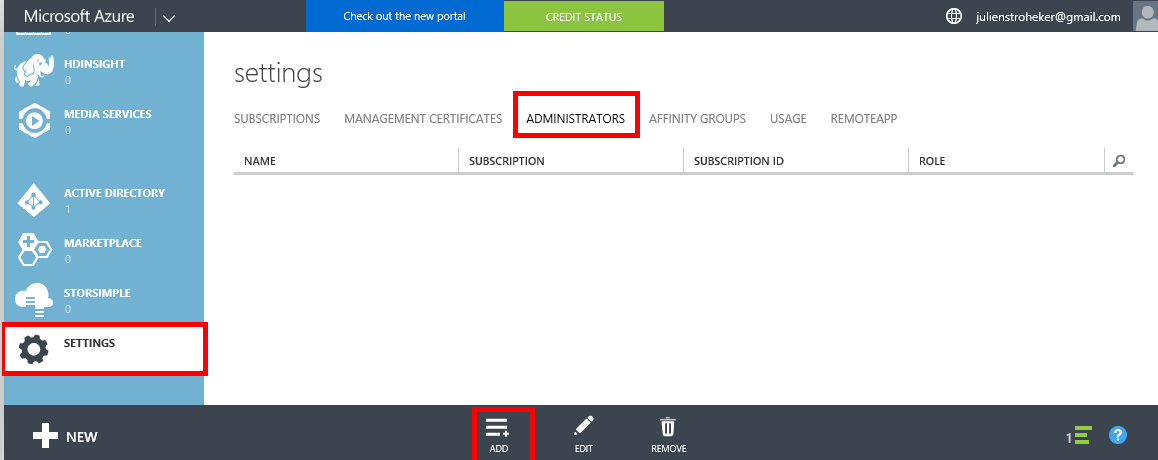
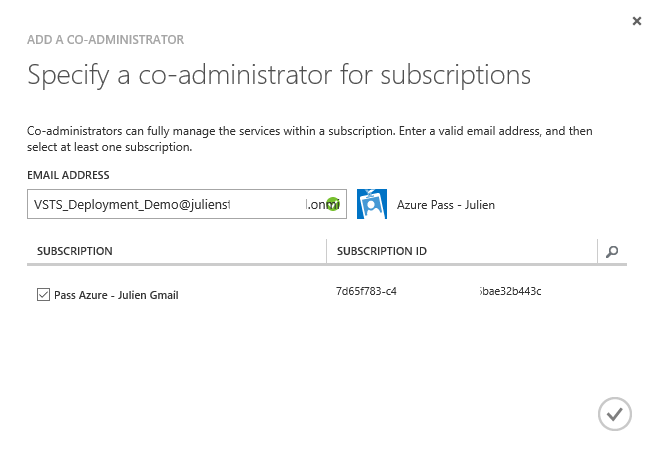
Return to your azure subscription (with your admin account), to add this new user as co administrator of this subscription
Go to the “settings” section and “Administrators” tab and click on Add at the bottom of the page and enter the information of your new user that you just created
NOTE: In an Azure production environment you will want to separate your deployment accounts per applications and give access to this account only to the resources you will need via RBAC.
We now have a new user in our Azure Subscription, ready to be called to do our deployment from Visual Studio Team Services.
The next step is to setup this account in our VSTS subscription.
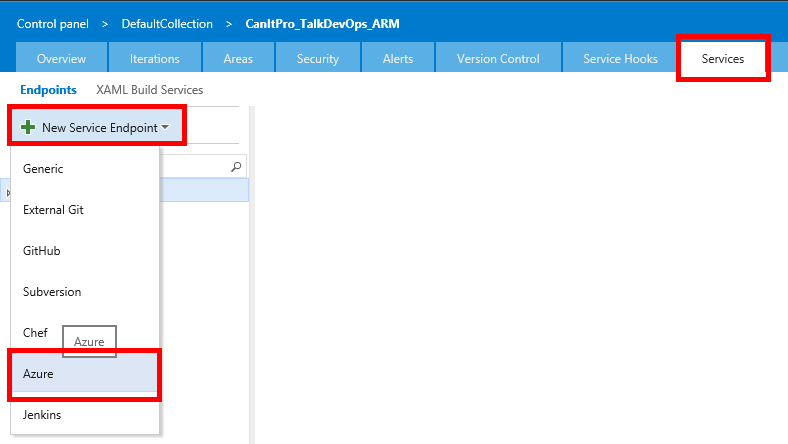
Visual Studio Team Services configuration
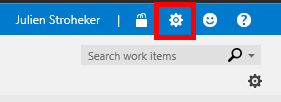
From your project click on Manage Project at the top right of your screen, it’s the little gear logo
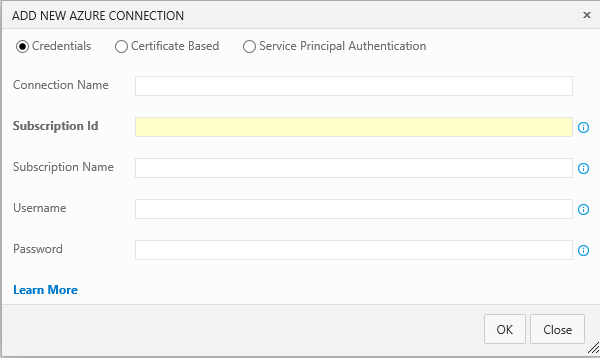
Go on the Services tab, click on New Service Endpoint and then Azure
We will need our previous information to get in the first section of this article
And Voilà, you should be able to use this endpoint in your VSTS subscription. For example, here in an ARM template deployment :
