Step-By-Step: Setting up Azure SMB File Share
Azure files enables you to have shared folders available to your Azure virtual machines and on-premise systems. In October 2015 Azure Files went from Preview to General Availability, so you can now safely leverage this feature.
You can use SMB file shares for:
- Storing shared application data
- Storing diagnostic data
- Storing tools and utilities
- Migrating on-premise applications that rely on file share
In this walkthrough, I am going to demonstrate how you can leverage this awesome feature using the Azure Preview Portal.
Before we begin, a few notes to be aware of:
- This can only be configured from the Azure Preview portal or via PowerShell
- RBAC is not tied to Azure Active Directory
- UDP Port 445 must be open to access from your on-premise environment
- On-premise systems must be either
-
- Windows 7, Server 2008 R2 for SMB 2.1
- Windows 8 or 10, Server 2012 and Server 2012 R2 for SMB 3.0
-
After this step by step, you will be able to easily configure Azure file storage in the Preview portal and create a mount on your Azure virtual machines to access this shared storage.
Lets get started.
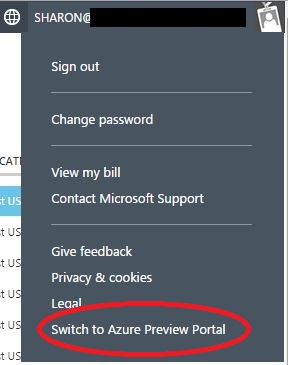
As I already stated, SMB file shares can only be created in the Preview portal or via PowerShell. To easily access the Preview portal from the classic portal, simply click on your account from the top right and select Switch to Azure Preview Portal.
For this demo, I am adding a storage account to a previously provisioned resource group called CanITPro. For details on how I provisioned this resource group with a single script, see Step-by-Step: Deploying Multiple Services via Azure Resource Manager.
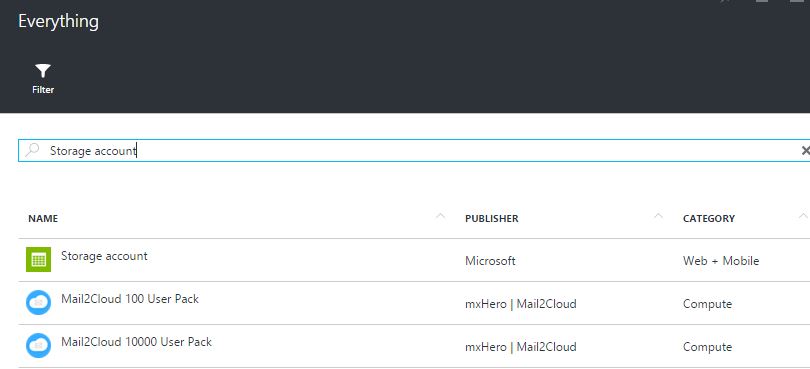
Next click the Add button, or the New button from the left hand menu.
To narrow down your search, enter storage account and then select the corresponding resource. If you have two “storage” selections be sure to choose the green Storage account option, not the orange Storage option.
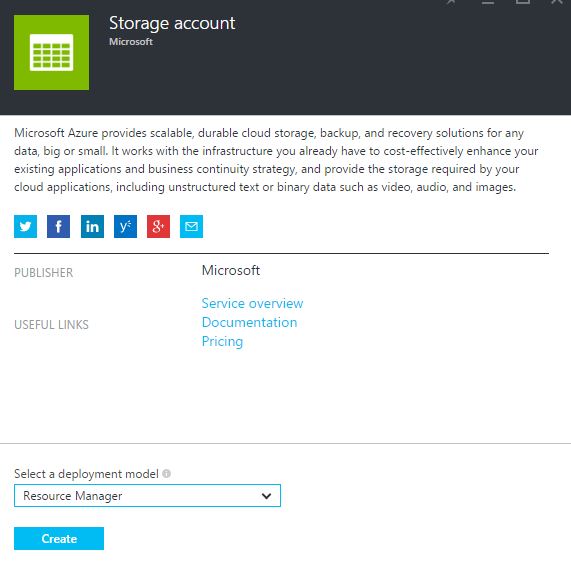
Once again, this SMB file is only available via the Preview portal, therefore you must select “Resource Manager” in the Select a deployment model dropdown. Then click the Create button.
Next, you are required to enter the values for your storage account.
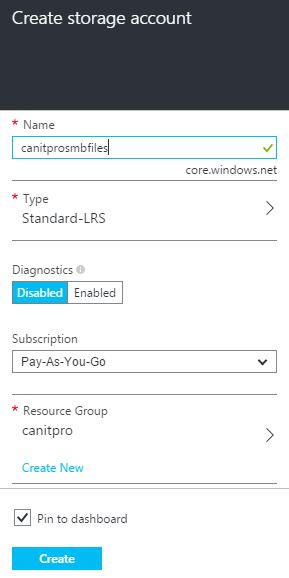
Populate the fields appropriately
-
Name = name of the Storage account – this must be all lowercase.
Type = choose from Locally Redundant or Geo-Redundant or Read-Access Geo-Redundant. Premium and Zone Redundant types do not support SMB Files.
Diagnostics = enable to track metrics and log requests for your account.
Subscription = associate the storage account with the appropriate subscription.
Resource Group = Iin my example I would like to keep this File share in the CanITPro resource group for management purposes.
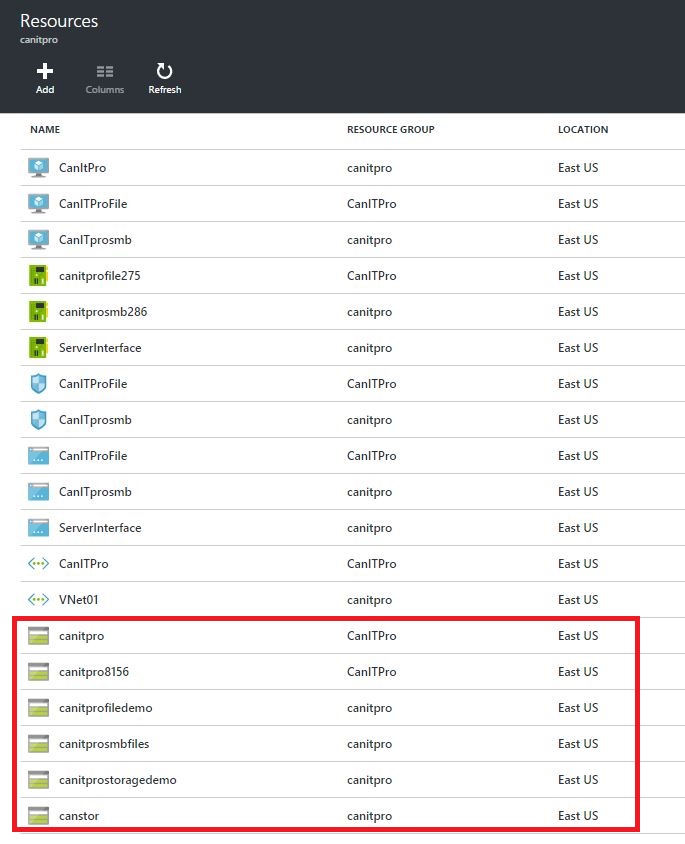
The storage account will now be created. You will notice in the following screenshot that I have several storage accounts created, including the canitprosmbfiles that we just created.
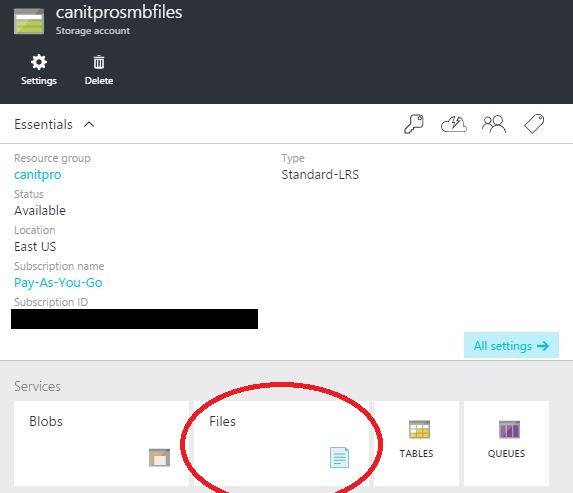
Next, we are creating our file shares. Click the storage account and then the Files icon.
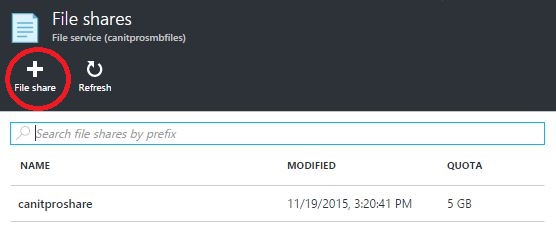
Next click File Shares

Finally, click the File shares icon.
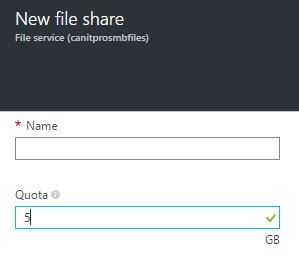
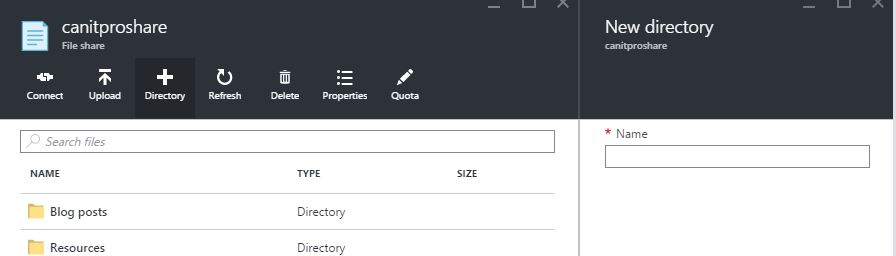
Now we can provide the new file share name. I created a file share called canitproshare. Next, set a quota for the share. This can be set to a max of 5120 GB. Do not forget to click the Create button at the bottom of the window.
Our file share is now created and we can add data to it.
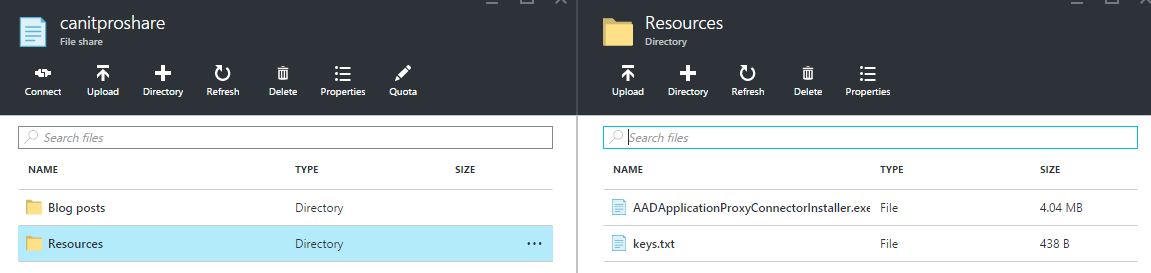
I created two directories, Blog posts and Resources, by selecting the Directory icon.
Once my file structure was created, I uploaded files to the Resources folder by selecting the Upload icon.
Now that we have created the share and added a file, we can connect our Azure virtual machines to the shared folder.
I have two virtual machines that will connect to our share, CanITProFile and CanITprosmb.

The procedure for both virtual machines are the same. Since the first step requires a PowerShell command, open PowerShell or PowerShell ISE with administrative privilege.
I always want be connected to the shared storage drive, even after a reboot, so I must first persist my credentials on each machine. To do this, enter:
cmdkey /add:<storage-account-name>.file.core.windows.net /user:<storage-account-name> /pass:<storage-account-key>
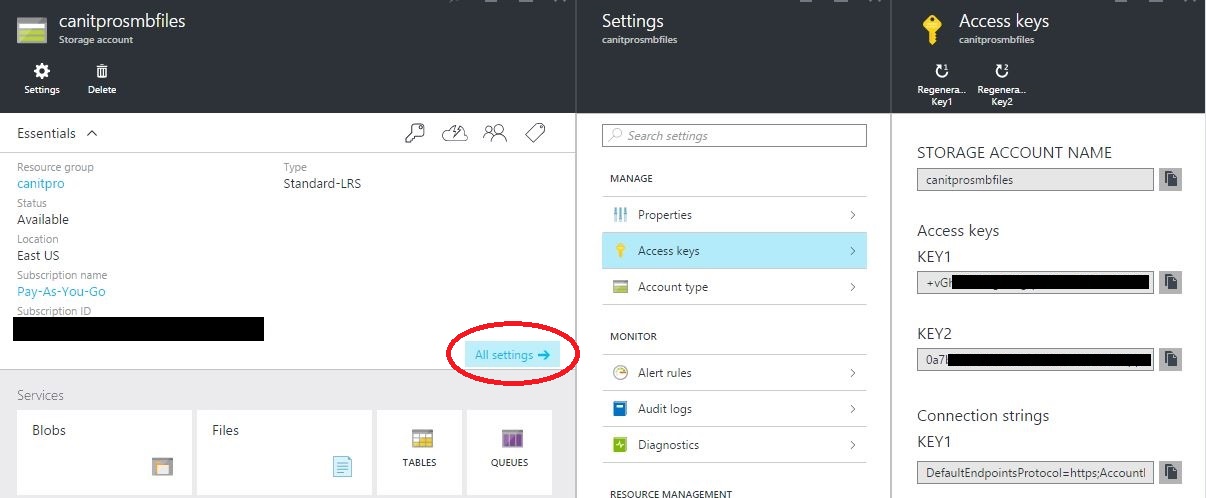
You will need to replace <storage-account-name> with your storage account name and <storage-account-key> with the access key. The storage account name is the name you assigned when you created the storage account. The storage account keys can be located by clicking All Settings on the storage account page, then Access Keys. Your storage account name will also be listed here.
Your line will look similar to cmdkey /add:canitprosmbfiles.file.core.windows.net /user:canitprosmbfiles /pass:<access-key> .

If the following "CMDKEY: Credential added successfully" is returned, you can proceed to the next step. If not, there is an error in your code; to find it, double check your syntax.
Next we are going to use the familiar Net Use command. The syntax will be as follows: net use <drive-letter>: \\<storage-account-name>.file.core.windows.net\<share-name> . You will replace the <storage-account-name> with the name of your storage account. The share name is the name you assigned when you created the storage account.
For our example the syntax is net use x: \\canitprosmbfiles.file.core.windows.net\canitproshare.

If the net use is completed successfully, the following line is returned "The command completed successfully", if not ,double check your command syntax for an error.
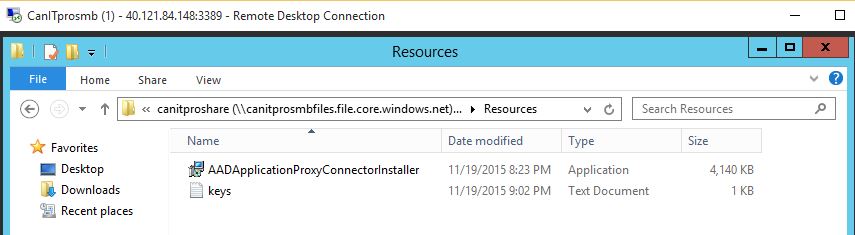
Your Azure SMB file share is now mounted in your Azure virtual machine and can be treated as any other shared folder.
Now perform the same procedure on any additional Azure virtual machines that need to access the share.
SMB file shares provide an easy way to share data, tools, logs, and diagnostic with your Azure virtual machines and your on-premise systems. If you have been waiting for these shares to become generally available to build your solutions, you can now do so with confidence and ease.