Step-By-Step: Shutting Down Azure VMs without Scripting
One of the most common questions I have from Microsoft Partners who are starting to explore Azure is how to automatically shut down their virtual machines. As we know, Azure is consumption-based, and for test and dev, or other applications for which the virtual machines are not needed for long periods of time, we can save money by shutting them down. Microsoft has made this process very easy without scripting. After reading this step-by-step you will have ALL your virtual machines shutting down automatically on your schedule, saving you money or IUR credits. Let’s get started!
1. Assigning co-administrator privilege to an Azure Active Directory user
If you are already a service or co-administrator, you can jump to step 2. Otherwise you will need to up a co-administrator if another Azure Active Directory user is going to “run” this script.
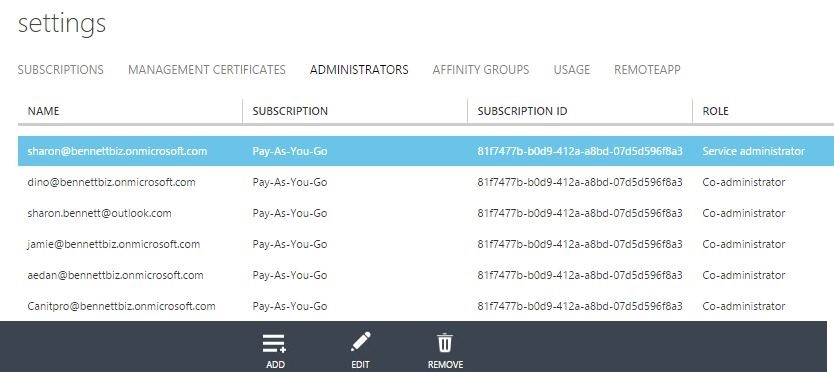
In the SETTINGS section of the Azure Portal select the ADMINISTRATORS tab.
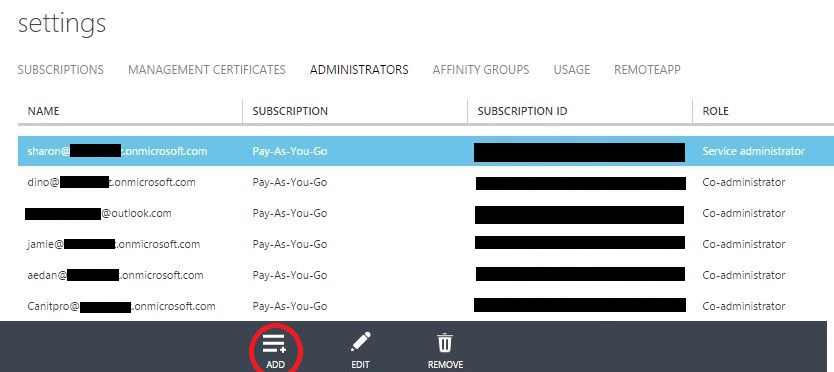
Click ADD user icon located at the bottom of the page.
Enter the email address and check the appropriate subscription.
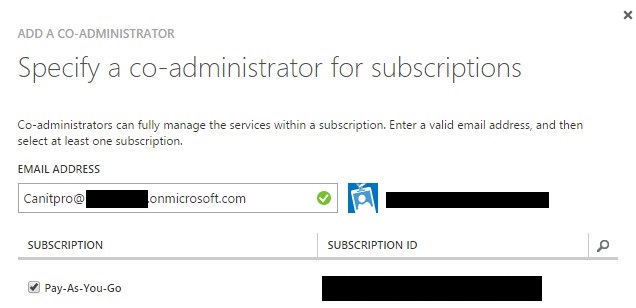
Then click the checkmark at the bottom right of the window.
The account is now a co-administrator account.
2. Creating the Runbook
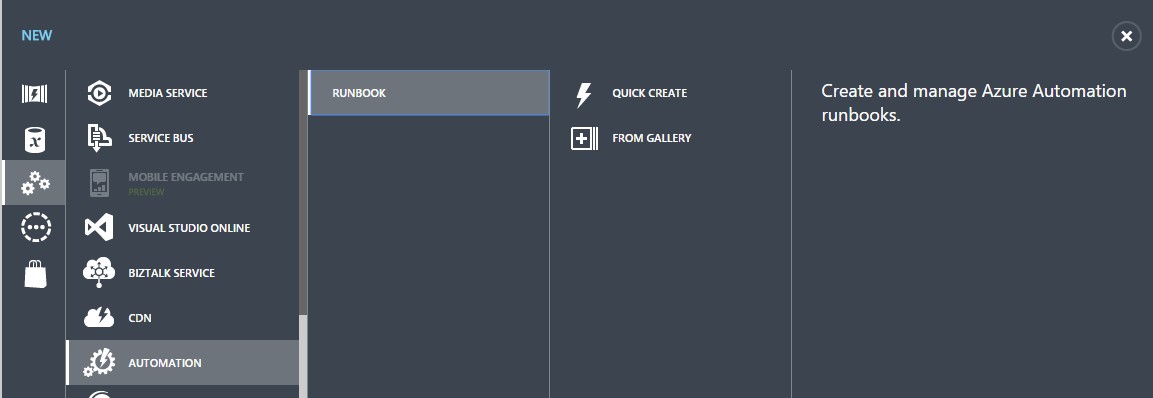
Click on AUTOMATION on the Azure portal then click NEW, then APP SERVICE (if you are not already there), AUTOMATION, then RUNBOOK, and finally FROM GALLERY.
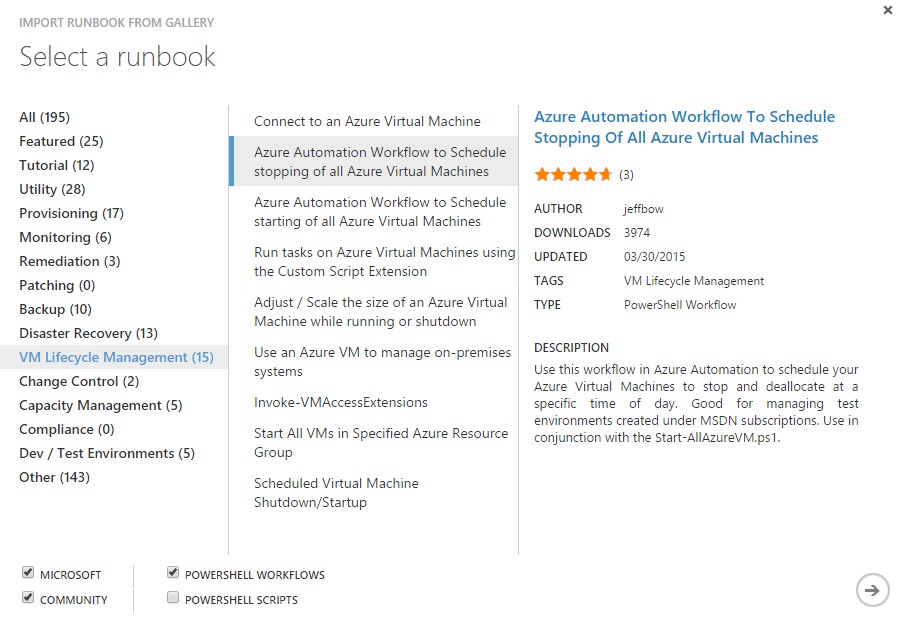
You will notice that within Azure there are almost 200 pre-configured runbooks to choose from. We are looking for the runbook that will stop ALL virtual machines. This runbook can be found in VM Lifecycle Management, and is called "Azure Automation Workflow to Schedule stopping of all Azure Virtual Machines".
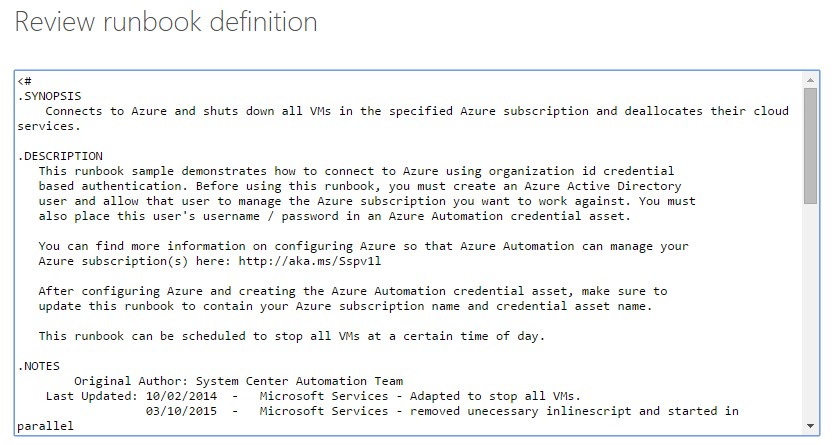
Next you will be presented with the Runbook Definition
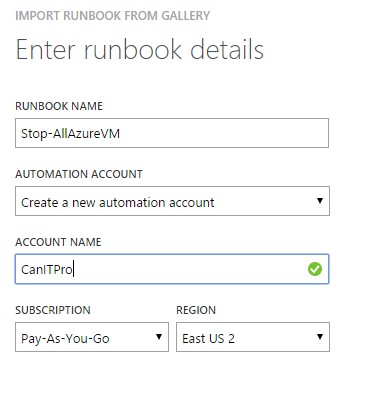
Proceed to the next page, "Importing the Runbook". Give the runbook an appropriate name, if this is your first automation account, then from the drop-down, click “create a new automation account”. If you already have an automation account, you can use it. For our demo, I’ll be creating a new account.
The CanITPro account was added to the Automation module.
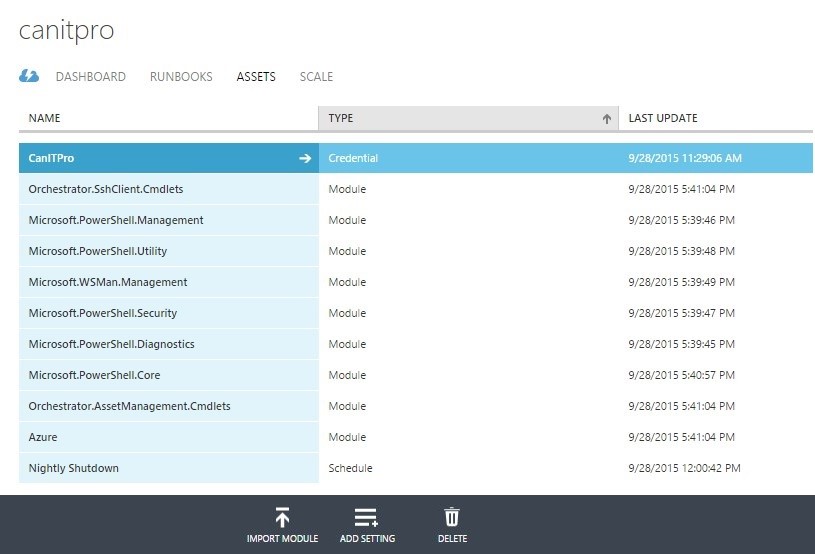
3. Adding the account to the RunBook Assets
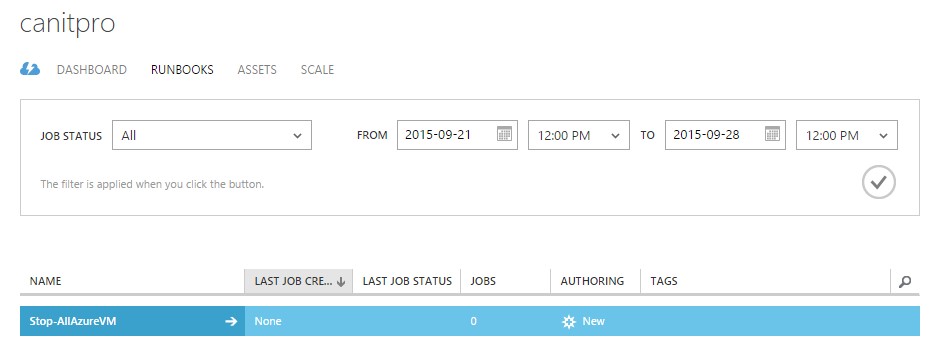
We now need to add the new account, in this case the CanITPro account, to the ASSETS list.
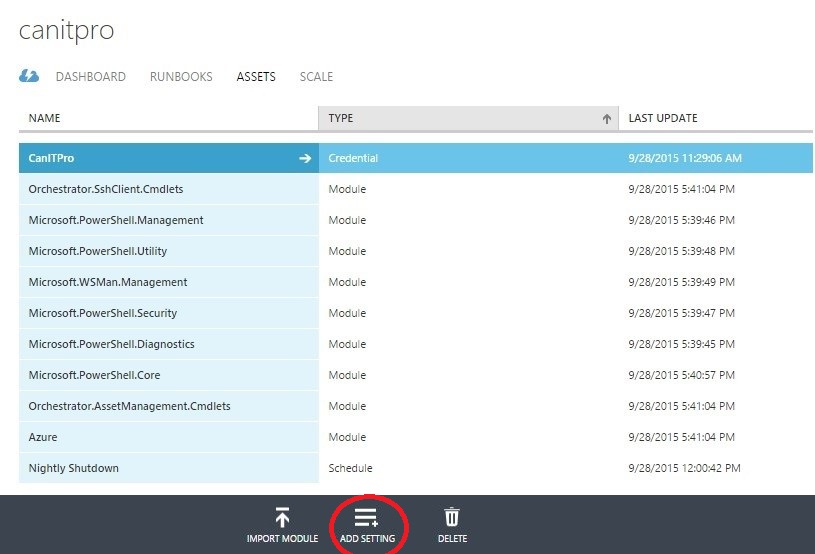
Click ADD SETTING, located at the bottom of the page.
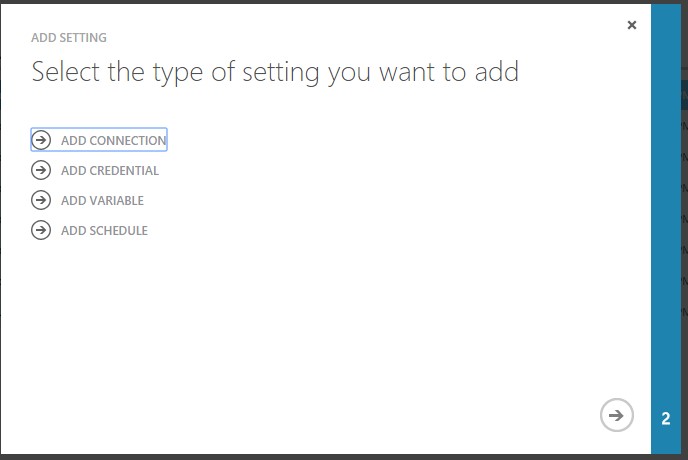
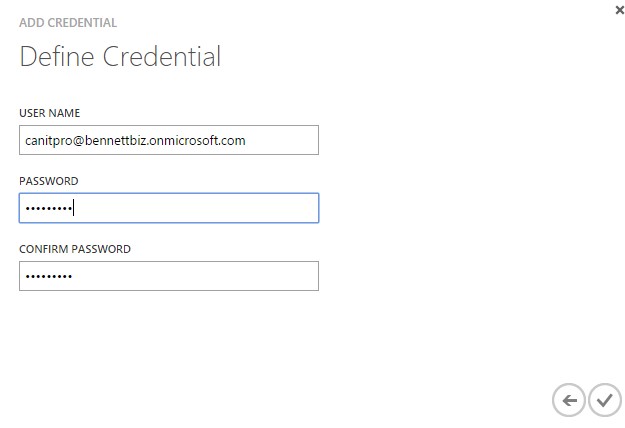
Then select ADD CREDENTIAL.
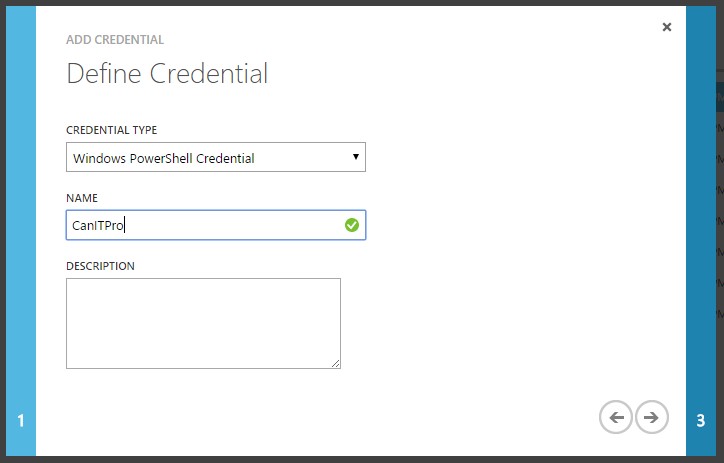
Now we have to define the credential. We are going to choose Windows PowerShell Credential as this is the account that will have rights to run the runbook. Now, provide a name and description if desired.
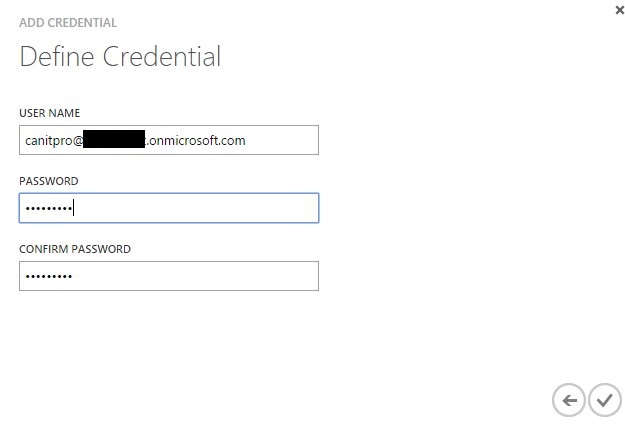
Next we have to add the account which has the rights to execute the runbook. This is why you need either a Service or Co-Administrator account from step 1.
The CanITPro asset has now been added.
4. Editing the Runbook
Now that the asset has been added, we can modify the runbook and add the asset we just created.
We need to access the runbook to finish up. Click on the RUNBOOKS tab in AUTOMATION, then select the Runbook we imported in step 2.
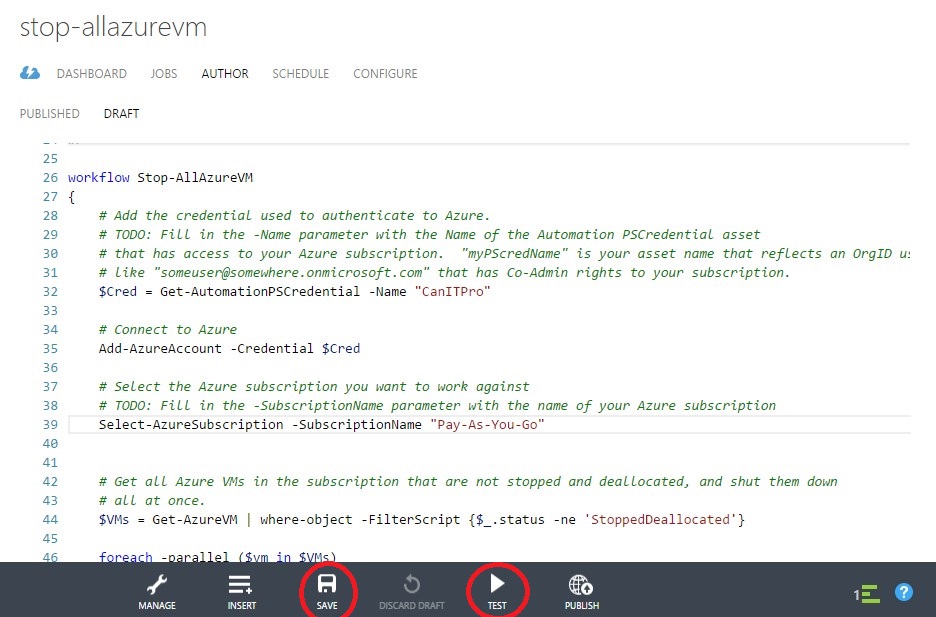
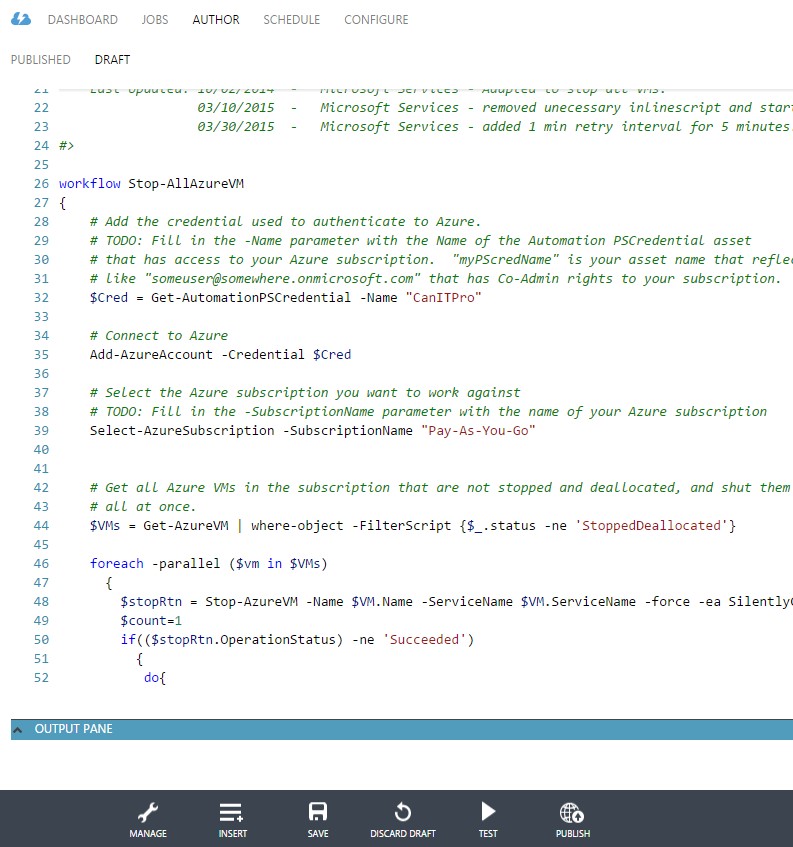
Now we need to edit the runbook. Select the AUTHOR tab.
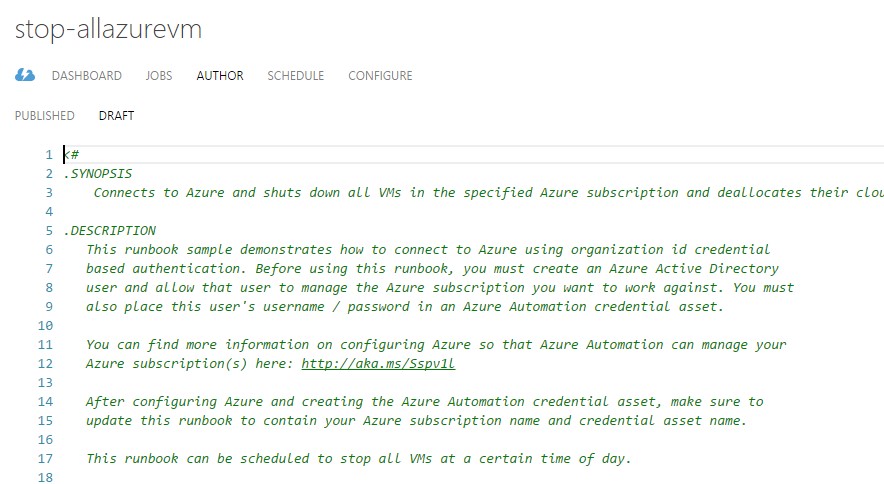
The two lines that need to be edited are $Cred = Get-AutomationPSCredential –Name “myPScredName” and Select-AzureSubscription –SubscriptionName “Some Subscription Name”
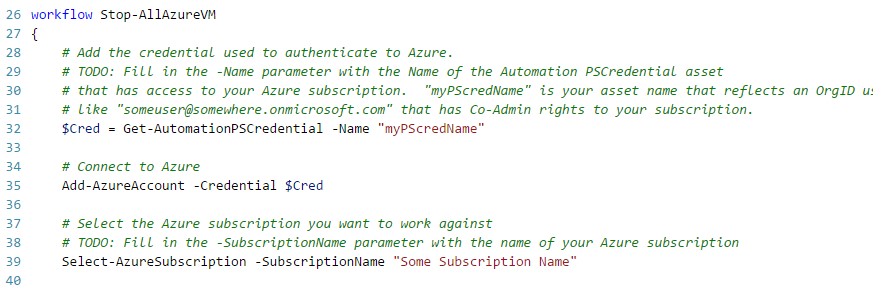
First change the “myPScredName” to the name of the asset you created in Step 3. For this demo the asset is called “CanITPro".
Next change the “Some Subscription Name” to the name of your Azure subscription. You can find this in the SUBSCRIPTIONS tab under SETTINGS, if you are unsure of the subscription name.

For this example the subscription is named “Pay-As-You-Go” .
Be sure to click SAVE at the bottom of the screen.
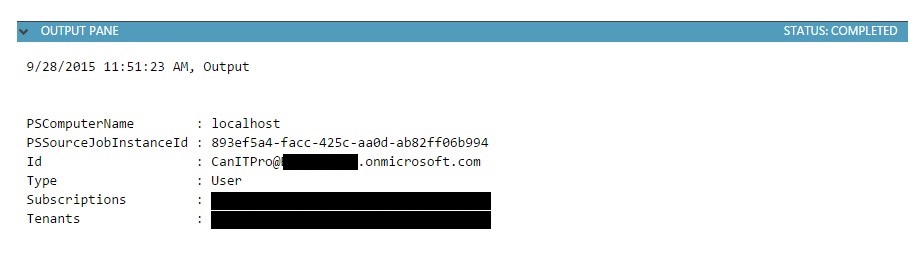
After saving the script, I recommend you test it to be sure it is running correctly. To do this, click the TEST icon at the bottom of the screen to be sure the script runs without errors. Be patient, this may take a few moments to run. Once the test is completed, you should have a successful output similar to the following screen shot.
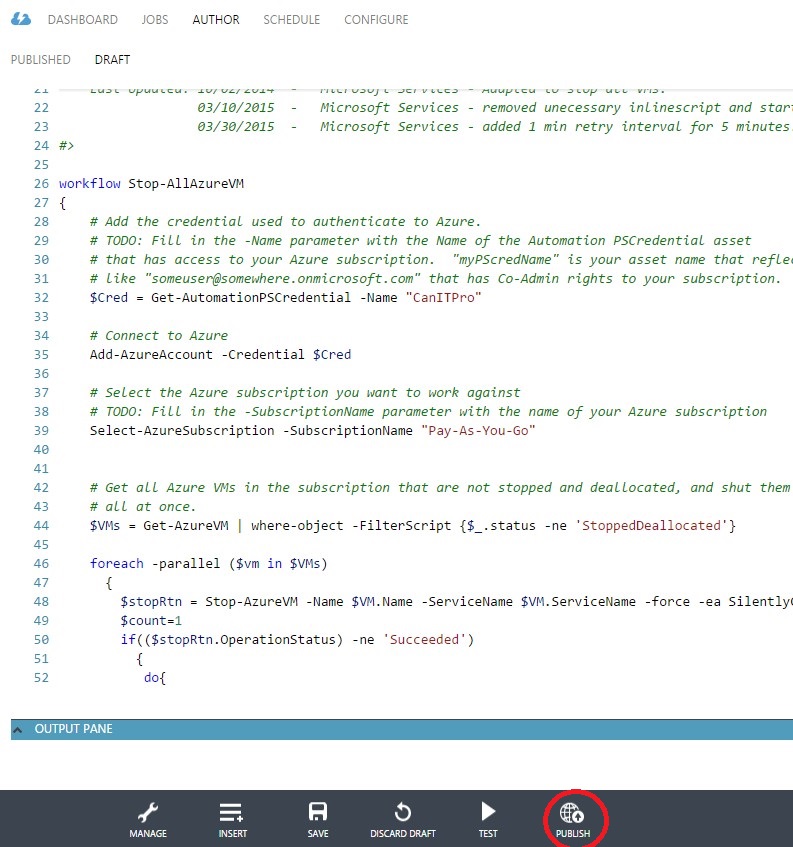
5. Publishing
Now that we now know our Runbook will run correctly, we can publish the runbook. To do this, simply click PUBLISH at the bottom of the screen.
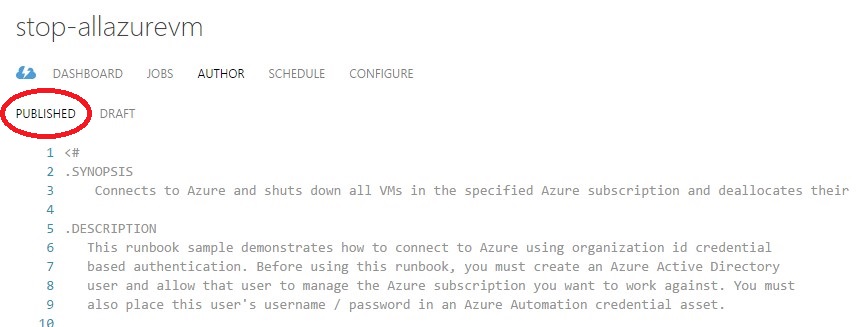
Once published, the PUBLISH tab will automatically be opened.
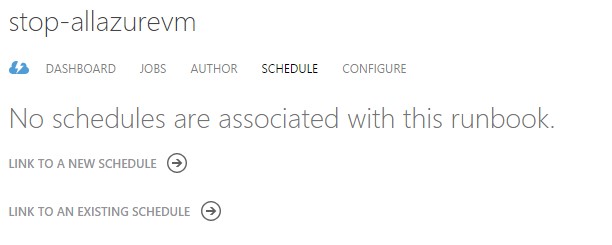
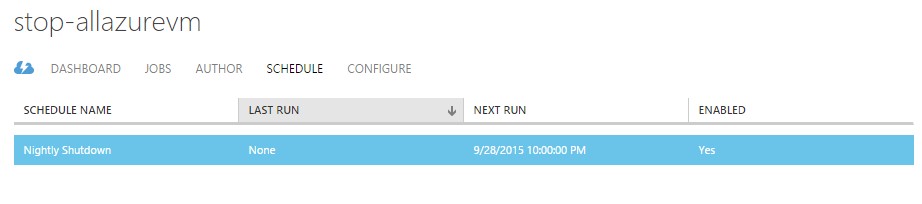
6. Set the schedule
Our last step is to assign a schedule to the runbook.
Click the SCHEDULE tab, then LINK TO A NEW SCHEDULE.
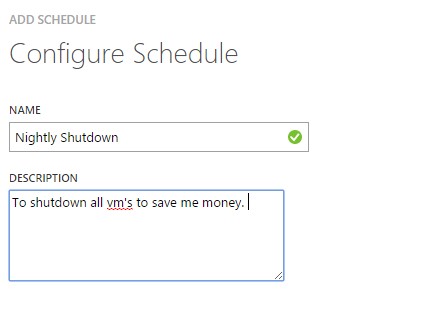
Name your schedule and add a description if desired.
We can now configure the schedule. For this example, we are going to shutdown all virtual machines at 10 pm daily.
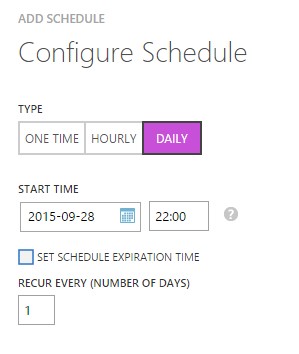
Now all of the virtual machines will shut down automatically to your desired schedule.
This seems like a lot of work, but really it only takes a few minutes to setup and will save you on your consumption costs. This would be a great solution for your test and dev environments, or even for clients who have 9-5 only businesses. I recommend exploring the various Runbooks that are already built for you to help you manage your Azure environment.