Step-By-Step: How to Clean Install Windows 10
One question that is frequently asked both in person and online as of late is as follows:
“How do I perform a clean install of Windows 10 when upgrading from Windows 7 or Windows 8?”
The video above provides a great overview of the options available for installation, however this Step-By-Step will provide details on two options available.
Prerequisite for all options
Should a upgrade to Windows 10 from an existing installation of Windows 7, Windows 8 or Windows 8.1 be desired, do not under any circumstances format or wipe the drive of said computer beforehand. The existing Windows 7, Windows 8 or Windows 8.1 key owned will not activate a net new install of Windows 10. The only time a valid Windows 10 key is provided is:
- Via a purchased retail copy of Windows 10
- Via an Enterprise key is provided via a Microsoft Service Agreement
- Via an OEM Windows 10 key
- Via a MSDN subscription key
Microsoft has changed the traditional activation process in Windows 10 by storing the license and the ID of the device it is activated on online as a new anti-piracy measure. With that being said, it is still feasible to perform a clean installation of Windows 10. All options start with an in place upgrade of Windows 7, Windows 8 or Windows 8.1. The upgrade can happen one of two ways:
- Start the upgrade process online via the Get Windows 10 app which appears on non-domain joined devices.
NOTE: See knowledge base article KB3081048 should the app not appear
- Download the Windows 10 Media Creation Tool in either its 32 or 64-bit offering
NOTE: Do not boot from the ISO once created. Run the setup.exe file in administrator mode from with in the existing Windows 7, Windows 8 or Windows 8.1 installation
Once the upgrade process has started, the following options are available to perform a clean installation of Windows 10:
Option 1
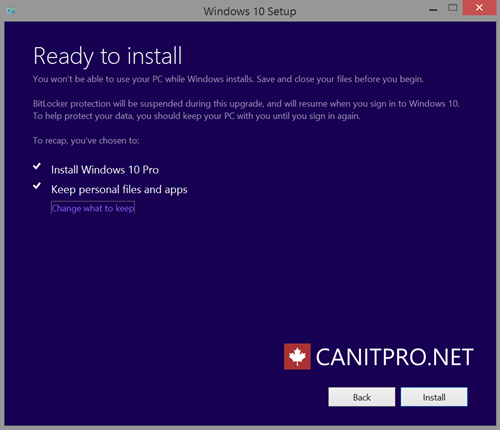
Near the beginning of the installation process, the following screen appears:

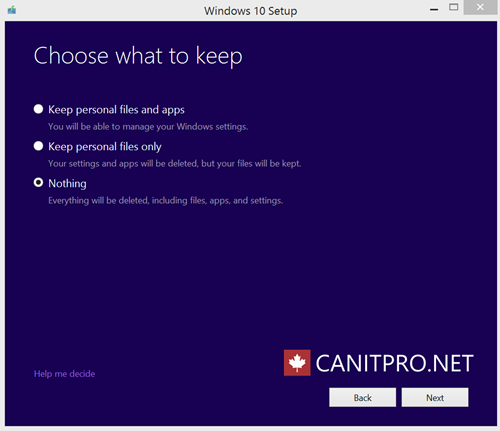
- Select Change what to keep
- Select Nothing and click Next

NOTE: Selecting Nothing will erase everything and in essence perform a clean installation of Windows 10. Be sure to backup all desired data before performing this step
- Continue following the displayed steps to complete the upgrade
Option 2
- Once the upgrade is completed, run Windows Update (Start > Settings > Update & Security > Windows Update) to ensure the installation is up to date
- Once all updates are completed, navigate to Start > Settings > Update & Security > Recovery
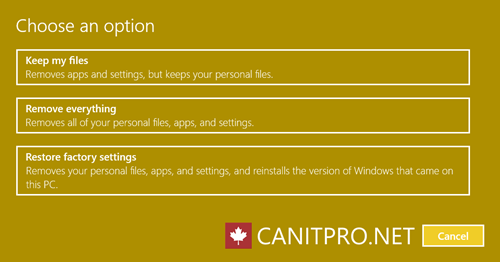
- Under Reset this PC, click Get started
- Select Restore factory settings

NOTE: Selecting Restore factory settings will erase everything and in essence perform a clean installation of Windows 10. Be sure to backup all desired data before performing this step
Should both option 1 or 2 not be desired, a third and much more lengthy option is available. Once the Windows 10 upgrade is completed and is attached to a Microsoft Account (Live ID), reboot the device and boot from the ISO (USB or DVD) to reinstall Windows 10. Remember the Windows 10 license and the ID of the device is stored online attached to the Microsoft Account (Live ID) used to upgrade the Windows 7, Windows 8 or Windows 8.1 device and will be required to re-authenticate once the Windows 10 installation is completed.