Step-By-Step: Populating machines in Microsoft Operations Management Suite
Hello Folks,
Last week I wrote about Microsoft Operations Management Suite. But it was just how to get started with setting up your OMS Workspace. This week we’ll look at connecting Servers to our workspace and start collecting data for analysis.
But before we go there. Lets address one thing. “Why should you try or use Microsoft Operations Management Suite?” Monitoring Servers in different locations, some in Cloud services, other on-premises, domain members, non-domain members…. It can be challenging. OMS gives you an easy way to set up, and connects to your on-premises datacenter or in cloud machines to an integrated console that provides you with instant access to your critical information.
From there you can Collect, analyze, and search millions of records across all your workloads and servers—no matter where they are. Plus, you can stop trying to integrate multiple tools. You can unify your management on a single solution, providing info at your fingertips and giving your have real insights in just hours, giving you faster time to value.
More knowledge, less work, less infrastructure to support.... sound like a win win to me.
Let’s get started.
Connecting servers to our OMS workspace
if you’ve looked at Operational insight before, you’re already ahead of the game since a lot of this will be VERY familiar.
1- I browse to https://canitpro-oms.portal.mms.microsoft.com/ where canitpro-oms the workspace I created. (it’s a different one than the one I created last week. I will use this one in conjunction with all my VMs in Azure to explore all the features\benefits over multiple weeks)
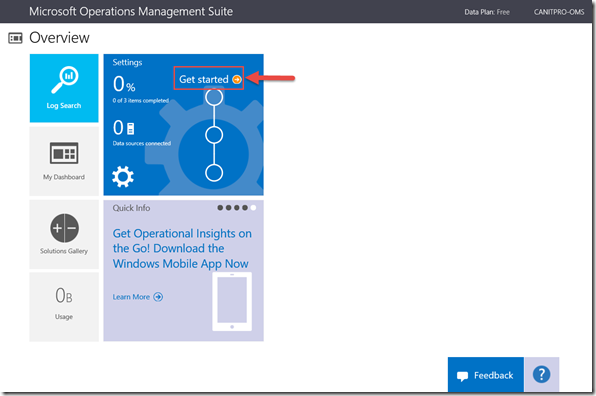
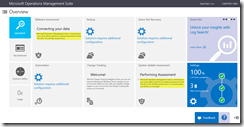
Once authenticated you will be presented with the management portal Overview Page
2- Click “Get Started”
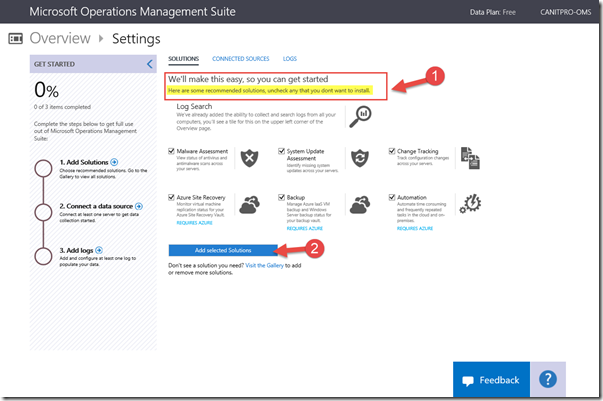
3- We will start by adding “Solutions” to our environment. in our case we selected all the default ones. I encourage you to visit the gallery and see what other sulotions your could take advantage of.
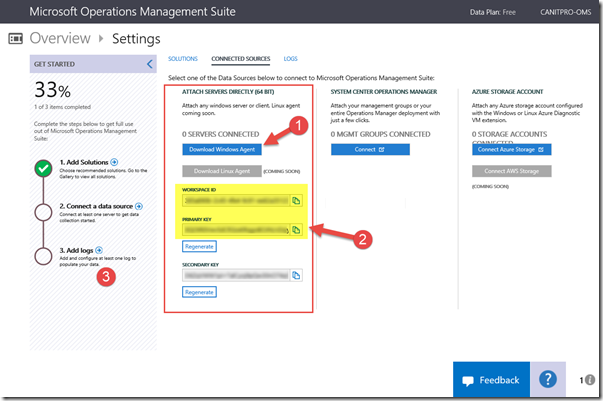
4- Once our solutions have been selected, we must connect machines to our workspace to start collecting the telemetry and start analyzing the health of our environment. Today I will use the Agent to install directly on my VMs. But I could also connect to an existing SCOM environment or directly to a Azure Storage Account where diagnostinc info is being stored ( we’ll cover those in weeks to come)
The Workspace ID and keys on this page allow machines to connect to your OMS workspace
Install the Agent
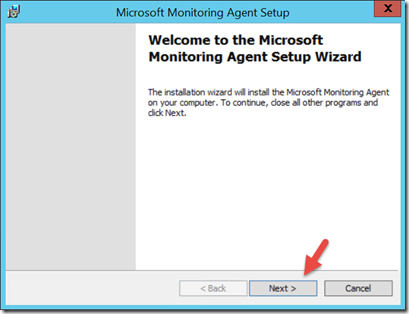
Once the client is downloaded you can install it using the GUI
1- Start MMASetup-AMD64.EXE
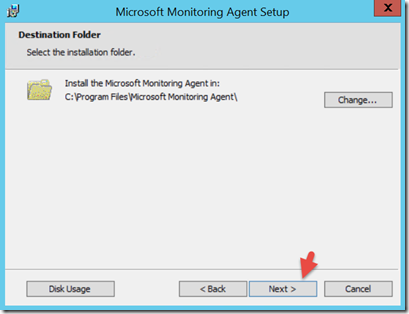
2- accept the Software License Terms by clicking “I Agree” and on the next page select a location for the agent.
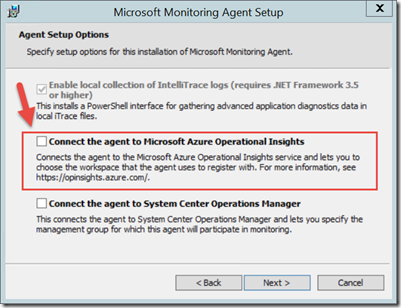
3- Make sure to select “Connect the agent to Microsoft Azure Operational Insights” (yes I know… we will update the name)
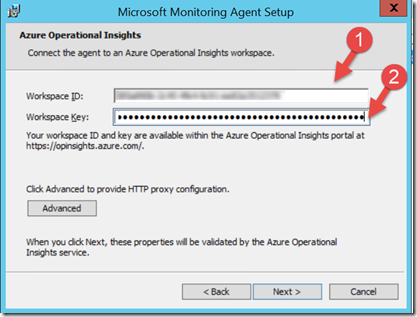
4- enter your Workspace ID and selected Key in the appropriate fields
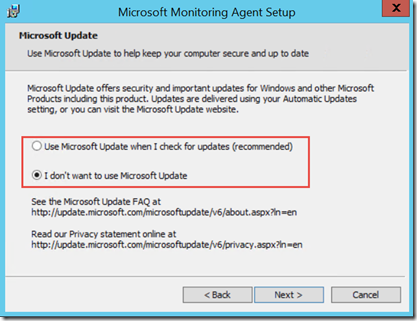
5- Decide if you want the agent to update using Microsoft Update ( I selected it)
and complete the installation.
You can also install agent using the command line
MMASetup-AMD64.exe /C:"setup.exe /qn ADD_OPINSIGHTS_WORKSPACE=1 OPINSIGHTS_WORKSPACE_ID=<your workspace id> OPINSIGHTS_WORKSPACE_KEY=<your workspace key> AcceptEndUserLicenseAgreement=1"
Once all your machines are connected the process will start and all the data will be uploaded to your workspace to be analyzed and reported on. This can take a while, so I will stop here and I will explore the other functionalities in upcoming posts.
Until then,
Cheers!
