Step-by-Step: Assigning a Static IP address to a VM in the new Azure Management Portal
Hello Folks,
I was discussing Virtual Networking with an attendee at an event last weekend and we started talking about static IP addresses in your own virtual Network. I’ve covered this subject before:
But with enhancements in the new Management Portal it’s so much simpler to achieve. Of course I still like the PowerShell method but it’s nice to know I can use which ever method I prefer to achieve my goal. Before we start I highly recommend checking out the following sessions to help you better understand and build your foundational cloud skills or to prepare you to take Exam 70-533: Implementing Microsoft Azure Infrastructure Solutions for Microsoft Azure Specialist Certification.
- Azure IaaS for IT Pros MVA modules
Now. Let’s look at how we can achieve the assignment of a static IP address to a VM in your Virtual Network using the new management portal.
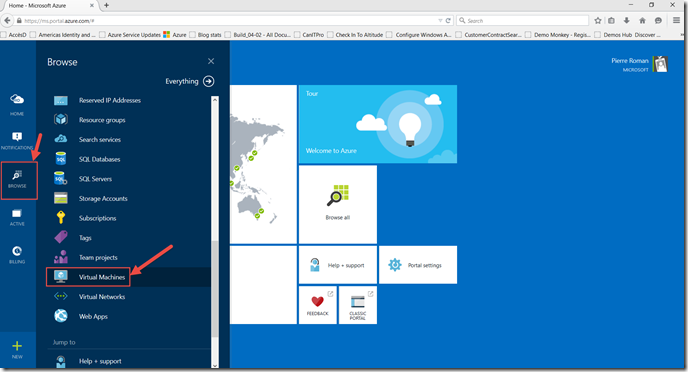
1- Browse to https://portal.azure.com
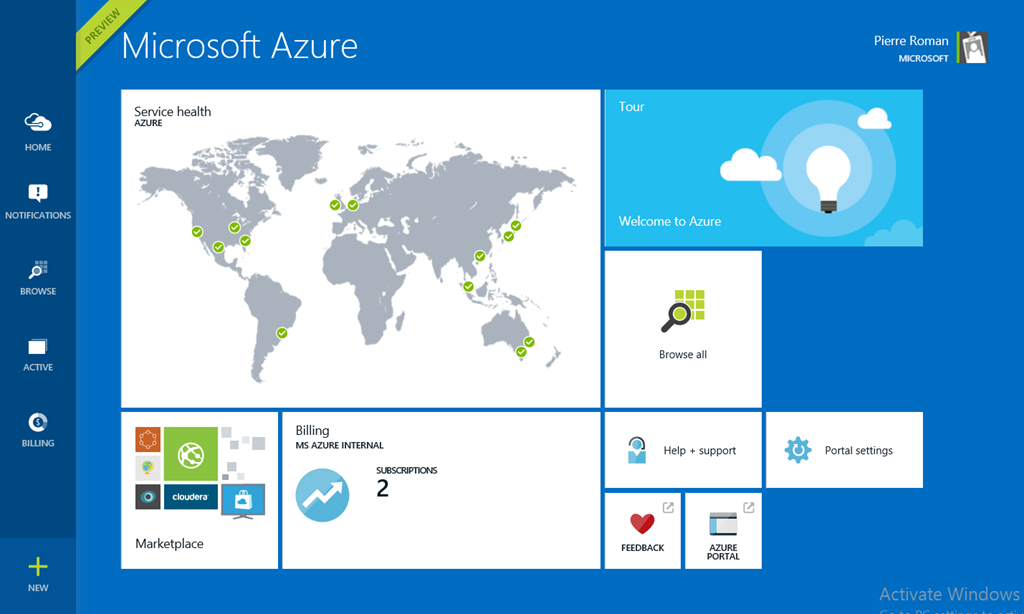
2- click on Browse, scroll down to Virtual Machines,
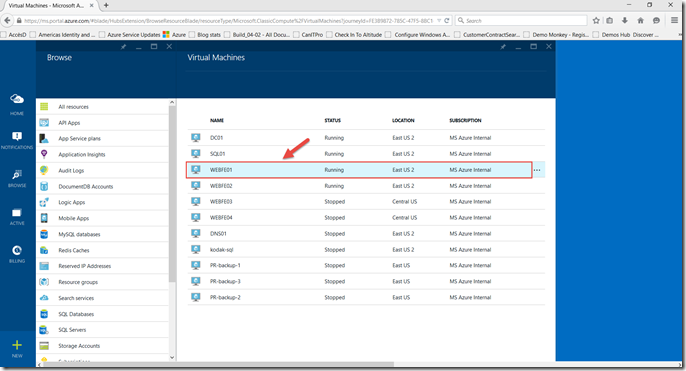
3- select the VM you want to assign the IP address to. In my case I will select WEBFE01
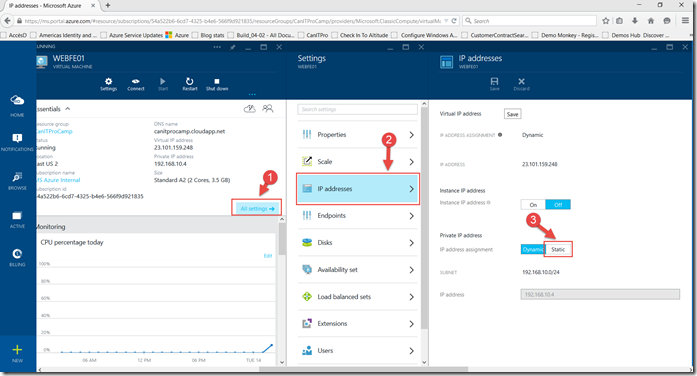
4- in the WEBFE01 info blade click on All Settings. Select IP addresses in the next blade and click on Static in the IP Address blade.
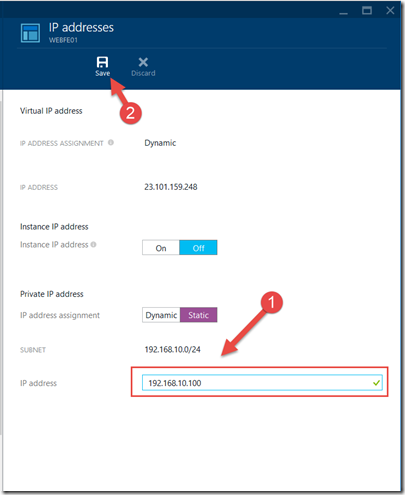
5- Enter in the IP Address field the address you want to assign and click Save to complete the operation.
and confirm your operation
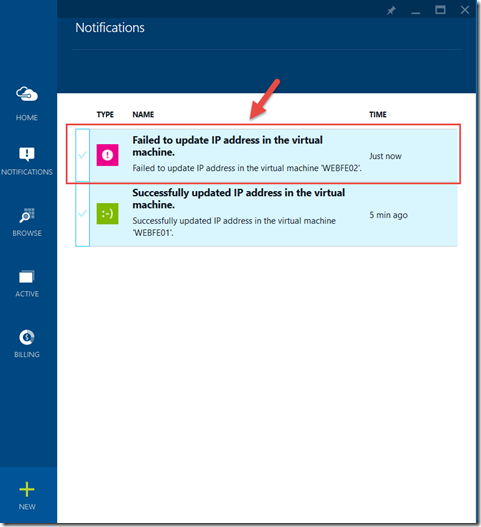
and you’re done. If by accident you happen to try to assign the same address to multiple machines you will see an error in the notification area of the portal.
I hope this helps.
Until next time. Keep learning…
Cheers!
