Step-By-Step: Restoring your PC data from Azure
Hello Folks,

My last 2 posts were about backing up your Windows 7, Windows 8 or Windows 8.1 machines to your Microsoft Azure subscriptions and following up on questions that I received regarding that topic. I’m going to close that loop with a look at how you can restore the data from one workstation running Windows 7, Windows 8 or Windows 8.1 machines. You can recover data that was backed up with Microsoft Azure Backup onto any machines running Windows 7, Windows 8 or Windows 8.1 machines that is connected to the Internet. This can be useful for disaster recovery situations where you need to recover data from the original machine can be restored onto a new or different machines. Thus, enabling users to regain access to their data faster.
Before I go on. I must remind you that since you’re reading this, you’re interested in disaster recovery and Business Continuity. So, I suggest the following MVA tracks.
- Microsoft Business Continuity
- Dive Deep into Networking Storage and Disaster Recovery Scenarios
- Hybrid Cloud Workloads: Storage and Backup
Step 1: Install the Microsoft Azure Backup MMC.
For this step, we’re assume that we’re restoring our data on a different PC. If you are restoring on the same machine that the data was backed up from? Move on to the next step.
To install the MMC and register the new PC, you need to download your vault credentials and save it locally because you’ll need it to register your new machine to the backup vault.

Install the backup agent and register your machine
Download the KB3015072 update and install it to get all the capabilities released in the last few months, including:
- KB2989574: Support for data sources more than 850GB
- KB2997692: Long Term Retention and Simplified Signup & Registration
- KB2999951: Support for Windows Server 2008
- KB3015072: Support for Windows 7, Windows 8, Windows 8.1

Follow the wizard to complete the installation and proceed to the registration. The registration is fairly straight forward.
Once you get in the registration wizard. Click the browse button and navigate to the location where you saved your vault credentials.

In the encryption settings, you can enter your own passphrase or click the Generate Passphrase button to generate a 36 characters Passphrase. And select where you want to save the file that will back it up locally. (You may want to save it to a different location than the drive you’re backup up.)

Follow the prompts until the registration is complete.
Step 2: Restore your Data
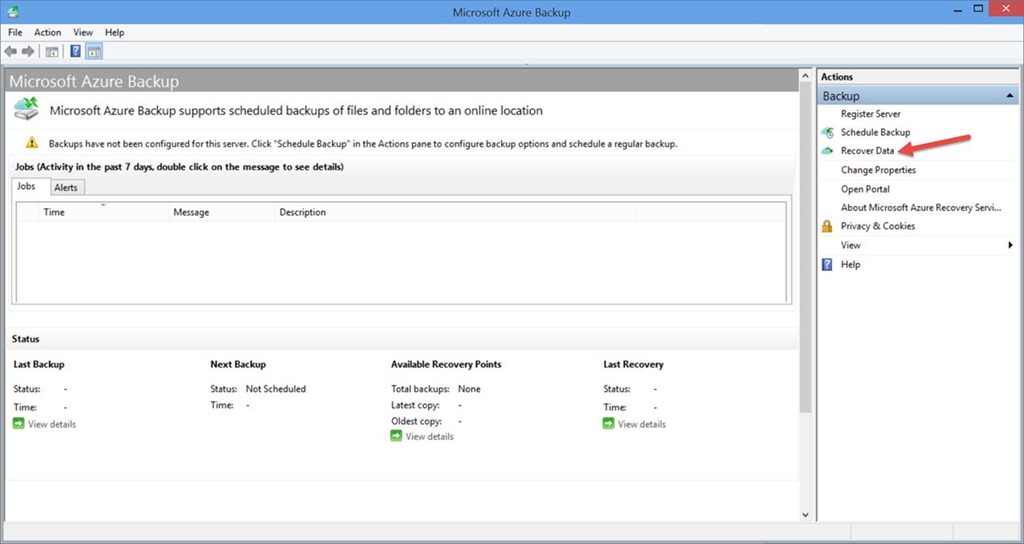
Restoring the data is very straight forward. Even your users could do it…. All you need, once the MMC is installed and the machine registered with your backup vault, is to click the Recover Data in the MMC and follow the wizard.

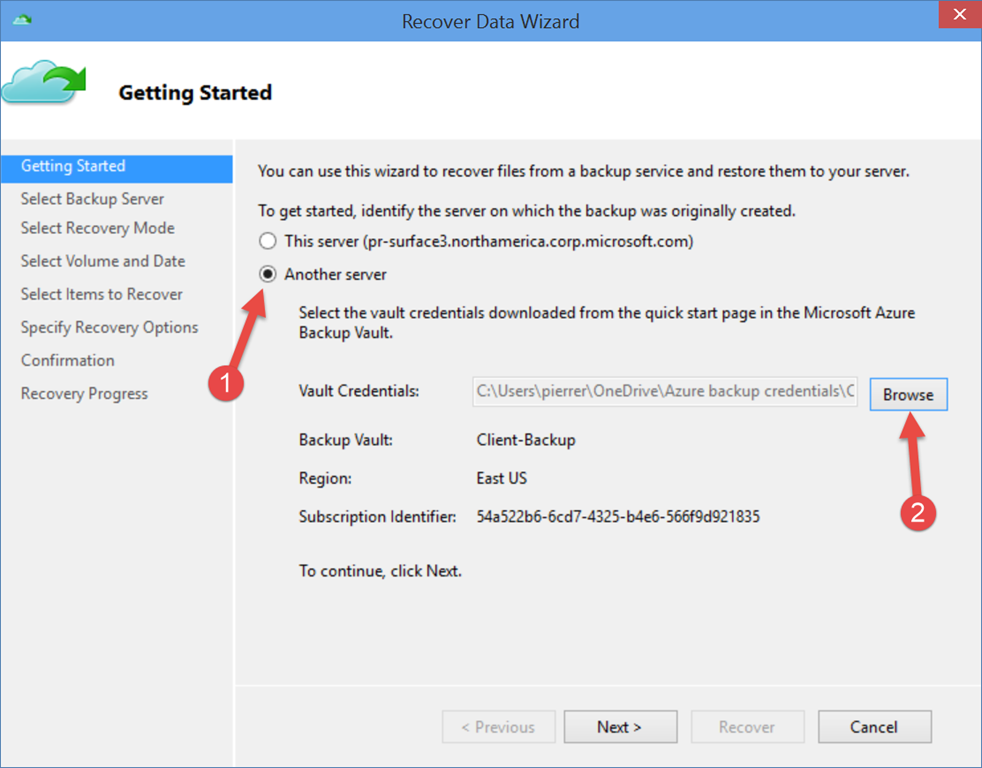
This is where you must decide if you’re restoring data from another machine or data that was backed up on the same machine you’re restoring to. For our example I’m restoring the data on another machine as if the original machine had been destroyed or lost. I selected “Another server” and clicked the browse button to the location of the vault credentials. (Remember we saved those locally when we registered the machine to the Backup Vault)

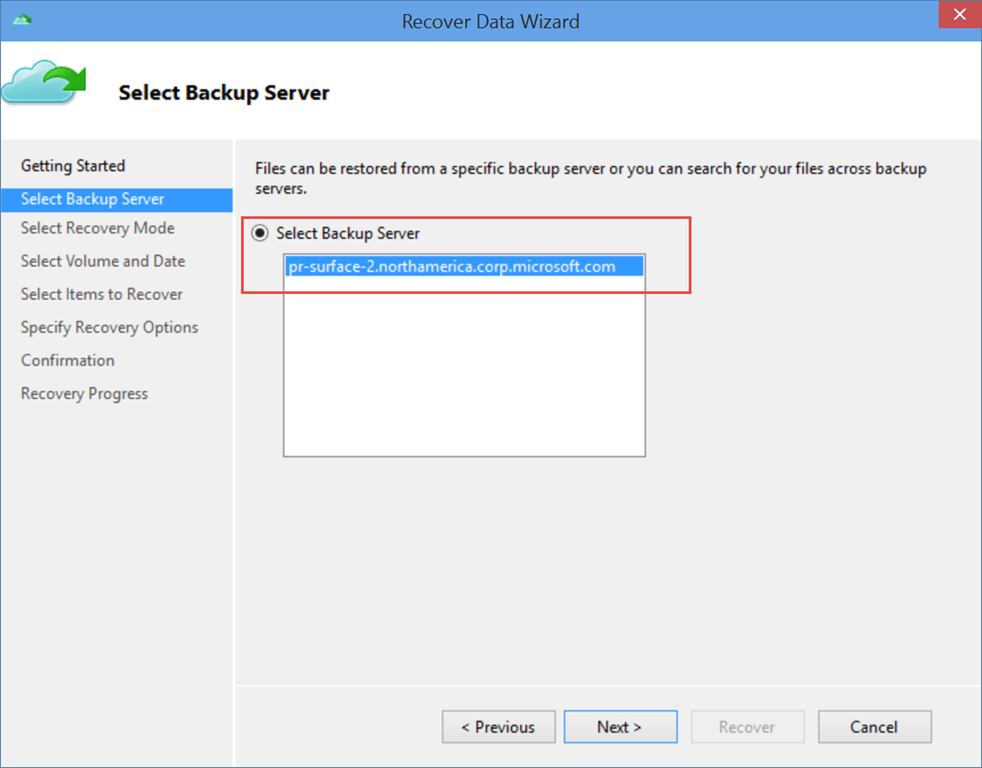
At this point you’ll be presented with a list of server/machines that are registered in this backup vault. Select the appropriate machine you want to restore from, and click next.

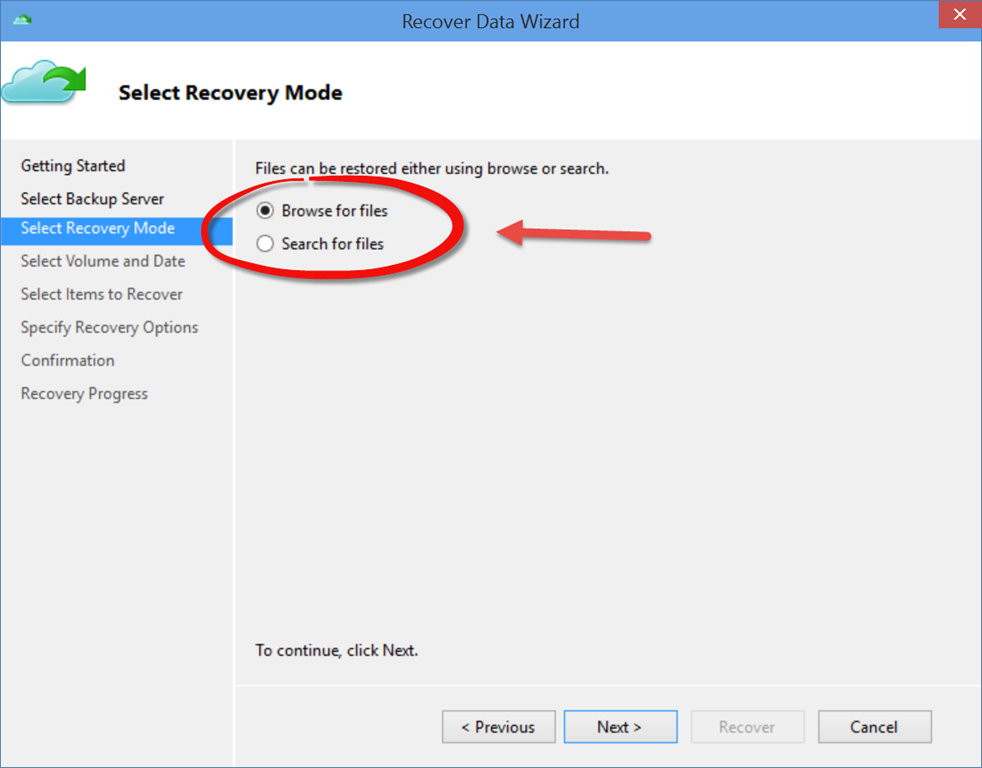
The next page in the wizard will ask you to pick between searching the volume for the file(s) or browsing to the location where the file(s) are stored. In our case, we’ll browse to the location.

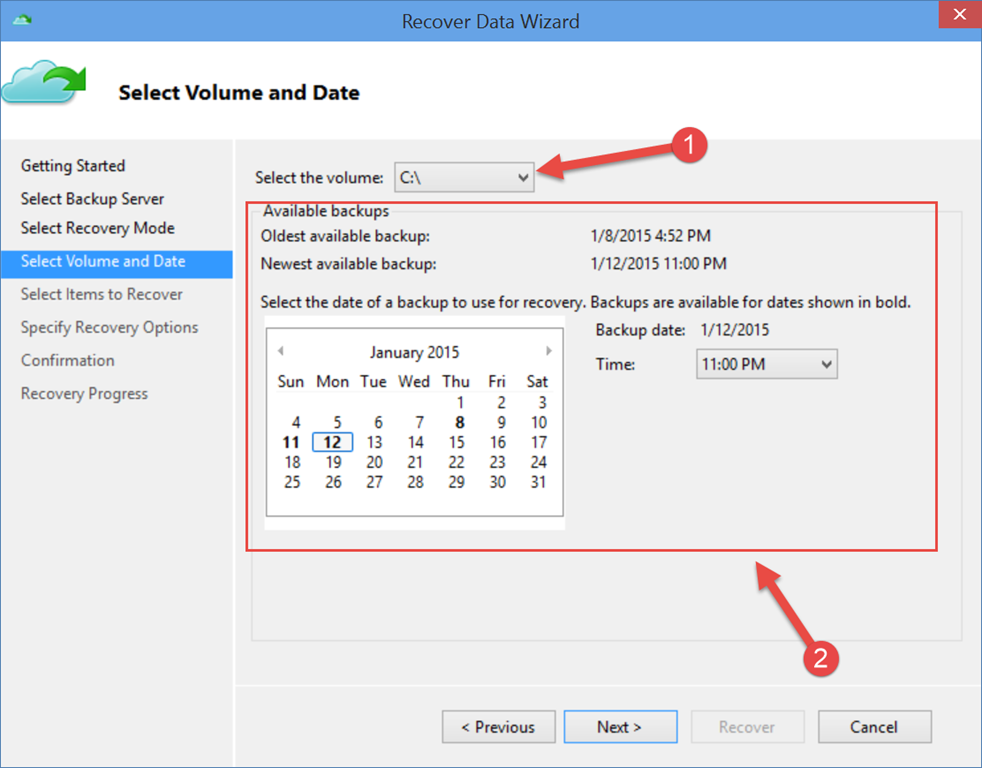
In the next page you need to first select the volume you want to restore from. And once you’ve picked the volume, the wizard will fetch the recovery points for that machine on that specific volume. It will display them in a calendar format. Pick the date, and the time (drop down) and it will load the list of files/directories in that recovery point.

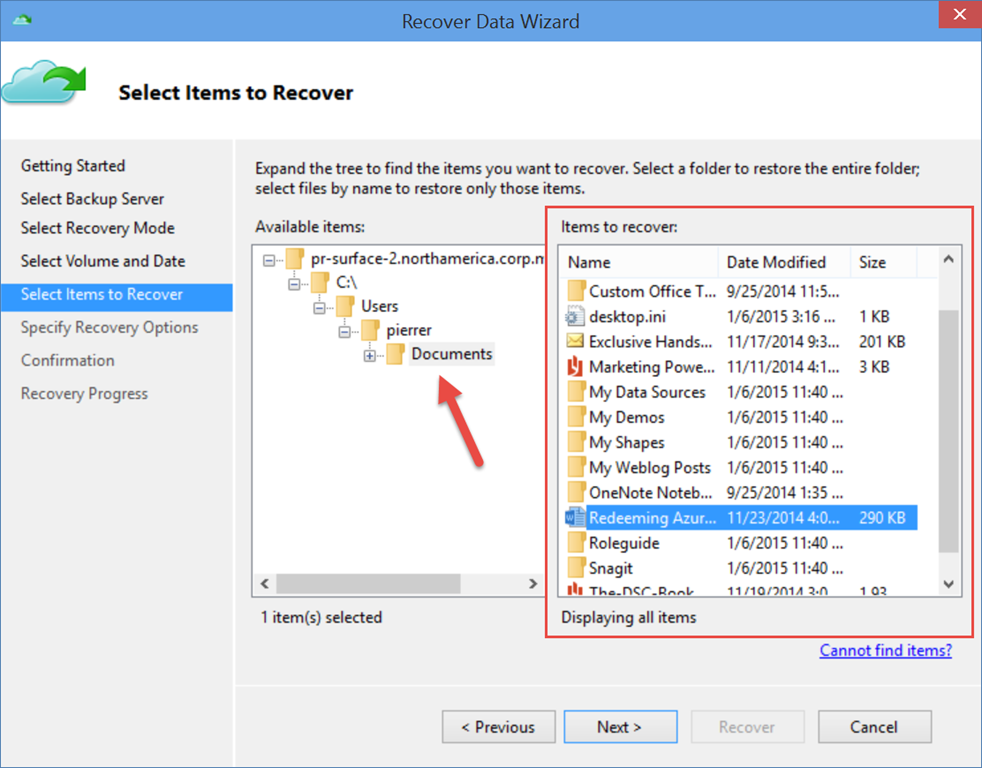
Navigate to where the files are, select the files/directories you want to restore (the Redeeming Azure Monetary Credit.docx) file.

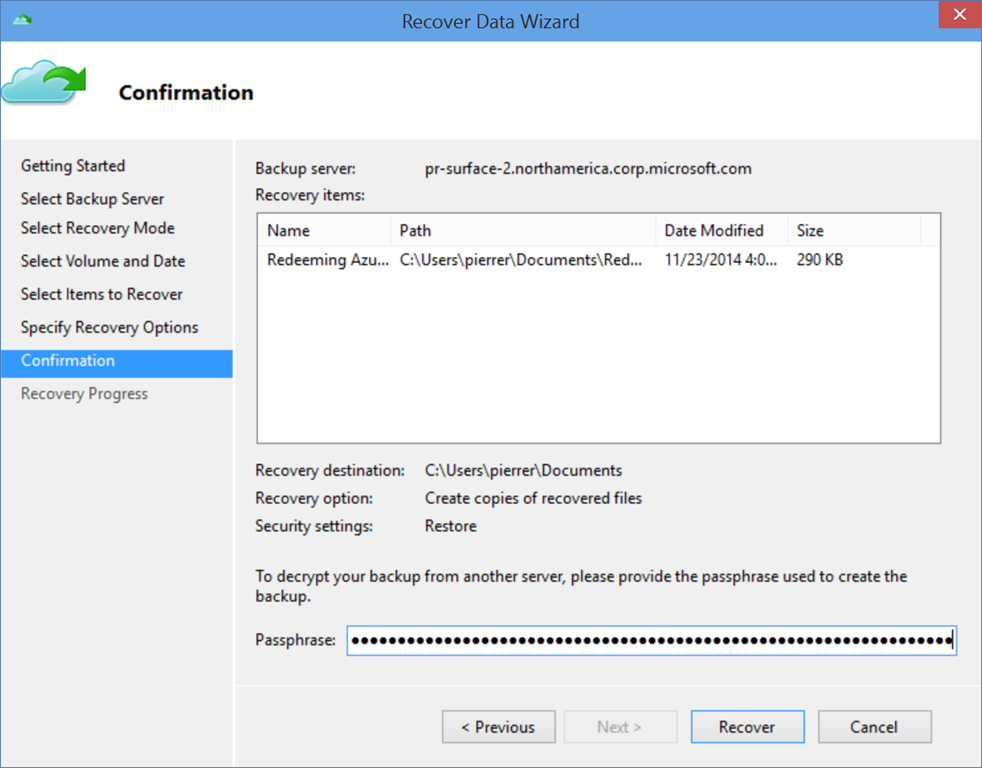
Select the location where you want to save the restored files. And how you want to handle items that are already in the destination location.

Provide the Passphrase for the original backup. (To protect the data)

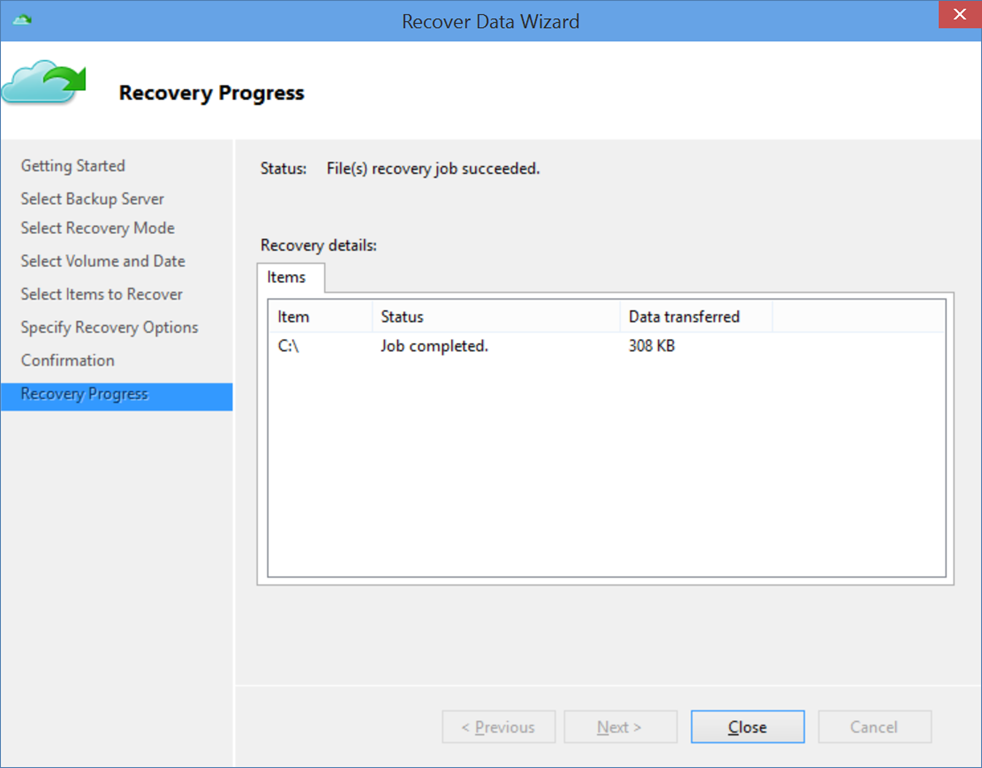
And the recovery process will complete.

Once complete, the files and\or directories will be restored in the location you specified. Notice that the restore process, creates a relative path mirroring the path that was present on the original machine starting with the volume. (In this case C_vol.) in the location you specified.

That’s it. The data is now restored from the original one. You’re now ready to face the any hardship that your machine will endure without worrying about losing your precious data.
Cheers!

Pierre Roman | Technology Evangelist
Twitter | Facebook | LinkedIn