Step-By-Step: Backup your PC data to Azure
Hello Folks,
On December 16, 2014 we announced that you can now backup the data from Windows 7, Windows 8 and Windows 8.1 machines, using Azure Backup. This is extremely useful for any of us who may not touch base in a specific office on a regular basis. I am constantly on the road away from the office and away from the pile of USB drives I use to backup all the data I carry with me.
Let see how we set that up.
Setup the backup Vault
First, in your Azure Subscription, login to the portal and click New in the action bar, than Data Services, Recovery Services, Backup Vault and quick create.

Give your backup vault a name and a location where the backup will be located. I called mine Client-Backup and the region I picked is East US. You can create a specific backup vault for each client machine or backup multiple machine to a single vault. (if you backup multiple machine to a single vault remember that there is a 50 machine limit)
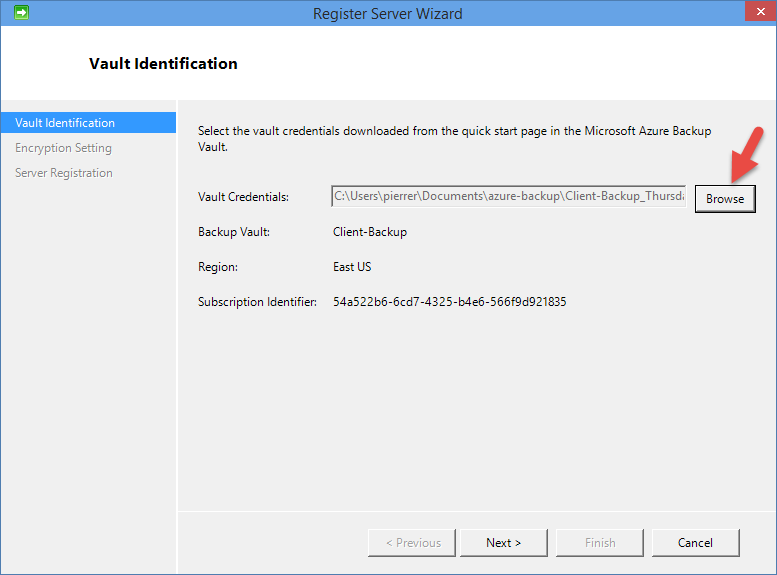
Once the Vault is created, download your vault credentials and save it locally. You’ll need it to register tour machine to the backup vault.

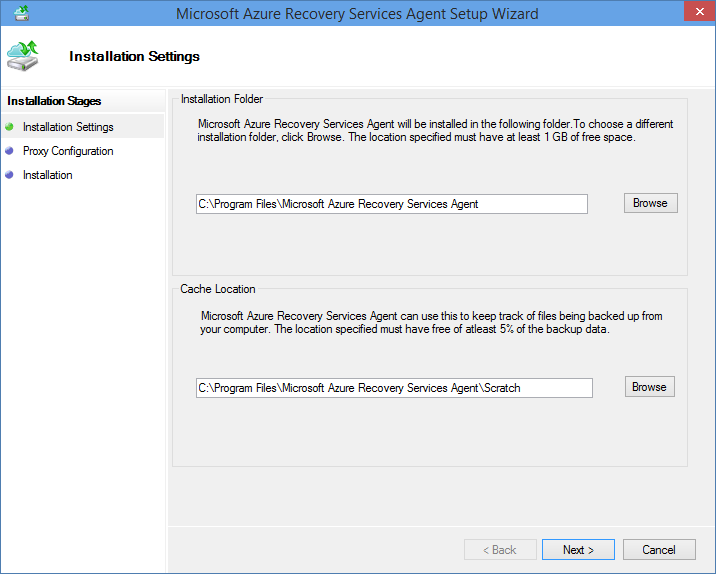
Install the backup agent and register your machine
Second, download the KB3015072 update and install it to get all the capabilities released in the last few months, including:
- KB2989574: Support for data sources more than 850GB
- KB2997692: Long Term Retention and Simplified Signup & Registration
- KB2999951: Support for Windows Server 2008
- KB3015072: Support for Windows 7, Windows 8, Windows 8.1

Follow the wizard to complete the installation and proceed to the registration. The registration is fairly straight forward.
Once you get in the registration wizard. Click the browse button and navigate to the location where you saved your vault credentials .

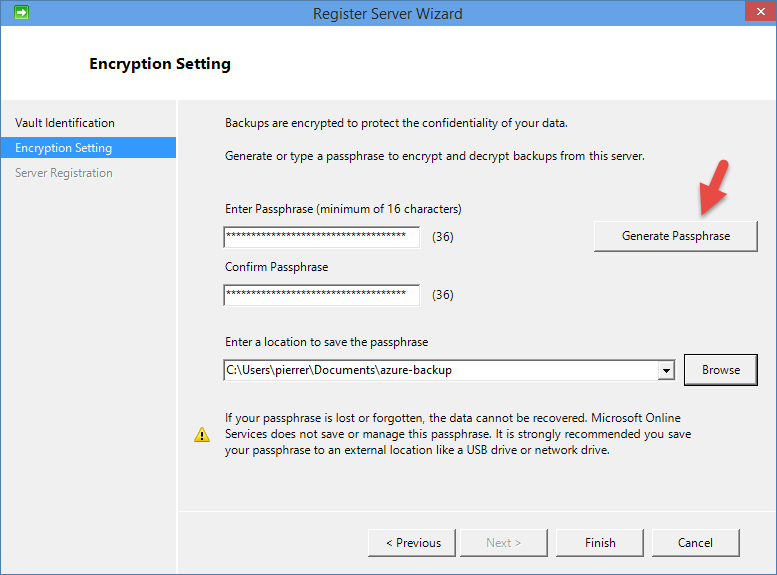
In the encryption settings, you can enter your own passphrase or click the Generate Passphrase button to generate a 36 characters Passphrase. And select where you want to save the file that will back it up locally. (You may want to save it to a different location than the drive you’re backup up.)

follow the prompts until the registration is complete.
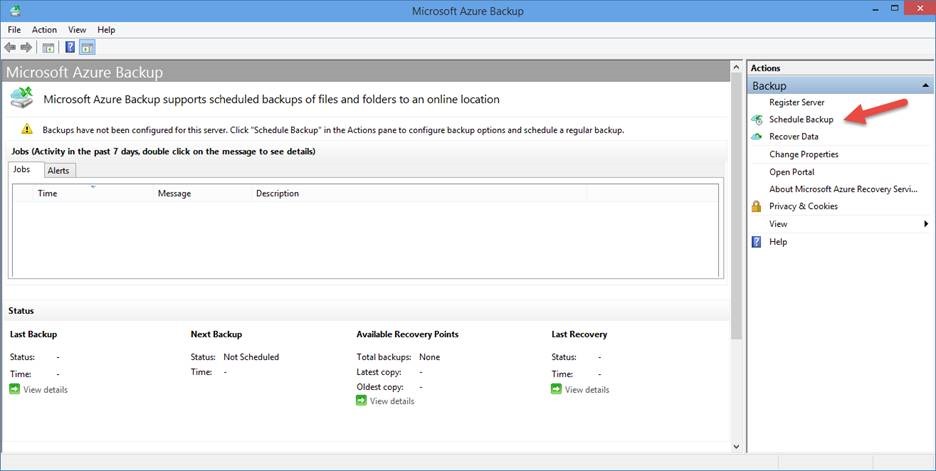
Schedule the backup
The last step is to configure the backup schedule. Search for “Microsoft Azure Backup” and launch the corresponding mmc. It provides the latest information and stats on the backup jobs.

Once the MMC is running, click on Schedule Backup and follow the wizard to select what you want to backup and what frequency you want the backup to run at.

That’s it. The machine is now protected and will on the schedule you created, backup its content to the Azure Backup Vault. Once the initial backup copy is completed, Azure Backup tracks the changes to the backed up files and efficiently transfers only the changed content over HTTPS. Plus Scheduled backups to Azure are intelligently skipped if your laptop is running on battery. Instead, the backup jobs are started as soon as the laptop is plugged back for charging.
Cheers!

Pierre Roman | Technology Evangelist
Twitter | Facebook | LinkedIn