Group Policy: Creating A Standard Local Admin Account
Much has been covered thus far in the Group Policy series:
- How to create a new policy
- How to link a GP to an OU
- How to navigate the GP management GUI
- Additional remediation technics.
This post will detail the setup of a group policy that will create a standard local admin account. The inherent value addresses the support need of a user who is unable to login and/or resolving issues with the domain based login thus utilizing a local admin to troubleshoot. Having a local admin account in a domain based scenario to allow entry level techs a degree of admin control without giving them domain admin permissions is a great enabler to alleviate tasks from senior administrators.
Steps to enable said local admin account are as follows:
Launch Group Policy management
Navigate through the structure to locate the “Computers” OU
Right click Computers and select Create a GPO in this domain, and Link it here…

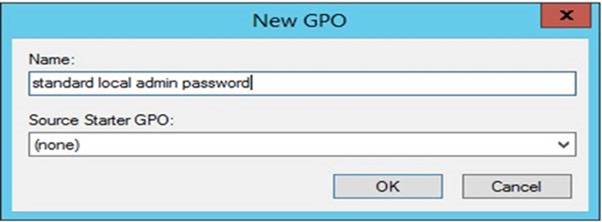
In the new pop-up window give the GP a name (be descriptive – it will make it much easier to find later). You can use a starter GP if you have any configured
Now you have to edit the policy.
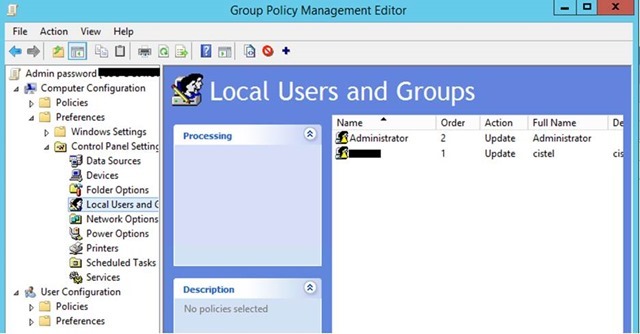
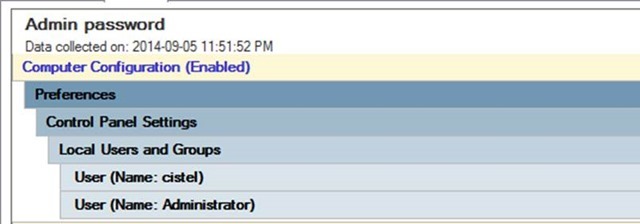
Note: This only applies if you have an existing group policy (skip to step 6 if this is the first policy you create) if you have an existing policy you can use it as a starting place to point you in the right direction. As you can see in the screen shot below which is taken from the “Settings” tab of the GP where we are heading is in “Computer Configuration -> “Preferences” -> “Control Panel Settings” -> “Local Users and Groups”
Right click on the GP and select Edit
Navigate to “Computer Configuration” -> “Control Panel Settings” -> “Local Users and Groups”
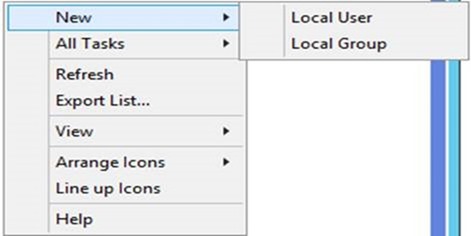
Right click in the Local Users and Groups screen and select “New”-> “Local User”
From here you create the user account just like you would in AD. The interface looks a little different from AD but the options are still similar. The only two new items here is the option to rename the account and that it relates directly to Group Policy
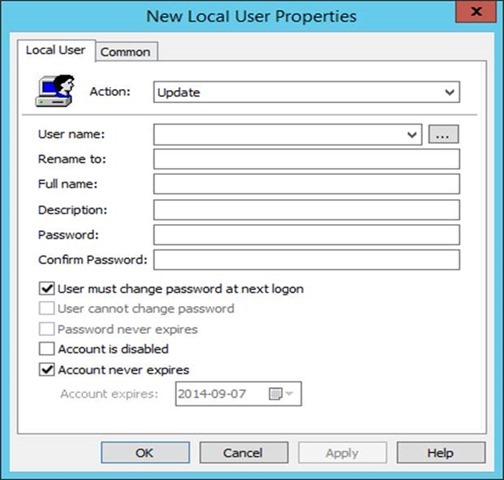
The first line in the above screen shot shows that we are going to “Update” the existing policy. If you click on the drop down you will see that there are 4 options. “Create” and “Delete” are fairly straight forward so I will not explain them. The “Replace” action is more suited to files. Think of this as remove and replace. The “Update” action is used to change the properties. This is what we will do here since the account already exists (in my case – you may most likely want to create one however). Later on (after the policy has been applied) you can change this from a “Create” action to an “Update” action.
Now comes the fun part. Sitting around and waiting for the policy to update. No time for waiting? Log onto the local machine to which you wish to push the policy and open a command prompt. Type the following command: “GPUPDATE /FORCE”
Once completed, a standard local admin account is now successfully created allowing a entry level tech to login to any PC on the domain.
