Migrate a Virtual Machine from On-Premise to Microsoft Azure
Hello Folks,
Today I delivered one the largest “Getting Started with Microsoft Azure” camp to date. Approximately 190 people had registered for it. One question came back several times during the day.
I figured I’d answer it here
“How do I migrate a VM from on premise to Azure?”
The easiest way is to sysprep the machine in your environment and upload the VM to Azure where you will use the uploaded VHD to create a new VM. Remember, the VHDX format is not supported in Microsoft Azure. You need to convert your disk to the VHD if you have a VHDX. todo that you can use Hyper-V Manager or the Convert-VHD cmdlet. A tutorial on this can be found here
Now that we have a VHD, here’s how we put it in Azure.
Upload the VHD to Azure
(in this section I’ll assume that you’ve already created a Storage Account in your Azure Subscription and a container in that storage account)
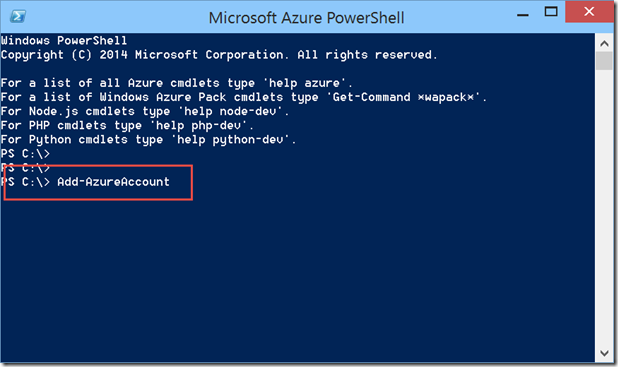
1- Open the Microsoft Azure PowerShell console and type the following command:
Add-AzureAccount
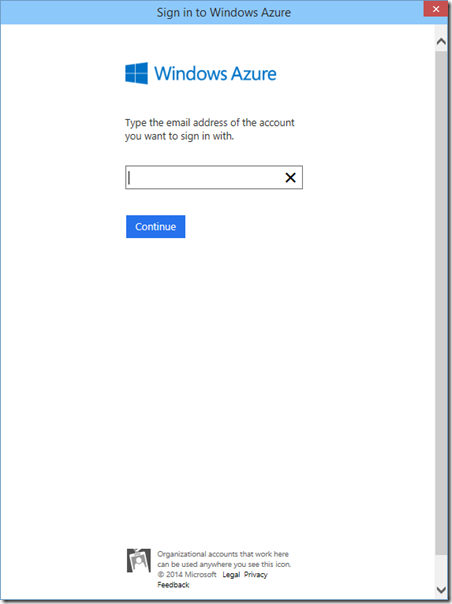
This command will opens a sign-in window so you can authenticate yourself.
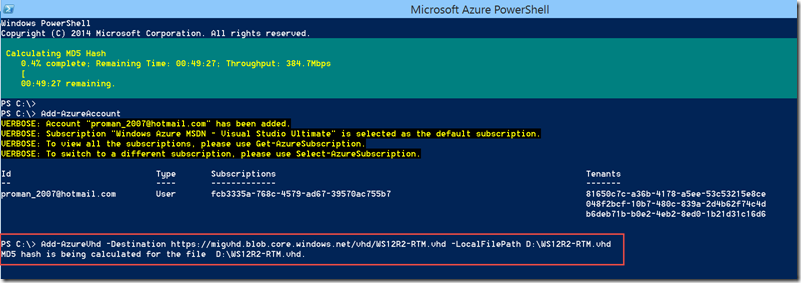
Once logged on, From the Microsoft Azure PowerShell window you used in the previous step, type:
Add-AzureVhd -Destination "<BlobURL>/<container>/<VHDName>.vhd" -LocalFilePath <PathToVHDFile>
so in my environment the command looks like this:
This will run for a while since the VHD is about 10Gb. (this is a test image I’m uploading)
once uploaded the VHD will show up in the Azure UI.
Add the Image to Your List of Custom Images
After you upload the VHD, you will add it as an image to the list of custom images associated with your subscription.
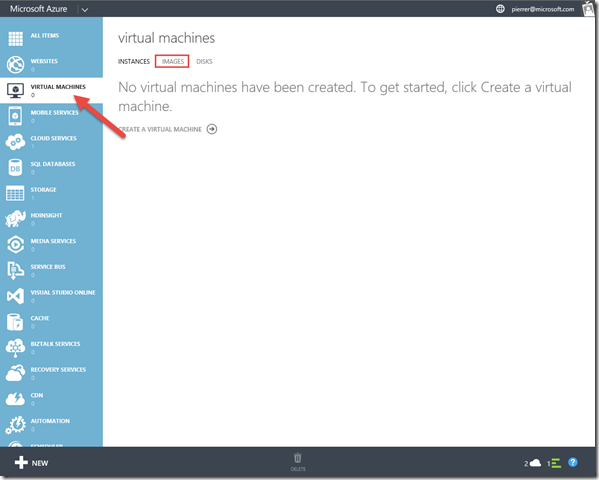
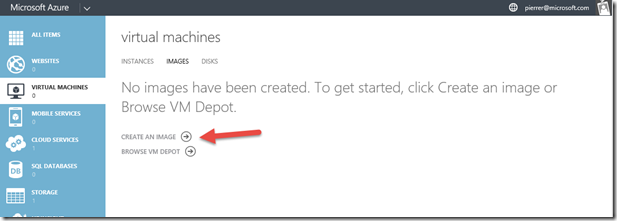
From the Management Portal, click Virtual Machines and click Images.
And then click Create an Image.
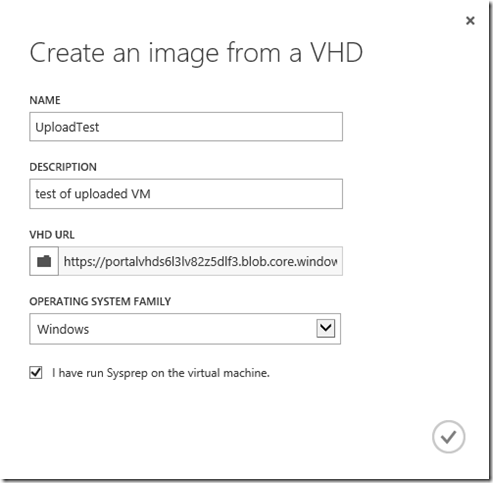
In Create an image from a VHD dialogue box, enter the following: (Name, description, URL of your VHD and what OS is on it).
In our case we already ran the sysprep. so we will click the “I have run Sysprep on the virtual machine.” checkbox.
click the folder button to launch the below dialog box
After completed, the new image is listed when you choose the Images tab and When you create a new virtual machine from the Gallery.
you can now use this new image to spin a VM with your workload already on it.
I hope this helps.
Cheers!
Pierre Roman | Technology Evangelist
Twitter | Facebook | LinkedIn
