Group Policy: Creating a New Policy Linked Directly To Its OU
In a previous post, Group Policy: Introducing Consistency Into Your Infrastructure, we covered some basic orientation in the Group Policy interface. We discussed the layout of Group Policy, some of the terms and locations and we covered a way of creating our first group policy. In this part of the intro we will see another way to create a Group Policy.
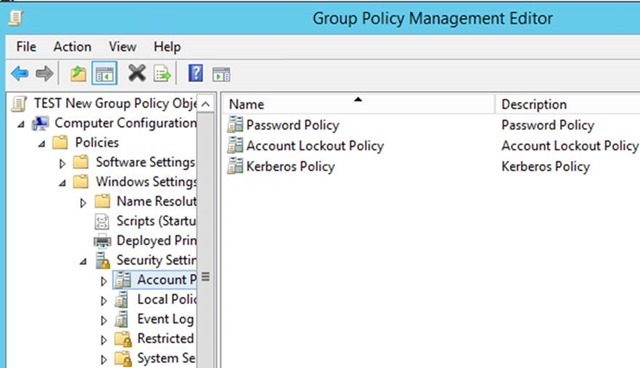
This second way, and my personally preferred method, is to create a brand new policy and link it directly to its OU. To do this you navigate to the OU to which you wish to link new policy, right click and select “Create a GPO in this domain and link it here”. This will open a new window which prompts you for a name (choose something descriptive as you will need to find it again at some point). Then you see the window below:
You can browse the structure here. Please note that there are hundreds (if not thousands) of settings that can be controlled. The first thing to do is decide if this is a computer or a user setting. Once you know that you can start to navigate the tree. Doing a bit of research first is advised for us newbies since it can be quite overwhelming. Just opening the “Password Policy” entry listed above shows us that there are 6 settings in this one policy so there is a VERY high degree of granularity here. Pick one of the settings and change it – voila: you just created your first policy
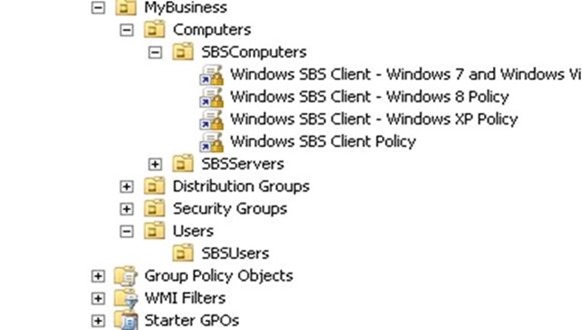
For this next bit we will see some of the structures in question. The first part to keep in mind is if you are creating a computer policy or a user policy. Computer policies will only apply to the given machine (or group of machines) and user policy will follow the user (or group of users)
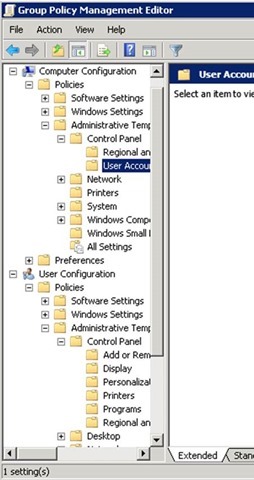
You already know how to create a new GP as described in the previous Group Policy post so I will skip that here but instead go to the next step: the linking. So the first thing to do is create the policy then edit it. This will open the GP management GUI.
From here you will see a new structure. This is where you will need to know what type of policy you are creating: user or computer. When you navigate the high-level folders (software settings, windows settings and administrative templates) you will that there is a lot of similarity until you dive deep. Notice that the “Control Panel” sections have different policies under them.
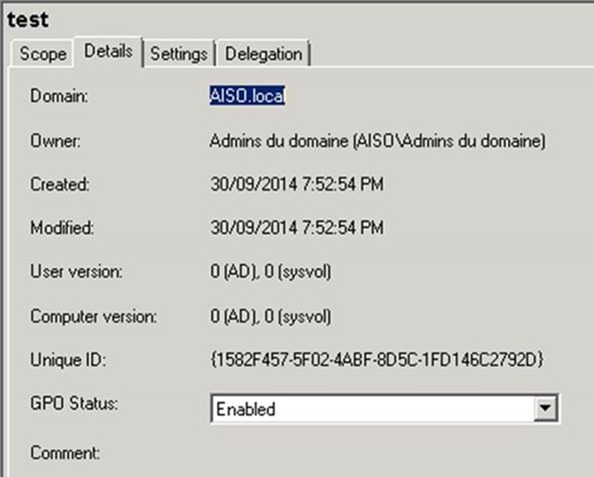
So now that we know how to create a new policy and navigate the layout I will give you some guidance when testing policies. First, be careful: it is entirely possible to lock yourself out of the system so proceed with caution. There are 2 things that you can do to minimize this risk (well, three if you include asking a senior tech). You do not have to link a policy. This means that you can create a new policy but not link it to any OU. An unlinked GP will not affect your environment. The second thing you can do is disable the policy.
Here we see that this GP (accessed via properties) is enabled and from here we can disable it. If you want to create the policy but not risk it affecting your environment then this is a great step to try
So that is the intro. You should now know where to find Group Policy, how to navigate the structure and how to create a new policy. One quick parting note is link order. When you have multiple policies set the policies are applied from the bottom to the top and the top takes precedence. It should also be said that the options in group policy are almost endless. In order to find the policies you need for a given situation a quick search on Bing will point you in the right direction! Alternatively, you can also visit Microsoft Virtual Academy and complete the Windows Server 2012 R2 training.
