Attaching disks to a VM in Azure
Hello folks,
Last week in Toronto during a delivery of our “Getting Started with Microsoft Azure for IT Professionals” IT Camp there was a great discussion about disks and maximum IOPS available to VMs in Azure. So I decided to write up a summary of that discussion for everyone’s benefit.
Before you get going, I recommend these 2 Microsoft Virtual Academy free online training to get up to speed:
- Microsoft Azure IaaS Deep Dive Jump Start
- Windows Azure Storage - Design and Implementation Jump Start
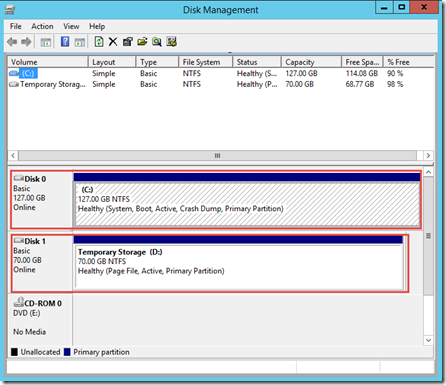
First, we need to define what the default disk configuration of a virtual machine in Azure. By default when you create a new VM 2 disks are attached to that VM. The first one, is a persistent disk that will hold data even after a reboot of the VM. It’s registered as a SATA drive and labeled as the C drive. This disk has a maximum capacity of 127 GB. When Azure creates an operating system disk, three copies of the disk are created for high durability. Additionally, if you configure the virtual machine for geo-replication, your VHD is also replicated. Second is a temporary disk automatically created for you. On Windows virtual machines, the temporary disk is labeled as the D drive. On Linux virtual machines, the disk is typically /dev/sdb and is formatted and mounted to /mnt/resource by the Azure Linux Agent. Don’t store data on the temporary disk. This disk provides temporary storage for applications and processes and is used to store data that you don’t need to keep, such as page or swap files
for more information on the available sizes and options for the virtual machine-based compute resources you can use to run your apps and workloads. These resources are available to you as Azure Virtual Machines (sometimes called “IaaS virtual machines” or “persistent virtual machines”), and Cloud Service role instances (web roles and worker roles). This topic also provides deployment considerations to be aware of when planning to use these resources. please refer to this page: Virtual Machine and Cloud Service Sizes for Azure
*** The link above is where you will find the IOPS stats for each type of virtual machines.***
You can attach new or existing “data” disks to your VM for storing persistent data. Here is how we do it.
Attach an empty disk
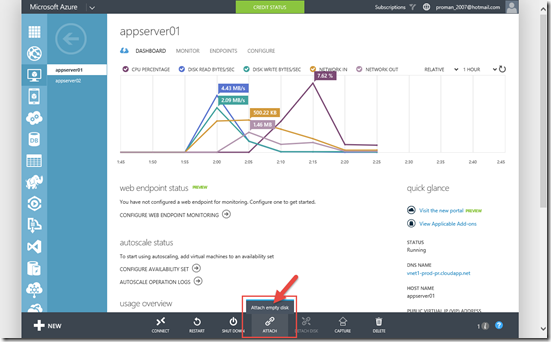
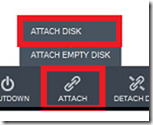
Click Virtual Machines, and then select the appropriate virtual machine. and on the command bar, click Attach, and then select Attach Empty Disk
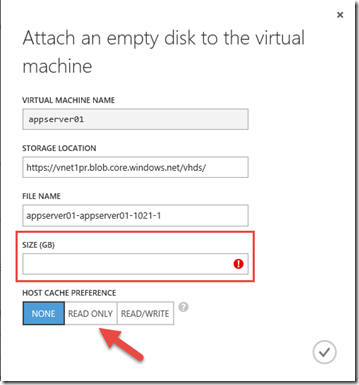
On the next dialogue box you need to configure the size you need for that disk (Max 1023gb or just shy of a 1TB drive) and the host cache preference. Host Cache Preference settings for an operating system disk or for a data disk improves performance under some circumstances. Host caching is off by default for both read and write operations for data disks. Host-caching is on by default for both read and write operations for operating system disks.
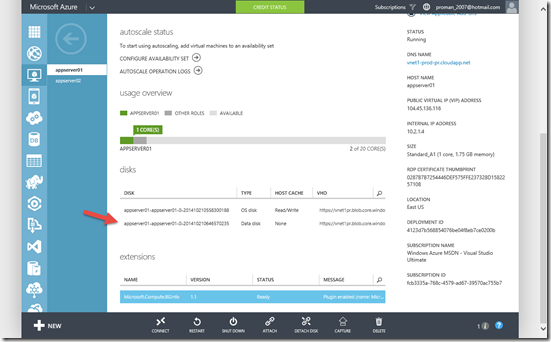
once it completes, You will now see the data disk listed on the dashboard of the virtual machine.
Attach an existing disk
Of course you can attach an existing disk to your VM. But that requires that you have a .vhd available in a storage account. You can use the Add-AzureVhd cmdlet to upload the .vhd file to the storage account or other tools like the Azure Storage Explorer found on CodePlex.
After you've created and uploaded the .vhd file, you can attach it to a virtual machine. In the same way as the new disk but you will need to select “attach disk” instead of “attach empty disk”.
Initialize the new disk in Windows Server
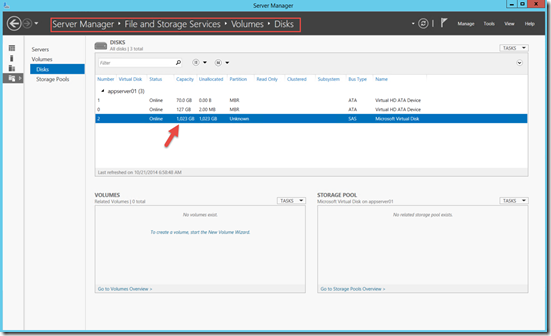
After you add a new data disk, you'll need to log on to the virtual machine and initialize the disk so the virtual machine can use the disk for storage. Connect to the virtual machine, and open Server Manager, in the left pane, expand File and Storage Services, and then click Disk. and select the new disk.
Right click it and select “Initialize”. (you will get a warning that the disk will be wiped)
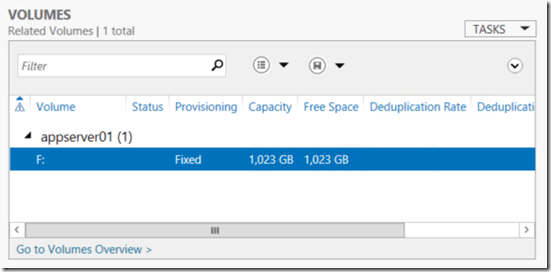
and in the Volumes pane, create a new volume
There you go. a new persistent drive you can use to store your data.
In upcoming weeks I’ll explore how these disks and azure storage in general can bring huge value to your deployments.
Cheers!
Pierre Roman | Technology Evangelist
Twitter | Facebook | LinkedIn
