Step-By-Step: Upgrading System Center Configuration Manager 2012 SP1 to 2012 R2
System Center 2012 R2 Configuration Manager (SCCM) provides an effective IT enabler allowing for secure and scalable software deployment, compliance settings management, and comprehensive asset management of servers, desktops, laptops, and mobile devices. Coupled with Intune, SCCM can be the one window to rule them all. Ensuring your organization is taking advantage of the latest SCCM offering is important as it allows for support of App-V 5.0 SP2 and other improvements. This Step-By-Step will walk you through an in-place upgrade of SCCM 2012 SP1 to 2012 R2, install Cumulative Update 1 and update MDT to 2013 to take advantage of said improvements.
Prerequisites
- Insure there are no outstanding errors in your current SCCM environment
- Backup the existing SCCM database
- Be sure to start at the top level of the SCCM hierarchy
- Restart the server (physical or VM) to ensure no pending requests are scheduled
Step 1: Upgrading the ADK to 8.1
Navigate to Control Panel > Programs > Programs and Features
Uninstall ADK 8 and click Yes when prompted to uninstall
Click Close once the uninstall is complete
Run adksetup.exe
Click Accept and Install Microsoft .NET Framework 4.5
Note: This will only appear should Microsoft .NET Framework 4.5 not be installed on said server
Click OK to reboot
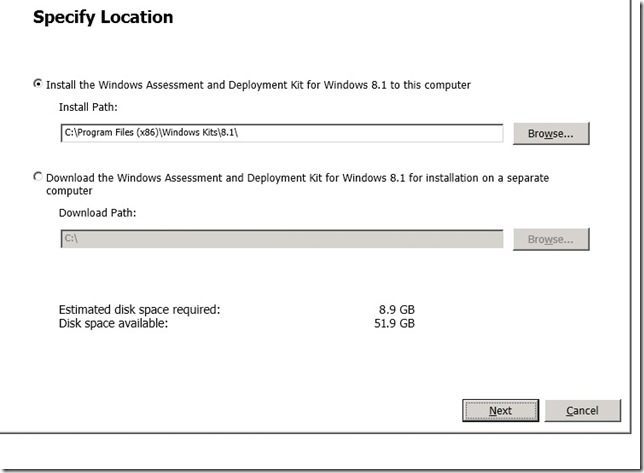
Accept or change the default download location for ADK specific to your installation needs and click Next
Select your choice on joining the Customer Experience Improvement Program (CEIP) and click Next
Click Accept to accept the license agreement
Select Deployment Tools, Windows PE and USMT from the feature listing and click Install
Click Close once the install is complete
Step 2: Installing SCCM 2012 R2
Run Splash.hta in the System Center 2012 R2 folder to start the R2 installation
Click Next
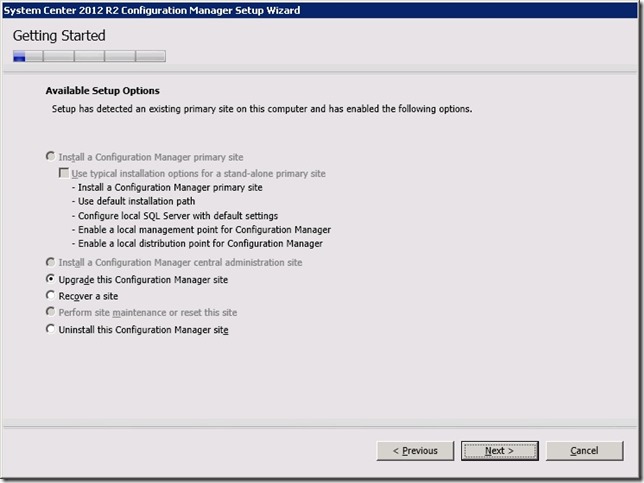
Select Upgrade the Configuration Manager Site and click Next
Enter the required license key and click Next
Select I accept these License Terms and click Next
Select I accept these License Terms for both Microsoft SQL Server 2012 Express and Microsoft SQL Server 2012 Native Client. Also Select I accept these License Terms and automatic updates of Silverlight and click Next
Select the download directory for the required files and click Next
Select the languages to install and click Next
Select the client languages to install and click Next
Click Next after reviewing the Settings Summary
Click Next to start the upgrade
Note: Be sure to address any pre-requisite failures prior to installation
Step 3: Installing Cumulative Update 1 (CU1)
- Download Cumulative Update 1 (CU1) for ConfigMgr 2012 R2
- Run CM12-R2CU1-KB2938441-X64-ENU.exe
- Click Next on the Welcome page
- Select I accept these License Terms and click Next
- Ensure all check marks are green, fix any errors that are reported and click Next
- Select Install the update for the Configuration Manager console and click Next
- Select Yes, update the site database and click Next
- Select Site server and computers that run the SMS Provider, Configuration Manager consoles and Clients and click Next
- Click Next on the Update Package for Configuration Manager Servers page
- Click Next on the Update Package for Configuration Manager Consoles page
- Click Next on the Update Package for Configuration Manager Clients page
- Click Install on the Setup Summary page
- Click Next once the update has completed
- Click Finish
Step 4: Updating MDT to 2013
- Download MDT 2013 and run MicrosoftDeploymentToolkit2013_x64.msi
- Click Next
- Select I accept the terms in the license agreement and click Next
- Select your choice on Custom Setup, standard setup is preferred, and click Next
- Select your choice on joining the Customer Experience Improvement Program (CEIP) and click Next
- Click Install
- Click Finish
Step 5: Removing old and installing new MDT 2013 Extensions
- From the Start Menu select Microsoft Deployment Toolkit > ConfigMgr Integration
- Select Remove the MDT extensions for Configuration Manager and click Next
- Click Finish
- From the Start Menu select Microsoft Deployment Toolkit > ConfigMgr Integration
- Select Install the MDT extensions for Configuration Manager, Install the MDT extensions for System Center 2012 R2 Configuration Manager, Add the MDT task sequence actions to a System Center 2012 R2 Configuration Manager server and click Next
- Click Finish
Once successfully completed, System Center Configuration Manager will report it is operating version 5.00.7958.1203. Other servers or VMs running the SCCM Console will also need to be upgraded to the latest release. Take this opportunity to also update your knowledge as to what System Center Configuration manager has to offer by visiting Microsoft Virtual Academy and completing the System Center 2012: Configuration Manager (SCCM) module.


