Windows 8.1 Deployment: From the ground up – Packages, Applications and Finalizing the Image
Hello Folks,
Windows XP reached the end of it’s supported life last week. So, let’s resume our Windows 8.1 deployment series in order to help us deploy supported OS versions. In previous posts we covered:
- Generate an inventory of our environment
- Setup our workbench to build our image
- Started building our image by importing the OS and Drivers
Today we will cover the final part of building the image and generate our image so it can be deployed using WDS, SCCM, or any other method is right for your environment.
In our case we will need to deploy images that are multilingual. That means that we must import the language packs that will be slipstreamed in the image.
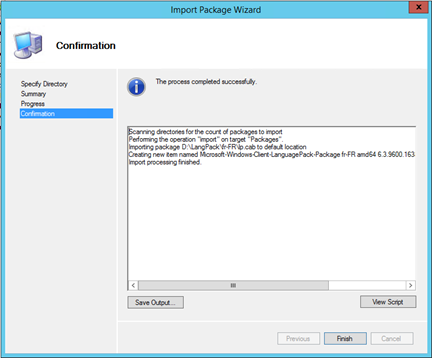
1- In our Workbench, we navigate to Deployment Workbench/Deployment Shares/MDT Deployment Share/Packages and in the Action pane on the right select “Import OS Packages”
2- When the Import Package Wizard starts, in the Specify Directory page, click Browse and navigate to where your language packs are stored. In our case D:\LangPack\fr-FR for the French language packs. Click OK, and Click Next twice to confirm and perform the import. and finish once it’s completed.
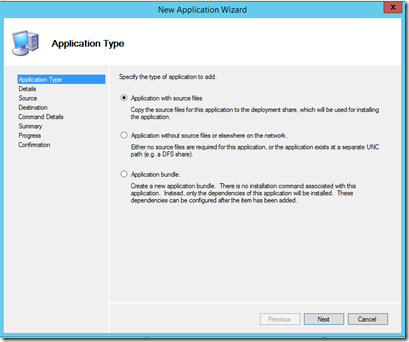
3- for the Applications, we will start with Office 2013. In the Deployment Workbench console tree, click the Applications node or then, in the Actions pane, click New Application. and the New Application Wizard starts
4- Complete the New Application Wizard
Application Type:
- Click Application with source files, and then click Next.
Details
- In Publisher, type the publisher name. In our Case Microsoft
- In Application Name, type the application name. our App is Office
- In Version, type the version , for us 2013
- In Language, type language (the language of the application is optional but it makes sense if you have apps with multiple languages).
- Click Next.
Source:
- In Source directory, enter the source folder where you copied the sources files. in our case D:\Apps\Office 2013
Command line:
- In Command line, type the command line you would use to install the App in an Unattended manor. I used setup.exe /config config.xml
- In this installation, i have used the properties of the Office application to create the config.xml.But you can experiment with the different way of deploying Office using MSP files.
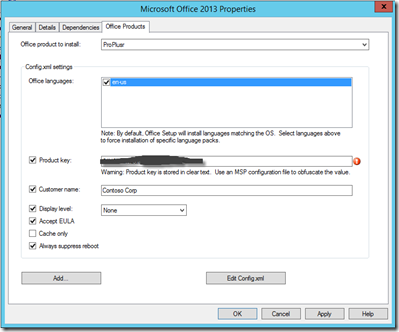
- In Working directory, enter the fully qualified or the relative path for the folder designated as the working directory for the application. for my setup I entered .\Applications\Microsoft Office 2013
- Click Next.
5- Create the task sequence that will dictate the process of deploying our image.
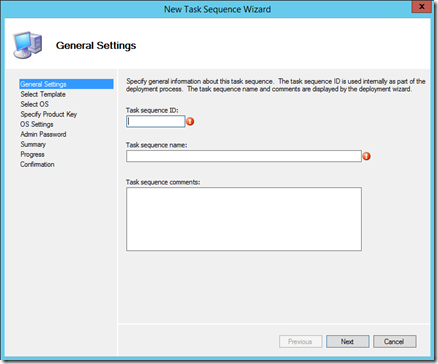
General Settings
- In Task sequence ID, we entered Win8.1
- In Task sequence name, enter the name you want to assign your image. for us we typed Standard
- In Task sequence comments, enter any relevant information describing the details of this task sequenc3e.
- Click Next.
Select Template
- In The following task sequence templates are available. Select the one you would like to use as a starting point, select Standard Client Task Sequence, and then click Next.
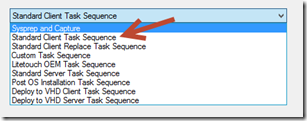
Select OS
- In “The following operating system images are available to be deployed with this task sequence. Select one to use”, select one of the Operating Systems we imported in our image. for us we will select “Windows 8.1 Pro in Windows 8.1 Pro x86 Install.wim” click Next.
Specify Product Key
- We Click Do not specify a product key at this time, and then click Next. However for your deployment select what is appropriate I would recommend looking into a KMS server to activate all your machines.
OS Settings
- In Full Name, type Admin or your name.
- In Organization, type Contoso Corp , or the name of your organization.
- In Internet Explorer Home Page, enter the home page you want to hardcode in the image.
- Click Next.
Admin Password
- In Administrator Password and Please confirm Administrator Password, type P@ssw0rd, and then click Next. I recommend you enter a generic password in the wizard but use Group Policy Preference to reset the password as soon as the machines joins the domain.
Summary
- Click Next.
Progress
- The progress for creating the task sequence is displayed.
Confirmation
- Click Finish.
6- Once the Task sequence is complete, we can modify the customsettings.ini file to in the Control directory of our deployment share or by right-clicking the deployment share in our Workbench, selecting Properties, and in the rules tab make the necessary changes.
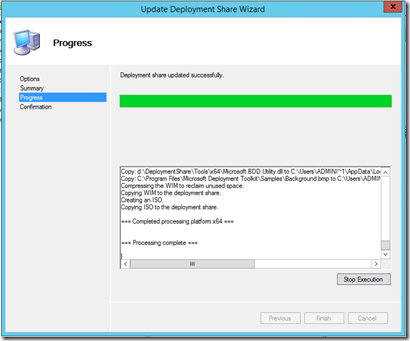
7- The last step to prepare our image to be deployed is to update the deployment point. Click deployment share, and then in the Actions pane, click Update Deployment Share. The Update Deployment Share Wizard starts. 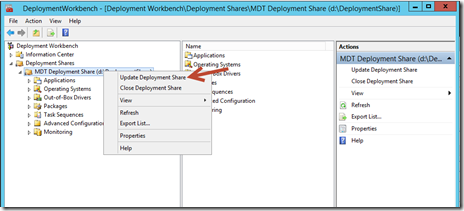
fill in the options as follows
Options: use the defaults for the initial Deployment Point Update
Click Next twice and after the processing (that might take a while) in the confirmation click Finish
we are now ready for deployment. On Thursday this week we will complete our “from the Ground Up” series with the final post where we will use the image we have to deploy to machines on our network. Both in “upgrade” and in “Bare Metal” scenarios
Until Then,
Cheers!
Pierre Roman | Technology Evangelist
Twitter | Facebook | LinkedIn

