Free Up Disk Space on Windows Server 2012
Hello Folks,
We’ve been busy delivering IT Camps across Canada. These camps are a great way to figure out what you as IT pros need in terms of information and scenarios that are important to you.
Well last week a conversation regarding Server Core lead us to discussing how you can free up disk space on a Windows Server 2012 R2.
Why would you want to free up the disk space on a server?
- Decrease the footprint of the base server install
- Reduce the number of potential patches (and reboots)
- Increase security compliance by removing features not integral to the role of the server
How do you regain that space? you may ask.
Since Windows Server 2008, we all the files required to add roles and features are copies on the machine during the install process in a folder known as “the Windows Side-by-Side (WinSXS) directory”. One of the benefits is that we no longer prompt for the CD when installing a role or a feature. It’s also used to automatically repair corrupt files using a good copy from the component store.
Well that directory is almost 6GB. It’s a sizable chunk off disk space. especially if you are running you machines in a virtual environment where space saving could translate in a higher VM density per hosts.

There is a another way of achieving the benefits while still achieving the disk savings. here are the steps:
- Purge the files not needed from WinSxS
- Copy the INSTALL.WIM to a share on your network and use GPO to assign the location of the INSTALL.WIM as an alternate location to get the files.
Removing any unwanted roles and Features
1- Open an administrative PowerShell command prompt and use the Get-WindowsFeature command lo list what is actually in the component store

2- as we can see in step one a lot of components are installed on our particular server. In order to remove the files that are NOT needed we want to remove the files associated with roles and features that are not installed.
let’s use some PowerShell magic to do just that.
Run the following command to remove the unused components completely from the server.
Get-WindowsFeature | Where-Object -FilterScript { $_.Installed -Eq $False } | Uninstall-WindowsFeature –Remove

You then end up wit the following:

Just a couple of minutes and we’ve saved approximately 2GB od disk space. Of course you could go all out and remove everything but I prefer to only remove what I do not need.

Setup Alternate location for the install files
In order to compensate for the removal of the files from the WinSxS, copy the INSTALL.WIM to a share available to all your servers and use Group Policy to point all servers to that alternate location instead of the standard location.
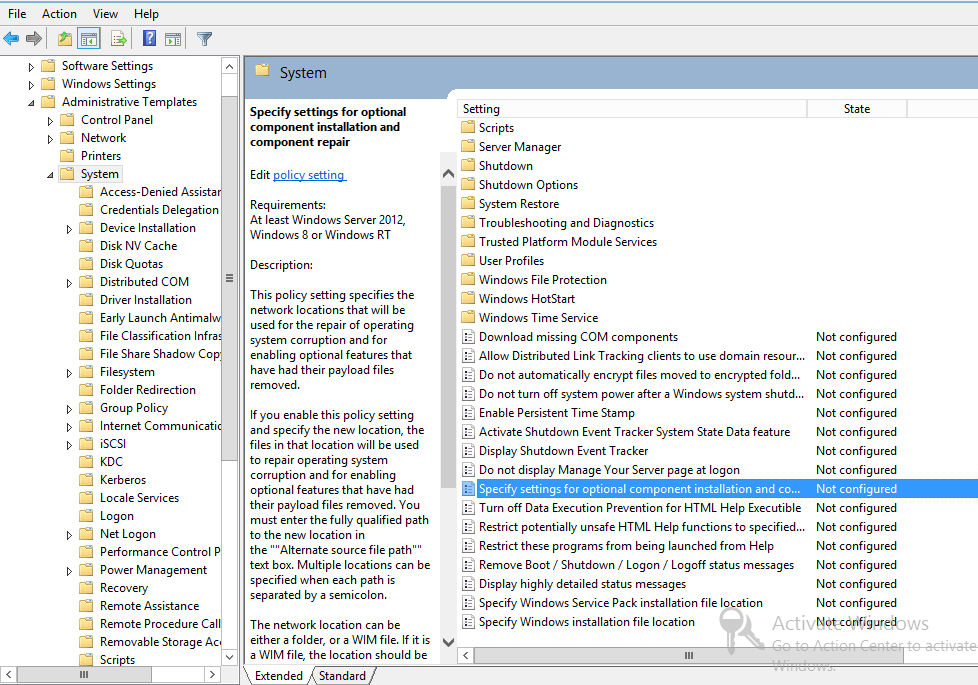
To achieve that, we configure the following item in a GPO
Computer Configuration\Administrative Templates\System\Specify settings for optional component installation and component repair
But first we need to figure out which index we need to reference in the INSATLL.WIM file by using the following PowerShell command.
dism /get-Wiminfo /wimfile:{location of install.wim}

I need index 4 for my servers since I use the datacenter version.
We will configure the GPO to point to wim:\\Server1\2012_Source\install.wim:4
That’s it. we save a boat load of space across all our servers, we increase our VM density. We minimize the patching and still keep all the functionality.
Cheers!

Pierre Roman | Technology Evangelist
Twitter | Facebook | LinkedIn