Step-By-Step: Migrating from Exchange 2007 to Office 365
A cutover migration is the simplest way to get all your existing email into Office 365. As the name implies, it’s a cutover from one service to another. As showcased in a previous post, cutover migrations are supported for Exchange 2003, 2007 and 2010; for organizations with fewer than 1000 mailboxes. The process is pretty straightforward, however, be sure to properly test the migration plan prior to trying to implement.
Step 1: Planning
Microsoft has done a great job of providing good quality information for administrators to use, to plan the migration to Office 365. It is always recommended to use the Exchange Deployment Assistant as a guide for all migrations. This site is up to date and will cover most of all the migrations scenarios to Office 365.
- Open the Exchange Deployment Assistant site.
- Once the site is launched, you are presented three options. Since I am doing a simple cutover migration from Exchange Server 2007, I am going to use the Cloud Only option.
- Click Cloud Only.
- You are now asked a series of questions on end state goals and existing setup.
- Answer all the questions.
- Click the Next arrow.
- The Exchange Deployment Assistant will generate a step by step guide for you to follow. Make sure to read and understand what you are doing.
Step 2: Testing the Existing Setup
Using the guide from the Exchange Deployment Assistant, we need to make sure that our Exchange 2007 infrastructure supports Outlook Anywhere (RPC over HTTP) and Autodiscover. Use the guide to verify the Exchange 2007 setup. Once the setup is verified to be correct, use the Microsoft Remote Connectivity Analyzer to verify Outlook Anywhere (RPC over HTTP) . Make sure that you have assigned the correct permissions to the mailboxes that you are migrating.
- Open the Microsoft Remote Connectivity Analyzer site.
- Select the Outlook Anywhere (RPC over HTTP) test.
- Click Next.
- Enter all the information that is requested. You will want to verify that you are using Autodiscover to detect server settings.
- Enter the Verification code.
- Click Perform Test.
Once the test is successful, you can continue to the next step. If it’s successful with warnings, review the warnings and correct them if needed. If the test fails, use the report generated and the guide (Exchange Deployment Assistant) to resolve the issues.
Use the guide and assign the correct permissions to the mailboxes. If you don’t assign the migration account permissions on the mailboxes, they will not migrate.
Step 3: Configure Cutover Migration
Open Internet Explorer.
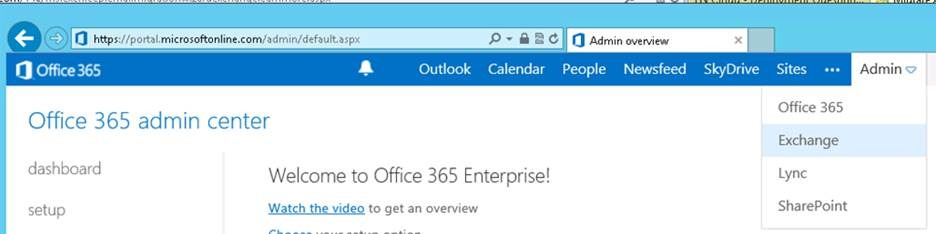
Login to the Office 365 Admin Center.
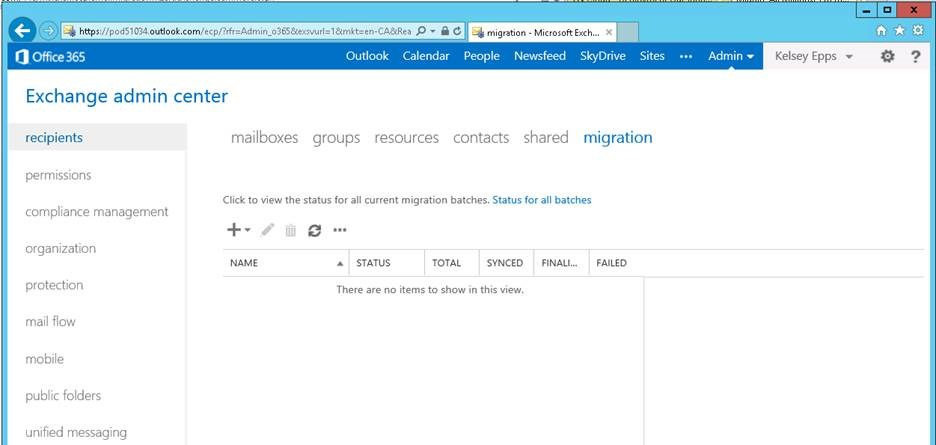
Open Exchange Admin Center.
Click Migration.
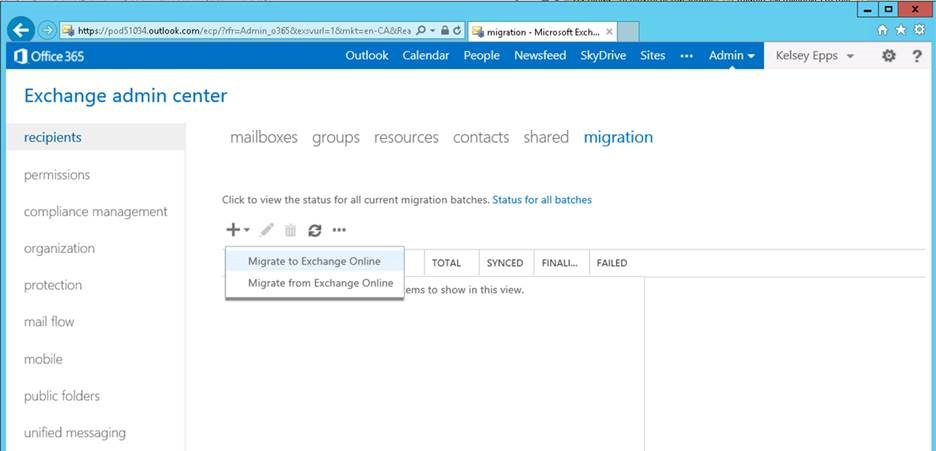
Click the + drop down menu and select Migrate to Exchange Online.
Select Cutover migration (supported by Exchange Server 2003 and later versions).
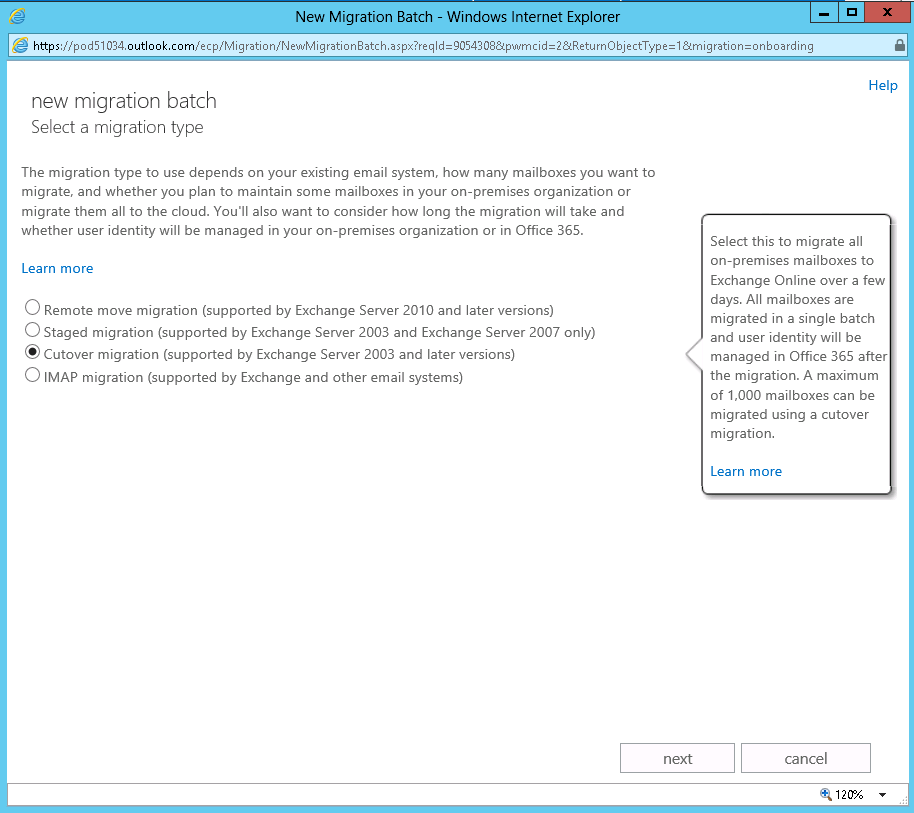
Click Next.
Enter on-premises account credentials (this is the same account that you gave full acccess permissions to on all the mailboxes).
Click Next.

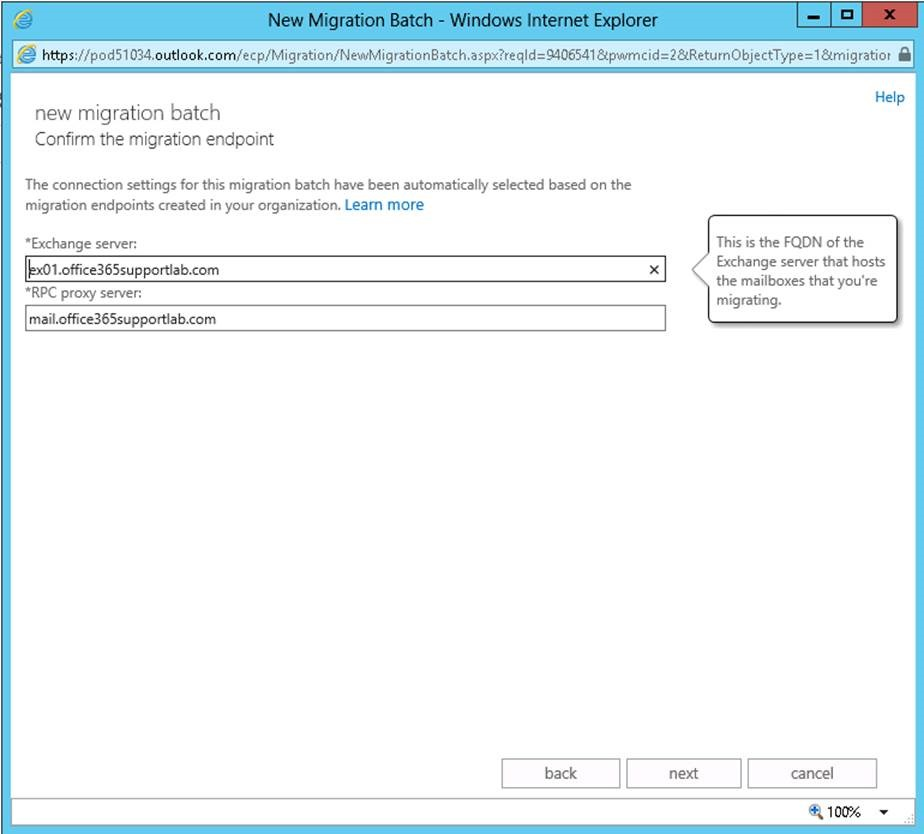
When configured properly, Autodiscover should resovle the on-premise Exchange Server and the RPC Proxy Server
Click Next.
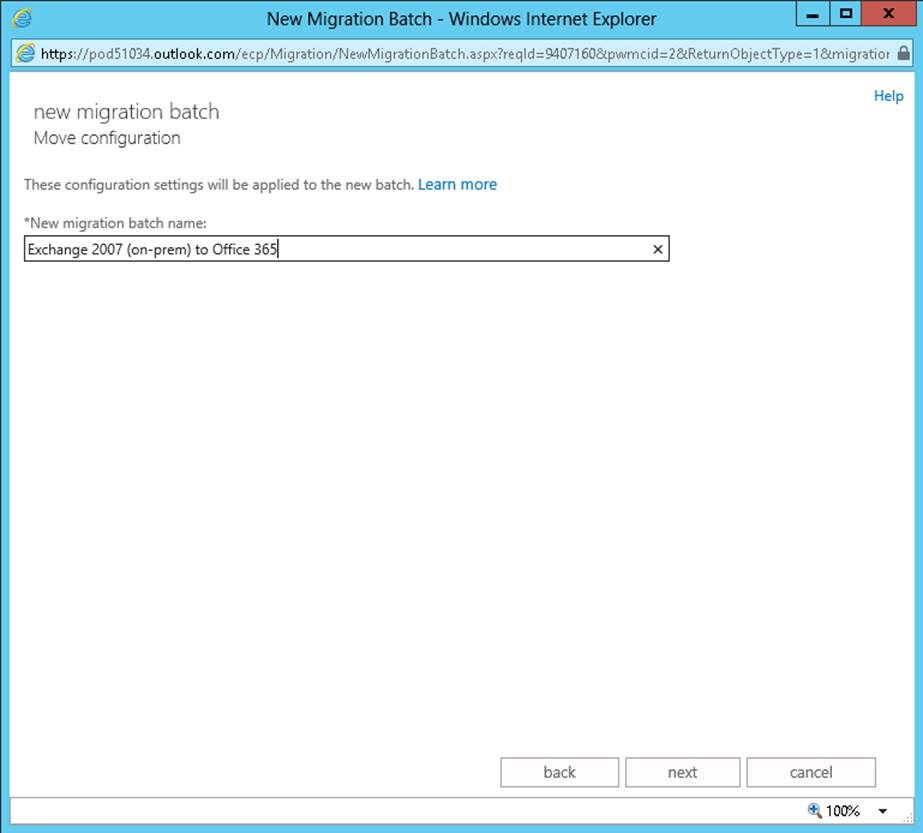
Enter a name for the New Migration Batch.
Click Next.
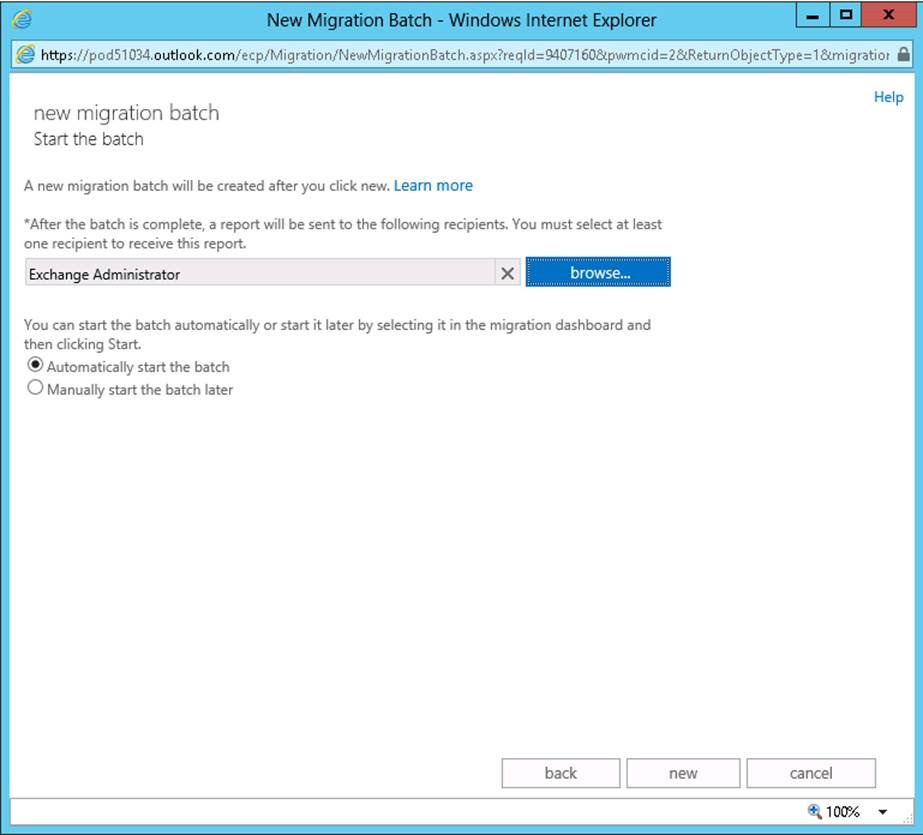
Select a user to get a report once the migration is completed. Multiple accounts can be selected. If you are ready to start the migration, then automatically start the batch. If you are not ready to start the migration, then select manually start the batch later.
Click New.
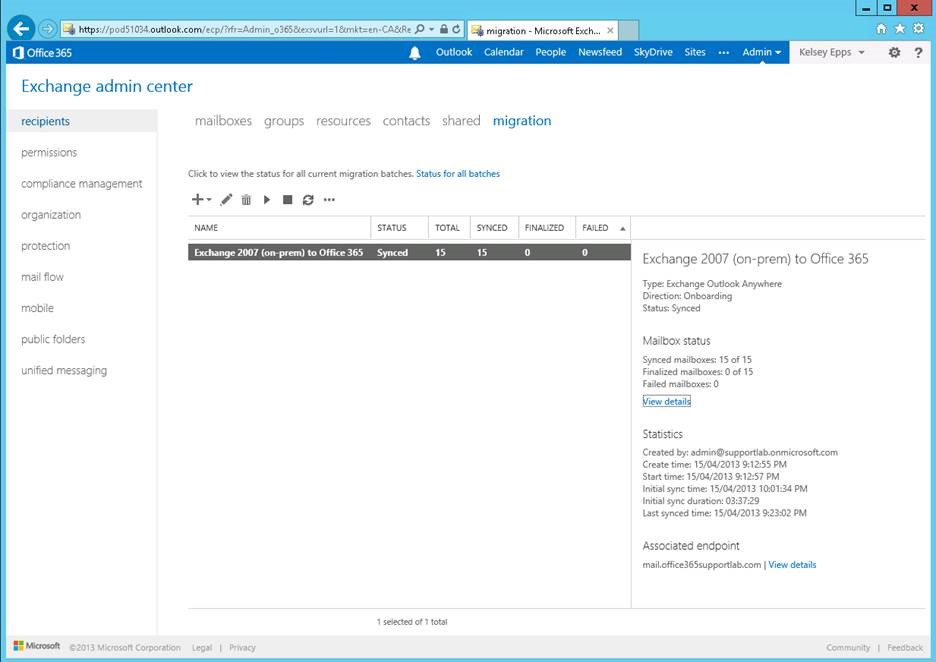
The new migration batch is created and the status is set to syncing.
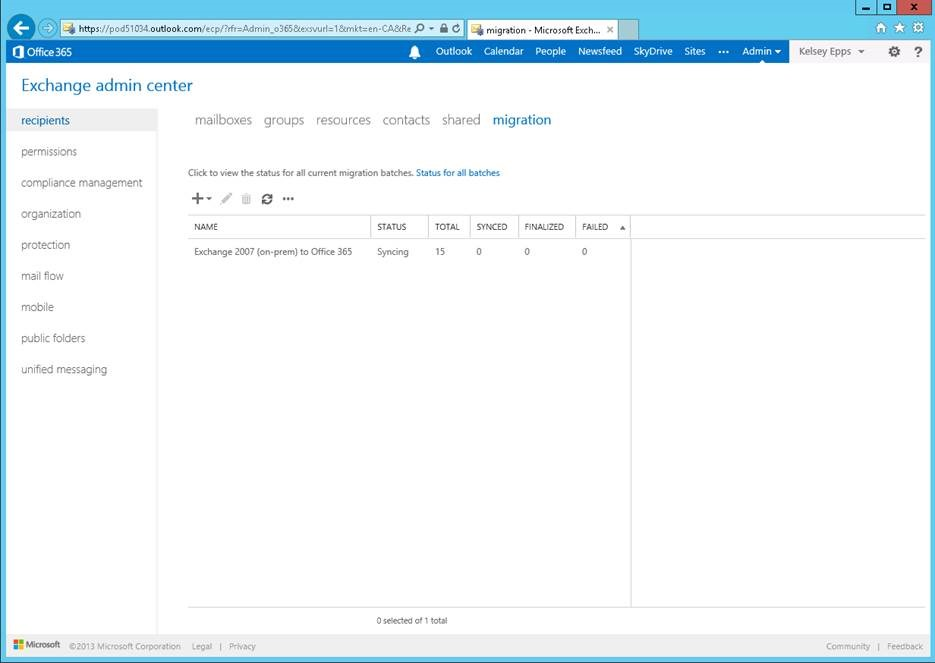
Depending on the number of accounts and the amount of data, this can take some time to migrate. Migration details can be viewed by clicking View Details under the Mailbox Status providing sight to the accounts being provisioned in Office 365 as well as the start of the sync from Exchange 2007 to Office 365.
Step 4: Completion of the Migration
When all the accounts are provisioned and the sync from Exchange 2007 to Office 365 is completed, you will get a report emailed to you. Once you get the report, you can complete the migration process.
- Migrate Public Folders – Microsoft has released a whitepaper for the companies that have public folders to migrate to Office 365. Migrating from Exchange Public Folders to Microsoft Office 365.
- Assign Office 365 licenses to all the users. Details can be found here.
- Verify that all the DNS records are updated and pointed towards Office 365 services. Details can be found here.
Note: Once you change the MX record to point at Office 365, there is some DNS replication time. During this time, email will be delivered to either Exchange 2007 or Office 365. It’s important to keep your migration batch job running for up to 72 hours after switching the MX record.
- Configure the desktops to use Office 365 services. Details can be found here.
- Once you are comfortable that all the email is migrated to Office 365 and the MX record DNS replication is completed, you can stop the migration batch job.
At this point the migration is complete and the Exchange 2007 server can be retired.
Be sure to take advantage of the Microsoft Virtual Academy to learn additional aspects of Office 365 to better enable your organization.