Migrating a Production Server 2008 R2 SP1 Hyper-V Cluster to a Server 2012 Production Hyper-V Cluster
Hello Folks,
I’m always looking for individuals in the Canadian IT pro community that have expertise they’d like to share. One of those individual I've had the pleasure of working with in the past few years is Dave Kawula
I meet Dave Kawula at TechDays a few years ago. We have since kept in touch and worked together on several occasion. Dave Kawula is now Senior Consultant 1E Software DataCenter Virtual Technology Specialist - Microsoft Canada.
In 2003, Dave co-founded TriCon Technical Services Inc. with the vision of building an elite professional services and training company. In 2004, Dave was selected to work with Microsoft’s technical SMSGR and GTR departments to create internal Microsoft training materials. Based on the success of these projects Dave became a world-wide lead instructor for Windows Vista Escalation Engineers. To date he has helped author over 40 courses for Microsoft. Currently - Dave works as a freelance consultant for Enterprise Consulting Organizations across North America. He has expertise helping customer ranging in sizes from 250 seats to 100K+.
you can follow Dave on twitter https://twitter.com/DaveKawula, and connect with him on LinkedIn.
Here is a great post from Dave on Migrating Hyper-V from Windows 2008 R2 to Windows Server 2012.
Enjoy!
This post also appears on Dave’s Personal Blog Nit and Grit of IT .
Many of you have immersed yourselves in the different versions of Hyper-V by now. As such I have found that a lot of customers are running production workloads on Hyper-V.
What do you do when you need to Migrate to the latest and greatest Microsoft Operating System Windows Server 2012. It has too many extra features to list and the value proposition is definitely there for customers to swing over to the new platform. So here comes the issue – Production workloads running cannot have extended outages and we need fallback plans in case something happens.
What I will show you in this blog post is how I moved the following configuration with more than 1 TB of production data from Server 2008 R2 SP1 Hyper-V Cluster to Server 2012 Hyper-V Cluster in less than 1 Hour of downtime.
Some of the steps listed below will entail having deep knowledge of your Storage Configuration. For this example my customer was running on a Dell Equallogic P5000 Storage Array.
Listed below are some of the architectural challenges I faced while doing this:
#1 – Customer demanded that we have a fall back plan if something happened during the migration. They wanted a “BIG RED Easy Button” to get back.
#2 – Customer wanted to minimize downtime on the environment and have a valid solution that could be tested offline before a live test was performed.
#3 – Customer wanted to use a solution similar to this for their DR Site.
Let’s start off by looking at constraint #1.
With the current model that is available via Microsoft TechNet and resources available online an outage is required to perform the Migration. So we cannot really get away from this. The customer wanted to see if any of the SAN technologies like SNAP Cloning or equivalent Dell technologies could be used. So this got me thinking…..
I had performed a Hyper-V Emergency repair of a CSV Cluster Volume in the past by using a cloned copy of the data volume from a replica set on another SAN.
What if I could do the same thing on the P5000 Equallogic Storage unit?
Initially I could simply clone the CSV Volume while it was running live. This wouldn’t be a crash consistent snapshot or clone. It would however give me the ability to test the solution in a lab environment with production data.
If I could prove out that it works than we could simply repeat the process during a planned outage to cutover the data.
The biggest problem when performing tasks like this outside of the SAN is the amount of time to copy data. For 1 TB of data I would be looking at a minimum of a 6 hour outage on their environment. This would clearly not be acceptable and testing at this SAN level would be a natural fit.
Another big problem is that in that Microsoft is advising to use the Cluster Migration Wizard as a powerful tool to help automate this task. You should really read this article at some point:
https://blogs.msdn.com/b/clustering/archive/2012/06/25/10323434.aspx
My issue is that in this article it states that in order to perform the final cutover – Luns or Volumes need to be re-zoned or re-mapped to the new Hyper-V Cluster Nodes. I have seen issues in the past in doing this where the cluster can pick-up a new disk signature and it makes it very difficult to fall back. Once this is done a lot of work is required to get the disk to present itself back into the new cluster. As I hadn’t done many production migrations at this point – I wanted to take a safe position and the customer agreed with trying the SAN Clone first before playing with the live data.
We will definitely use this Cluster Migration Wizard to create the base shell of the VM configurations prior to presenting the new CSV volumes.
So we have a plan for #1 – Moving on to constraint #2
Constraint # 2 – Customer wanted to minimize downtime for this solution. Well when we look at the amount of time to copy data over the network. Working with the SAN was the only option. If we couldn’t get this working it would cause a significant impact to the customer.
Constraint # 3 – Well I told the customer that we had to put this on the backburner for now but that it would work without issues. As we would be moving to Server 2012 Hyper-V as a platform of choice. It is extremely easy to mount a volume and present guests and their configurations without exporting it first. In previous versions we could use some PowerShell scripts to export VM Configuration Only to get the guest metadata. Now with Server 2012 Hyper-V it can do this for us automatically and I have done it many time successfully with live customer guest workloads. So this was a no problem it will work to the customer J
Ok so let’s fast forward just a little bit here. We are at the point that we can start doing some configurations.
What I have done ahead of time for the sake of keeping the article short is this:
1. Build the Base Windows Server 2012 Hyper-V Host Servers
2. Joined to the Domain
3. Fully patched and updated with all relevant hotfixes
4. Hyper-V Role Installed
5. Hyper-V Management Tools and PowerShell Support Installed
6. Failover Clustering Installed
7. Connect to the Equallogic Storage Array and clone the existing CSV Volumes and create a new Quorum Drive.
a. So I did check and there was enough free space on the SAN to perform the Clone of the existing volumes.
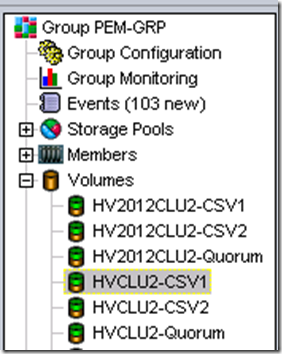
b. Find the volumes in this case they are HVCLU2-CSV1 and HVCLU2-CSV2
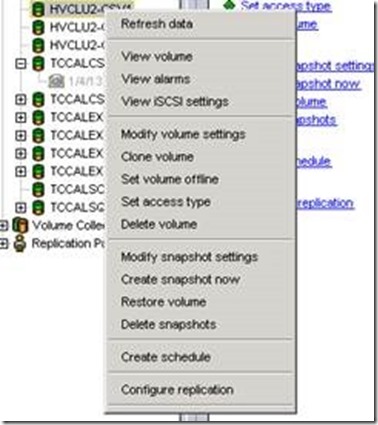
c. Right Click HYCLU2-CSV1 and Click Clone Volume
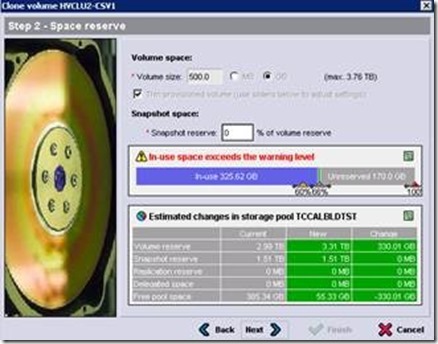
d. Give the new Volume a name in this case HV2012CLU2-CSV1 and choose a storage pool with enough available space.
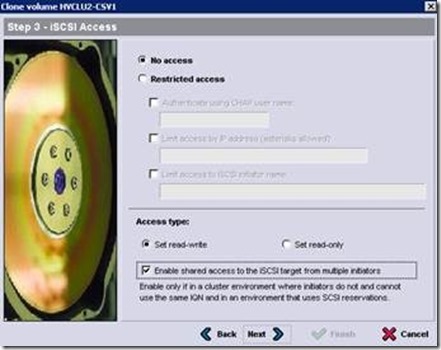
e. We will configure the security ACL’s for the new volume later. For now we will setup as no access and enable Shared Access to the ISCSI Target as seen below
f. Ok so now we just repeat the process for HVCLU2-CSV2 and create a new volume for the Quorum disk on the new cluster. Seen below are my results.
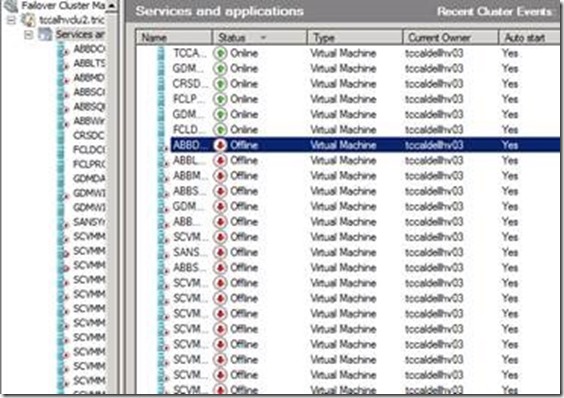
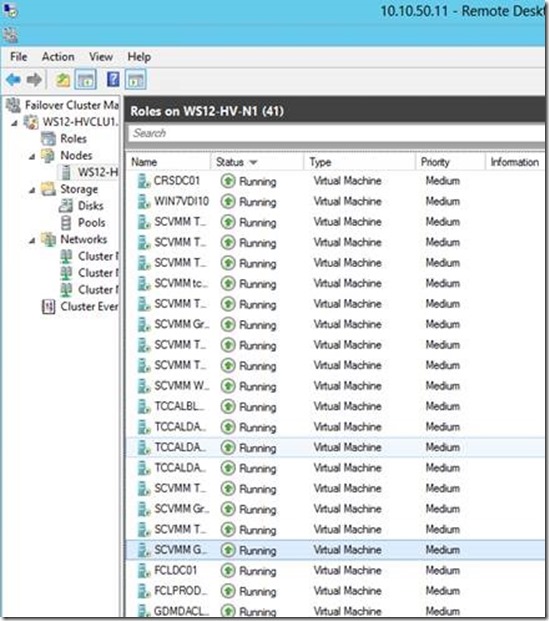
8. So we have the disks ready to go. In essence these drives will contain all of the data required to start the Virtual Machines in the Cluster – Let’s have a quick look at the old Cluster that we will be migrating. When I checked there are about 40 + guest that need to be migrated from the first cluster.
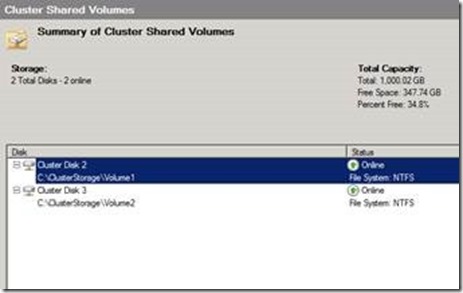
a. Let’s also have a quick look at the Cluster Shared Volume Configuration before proceeding.
b. So let’s recap. At this point the production cluster is still running and we have cloned these two CSV volumes at the SAN Hardware level. Now we will move on the configuration steps required to stand up the new Server 2012 Hyper-V Cluster. For the sake of keeping the article readable I have trimmed some of the steps on the basic configuration.
9. We have named the Hyper-V Node WS12-HV-N1 and the next step for us is to configure some base networking. Now a common issue we will run into especially with Blade Hardware which is what this infrastructure is running on is a lack of physical network connections. Many vendors like Emulex have created converged network adapters and prior to Server 2012 it was not possible to create converged adapters at the software layer. Also will be configuring the traffic to run through a Windows 2012 Team. As these will be connecting through a single set of Switches we will be ok to use the converged adapters. You will see this configuration in the next set of steps.
a. As you are probably a bit new to the teaming capabilities of Windows Server 2012 – Read this Article – It does a great job of explaining our configuration. We will be taking our 2 x 1GbE ports and creating a team then we will configure the additional converged adapters.
https://blogs.technet.com/b/privatecloud/archive/2012/06/19/nic-teaming-in-windows-server-2012-brings-simple-affordable-traffic-reliability-and-load-balancing-to-your-cloud-workloads.aspx
Open Powershell and type the following command:
PS C:\Windows\system32> New-NetlbfoTeam PRODVLAN “Ethernet”, “Ethernet 2” –verbose
Name : PRODVLAN
Members : {Ethernet, Ethernet 2}
TeamNics : PRODVLAN
TeamingMode : SwitchIndependent
LoadBalancingAlgorithm : TransportPorts
Status : Down
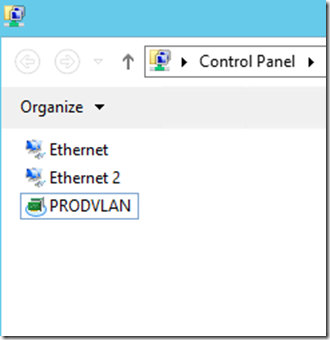
i. Now validate the settings in the GUI – A screen shot is shown below
ii. Here is a Screenshot of the new NIC TEAM
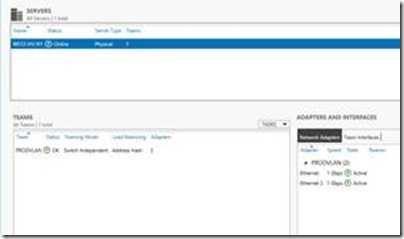
b. Now we will configure the Converged Adapters Required – For this we will create 4 x New adapters – HOST,ISCSI, CLUSTERCSV, LM – There is a great Step-by-Step guide that can be followed here
I highly suggest reading this before proceeding
c. First let’s take a look at our Adapter Configuration by typing:
PS C:\Windows\system32> Get-NetAdapter | sort name
Name InterfaceDescription ifIndex Status MacAddress LinkSpeed
—- ——————– ——- —— ———- ———
Ethernet Intel(R) 82576 Gigabit Dual Port Net… 12 Up 00-A0-D1-EC-8F-ED 1 Gbps
Ethernet 2 Intel(R) 82576 Gigabit Dual Port N…#2 13 Up 00-A0-D1-EC-8F-EC 1 Gbps
PRODVLAN Microsoft Network Adapter Multiplexo… 20 Up 00-A0-D1-EC-8F-EC 2 Gbps
d. Create a new Hyper-V Virtual Switch with the following settings:
PS C:\Windows\system32> new-vmswitch “VSW01? -MinimumBandwidthMode Weight -NetAdapterName “PRODVLAN” -verbose
VERBOSE: new-vmswitch will create a new virtual network.
Name SwitchType NetAdapterInterfaceDescription
—- ———- ——————————
VSW01 External Microsoft Network Adapter Multiplexor Driver
e. Note: If the command New-VMSwitch doesn’t work it may be because you need to install the Hyper-V Powershell Modules
f. Next check that the bindings look correct by typing
PS C:\Windows\system32> Get-NetadapterBinding | where {$_.DisplayName –like “Hyper-V*”}
Name DisplayName ComponentID Enabled
—- ———– ———– ——-
vEthernet (VSW01) Hyper-V Extensible Virtual Switch vms_pp False
PRODVLAN Hyper-V Extensible Virtual Switch vms_pp True
Ethernet Hyper-V Extensible Virtual Switch vms_pp False
Ethernet 2 Hyper-V Extensible Virtual Switch vms_pp False
g. Ensure that the NIC’s are up and that everything looks good
PS C:\Windows\system32> Get-NetAdapter | sort name
Name InterfaceDescription ifIndex Status MacAddress LinkSpeed
—- ——————– ——- —— ———- ———
Ethernet Intel(R) 82576 Gigabit Dual Port Net… 12 Up 00-A0-D1-EC-8F-ED 1 Gbps
Ethernet 2 Intel(R) 82576 Gigabit Dual Port N…#2 13 Up 00-A0-D1-EC-8F-EC 1 Gbps
PRODVLAN Microsoft Network Adapter Multiplexo… 20 Up 00-A0-D1-EC-8F-EC 2 Gbps
vEthernet (VSW01) Hyper-V Virtual Ethernet Adapter #2 23 Up 00-A0-D1-EC-8F-EC 10 Gbps
h. Next we will create the 4 Converged Adapters HOST,ISCSI, CLUSTERCSV, LM — Note that the Host Converged NIC is created by default
Add-VMNetworkAdapter –ManagementOS –Name “LM” SwitchName “VSW01” –verbose
Add-VMNetworkAdapter –ManagementOS –Name “ISCSI” –SwitchName “VSW01” –verbose
Add-VMNetworkAdapter –ManagementOS –Name “CLUSTERCSV” –SwitchName “VSW01” –verbose
i. Review the NIC Configuration again
Get-NetAdapter | Sort name
Name InterfaceDescription ifIndex Status MacAddress LinkSpeed
—- ——————– ——- —— ———- ———
Ethernet Intel(R) 82576 Gigabit Dual Port Net… 12 Up 00-A0-D1-EC-8F-ED 1 Gbps
Ethernet 2 Intel(R) 82576 Gigabit Dual Port N…#2 13 Up 00-A0-D1-EC-8F-EC 1 Gbps
PRODVLAN Microsoft Network Adapter Multiplexo… 20 Up 00-A0-D1-EC-8F-EC 2 Gbps
vEthernet (CLUSTERCSV) Hyper-V Virtual Ethernet Adapter #5 43 Up 00-15-5D-32-0B-02 10 Gbps
vEthernet (ISCSI) Hyper-V Virtual Ethernet Adapter #4 39 Up 00-15-5D-32-0B-01 10 Gbps
vEthernet (LM) Hyper-V Virtual Ethernet Adapter #3 35 Up 00-15-5D-32-0B-00 10 Gbps
vEthernet (VSW01) Hyper-V Virtual Ethernet Adapter #2 23 Up 00-A0-D1-EC-8F-EC 10 Gbps
j. Now we should rename the HOST NIC
10. PS C:\Windows\system32> Rename-NetAdapter –Name “VEthernet (VSW01)” –NewName “vEthernet (Host)” –verbose
11. VERBOSE: Rename-NetAdapter -Name ‘vEthernet (VSW01)’ -NewName ‘vEthernet (Host)’
h. Review the NIC Configuration again
Get-NetAdapter | Sort name
Name InterfaceDescription ifIndex Status MacAddress LinkSpeed
—- ——————– ——- —— ———- ———
Ethernet Intel(R) 82576 Gigabit Dual Port Net… 12 Up 00-A0-D1-EC-8F-ED 1 Gbps
Ethernet 2 Intel(R) 82576 Gigabit Dual Port N…#2 13 Up 00-A0-D1-EC-8F-EC 1 Gbps
PRODVLAN Microsoft Network Adapter Multiplexo… 20 Up 00-A0-D1-EC-8F-EC 2 Gbps
vEthernet (CLUSTERCSV) Hyper-V Virtual Ethernet Adapter #5 43 Up 00-15-5D-32-0B-02 10 Gbps
vEthernet (Host) Hyper-V Virtual Ethernet Adapter #2 23 Up 00-A0-D1-EC-8F-EC 10 Gbps
vEthernet (ISCSI) Hyper-V Virtual Ethernet Adapter #4 39 Up 00-15-5D-32-0B-01 10 Gbps
vEthernet (LM) Hyper-V Virtual Ethernet Adapter #3 35 Up 00-15-5D-32-0B-00 10 Gbps
i. The last part of this configuration will have us setup the Weighting on the Adapters
Set-VMNetworkAdapter –ManagementOS –Name “CLUSTERCSV” –MinimumBandwidthWeight 40
Set-VMNetworkAdapter –ManagementOS –Name “LM” –MinimumBandwidthWeight 20
Set-VMNetworkAdapter –ManagementOS –Name “ISCSI” –MinimumBandwidthWeight 10
Set-VMNetworkAdapter –ManagementOS –Name “VSW01” –MinimumBandwidthWeight 5
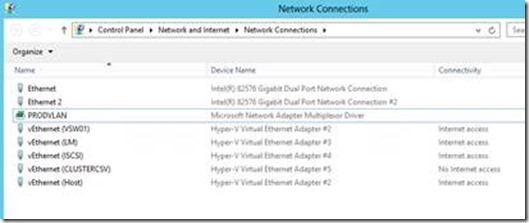
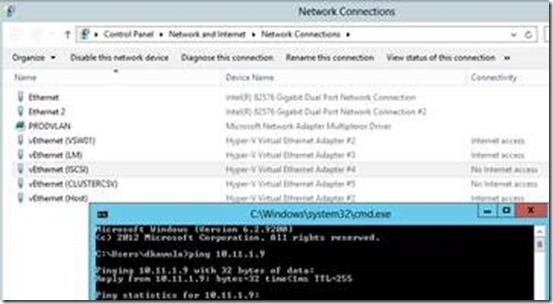
j. Let’s have a look and see what the NIC Configuration looks like in the GUI now
k. I have created this as a simple script which is listed below and could help you automate this process:
#Script Created By Dave Kawula MVP
#Base Configuration of Network for a 2 NIC Hyper-V Host
#Jan 3, 2013
#Production Hyper-V Cluster Upgrade
start-transcript -path c:\post-install\001-NetworkConfig.log
#Create the NIC Team
New-NetlbfoTeam PRODVLAN “Ethernet”, “Ethernet 2” –verbose
#Get the Status of the Network Adapters
Get-NetAdapter | Sort Name
#Create the new Hyper-V Vswitch VSW01
new-vmswitch “VSW01? -MinimumBandwidthMode Weight -NetAdapterName “PRODVLAN” -verbose
#Check the Bindings
Get-NetadapterBinding | where {$_.DisplayName –like “Hyper-V*”}
#Check the Adapter Settings
Get-NetAdapter | sort name
#Now Create the Converged Adapters
Add-VMNetworkAdapter –ManagementOS –Name “LM” –SwitchName “VSW01” –verbose
Add-VMNetworkAdapter –ManagementOS –Name “ISCSI” –SwitchName “VSW01” –verbose
Add-VMNetworkAdapter –ManagementOS –Name “CLUSTERCSV” –SwitchName “VSW01” –verbose
#Review the NIC Configuration Again
Get-NetAdapter | Sort name
#Rename the HOST NIC
Rename-NetAdapter –Name “VEthernet (VSW01)” –NewName “vEthernet (Host)” –verbose
#Review the NIC Configuration Again
Get-NetAdapter | Sort name
#Set the weighting on the NIC’s
Set-VMNetworkAdapter –ManagementOS –Name “CLUSTERCSV” –MinimumBandwidthWeight 40
Set-VMNetworkAdapter –ManagementOS –Name “LM” –MinimumBandwidthWeight 20
Set-VMNetworkAdapter –ManagementOS –Name “ISCSI” –MinimumBandwidthWeight 10
Set-VMNetworkAdapter –ManagementOS –Name “VSW01” –MinimumBandwidthWeight 5
Stop-transcript
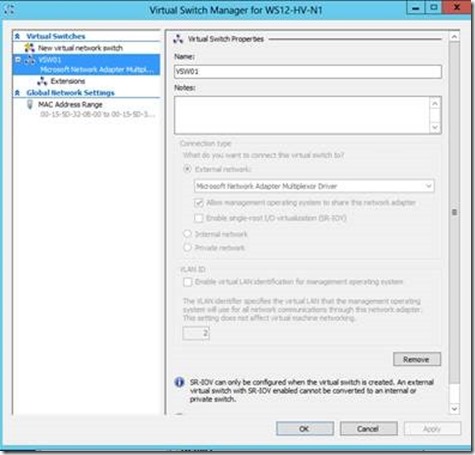
h. It should also be noted that the VSwitch VSW01’s properties cannot be modified because it was created as a Converged VSwitch as seen below. This is normal a normal behavior.
10. Now it is time for us to configure our target Windows Server 2012 Hyper-V Cluster. We will configure this with a Single Node Cluster to start with for the purpose of this article. Extra nodes can easily be added later.
a. First we need to connect to our P5000 Dell ISCSI SAN and configure some of the ACL’s. We will run all of the ISCSI Traffic over the new Converged ISCSI Adapter.
b. Setup the ISCSI Adapter with an IP Address on the ISCSI Vlan – Validate that you can ping the ISCSI Target Portal’s IP Address
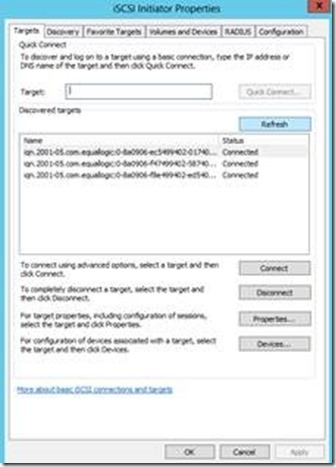
c. Now open the ISCSI Initiator and accept the default firewall warning
d. Click on the configuration tab and copy the ISCSI IQN in this case:
i. iqn.1991-05.com.microsoft:ws12-hv-n1.companyx.com
b. Setup the Access Rights in the P5000 management console using this IQN – at this time we will connect the cloned volumes but we will only connect the quorum drive. We will connect the other 2 x CSV Volumes after we run the Cluster Migration tool
c. Go back to the ISCSI Initiator and type the address of the Virtual IP on the SAN – in my case 10.11.1.9
d. We will actually connect all of the volumes and ensure the data is there now.
e. Open Disk Management and bring all disks online and initialize the Quorum Drive
f. Format the Quorum Drive and label it with the q:
g. The other two CSV Volumes will be setup as mount points so it doesn’t matter about their drive letters for now
h. Open the Failover Cluster Manager
i. Right Click on Failover Cluster Manager and click Create Cluster
j. For this cluster we will pretty much accept all of the defaults and then give it a name through the wizard – Make sure you run the Cluster Validation Wizard and ensure it passes before proceeding
k. Perform all other steps required to prepare the production Hyper-V Cluster. These next steps assume you are happy with the functionality of the cluster
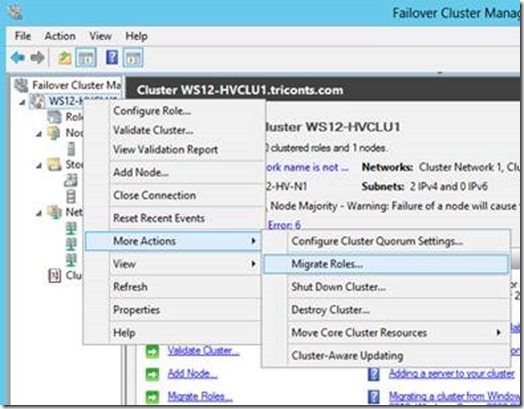
l. Right Click on the Cluster Node at the top of the console, Click More Actions, Click Migrate Roles
m. On the Migrate a Cluster Wizard Screen Click Next
n. On the Specify Old Cluster type the name or IP of the old Cluster
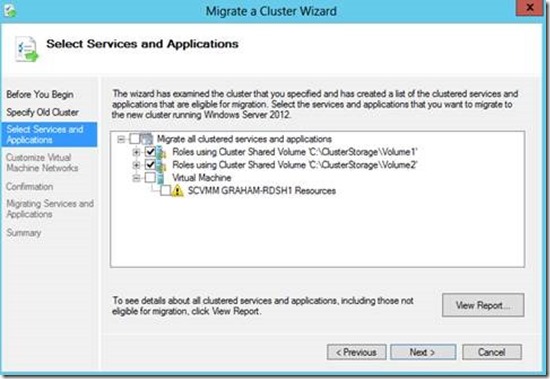
o. The wizard should compile a list of running Services and Applications
p. Select from the dialog box a list of the HAVM’s that you want to migrate – in our case all of them. Notice that there is a warming on the Virtual Machine Resource. This is because we have a Pass Through Volume Connected to this Virtual Machine. This will not work moving over to the new cluster – We will just skip it for now. Also as a note this creates a report – -You can view and save the report for your documentation in the project.
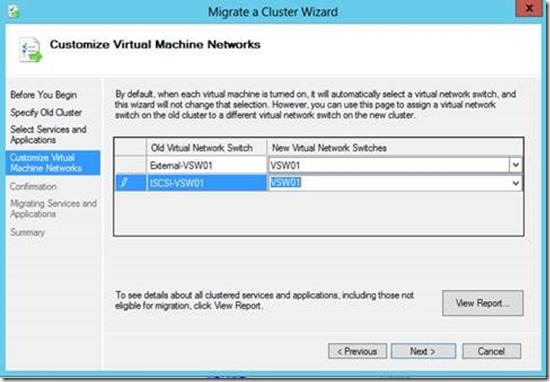
q. Now we need to customize the Virtual Network Connections as they will no longer work from the old configurations. As seen in the screen shot below we will simply connect these to their appropriate Virtual Networks. This will change the virtual machine metadata to map to the new networks.
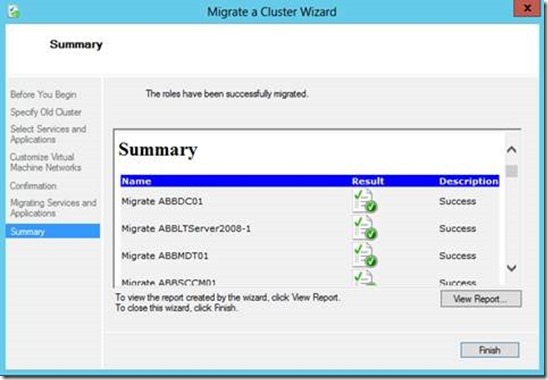
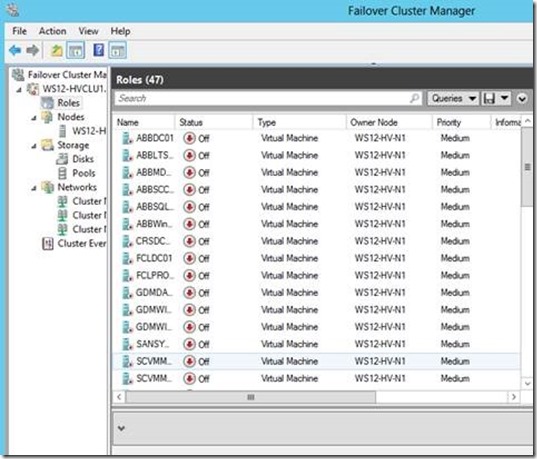
r. Success — We now have 40 x VM Configurations stored on the new Cluster. Now we just need to setup the new CSV Volumes and start the VM’s. After we shut down the old Cluster
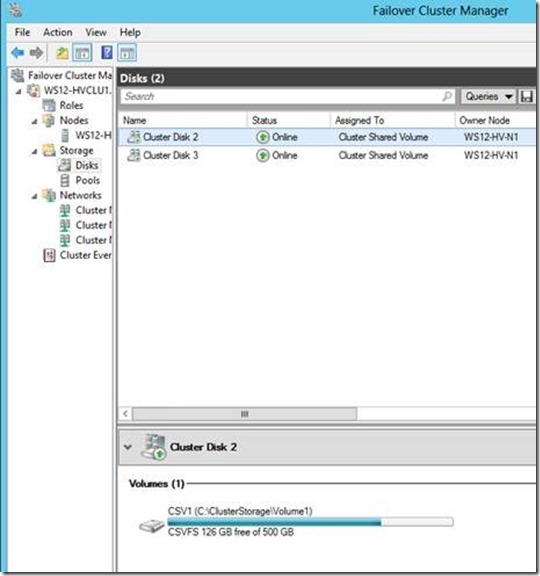
s. Because the disks were already setup with Cluster Disk Signatures and were CSV Volumes. The new Cluster is already aware of them. So all you need to do is online them from the Disks Node
t. Time to test these out.
u. Success!! – Now we just need to perform the following steps to make this work for production
v. Stop all of these Guests’s once tested – We are ok because I put this on an Isolated VLAN for testing J
w. Stop all of the Guest’s on the source Production Cluster
x. Take another Clone of the CSV Volumes
y. Give Access Rights to the Target Server
z. Remove the Access Rights from the Testing CSV’s we were just working with
aa. Delete the old Clone so we don’t waste space on the SAN
bb. Online the new CSV Disks in Disk Management
cc. Ensure they come online in the Failover Cluster Manager
dd. Once Online – Start Bringing the VM’s online
As you can see with the above process the only production downtime would be from the last 10 or so steps. The Cloning of Volumes at the SAN Hardware level is nearly instantaneous. As such you should easily be able to port things over to the new Production Windows Server 2012 Hyper-V Cluster with less than one hour of Downtime.
I hope you enjoy this and find it useful.
Thanks,
Dave

