Deploying a Simple Cloud App: Part 1 - Provisioning and Configuring SQL Azure
If you’ve started reading from this post, you’ll need to go through the previous parts of this series before starting this one:
The architecture of the application calls for a SQL Azure database to store the application’s data. The developers have created the database on their on-premise development SQL Server instance and since you can’t simply detach the database from SQL Server and then attach it to the SQL Azure server, they have scripted the database for SQL Azure and have included it in the deployment package.
To find out how the on-premise SQL database was scripted for SQL Azure, see the part 2 of the developer walkthrough, Scripting the On-Premise Database for SQL Azure.
Let’s get started.
Log in to the Windows Azure Management Portal .
Once you get started with Cloud services, you’re going to be visiting this site often. I highly suggest bookmarking it or committing https://windows.azure.com to memory.
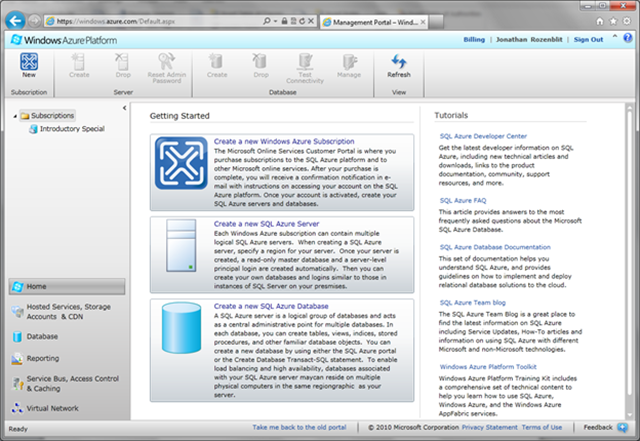
In the navigation menu on the left, you’ll find the Databases button. Click on the Databases button.
At the top, you’ll see a list of Windows Azure subscriptions that are associated with your Windows Live ID.
Click on the subscription that will host your SQL Azure server(s) and database(s) . You’ll see a listing of all the SQL servers associated with your subscription. We’ll come back to this screen later on and you’ll see it populated with server information.
Provisioning the SQL Azure Server
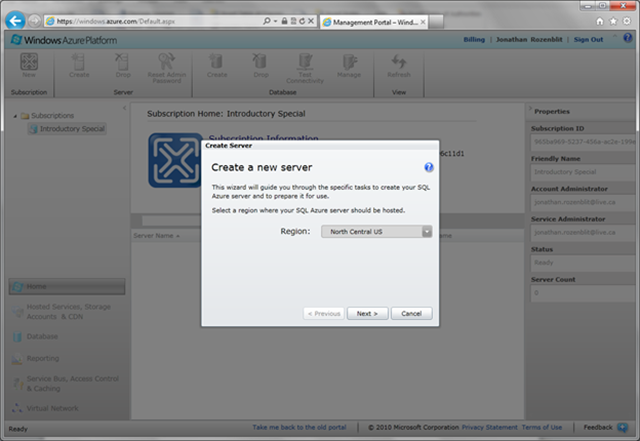
Click on Create in the Server tab group of the toolbar (located at the top of the screen). The Create Server dialog box will popup where you’ll configure your SQL Azure server. The neat thing here is that you’re actually provisioning a server as if you would in your own data centre, except you’re doing it through a wizard and the actual work of installing Windows Server, SQL Server, and configuring everything is done for you.
Select a Region. Selecting a region allows you to host your database in one of several regions (data centres) around the world. This allows you to geo-locate your database servers throughout the world in order to optimize performance. For this walkthrough, select North Central US.
Click Next.
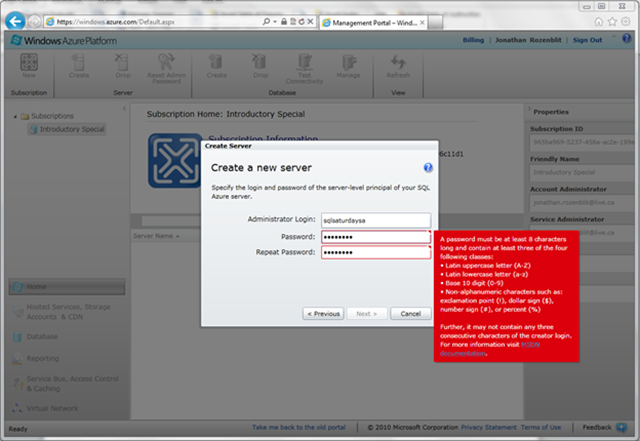
Now you have to create your administrative credentials so that you can log in to the database. SQL Azure uses SQL authentication, so this process is like setting up your “sa” login on an on-premise box. Choose a login that is unique. Usernames like “admin”, “administrator”, “sa”, “root”, “guest”, “dbmanager”, and “loginmaster” are not allowed – people know these logins, so to minimize any security exposure, you’re prevented from using them.
Notice the red warning? I tried to use an easy password (“demo” – clearly not a strong password!). The red warning highlights the password rules that you have to use when creating a password to ensure that everything is kept secure. As soon as you enter a password that meets the rules, the warning will disappear and the Next button will become available.
Click Next.
Now we have to create firewall rules so that our database can be accessible. Typically, you’ll just want your application connecting to the database, so you’ll add the IP of the server that hosts your application. Similarly here, select Allow other Windows Azure services to access this server to allow the application hosted in Windows Azure to access the SQL Azure server.
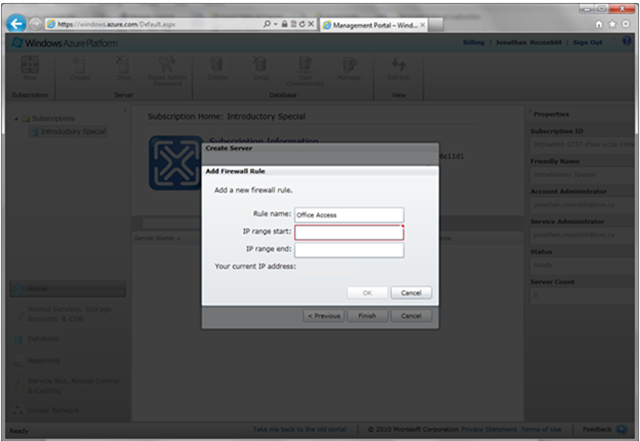
We’ll also need access to the database from our local machine so that we can use SQL Management Studio (or the SQL management tool of your preference). Click on Add to add a new firewall rule to the list.
First things to do is to give the rule a name. The best thing to do is to give the rule a name based on the location from which you’re going to be connecting – something like “Toronto Office”. This will make it easy for you to locate the rule in the future and remember its purpose.
It is recommended that you add the firewall rule right before you start working and make sure to remove it when you’re done. This just makes sure that your database(s) stay secure at all times.
After naming the rule, enter the starting and ending range of the IPs that will have access to the database. Notice that your IP is shown at the bottom. If you’re creating a rule for yourself (this is what we’re doing in this walkthrough), the guess work is taken out of the equation – you can simply use the IP address shown for both the start and end range.
Click on Finish. You’ll notice a little green wheel spinning. This tells you that the server is being provisioned.
The server is now provisioned.
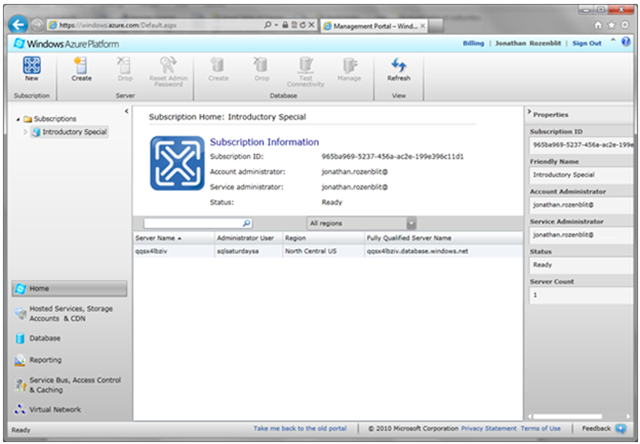
We can now see that we have one server provisioned. At a glance, we can see the server name, user, region, and the fully qualified server name. We’re going to need these later on when we connect to the server.
Creating the Database
Now that we have a server, the next step is to provision a database on that server. While still on the Subscription Home screen, click on Create in the Database group of the ribbon. Notice the same wizard-like approach as creating a server.
Give the database a name. For this walkthrough, we’ll use NerdDinner (that’s the app that’s going to use this database).
Select an edition. For the purposes of this walkthrough, let’s use the Web Edition.
For more information on the differences between the editions, see the SQL Azure FAQs.
- Select a size. We’ll stick with 1GB for now since that’s all we need for this application.
- Click OK. You’ll see the green wheel spinning meaning. Like before, the provisioning process is now occurring. Once it’s done, we’ll have a database.
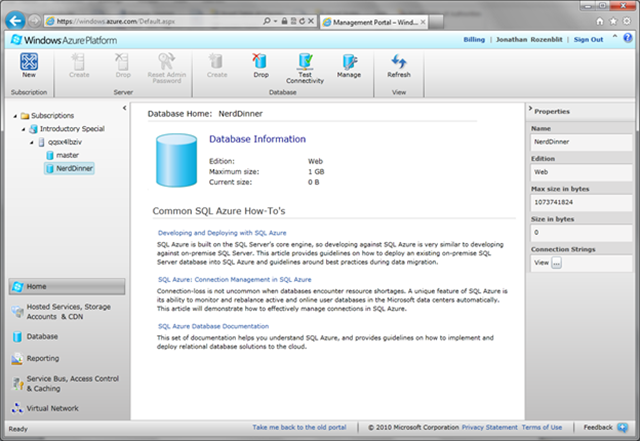
That’s it! We now have a database. Let’s see what that database looks like. Go over the left navigation pane, and expand the subscription and then expand the server. There’s our database. Click on it.
You’ll now see some information about the database in the right-hand side Properties pane.
If you’re interested in the onlineDatabase Manager, click on Manage from the toolbar. You can manage the database online as well as with the SQL tools that you’re already familiar with.
Connecting to SQL Azure Server
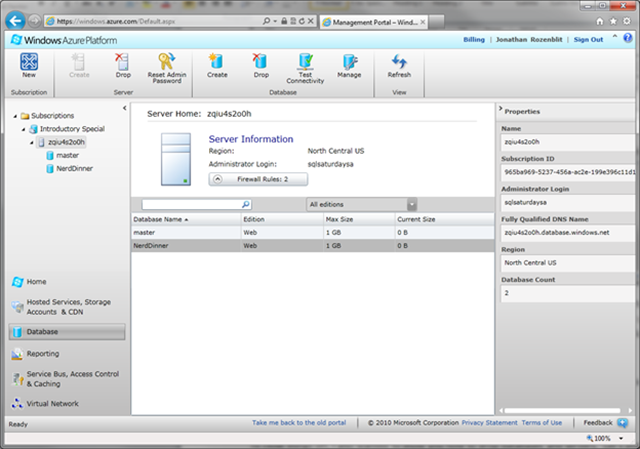
In the Windows Azure Management Portal, click on the previously provisioned server. The Properties pane on the right-hand side of the screen will refresh with the server information.
If, for some reason, you can’t see it, hover your mouse on the right-hand side of the screen until you see the cursor change to a two arrow cursor. Drag it towards the left and the Properties pane will appear.
In order to connect to the database, we’re going to need the fully qualified DNS name of the server. Highlight the value in the Fully Qualified DNS Name and press CTRL+C.
Remember, the Windows Azure Management Portal is a Silverlight application. Don’t bother trying to right-mouse click to copy because you’re just going to get the Silverlight menu.
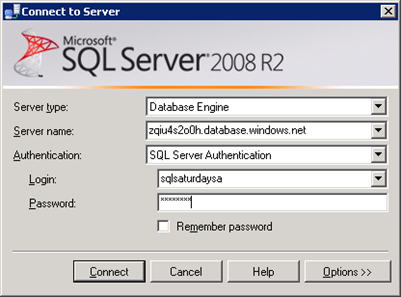
Open SQL Server Management Studio and open a new connection.
In order to work with SQL Azure, you’ll need the SQL Server 2008 R2 management tools.
Paste the server name in the Server name field.
Change the authentication type to SQL Server Authentication.
Enter the administrator login and password setup earlier in the Login and Password fields respectively.
If you don’t remember the login, just flip back to the Windows Azure Management Portal and it will be in the Properties pane.
Before we click on Connect, click on Options.
We want to make sure that the connection is secure. To do that, click on Encrypt connection.
Click on Connect. Give it a few seconds and you’ll be connected.
Notice the icon next to the server name? The icon is blue, indicating that the connection is to a SQL Azure server. Expand the Databases node to see our NerdDinner database.
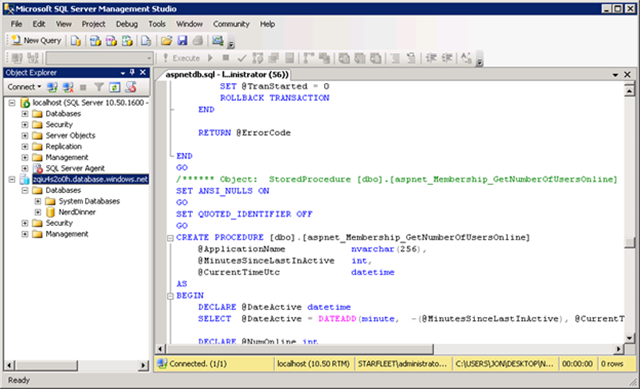
Open the first of the developer provided scripts. From the File menu, click on Open, and then select File. Select InstallCommon.sql.
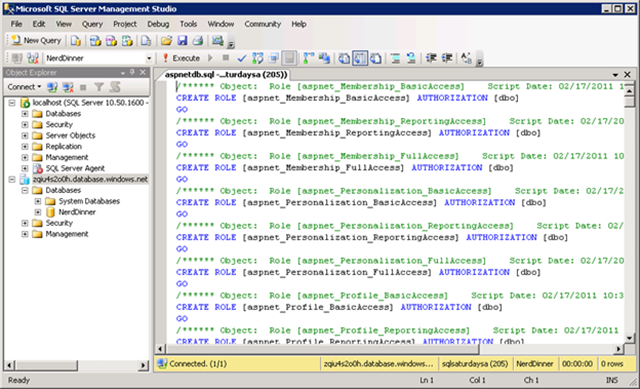
Change the database to NerdDinner and click Execute.
It should run relatively quickly and execute with no problems.
Repeat steps 10 and 11 for each of the provided scripts. Don't forget to ensure that the NerdDinner database is selected before running each script.
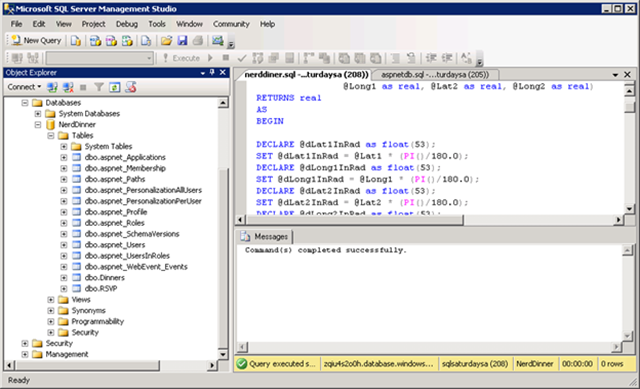
Let’s check that the tables and stored procedures were created. Expand the NerdDinner database. You should now see tables and stored procedures.
That was relatively painless, right? Not too different from running scripts against your on-premise SQL Server, right? Right! Congratulations! You have now successfully deployed the SQL Azure database.
Online Database Manager
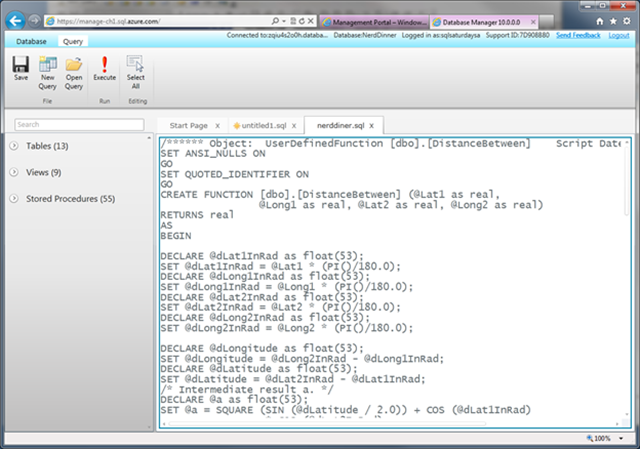
Let’s pause for a moment and look at a scenario where you may not have SQL Server Management Studio available to you. No problem. You can deploy the scripts from the online management console.
Go back to the Windows Azure Management Portal.
Click on the NerdDinner database, and then click on Manage in the ribbon. A new tab or window will open. It’s going to open up a new tab.
If you have a pop-up blocker, it may prevent the window from opening. Allow the window to pop-up in your pop-up blocker, and click on Manage again.
All the login information is pre-populated because you previously selected the database. Just enter your password and click Connect.
You can do pretty much everything from here. New query, tables, etc. For example, to deploy scripts:
- Click on Open Query.
- Select a script file and click Open.
- Click on Execute.
There you have it – deployments from anywhere!
SQL Azure Deployment Completed
With that, we’re done the SQL Azure portion of our deployment. Let’s review what we did:
- We created a SQL Azure Server.
- We created a SQL Azure Database.
- We connected to the SQL Azure database, and executed the scripts provided by the developers against it.
Let’s go back to our to do list and see what we have to do next.
![Deploying-a-Simple-Application_thumb[2] Deploying-a-Simple-Application_thumb[2]](https://msdntnarchive.blob.core.windows.net/media/TNBlogsFS/prod.evol.blogs.technet.com/CommunityServer.Blogs.Components.WeblogFiles/00/00/00/48/12/metablogapi/6567.Deploying-a-Simple-Application_thumb2_thumb_66A7F521.png)
