Windows 2012 Core Survival Guide - Managing basic IPv4 configuration information
Learn about my 2012 Core Survival Guide here.
Basic IPv4 Address configuration
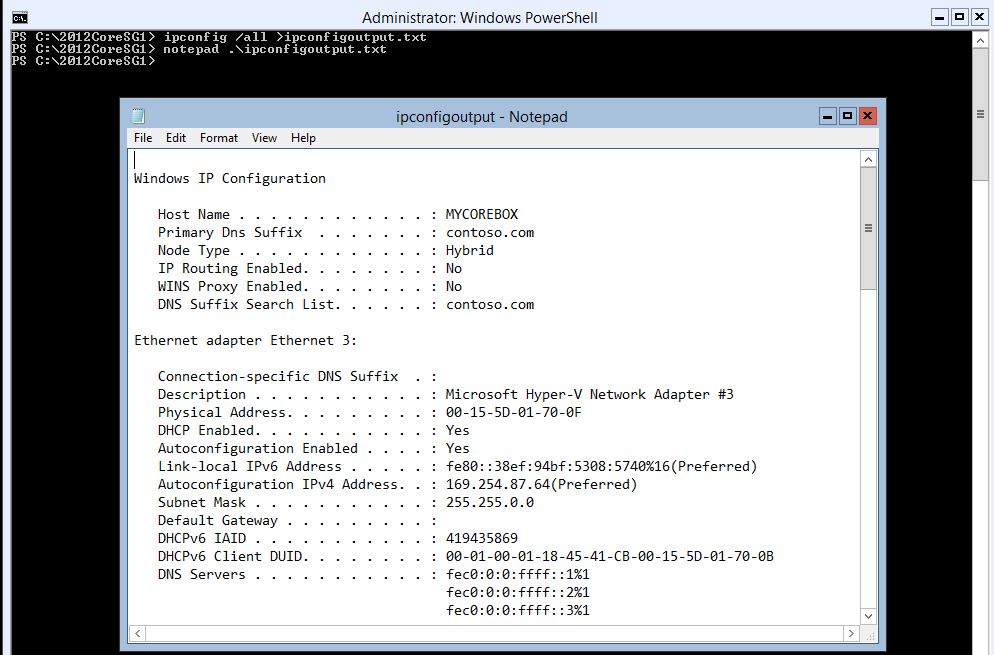
Windows Server 2012 Core still has IPCONFIG.EXE that can be used to view the IP configuration. Modern servers typically come with several network interface ports. This causes IPCONFIG.EXE to scroll off the screen when viewing its output. Consider piping the output if IPCONFIG.EXE to a file and view it with Notepad.exe. This is the typical command I use:
IPConfig /all >IPConfigOutput.txt
Notepad IPConfigOutput.txt
The screen shot below is what you would expect to see using the above commands.
Viewing basic IPv4 configuration information with Get-NetIPAddress
If you wish to modify your IPv4 configuration you will need to know the “InterfaceIndex” of the NIC. PowerShell is going to be the tool of choice to determine this. I use the following PowerShell command to determine the “InterfaceIndex”
PowerShell Command:
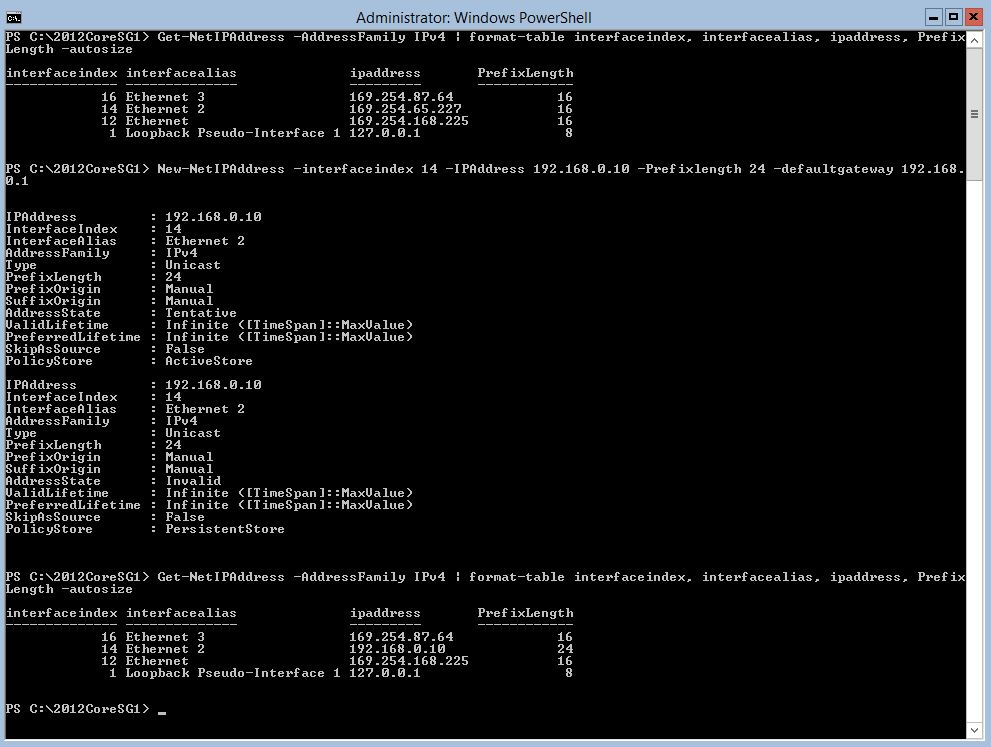
Get-NetIPAddress -AddressFamily IPv4 | format-table interfaceindex, interfacealias, ipaddress, PrefixLength -autosize
This command will display in a table format the IPv4 address for all of the Network Interface ports installed in the server. As you can see below all three NICs have link local address (169.254.y.z). This may indicates that NICs are configured for DHCP and this server cannot locate a DHCP server. (See Determining if an IPv4 address is DHCP or Static to verify NIC setting)

In the above screen shot PrefixLengh is the CIDR-type subnet mask. This equals the number of bits used for the Subnet Mask. For example:
- 24 is a subnet of 255.255.255.0
- 16 is a subnet of 255.255.0.0
- 8 is a subnet of 255.0.0.0
Modifying basic IPv4 configuration information
As you can see from the output above we have 3 NIC in this box and the loopback adaptor. Now that you know the “InterfaceIndex” we can modify one of the NIC in the this server.
I have found that when working with Core it is a best practice to configure the IP Address, Subnet Mask and Default Gateway all at the same time. Below I am going to modify the NIC with “InterfaceIndex 14”. I am going to give it an IPv4 address of 192.168.0.10 with a Subnet mask of 255.255.255.0 and a default gateway of 192.168.0.1.
PowerShell Command:
New-NetIPAddress -interfaceindex 14 -IPAddress 192.168.0.10 -Prefixlength 24 -defaultgateway 192.168.0.1
Below you can see I started with a link local address of 169.254.65.227 with a CIDR-type subnet mask of 16. We change it to 192.1680.10 with a CIDR-type subnet mask of 25. I will cover how to see the default gateway in an upcoming blog. For now you will have to believe me that I set it.
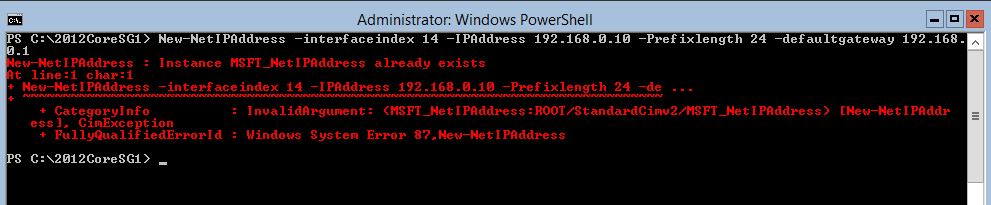
If the IPv4 address has already been set or you run the same command again you might see this error below.
Removing basic IPv4 configuration information
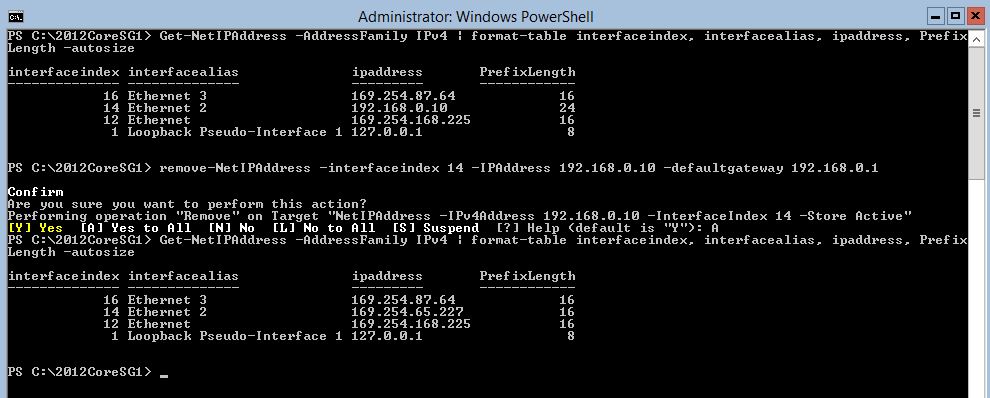
Removing all of the basic settings is a bit tricky. You must use the same parameters that would be used to configure the interface. If you leave off defaultgateway it does not remove it from the configuration.
PowerShell Command
Remove-NetIPAddress -interfaceindex 14 -IPAddress 192.168.0.10 -defaultgateway 192.168.0.1
In the screen shot below we show the current setting, removing the setting and the results of the removal.
The removal of the default gateway has some challenges. If not correctly removed, it can prevent you from correctly configuring the basic IPv4 configuration. I plan to blog about this in my upcoming blogs. I will include complete instruction and troubleshooting steps for removing the default gateway.
Modifying an misconfigured IPv4 Address
If your IPv4 address has been set, but misconfigured, you can modify it by first removing the old IPv4 address and adding it back.
Now it is time for you to get into your lab and play with this. You don’t want your first experience with configuring basic IPv4 configuration to happen with the CIO standing over your shoulder watching you.
I hope you found this useful. Please leave me a comment
Thanks,
Bruce