How to Create Custom Views in Project Professional 2007 and 2010
How to Create Custom Views in Project Professional 2007 and 2010
Custom views are an extremely powerful way to relay critical information when you use a lot of enterprise custom fields (ECF). Because ECFs, by definition, are not included in default views, you can add them to default views or create your own custom views in the project plan and add them there.
This article describes how to create a custom view and add ECFs to it so that the view is available to all users as part of the Enterprise Global Template, then continues to describe how to create a project manager created custom view where the view can be copied easily from one project to another by the PM.
The ECF requirements will need to documented and relayed to the Project Server administrator so the fields may be created. Additionally, the custom view description/requirements will need to be relayed, as well, so the admin can create the view and add it to the Enterprise Global Template in order to make it available to all project managers. There will likely be a review board or some sort of process control to ensure that the views being created and added to the Enterprise Global Template are necessary and deserve to be elevated to Enterprise Global Template availability.
Note: Creating a view in PWA to match a view in Project Pro is outside the scope of this article.
The steps for creating tables and views are identical in Project 2010, however the access method differs because of the Ribbon. You will find screenshots of how to access Tables and Views at the end of this article.
Administrator Creates New View in Enterprise Global Template
The Project Server administrator is the person who will make changes to the Enterprise Global Template and create the new view.
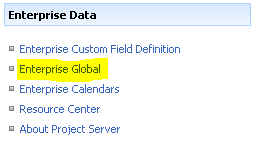
1. Go to PWA URL.
2. Click on Server Settings > Enterprise Global.
3. Click on the Configure Project Professional button.
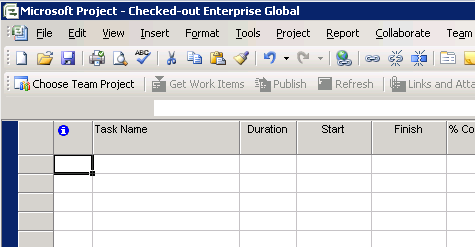
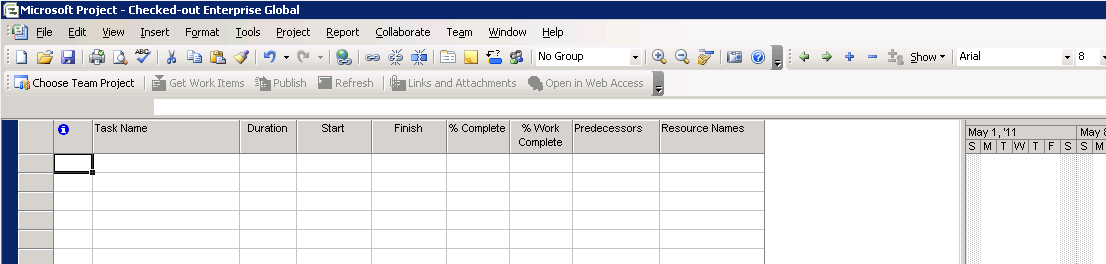
4. Project Pro will open and check out the Enterprise Global Template. The title bar will show Microsoft Project – Checked-out Enterprise Global and will look like an empty plan.
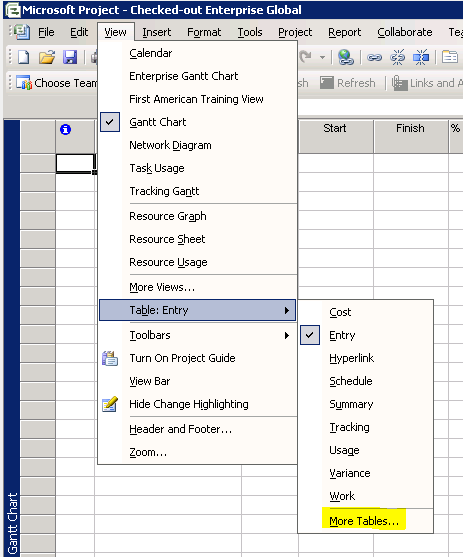
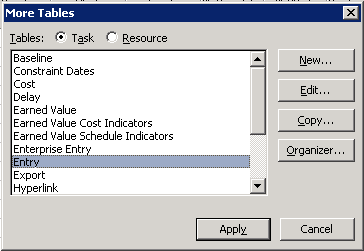
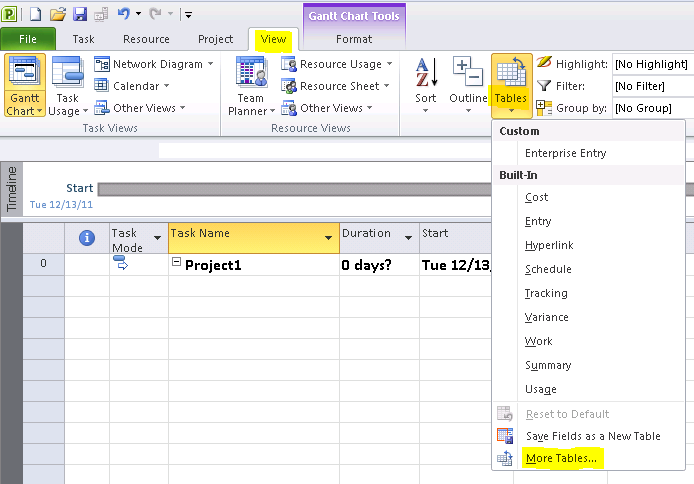
5. Go to View > Table > More Tables…
6. On the More Tables dialog box, you will copy an existing table and make edits to it. Here, click the table you want to copy and choose Copy… , then fill in a new table name.
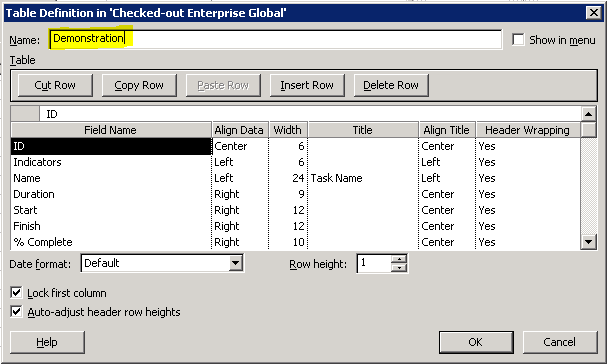
7. In the Table section where the rows are listed, you can cut and copy rows to move them around and insert or delete rows. This is where we can add any ECFs that have been created by selecting the field name dropdown.
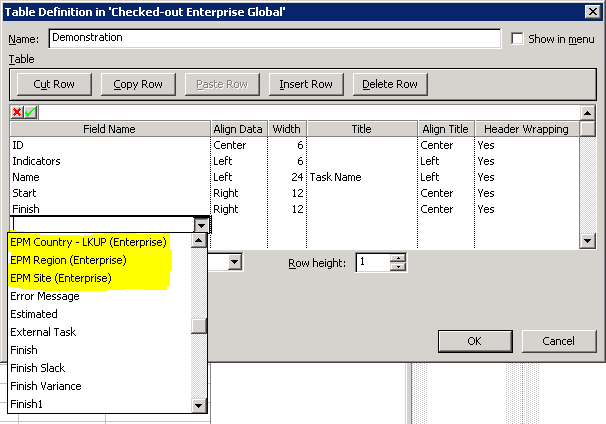
8. To add an ECF, click the dropdown arrow of a new or existing field and select the ECF. In this example, several default fields have been removed and there are three ECFs all beginning with “EPM” that I can add. Your environment will have more ECFs that can be used here in this list.
9. Once selected, you can alter how the data in the field is aligned, the width, title, title alignment, and header wrapper. The Field Name will be used as the title unless you specify a value in the Title field. As a best practice, the ECF field name should be descriptive and short while satisfying the Title field without being altered. This will prevent confusion when a user asks about a column in Project Professional that has a different name in the ECF table the admininstrator sees.
10. If you want the new table to be listed in the View > Table menu, check the Show in menu box.
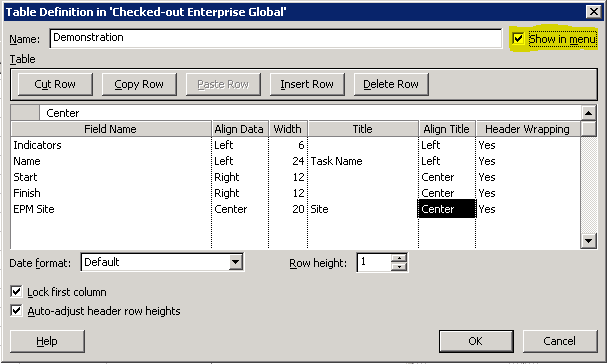
11. Click OK to save your changes to the new table.
12. Next, we’ll create the new view and add the new table we just created.
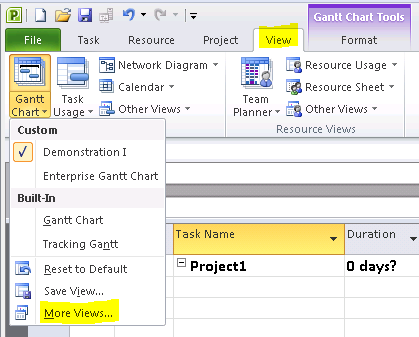
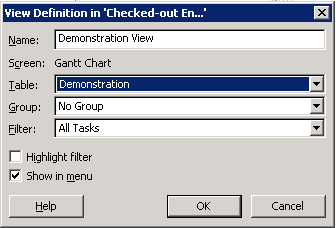
13. Go to Views > More Views… and choose to copy an existing view. For this demonstration, we’ll use the Gantt Chart view.
14. Rename the view in the Name field, then click the dropdown for Table and select the table we created earlier. You can set up grouping and a filter, if you like. If you are going to the trouble of creating a custom view for the Enterprise Global Template, you will like want to check the Show in menu box. Then, click OK.
15. Your new view will now be listed in Views > More views and on the main Views list.

16. Choose File > Close and choose to save and check-in the Enterprise Global Template.
17. Close Project Pro.
18. Because we created the new table and view in the Enterprise Global Template, it will now be available to any project manager who closes and reopens Project Pro after the Enterprise Global Template is checked back in. This will pull the Enterprise Global Template changes to the client application.
Creating Custom Views for Private Viewing
1. As a project manager, you will still able to create your own views that are specific to a plan and move them from your open plan to the global template (different from the Enterprise Global Template) on your local machine so it becomes available to all of your other plans. Other project managers who can edit your plan will be able to see the custom view.
2. The process for creating new tables and views is identical the description above, except the project manager will not have access to edit the Enterprise Global Template. The project manager will simply open a new plan and start creating a new table or new view immediately.
3. Once your view has been created, go to Tools > Organizer and select the Views tab.
4. Select the view you just created and choose <<Copy to copy it to the global template.
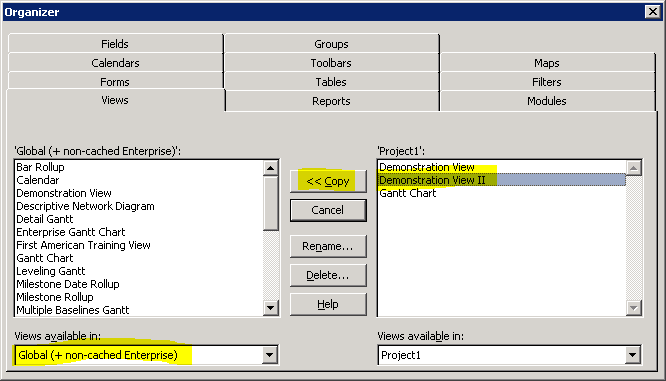
5. Close your plan and open a new plan.
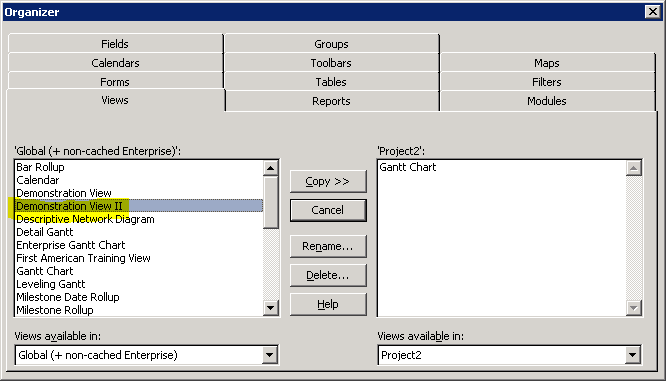
6. Go to Tools > Organizer and select the Views tab.
7. You can copy the Demonstration II view from the global template to your project file to make that view available there.
Creating Custom Views in Project 2010
1. The steps are identical to creating custom views in Project 2007.
2. To create new tables, go to the View tab, Data group, and choose Tables > More tables.
3. To create a new view, go to the View tab, Task Views group, and choose Gantt Chart > More views.