Creating a Quiz Web application using SharePoint designer - Part 3
Welcome to part 3 of this article. We will now begin to build our ShowQuestion.ASPX page, as this is where most of the hard work is done I have split this into two sections. We will be working with the parameters passed from our Default.ASPX page to display the correct question from the correct quiz.
Creating the ShowQuestion.aspx
We now have our default.aspx page that displays a list of available Quizzes. When the user clicks on the title of a Quiz we jump to the ShowQuestion.aspx page and we pass three parameters via a query string.
Here is an example of the whole URL the default.aspx creates:
http:/server/quiz/ShowQuestion.aspx?Title=Capital%20cities&Question=1&of=3&Session=2009-04-08T01:32:24ZUsername
And here is a reminder of the values we are passing in that string
Paramter |
Description |
Title |
Exam Title |
Question |
The number of the question to display |
Of |
The total number of questions in the exam |
Session |
Unique session ID for the attempt at the quiz |
The ShowAnswer.aspx page is where most of the work for the application is done. The page will display the question itself (fields taken from the Questions list) and populate fields in the Answers DVWP. It will also accept an answer from the user and create items in the Answers list.
Our ShowQuestion.aspx page will consist of two Data View Web Parts (DVWP) one with the Question list as its data source and one with the Answers list as its data source. We will pass values from the query string into the data views and will also pass values from one web part to another (taking fields from the Question table and loading them into the Answers table) – lots to get stuck into here!
In SharePoint designer open up your site and then open your ShowQuestion.aspx page (which we created earlier but is currently blank). You should see a blank form in front of you. To give yourself some room to work click into the form and press return several times to make some space.
Next we are going to create two Web Part Zones, effectively two placeholders for where our DVWP’s will be dropped. To do this, from the top menu select: Insert | SharePoint Controls | Web part Zone.
Do this twice so that you have two Zones on your screen. Currently they will be shown as “Zone1” and “Zone2” so let’s give them more friendly names.
Right click on the Zone and select Web Zone Properties
· Change the name of the First web part to “Questions”
· De-select the three checkboxes to disable users from interacting with the web part
· Do the same for the second Web Zone calling it “Answers”
You should now have two rectangular Web Part Zones, one on top of the other.
Configuring the Questions DVWP
The uppermost Web Part Zone will display our Question using a Data View Web Part (DVWP). Click on the Web Part Zone and from the top menu select Data View | Insert a Data view.
You r Web Part Zone will change to reflect that it contains the beginnings of a DVWP (it will show “Click a data source...”). We need to link this to the Questions table and select our fields, to do this:
1. In the top right task pane Click on the Data Source Library tab
2. You will see our three SharePoint lists available (Quiz, Questions and Answers)
3. Click on the Questions list and select Show Data
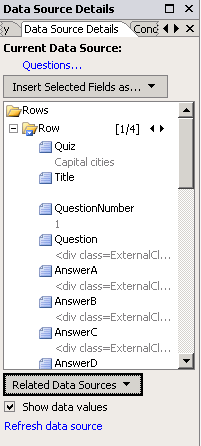
4. You should now be able to see all the fields available in the Questions list
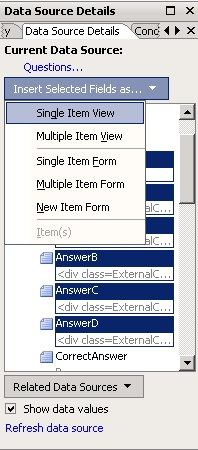
5. Using Control & Click select the following fields from the list: QuestionNumber, Question, AnswerA, AnswerB, AnswerC, AnswerD
6. Click on the Insert Selected Fields button and select Single Item View
You should now see your DVWP populated with the Question number, the Question and the four possible answers. Like this:
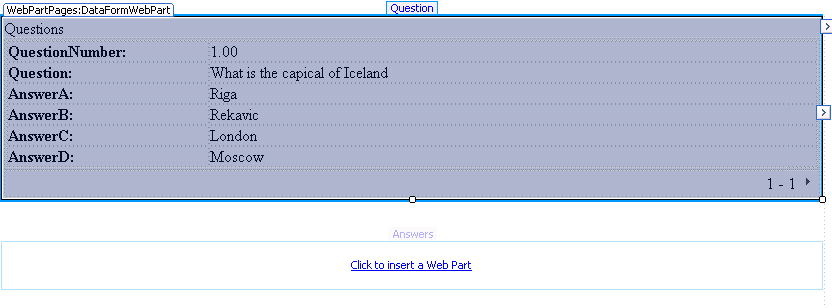
This all looks great but at the moment it is just showing the very first question available in the Questions list. We want the view to know which Quiz it is running and also display the correct question number.
To do this we are going to use the Title and Question values that we passed across in the query string.
Passing values from our Query string into our web part
To make our DVWP display the correct Quiz and Question number, do the following:
1. Click on the On Object User Interface (OOUI) button for the web part
You will see a whole lot of options for configuring the DVWP – this web part is very powerful. The DVWP can connect to all manner of data sources (not just lists) and has powerful functionality to display the data in many ways.
2. Click the Filter option
3. Click on the shaded bar entitled Click here to add a new Clause
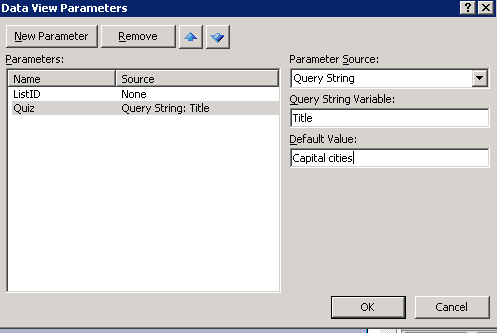
4. In the Field name drop down box, scroll down and select Quiz
5. In the Values column, select Create a new parameter
6. For the name, enter “Quiz”
7. For the parameter source, choose “Query String”
8. For the Query String Variable enter “Title”
9. For the default value enter the name of your test quiz*
*If you have created a Quiz list item for testing put the name of it as the default value so that you will be able to see data in the SharePoint designer view
You don’t need to enter a default value but if you don’t then when you are working in the designer you may not see any data displayed as the Quiz Title is only created when you click on the hyperlink.
The above steps have filtered the DVWP to only show questions from the Quiz whose title was passed in the Query string. We passed the value of Title from the query string into a parameter of the DVWP called Quiz.
So, we have the name of the Quiz in the Query string stored as title=Quiz Name and each Question has a field with the name of the Quiz it belongs to (Quiz). We just set up a filter to only display questions where the two fields match. I.e. only show questions from the Quiz we have chosen.
Next we want to add another filter to show the Question number that matches the Question number contained in the Query string.
In the Query string we have a value question=1 and in the Questions table we have a field name Question number. We want to add another filter so that only the Question that corresponds to the question number will be showed. I.e. If in the query string we have question=18 then show the Question list item where the Question number field is 18.
Hopefully, you can guess the steps we need to do this:
1. In the Filter section of the Web Part parameters click the “Click here to add an new clause...”
2. Set the “Field name” to QuestionNumber
3. In the value section, select “Create a new parameter”
4. Give the name as “QuestionNumber”
5. Set the source as “Query” string
6. Set the Query string variable as “Question”
7. Set the default value as “1”
This gives us a new Parameter QuestionNumber which holds the value of the Question from the query string.
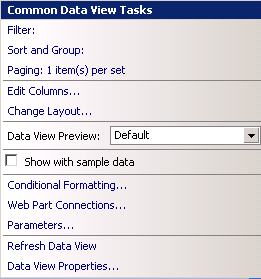
With both your filters configured it should look like this:
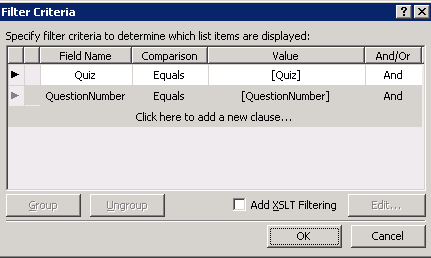
We are passing the query string parameters Title and Question and filtering the view of the Questions table depending on their value.
Save the page and let’s go and test everything works okay.
To test, try this:
1. Go your default.aspx in your browser
2. Hover over each of the Quiz titles (hopefully you have added a couple of Quizzes for testing) and notice how the hyperlink changes to reflect the change in the Title parameter
3. Click on one of the Quiz titles
4. Your ShowQuestion.aspx should now display the first question from the correct Quiz
5. Manually edit the URL in your browser and change the value of Question=1 to Question=2
6. Your page should now display the next question
7. Hit “back” a couple of times on your browser to get back to your default.aspx page
8. Choose another quiz and make sure that the Question shows up correctly
Quick summary
In part two we built a customised hyperlink that passes parameters via a query string to the ShowQuestion.ASPX page. The page then filters a Data View Web Part depending on those values.