Article - Dual Booting Windows 7 and Windows Server 2012 or Windows 8
Here are my latest notes for boot to .VHD without messing up your bare metal.
This process can be used for Windows Server 2012 or Windows 8.
Here’s what you need to have in your IT Toolbox for this exercise.
- USB Drive (4GB or larger)
- .Get your Windows Server 2012 RTM Eval and Windows 8 Eval .ISO downloads at: https://aka.ms/msproducts
- The Windows 7 USB/DVD Download
Native VHD boot is supported only by Windows 7, and it is restricted to the following editions:
-
-
Windows® 7 Enterprise
Windows® 7 Ultimate
Not Professional
My understanding of this is that Native VHD Boot of the Windows 7 OS is only supported on Enterprise and Ultimate. However, using BCDBOOT, I’ve seen other OS’s booted on a PC that originally had Windows 7 Home, Pro, Enterprise and Ultimate installed as its native OS. Thanks Keith.
-
https://technet.microsoft.com/en-us/library/dd799282(v=WS.10).aspx
Check your BIOS – Boot and do an F2 – or whatever your BIO enablement is (F10, ThinkVantage Blue Button or whatever to boot into your BIOS).
Check the following:
o Enable “Virtualization Technology [VT]” (Processor)
o Enable “Data Execution Prevention [DEP]” (Security)
o Enable “Second Level Address Translation [SLAT]”
o Change boot sequence to allow media (USB Drive)
Get a USB Thumb Drive. 4GB – 8GB (Note: 4GB will work for .ISO boot as the files are 3.44GB. The drive will be formatted!)
You can use the GUI (Graphical User Interface) Windows 7 USB/DVD Download Tool that is in the parking lot of the This is a great tool at the Microsoft Store location at : https://images2.store.microsoft.com/prod/clustera/framework/w7udt/1.0/en-us/Windows7-USB-DVD-tool.exe
Or you can do the CUI (Character User Interface) later in the post.
It is all Step-By-Step. Want to have it easy?
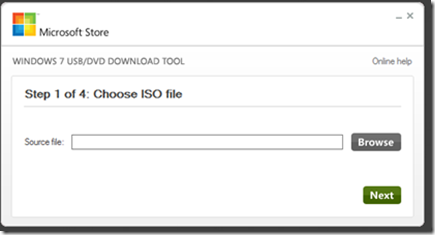
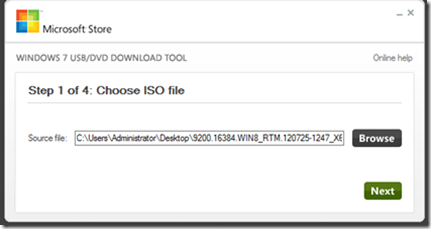
Start the USB Boot Tool -
Choose the .ISO
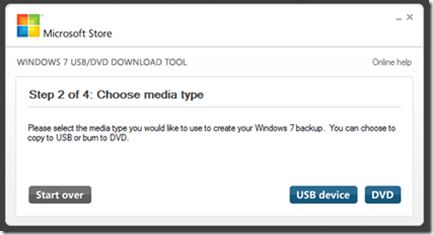
Choose the Media – USB or DVD - It’s that Easy
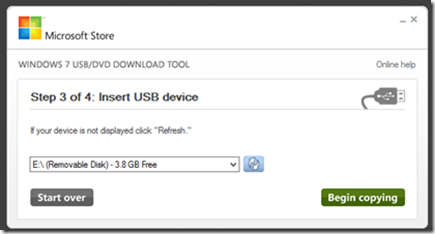
Insert USB Device
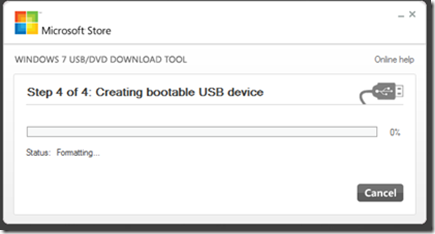
Create the USB Bootable Device
If you want to do the CUI for the USB Thumb Drive which ends with the same results, do the following:
Open up – Command Prompt
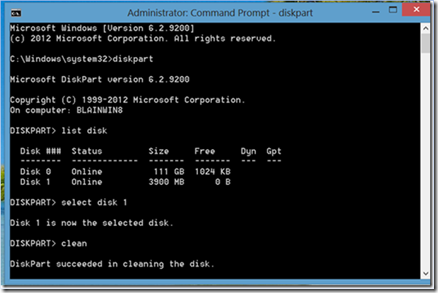
diskpart - enter
list disk enter. Find your USB drive letter.
(CAUTION: Be sure to select the CORRECT DISK before formatting)
select disk 1 (Replace disk 1 with your disk number)
clean
Sample below:
create partition primary
select partition 1
active
format fs=ntfs
(Format process may take a couple of minutes)
assign
exit
Sample below:
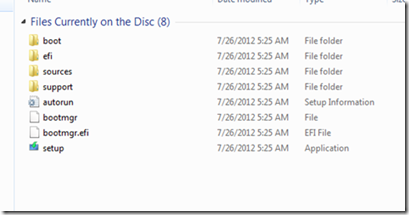
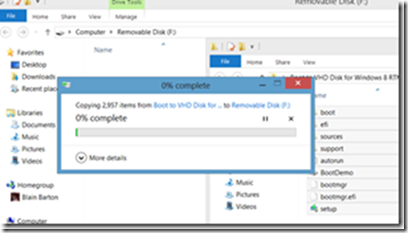
Copy the Windows files from the .ISO to your USB drive with Windows Server 2012 90-Evaluation downloaded from https://aka.ms/msproducts
Sample below:
Make sure your computer BIOS is set to boot to USB
Boot from USB (it will do this automatically if you build the USB to be bootable above!)
CAUTION! If you want to keep you OS and dual boot, do not delete your primary on System Partition on Drive 0 and OS partition on Drive 1.
Create a new partition for your boot to VHD.
To to this, go through the Windows Server 2012 install until you see the partitions screen.
Hit SHIFT + F10 to open a command prompt window, find the installation drive (dir c:, dir d:, dir e: and keep this drive) usually c:
DISKPART
create vdisk file=e:\BootDemo.vhd type=expandable maximum=40000
attach vdisk
Hit REFRESH to see the partition, to see a video go to my buddy’s Dan Stolt’s at https://aka.ms/Boot2VHD
Continue and the install will begin and start loading the files.
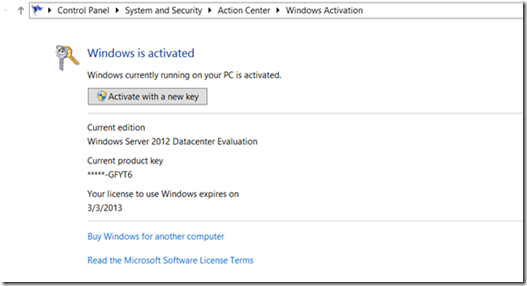
FYI - Note: Windows Product Key is not required for this 180-Day Evaluation Edition. You can always add your Product Key in later with “Activate with a new key”.
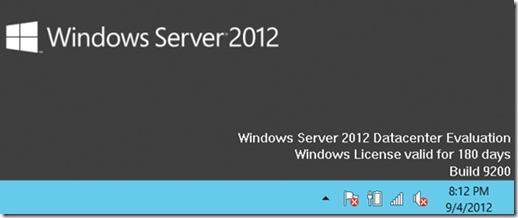
This is what you will see on the desktop on first boot.
Take the defaults on the Language screen Click Next
Click Install now on the install screen
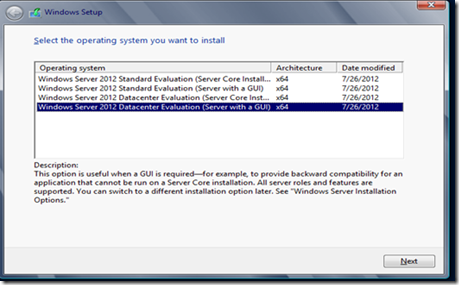
If Installing Windows Server 2012 Datacenter (Server with a GUI) x64 –
Note: Click the 4th line item for the GUI.
The default install is now Server Core click Next
Read License Agreement, Click checkbox “I accept the license terms” then Click Next
The disk you are using should be listed. If not, you will need to Load driver. Select the disk you will be installing on. Select the 39.9 partition want to change drive options Click Next
It will then start copying files. This will take a while (could be 20 minutes or so depending on hardware performance)
It will reboot a couple times (automatically) after the first reboot it will no longer be running off of the USB (if you see the Install screen, take out the USB, cancel the Install and Reboot.
The install for the Boot to VHD routine will continue….
In the Password box enter a new password for this computer. It must meet complexity requirements. Re-enter the password in the second password box then click Finish
If you are using Windows Server 2012 Press Ctrl-Alt-Delete at the same time to get the login screen
Enter password and press <ENTER>
If you are using Windows Server 2012 - The Desktop will be displayed and Server Manager will be opened automatically.
If you are using Windows Server 2012 Press Windows Key on the keyboard will bring up the start screen (formerly known as Start Menu)
If you Right-Click on Computer you will see the new right-click menu is on the bottom of the screen instead of in a dropdown box. Select Properties
We can now change the computer name by clicking on Change Settings
If you are using Windows Server 2012 Type new computer name you would like to use and click OK
Click OK on the information box
Click OK to allow a restart
Then click Restart Now on the final dialog box.
When the computer restarts it will have the new name,
Note: You will see the dual boot to boot to .VHD which is usually your Volume 2, and the NATIVE operating system is usually Volume 1.
Deleting the Boot to the Virtual Hard Disk Scenario
To get your machine back to boot off of the NATIVE operating system (ie. Volume 1) Hit the Windows Key + C then go to SEARCH, or click the lower right-hand corner and go to SEARCH and type in MSCONFIG (under APPS).
In MSCONFIG, go to the BOOT tab and Delete the one you want to disguard but keep the Current OS as that will be your bare metal installation of Windows.
Click “Ok”.
To delete the .VHD and dual boot go to Desktop and Windows Explorer and delete the BootDemo.vhd file, Click Continue in the message box, then empty the Recycling Bin.
If you have issues- boot to the Native Operating System DVD and use the System Repair in Windows.
.png)
