“Step-By-Step”- 4 Methods to Dual Boot Microsoft Windows 8 and Windows Server 2012 with or without Windows 7
There are 4-ways to install Microsoft Windows 8 and Windows Server 2012, depending on what you want to do.
Here are some scenarios that are often asked about:
1. Dual Booting to Windows 8 or Windows Server 2012 from within the Windows 7 Operating System using an existing .VHD
2. Dual Booting Windows 7 and Windows 8 Side-By-Side
3. Dual Booting between Windows 8 and Windows Server 2012 while creating a new Virtual Hard Disk File (VHD)
4. Dual Booting off a USB thumb drive with a newly created .VHD
________________________________________________________________________________________________________________________
1. Dual Boot to Windows 8 or Windows Server 2012 from within the Windows 7 Operating System using an existing .VHD
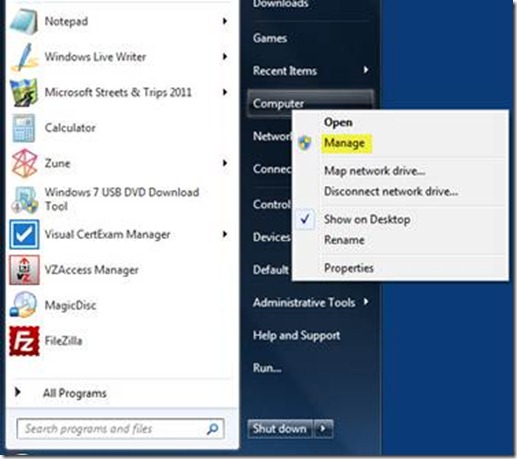
1. Right-click on Computer - select Manage. If User Account Control prompt appears, click Yes.
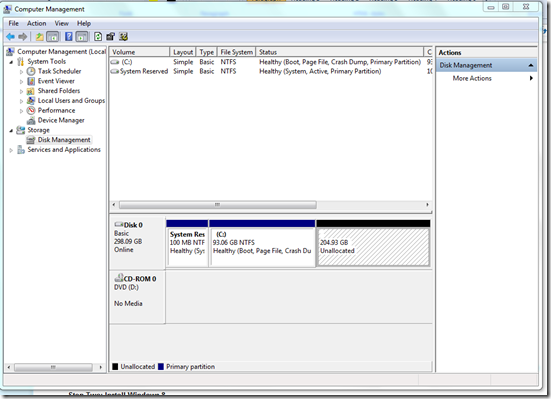
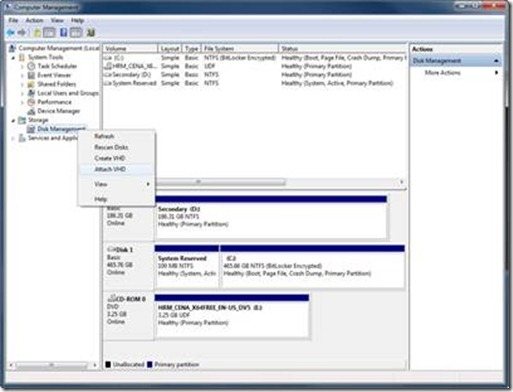
2. Select Disk Management and wait for the list of drives to refresh.
Once the lists of drives appears in the middle pane, Right-click Disk Management and select Attach VHD.
3. Select your VHD. Server2012RTM.vhd (whatever you name it)
4. The VHD will be mounted and assigned a drive letter. In my case, it is drive F: [note the drive letter that is assigned to your mounted VHD as you will use this in step 7]. You might see automatically mounted.
5. Right-click on the Command Prompticon on your Start Menu and select Run As Administrator . If prompted to confirm this operation via User Account Control, select Yes. This will launch a new command prompt window with administrative rights.
6. IMPORTANT: To save an exported backup of your boot loader configuration, type the following command and press ENTER.
↪ bcdedit /export BCDBackup.bak
7. In the command prompt window, typing the following (replace [drive] with your drive letter) and then pressing ENTER:
↪ bcdboot [drive]:\windows
(i.e. bcdboot f:\windows)
8. To test your new dual-boot configuration, restart your computer and select the “Windows Server 2012” boot option.
Configure your new Windows Server Operating System (OS)
1. Upon restarting your computer, you will be presented with two operating system boot choices: (1) your originally installed operating system, and (2) your new operating system boot choice for “Windows Server 2012” or Windows 8. Select Windows Server 2012 to boot from your newly added operating system boot choice.
2. During the first-time boot sequence, Windows Server will attempt to locate the appropriate device drivers for your computer hardware. Depending on your computer hardware configuration, one or more reboots may be required during this initial configuration. Each time your computer reboots, select Windows Server 2012 as your boot choice.
3. When the Settings page appears and asks you for the Product Key, click Skip.
4. When prompted to “Please read the license terms”, check the “I accept the license terms for using Windows” checkbox, and click Accept.
5. On the Region and Language screen, click Next.
6. Enter and confirm an Administrator account password, and click Finish.
2. Dual Booting Windows 7 and Windows 8 Side-By-Side
Create a New Partition from within Windows 7.
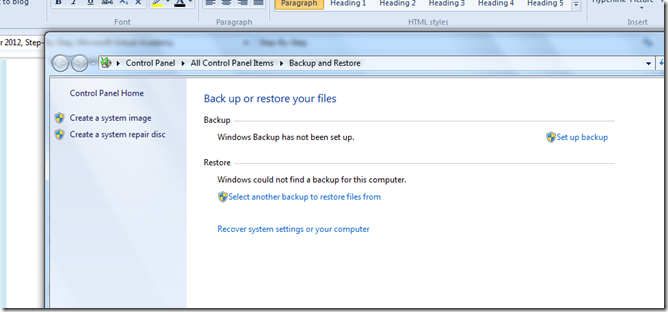
Boot to Windows 7. First, make a backup of your data before you start this exercise via Windows Backup and Restore – Create a System Image (Ultimate Edition) is the easiest way to get the image for backup.
You are going to be formatting drives and installing the new operating system. If anything goes wrong, and you don't want to lose all your precious data.
You need to create a new partition for the new operating system to reside on. A 20GB-40GB partition is a good size to set.
Open the Start Menu right click on the "Computer" option. Click "Manage", click on "Disk Management"
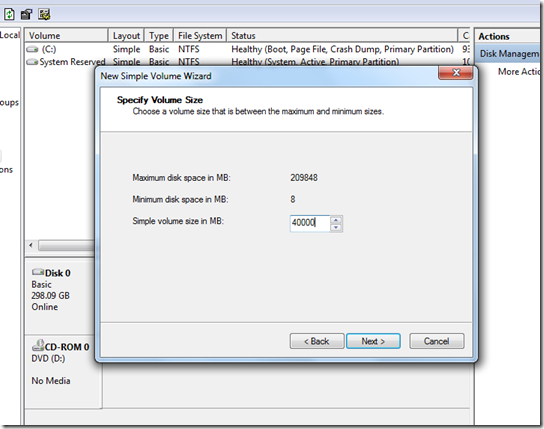
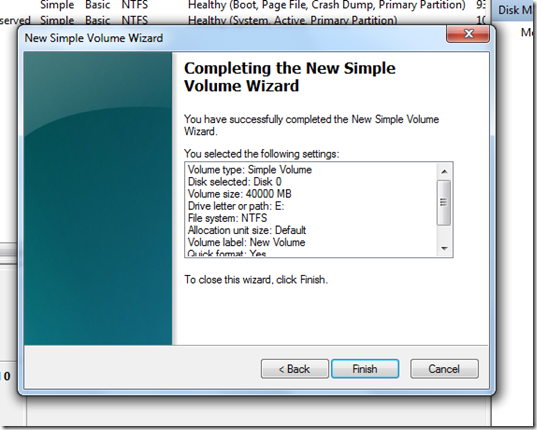
Create a New Simple Volume, this one was 40GB, Make sure you have the available disk space.
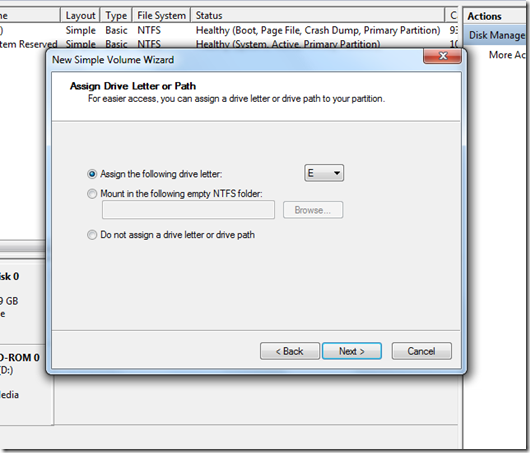
Assign a Drive Letter.
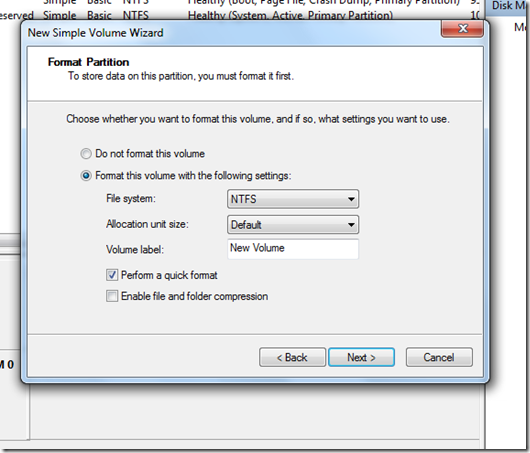
Format the Partition you just created.
Complete the New Simple Volume Wizard
Installing Windows 8
If you haven't downloaded the Windows 8 .ISO 90-Day Evaluation, head over to my download area at https://aka.ms/msproducts and download it.
Burn it onto a DVD. Make sure your computer is set to boot from CD or USB stick in your installation media, then reboot.
Once the BIOS is set to boot off DVD "Press any key to boot from DVD" hit ENTER. You will boot into the Windows 8 install.
CAUTION! You will see the 40GB partition and this is the one to select, selecting the primary partition on Disk 0 will delete your data if selected!
When the Settings page appears and asks you for the Product Key, click Skip. Note: You will not see Product Key if using the 90-Day evaluation.
When prompted to “Please read the license terms”, check the “I accept the license terms for using Windows” checkbox, and click Accept.
On the Region and Language screen, click Next.
Enter and confirm your Administrator Username and password click Finish.
if you let it finish booting it will AUTOMATICALLY go into the newly selected your operating system. Let it finish. It will find your SSID wireless networks and make sure you have your LIVE ID and or hotmail.com to complete your email setup.
Make Windows 7 the Default (Optional)
Here’s how to make your Windows 7 the default operating system as the new setup will want to make Windows 8 your new default operating system.
On the boot menu, click on the button at the bottom that says "Change Defaults or Choose Other Options", and hit "Choose the Default Operating System". From there, you can pick Windows 7 from the menu. By default, your computer will boot into Windows 7 from now on.
You can also go into MSCONFIG to the Boot tab and change to the current, default operating system.
3. Dual Boot between Windows 8 and Windows Server 2012 while creating a new Virtual Hard Disk File (VHD)
CAUTION! If you want to keep you OS and dual boot, do not delete your primary on System Partition on Drive 0 and OS partition on Drive 1.
Create a new partition for your boot to VHD.
To to this, go through the Windows Server 2012 install until you see the partitions screen.
Enter SHIFT + F10 to open a command prompt window, find the installation drive (dir c:, dir d:, dir e: and keep this drive) usually c:
diskpart
create vdisk file=e:\BootDemo.vhd type=expandable maximum=40000
attach vdisk
Hit REFRESH to see the partition, to see a video go to my buddy’s Dan Stolt’s at https://aka.ms/Boot2VHD
Continue and the install will begin and start loading the files.
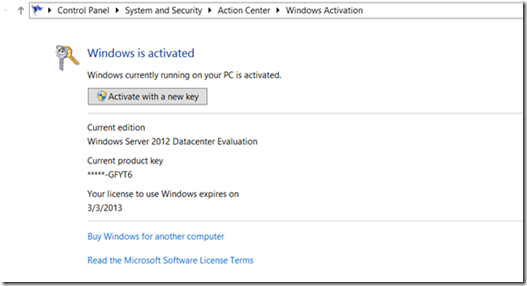
FYI - Note: Windows Product Key is not required for this 180-Day Evaluation Edition of Windows Server 2012.
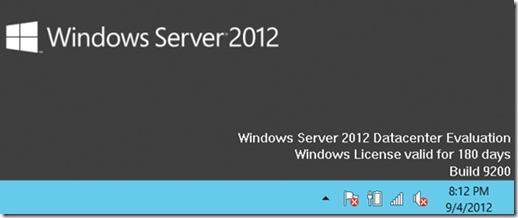
This is what you will see on the desktop on first boot.
Take the defaults on the Language screen Click Next
Click Install now on the install screen
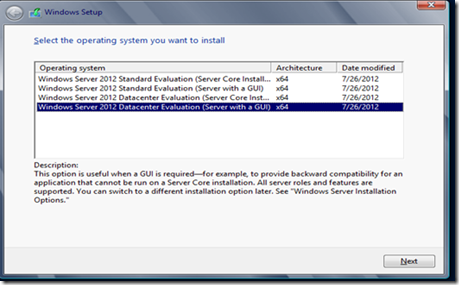
If Installing Windows Server 2012 Datacenter (Server with a GUI) x64 –
Note: Click the 4th line item for the GUI.
The default install is now Server Core click Next
Read License Agreement, Click checkbox “I accept the license terms” then Click Next
The disk you are using should be listed. If not, you will need to Load driver. Select the disk you will be installing on. Select the 39.9 partition want to change drive options Click Next
It will then start copying files. This will take a while (could be 20 minutes or so depending on hardware performance)
It will reboot a couple times (automatically) after the first reboot it will no longer be running off of the USB (if you see the Install screen, take out the USB, cancel the Install and Reboot.
The install for the Boot to VHD routine will continue….
In the Password box enter a new password for this computer. It must meet complexity requirements. Re-enter the password in the second password box then click Finish
If you are using Windows Server 2012 Press Ctrl-Alt-Delete at the same time to get the login screen
Enter password and press <ENTER>
If you are using Windows Server 2012 - The Desktop will be displayed and Server Manager will be opened automatically.
If you are using Windows Server 2012 Press Windows Key on the keyboard will bring up the start screen (formerly known as Start Menu)
If you Right-Click on Computer you will see the new right-click menu is on the bottom of the screen instead of in a dropdown box. Select Properties
We can now change the computer name by clicking on Change Settings
If you are using Windows Server 2012 Type new computer name you would like to use and click OK
Click OK on the information box
Click OK to allow a restart
Then click Restart Now on the final dialog box.
When the computer restarts it will have the new name,
Note: You will see the dual boot to boot to .VHD which is usually your Volume 2, and the NATIVE operating system is usually Volume 1.
Deleting the Boot to the Virtual Hard Disk Scenario
To get your machine back to boot off of the NATIVE operating system (ie. Volume 1) Hit the Windows Key + C then go to SEARCH, or click the lower right-hand corner and go to SEARCH and type in MSCONFIG (under APPS).
In MSCONFIG, go to the BOOT tab and Delete the one you want to disguard but keep the Current OS as that will be your bare metal installation of Windows.
Click “Ok”.
To delete the .VHD and dual boot go to Desktop and Windows Explorer and delete the BootDemo.vhd file, Click Continue in the message box, then empty the Recycling Bin.
If you have issues- boot to the Native Operating System DVD and use the System Repair in Windows.
4. Dual Booting off a USB thumb drive with a newly created .VHD
