How to create alternate URL for Service Manager Self Service Portal?
In this blog post, I will walk you through the scenario where Web Content Server (WCS) and SharePoint web parts are on different servers.
First, let’s understand how self-service portal works.
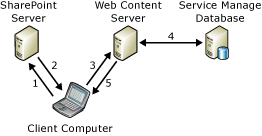
The flow of data is as follows:
- The client accesses the Self-Service Portal with a browser by specifying the URL for the SharePoint server.
- The SharePoint server returns Silverlight code that creates a web page containing the basic framework of the Self-Service Portal and also the URL for the web content server computer. The URL for the web content server computer was defined when you installed the Self-Service Portal.
- The client computer, which is now running the Silverlight code, makes a connection to the web content server computer using the URL in step 2.
- The web content server computer reads and writes data to the Service Manager database. The computer name for the Service Manager Database was defined when you installed the web content server.
- The web content server computer returns the data that makes up the center pane on the Self-Service Portal page.
If you install Self-Service Portal (SSP) with SSL, things to remember.
- The certificates that you use for the Self-Service Portal must be issued from a Certification Authority that is trusted by the client.
- The name on the certificate for the SharePoint website server must match the URL that your users enter into the browser. For example, if the user types the URL https://ServiceDesk/SMPortal, then the certificate must have been issued to ServiceDesk and not to FQDN, for example, ServiceDesk.woodgrove.com.
- The name on the certificate for the web content server must match the name that you entered when you deployed the SharePoint website server.
If you are deploying both the SharePoint website server and web content server on the same computer, you need only one certificate. That one certificate will work for both ports. If you are deploying the SharePoint website server and web content server on different servers (which is recommended in a production environment), you will need one certificate for each computer.
Please refer these TechNet links for more details
https://technet.microsoft.com/en-us/library/hh914195.aspx
https://technet.microsoft.com/en-us/library/hh667343.aspx
Ok, let’s continue with our scenario.
I will install the WCS and SharePoint on two different servers and will use https://ServiceDesk/SMPortal as my portal URL and not the https://<ServerName>/SMPortal.
Step 1:
We need to create the DNS record for ServiceDesk and point it to Service Manager Portal Server (in this scenario to the server where we will install SharePoint web parts).

Step2:
Here, we need to create two certificates one for WCS and other for alias name (Sharepoint server)
1. Create the certificate for this alias name.
For our scenario, I’ll create it from IIS -> Server Certificates -> Create Domain Certificate

On next page you need to select CA.
When you create the certificate it will look like this
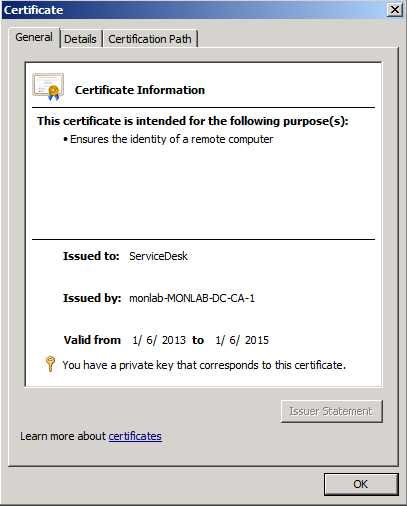
Note: Issued to name should be same as URL
2. I'll use same method to create the certificate for WCS server (this certificate issued to name will be same as URL in the application settings on the SharepointServer)
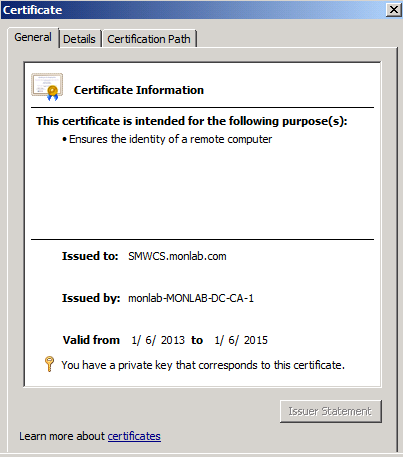
Sharepoint Server -> IIS -> Service Manager Portal -> Application Settings
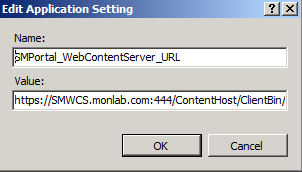
Note : WCS certifcate issued to name and name in this URL should match.
Step 3: Install SSP
Install WCS, refer this link for details https://technet.microsoft.com/en-us/library/hh524264.aspx
and then Install Sharepoint WebPart, refer this link for details https://technet.microsoft.com/en-us/library/hh495676.aspx
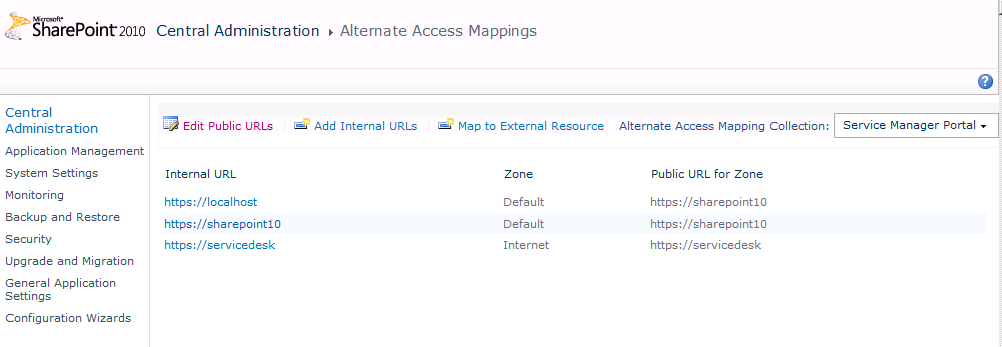
Step 4: Configure the Alternate Access Mappings (AAM)
Alternate Access Mappings (AAM) allows you to modify results URLs based on the access URLs for a site. For SSP we are using the URL as ServiceDesk and not server name so to allow this in SharePoint we need to configure AAM.
Steps to configure it: https://technet.microsoft.com/en-us/sharepoint/ff679917.aspx
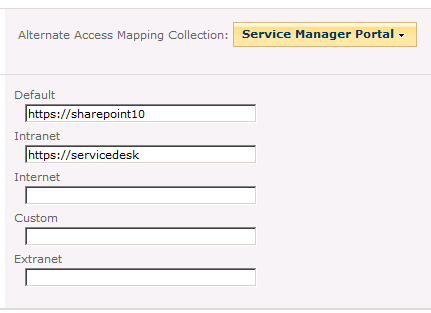
SharePoint Central Administration -> Application Management -> Configure Alternate Mappings -> Select the Service Manager Portal URL -> Edit Public URLs -> and update the alternate URL
Hope this helps!