Azure Service Principal in Jenkins
A quick update to a previous post - below is how to add an Azure Service Principal to a Jenkins job - then use it to authenticate to Azure using PowerShell Core.
- Ensure that the Azure AD Plugin is installed in the Jenkins instance - it requires a restart of the service.

- Add a new credential - select Microsoft Azure Service Principal

- Fill in the details from your application.
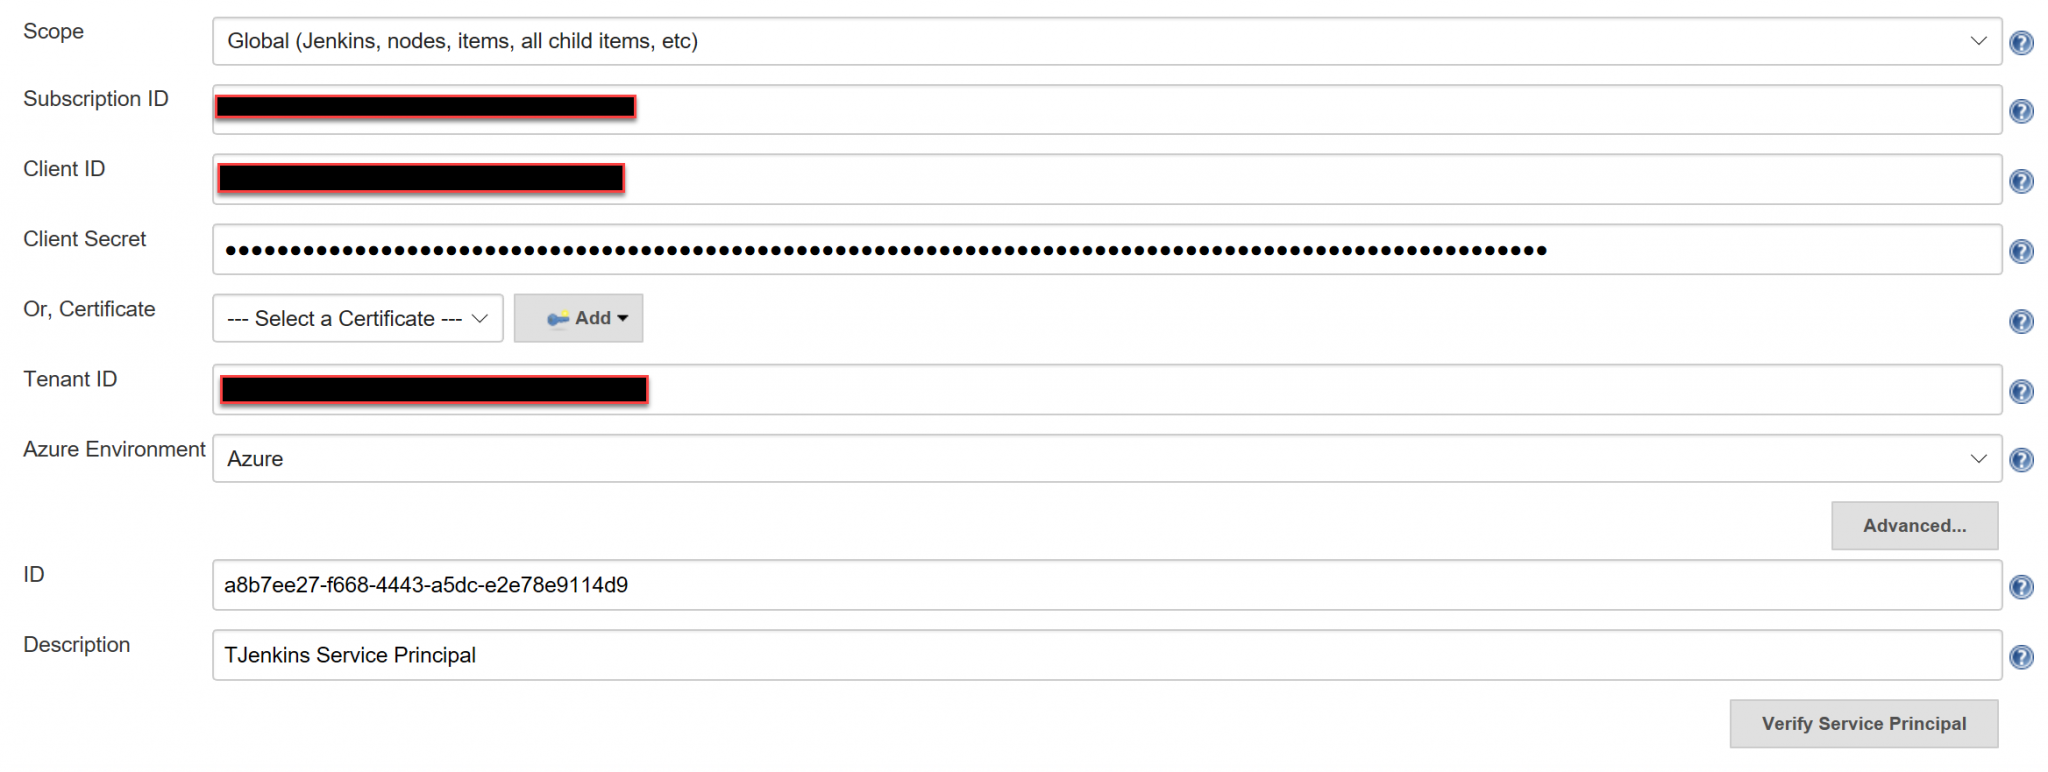
- Click Verify Service Principal. If it is working you should get a success message.
When using the service principal in a job.
-
- Ensure that the Use secret text or file(s) is ticked and select the service principal.
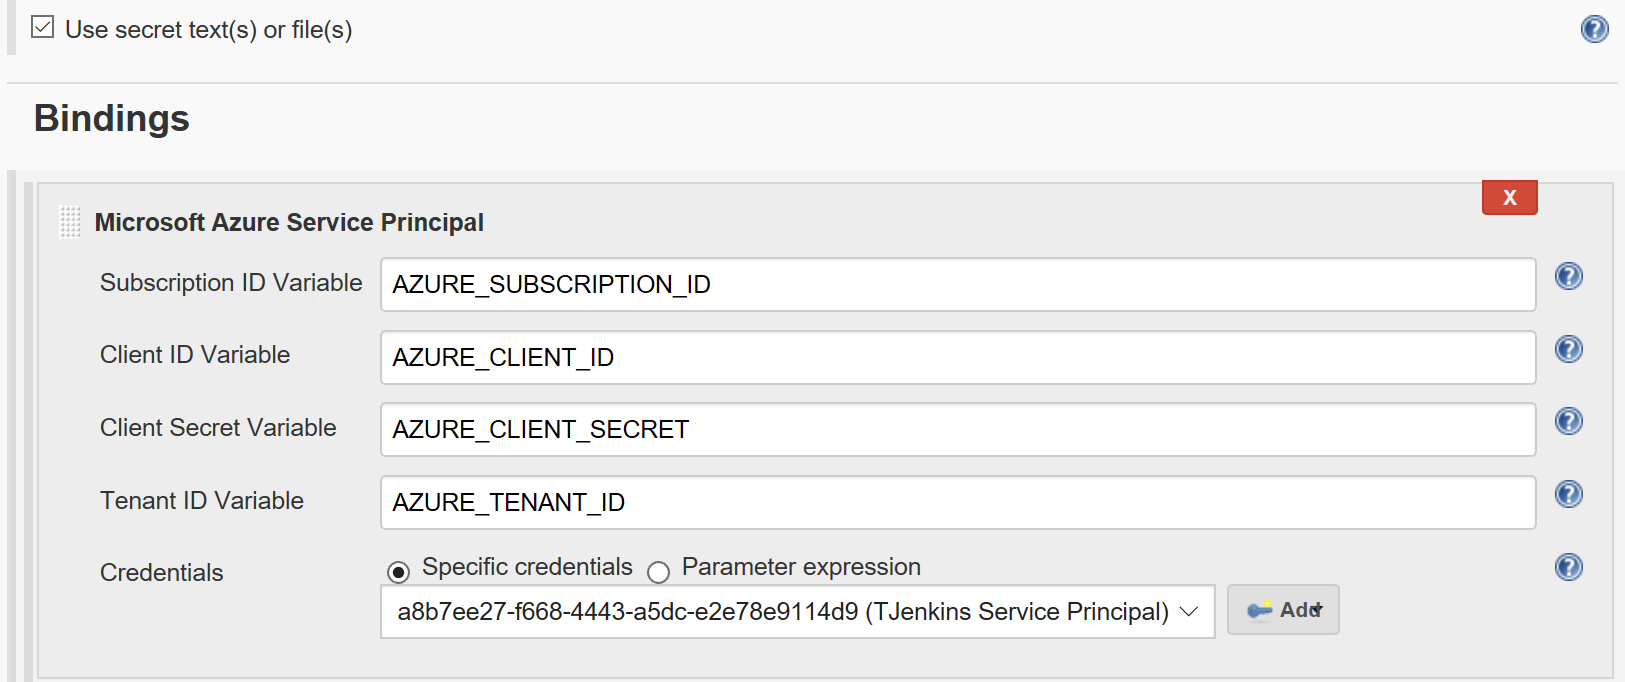
- In the ps1 file - add the following function (or create a module on the Jenkins node) - the you can just call it to authenticate to Azure.
- Ensure that the Use secret text or file(s) is ticked and select the service principal.
function Connect-AzureJenkins { $tenantId = $env:AZURE_TENANT_ID $username = $env:AZURE_CLIENT_ID $password = ConvertTo-SecureString -String $env:AZURE_CLIENT_SECRET -AsPlainText -Force $credential = New-Object -TypeName System.Management.Automation.PSCredential -ArgumentList $username, $password Add-AzureRmAccount -ServicePrincipal -Credential $credential -TenantId $tenantId }