UEFI Boot 環境でダイナミック ディスクの RAID 1 (ミラーリング) を組む方法 3/3
こんにちは。
Windows プラットフォーム サポート担当の佐々木です。
今回は、UEFI Boot 環境の Windows 10 において、前回のブログで作成した EFI システム パーティションの BCD を訂正し、
新規に作成したディスクから OS を起動をさせるまでの手順についてご説明させていただきたいと思います。
前回までのブログ
UEFI Boot 環境でダイナミック ディスクの RAID 1 (ミラーリング) を組む方法 1/3 UEFI Boot 環境でダイナミック ディスクの RAID 1 (ミラーリング) を組む方法 2/3
■ BCD (ブート構成データ)とは?
OS の起動に関する情報が埋め込まれたデータのことです。
BCDEdit.exe というコマンドツールから BCD を編集することができます。
5. BCD (ブート構成データ) の修正する。
5-1. 管理者権限でコマンド プロンプトを起動し、以下のコマンドを順番に実行します。
bcdedit.exe /enum all 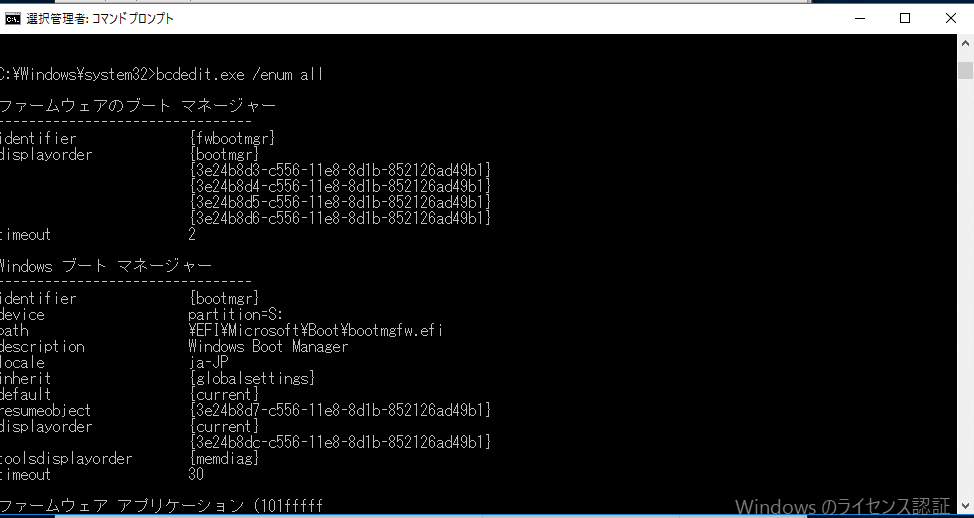
(I) 表示された一覧から、 詳細に Windows Boot Manager または Windows Boot Manager – Primary Disk と記載のある Windows Boot Manager の GUID をメモします。
詳細が "Windows Boot Manager – Primary Disk" ではなかった場合は、以下のコマンドで変更します。
bcdedit.exe /set {identifier} description “Windows Boot Manager – Primary Disk”
※ identifier には (I) でメモした GUIDを入力します。
(II) bcdedit.exe /copy {identifier} /d “Windows Boot Manager – Secondary Disk”
※ identifier には (I) でメモした GUIDを入力します。表示された GUID をメモします。
bcdedit.exe /set {identifier} device partition=t:
※ identifier には (II) でメモした GUIDを入力します。
Bcdedit.exe /enum all
(III) 表示された一覧から、 詳細に Windows Resume Application – secondary plex と記載のある “休止状態からの再開” の GUID をメモします。
(IV) 表示された一覧から、 詳細に Windows 10 – secondary plex と記載のある “ Windows ブートローダー” の GUID をメモします。
Bcdedit.exe /export t:\EFI\Microsoft\boot\BCD
Bcdedit.exe /store s:\EFI\Microsoft\Boot\BCD /delete {identifier}
※ identifier には (III) でメモした GUID を入力します。
Bcdedit.exe /store s:\EFI\Microsoft\Boot\BCD /delete {identifier}
※ identifier には (IV) でメモした GUID を入力します。
Bcdedit.exe /store t:\EFI\Microsoft\boot\BCD /enum all
(V) 表示された一覧から、”Device Options” の GUID をメモします。
(VI) 表示された一覧から、 詳細に Windows Recovery Environment と記載のある “Windows Boot Loader” の GUID をメモします。
(VII) 表示された一覧から、 詳細に Windows Resume Application と記載のある “休止状態からの再開” の GUID をメモします。
(VIII) 表示された一覧から、 詳細に Windows 10 と記載のある “Windows Boot Loader” の GUID をメモします。
(IX) 表示された一覧から、 詳細に Windows Boot Manager – Primary Disk と記載のある “Windows Boot Manager” の GUID をメモします。
(X) 表示された一覧から、 詳細に Resume Application – secondary plex と記載のある “休止状態からの再開” の GUID をメモします。
(XI) 表示された一覧から、 詳細にWindows 10 – secondary plex と記載のある “Windows Boot Loader” の GUID をメモします。
(XII) 表示された一覧から、 詳細にWindows Boot Manager – secondary disk と記載のある “Windows Boot Manager” の GUID をメモします。
Bcdedit.exe /store t:\EFI\Microsoft\boot\BCD /set {identifier} ramdisksdidevice partition=r:
※ identifier には (V) でメモした GUID を入力します。
Bcdedit.exe /store t:\EFI\Microsoft\boot\BCD /set {memdiag} device partition=t:
bcdedit.exe /store t:\EFI\Microsoft\boot\BCD /set {identifier1} device ramdisk=[r:]\Recovery\WindowsRE\Winre.wim {identifier2}
※ identifier1 には (VI) でメモした GUID を入力します。
※ identifier2 には (V) でメモした GUID を入力します。
bcdedit.exe /store t:\EFI\Microsoft\boot\BCD /set {identifier1} osdevice ramdisk=[r:]\Recovery\WindowsRE\Winre.wim {identifier2}
※ identifier1 には (VI) でメモした GUID を入力します。
※ identifier2 には (V) でメモした GUID を入力します。
bcdedit.exe /store t:\EFI\Microsoft\boot\BCD /delete {identifier}
※ identifier には (VII) でメモした GUID を入力します。
bcdedit.exe /store t:\EFI\Microsoft\boot\BCD /delete {identifier}
※ identifier には (VIII) でメモした GUID を入力します。
bcdedit.exe /store t:\EFI\Microsoft\boot\BCD /delete {identifier} /f
※ identifier には (IX) でメモした GUID を入力します。
bcdedit.exe /store t:\EFI\Microsoft\boot\BCD /set {identifier} description “Windows Resume Application”
※ identifier には (X) でメモした GUID を入力します。
bcdedit.exe /store t:\EFI\Microsoft\boot\BCD /set {identifier} description “Windows 10”
※ identifier には (XI) でメモした GUID を入力します。
bcdedit.exe /store t:\EFI\Microsoft\boot\BCD /set {identifier1} resumeobject {identifier2}
※ identifier1 には (XI) でメモした GUID を入力します。
※ identifier2 には (X) でメモした GUID を入力します。
bcdedit.exe /store t:\EFI\Microsoft\boot\BCD /set {identifier1} recoverysequence {identifier2}
※ identifier1 には (XI) でメモした GUID を入力します。
※ identifier2 には (VI) でメモした GUID を入力します。
bcdedit.exe /store t:\EFI\Microsoft\boot\BCD /set {identifier1} default {identifier2}
※ identifier1 には (XII) でメモした GUID を入力します。
※ identifier2 には (XI) でメモした GUID を入力します。
bcdedit.exe /store t:\EFI\Microsoft\boot\BCD /set {identifier1} resumeobject {identifier2}
※ identifier1 には (XII) でメモした GUID を入力します。
※ identifier2 には (X) でメモした GUID を入力します。
5-2. ディスク 1 上のセカンダリ プレックスの情報を更新するため以下のコマンドを実行します。
bcdedit.exe /enum all
(I) 表示された一覧から、 詳細にWindows Boot Manager – secondary disk と記載のある “Windows Boot Manager” の GUID をメモします。
bcdedit.exe /set {fwbootmgr} displayorder {identifier} /addfirst
※ identifier には (I) でメモした GUID を入力します。
5-3. システムを再起動するため、以下のコマンドを実行します。
shutdown.exe /r /t 0
※ 再起動後はディスク 1 (セカンダリ ディスク) から起動します。
5-4. 再起動完了後、管理者コマンドプロンプトで Diskpart ユーティリティーを起動し、以下のコマンドを順に実行します。
Select disk 0
Select partition 2
Assign letter=s
※ ディスク 0 上の EFI システム パーティションにレター S を割り当てています。
Select disk 1
Select partition 2
Assign letter=t
※ ディスク 1 上の EFI システム パーティションにレター T を割り当てています。
5-5. 新たな管理者権限のコマンド プロンプトを起動し、以下のコマンドを順番に実行します。
bcdedit.exe /store s:\EFI\Microsoft\boot\BCD /enum all
(I) 表示された一覧から、 詳細に Windows Boot Manager – secondary disk と記載のある “Windows Boot Manager” の GUID をメモします。
Bcdedit.exe /store s:\EFI\Microsoft\boot\BCD /delete {identifier}
※ identifier には (I) でメモした GUID を入力します。
bcdedit.exe /enum all
(II) 表示された一覧から、 詳細に Windows Boot Manager – Primary Disk と記載のある “Firmware Application {101fffff}” の GUID をメモします。
※ 詳細に Windows Boot Manager – Primary Disk と記載されていない場合は、ディスク 0 (プライマリ ディスク) のファームウェア アプリケーションをメモします。不明な場合は、手順 3-2 で確認した BCD 情報を参考にしてください。
bcdedit.exe /set {fwbootmgr} displayorder {identifier} /addfirst
※ identifier には (II) でメモした GUID を入力します。
bcdboot c:\windows 
bcdedit /enum firmware
(III) 表示された一覧から、 詳細に Windows Boot Manager – secondary disk と記載のある “Windows Boot Manager” の GUID をメモします。
bcdedit /delete {identifier}
※ identifier には (III) でメモした GUID を入力します。
bcdedit /set {bootmgr} description “Windows Boot Manager – Secondary Disk”
bcdedit /enum firmware
(IV) 表示された一覧から、 詳細に Windows Boot Manager – Primary Disk と記載のある “Firmware Application {101fffff}” の GUID をメモします。
bcdedit.exe /set {fwbootmgr} displayorder {identifier} /addfirst
※ identifier には (IV) でメモした GUID を入力します。
1-6. システムを再起動します。以下のコマンドを実行します。
shutdown.exe /r /t 0
以上でダイナミックディスクの RAID 1 を構成する手順は完了です。
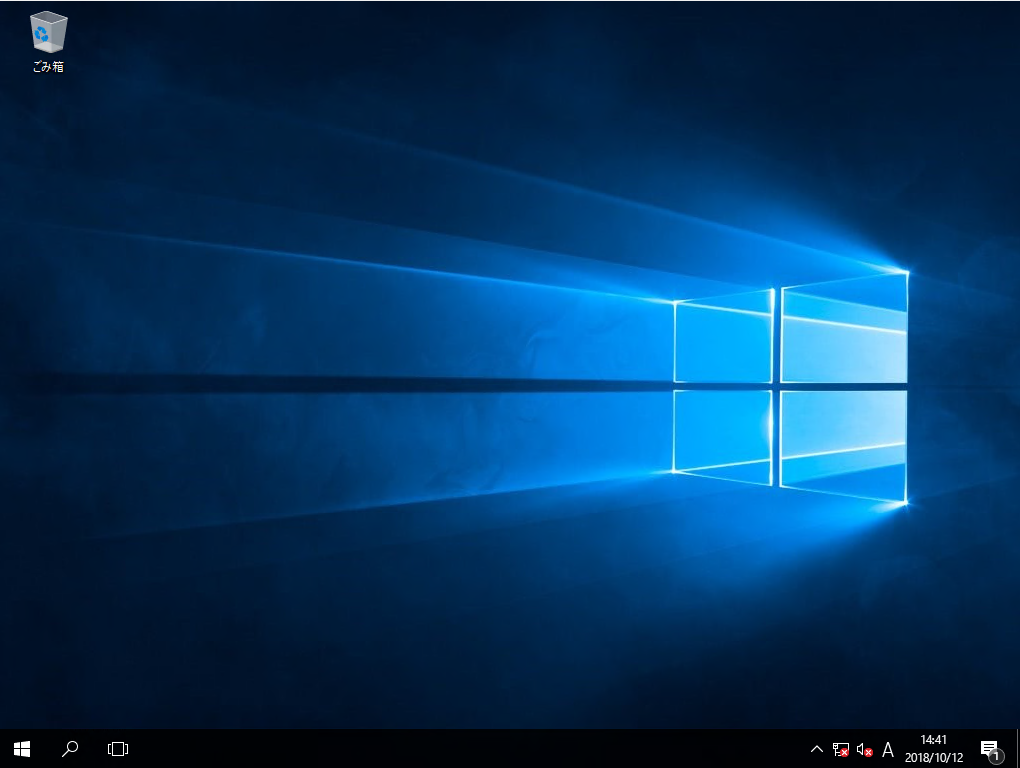
ディスク 0 を取り外し、新たに作成したディスク 1 から OS の起動が可能かお試しください。
※以下の画像のように起動できれば、ディスクのミラーリングに成功しています。
いかがでしたでしょうか。
本ブログが少しでも皆様のお役に立てば幸いです。
- 参考情報
Virtual Disk Service is transitioning to Windows Storage Management API
https://msdn.microsoft.com/ja-jp/windows/compatibility/vds-is-transitioning-to-windows-storage-management-api