Establishing Network Connectivity to a Share in the Windows Recovery Environment
Hi there! My name is Neil Dsouza and I’m a Support Escalation Engineer with the Windows Core team.
Today I’m going to cover a scenario where you have a server that fails to boot and all you want to do is copy the data off the machine to a network share. In most cases connecting a USB flash drive/hard drive is the easiest solution to copy off the data. However, if you don’t have physical access to the server, but you do have remote console access, then you can copy the data to a network share. These steps will also help gather logs or data when troubleshooting Windows in a no-boot scenario.
For Operating systems newer than Windows 7, by default Windows Recovery Environment (WinRE) is installed, unless this was changed during deployment/installation of Windows. The steps should work for most operating systems Windows 7 and newer.
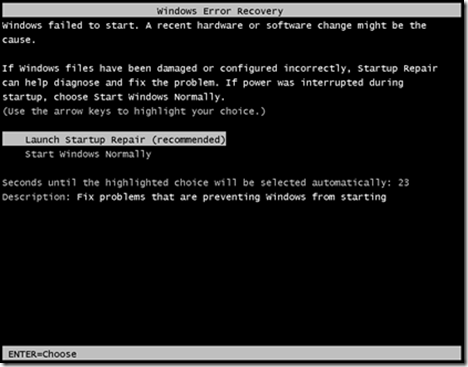
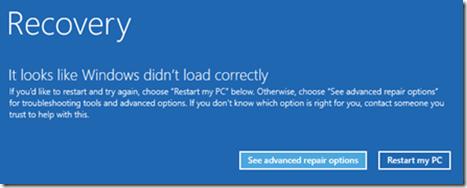
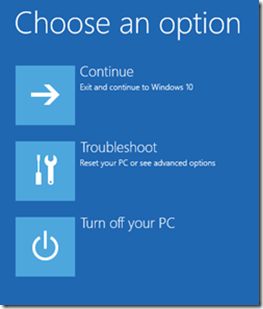
When the Operating system fails to boot, by default it will take you to a boot menu with an option to boot into WinRE which would say ‘Repair your computer’ or ‘Launch Startup repair’.
Image1: Boot menu to go to WinRE in Windows 7 or Windows Server 2008 R2
Image 2: Boot Menu to go to WinRE in Windows 8 / 2012 / 2012 R2 / 8.1 / 10
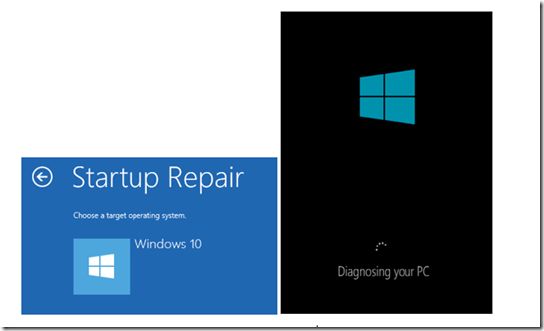
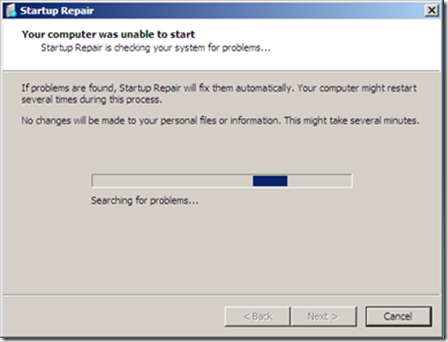
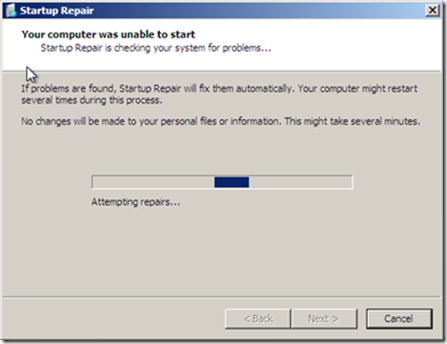
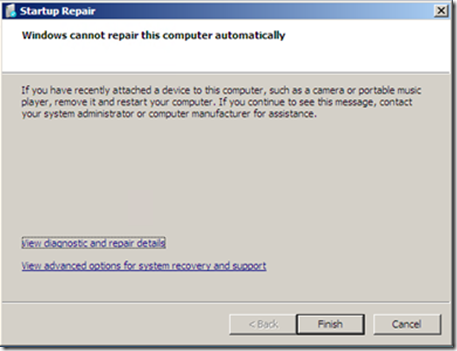
Choosing the ‘Startup Repair’ option will run the ‘Startup Repair Wizard’ and attempt to fix the most common issues that cause operating system boot failures.
Image 3: Startup Repair running in Windows 8 and newer OS
Images 4: Startup Repair running in Windows version before Windows 8
In the end a report is provided with the tests that ran to detect issues and what the result was. This information can be useful to understand why Windows failed to boot.
Image 5: Startup repair Results
If you miss seeing this in the wizard, you can always go to the Command Prompt in WinRE and open the below file which has the information logged: %WINDIR%\System32\LogFiles\SrtTrail.txt
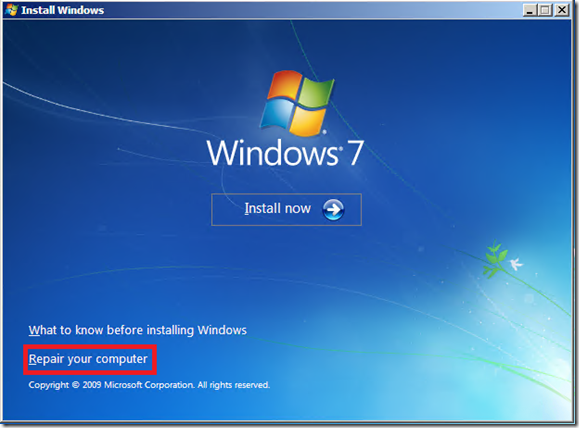
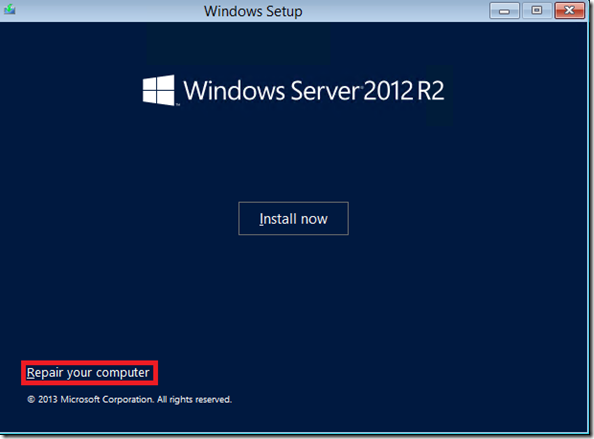
If you do not see the ‘Repair Your Computer’ or ‘Launch Startup Repair’ option, it means that WinRE was not installed when the OS was installed. In such cases you can still boot to WinRE by using the operating system disk and selecting ‘Repair your computer’ at the install screen.
Image 6: Boot from CD/DVD/ISO screen for Windows 7
Image 7: Boot from CD/DVD/ISO screens for Windows 8 / 2012 / 8.1 / 2012 R2 / 10
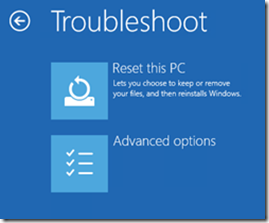
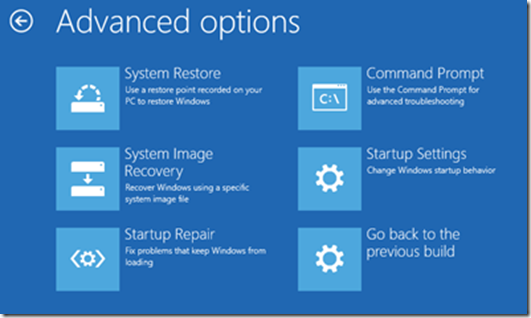
On Windows 8 and newer OS’s, you have to navigate through the options further as shown below:
Select ‘Troubleshoot’
Select ‘Advanced Options’
Select ‘Command Prompt’, or you could run the ‘Startup Repair’ from here
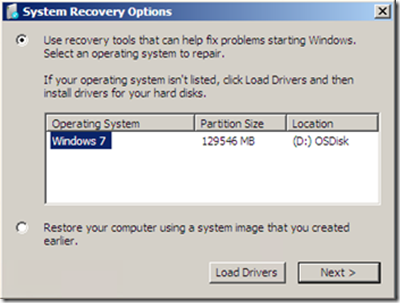
For OS versions of Vista thru Windows Server 2008 R2
Click ‘Next’
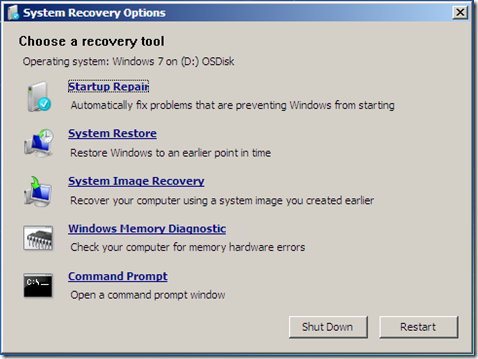
Select ‘Command Prompt’, or you could run the ‘Startup Repair’ from here
Once we are at the command prompt we can do our magic.
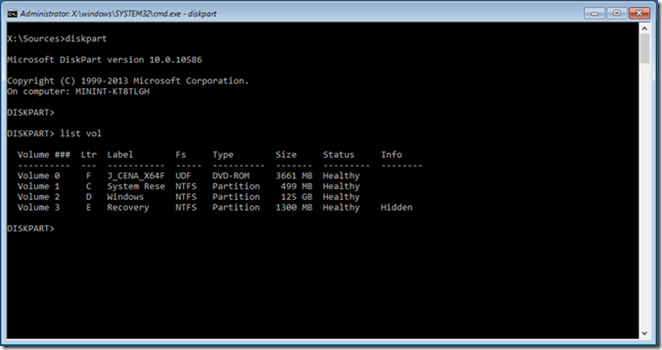
First thing we want to do is see what the drive letters are for each partition. DISKPART is our friend here.
Run the command: diskpart
List Volume
Now we come to the most interesting part.
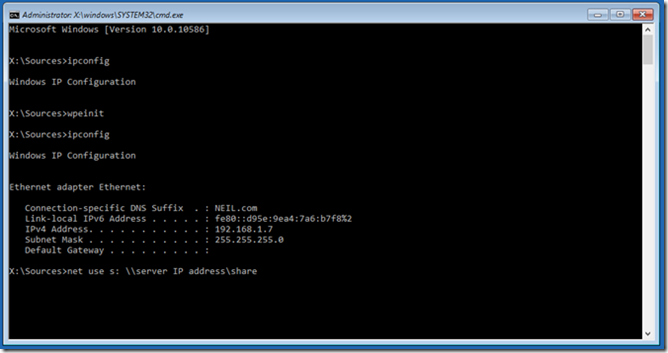
To establish network connectivity with a file share on some machine where you need to copy your data, log files or that memory dump Microsoft support is asking for when the machine blue screens on startup, you can run ‘wpeinit’ from the command prompt. This is a program built into WinPE from which WinRE is created.
Now you can run ‘ipconfig’ and you will see that an IP address is assigned to the WinRE session. This will work only if you have a DHCP server assigning IP addresses.
In certain cases, ‘wpeinit’ runs, however does not initialize the NIC or does not assign IP address. There are couple of reasons why that happens.
1. NIC driver is not loaded
In this scenario you can manually load the NIC driver. First you need to identify the right driver that may already reside on the machine. All drivers that were installed on the machine are maintained, unless explicitly removed, in the path %WINDIR%\System32\DriverStore\FileRepository with a folder name starting with the driver inf file name followed by a GUID. You may have multiple folders starting with inf filename if you have installed multiple versions of the same driver. In any case you can download the driver and extract it on to a USB stick. We need the .sys, .inf, etc files uncompressed to be able to load the driver manually.
An example of the driver files in FileRepository is below.
Run the below command to load the NIC driver from the above image:
drvload c:\Windows\system32\DriverStore\FileRepository\netwew01.inf_amd64_9963f911be06feae\netwew01.inf
2. There’s no DHCP Server in the environment that could automatically assign an IP address
What do you do if there isn’t a DHCP server assigning IP addresses? Well, you can assign a static IP address using the below netsh command. You may use the same IP address of the server, however if you have trouble with that use a different IP address.
netsh int ipv4 set address "<Connection Name>" static <IP> <Subnet Mask> <Default Gateway>
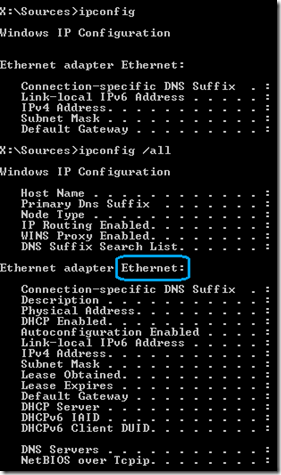
The Connection Name can be obtained by running ‘ipconfig /all’ command. It’s the text highlighted in blue in the below image.
Once you have an IP address, you can map a network drive using the command below to a file server or a simple share on another machine.
net use y: \\ServerName\ShareName
ServerName is the Computer Name of the server or IP Address in case name resolution is not working and ShareName is the name of the share. You will be asked for credentials to access the network share.
You could run the command below for it to take next available drive letter and display the letter.
net use * \\ServerName\ShareName
Now you can copy files and folders from the non-booting machine to a network share using copy, xcopy or much better use robocopy.
I hope this helps you save some time when you have a machine that is not booting up, whether it’s a server or a client machine and help you copy/backup important data or logs to investigate the issue
Neil Dsouza
Support Escalation Engineer
Windows Core Team
