Step-By-Step: Configuration Manager Site Database hosted on SQL Server AlwaysOn Availability Group
Introduction
Configuration Manager 1602 introduced the support of SQL Server AlwaysOn Availability Groups. Now we can host the Central/Primary Site databases into Availability Groups for high availability and disaster recovery purposes.
Note - This feature is supported for existing Site DBs and cannot be used during the initial ConfigMgr setup.
Environment
Here's a snapshot of the environment I am using to demonstrate this feature.
| Domain Controller | DDC1 | Windows Server 2012 R2 |
| SQL Server | SQL1 | Windows Server 2012 R2 |
| SQL Server | SQL2 | Windows Server 2012 R2 |
| Primary Site | PRIMARY1 | Windows Server 2012 R2 |
SQL Configuration
Both the SQL Servers are running identical configuration.
| Edition | SQL Server 2014 Enterprise Sp1 |
| Features | Database EngineManagement Tools |
| Instance | MSSQLSERVER (Default) |
| Port | 1433 (Default) |
| Service Account | Domain Account |
| Mode | Windows Authentication |
If you have a scenario where you can't use the same version, follow the steps in this TechNet link under section Known Issues.
SCCM Configuration
Here's a snapshot of the ConfigMgr environment.
| Type | Standalone Primary |
| Version | 1511 |
| Upgrade | 1602 |
| Roles | MP & DP Local on Site Server |
| SQL | SQL1 (Remote) |
| Site Code | PS1 |
| Mode | HTTP |
Prerequisite for SQL AlwaysOn
Assuming you have a healthy ConfigMgr environment, we will now proceed with the introduction of SQL AlwaysOn.
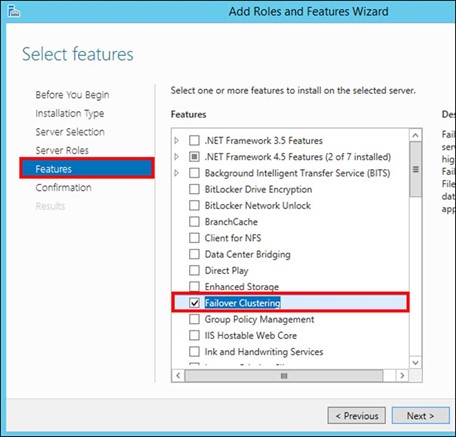
Install Feature - Failover Clustering
On all the SQL servers participating in AlwaysOn group, install the Failover Clustering feature.
Failover Cluster Configuration
Open Failover Cluster Manager and click Create Cluster
- Add all the SQL Nodes participating in SQL AlwaysOn availability group
- Click Next

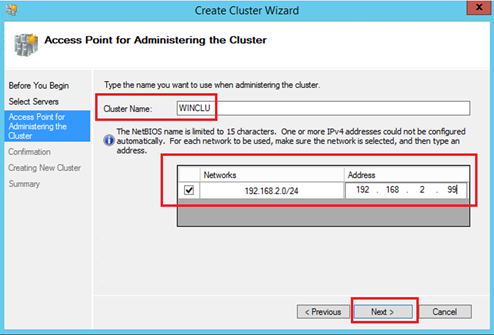
- Specify a Cluster Name. (This name will not be used by ConfigMgr)
- Specify an IP Address and click Next
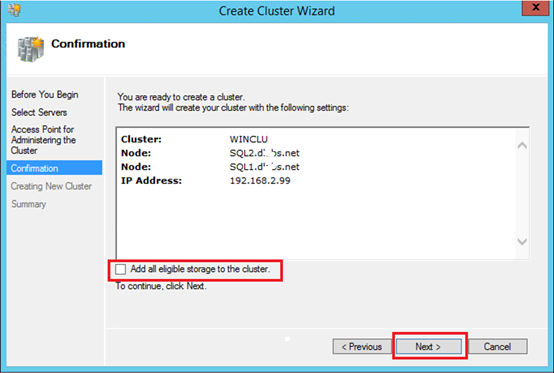
- Uncheck the box Add all eligible storage to the cluster and click Next
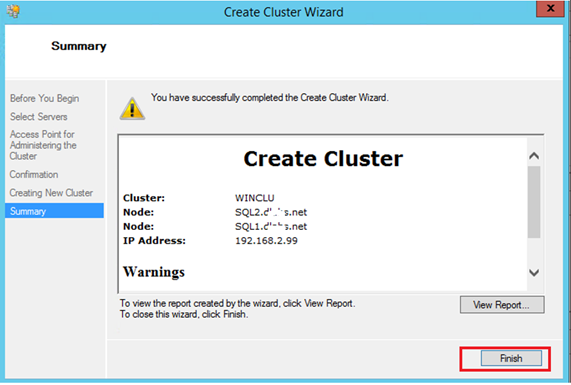
- Validate a successful creation on cluster and click Finish
- Based on the number of nodes, configure the Cluster Witness as appropriate.
Enable SQL Server AlwaysOn Availability Groups Feature
On all the SQL servers participating in AlwaysOn group, perform the following steps.
- Open SQL Server Configuration Manager.
- Double-click the SQLServer (MSSQLSERVER) service to open the Properties dialog box.

- In the Properties dialog box, select the AlwaysOn High Availability tab.
- Check the Enable AlwaysOn Availability Groups check box.
- Click OK and this will prompt you to restart the SQL Server service.
- Manually restart the SQL Server Service

Prepare ConfigMgr for SQL AlwaysOn
- Add the computer account of the Primary Site server to the Administrators group on each SQL server participating in SQL AlwaysOn availability group.
- Add the Installation account to the Administrators group on each SQL server participating in SQL AlwaysOn availability group.
- Add the Installation account to sysadmin role on each SQL server participating in SQL AlwaysOn availability group.
- Open a command prompt window and navigate to the following directory - E:\Program Files\Microsoft Configuration Manager\bin\X64\00000409
- Run the following command - Preinst.exe /stopsite
Once all the components are stopped proceed to the next steps.
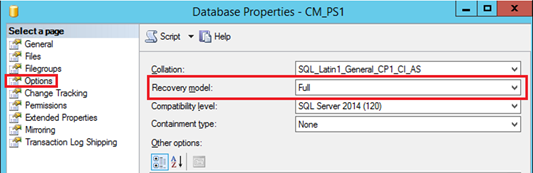
Change Backup Model to Full
On the existing SQL Server -
- Open SQL Server Mgmt Studio and go to the Properties of the Site Database and click Options tab.
- Change Recovery model = Full
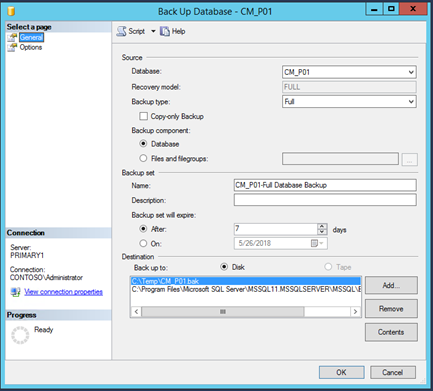
Backup ConfigMgr DB
On the existing SQL Server -
- Open SQL Server Mgmt Studio and Right click ConfigMgr DB > Tasks > Backup
- Make sure Full is selected for Backup type
- Set an expiry date
Optionally you can add additional destination.
Copy the .bak file to one of the SQL servers participating SQL AlwaysOn
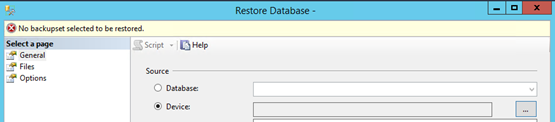
Restore ConfigMgr DB
Select one of the participating SQL AlwaysOn node to restore the database. (where you copied the .bak file)
- Open SQL Server Mgmt Studio and Right click Databases > Restore Databases
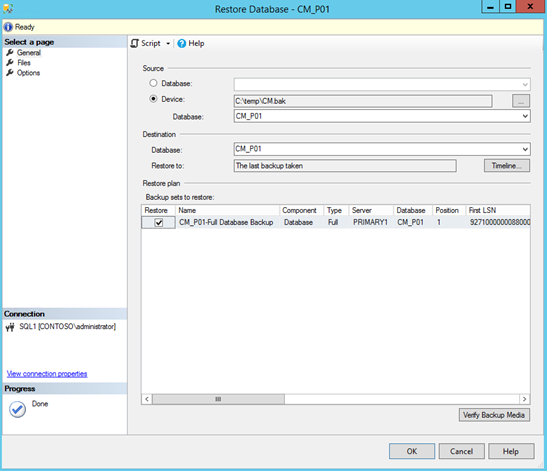
- Choose Device and click elipse
- Add .bak file
- Click OK to restore.
Create and Configure SQL Server AlwaysOn Availability Groups
- Open SQL Server Management Studio. Connect to the SQL Server instance
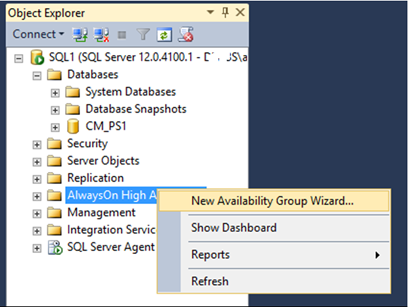
- Click Always On High Availability and right click to select New Availability Group Wizard.
- Click Next in the Availability Group Wizard
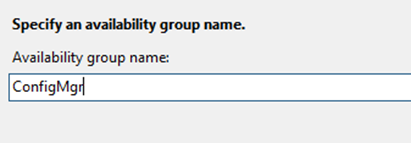
- Specify an Availability Group Name
- Click Next to Select Database. Ensure status is Meets prerequisites.

- Click Next to Specify Replicas. Click Add Replica to add each SQL server participating in SQL AlwaysOn availability group.
- Check the box for Synchronous Commit
- Set Readable Secondary = Yes
These are requirements for ConfigMgr specified in this link https://technet.microsoft.com/en-US/library/mt651651.aspx 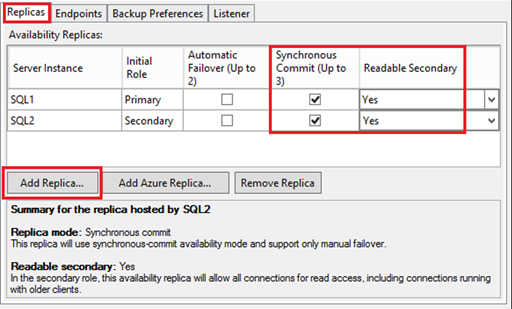
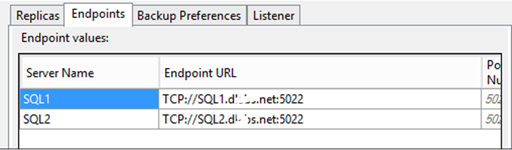
- Click Endpoints tab to verify each SQL server participating in SQL AlwaysOn availability group.
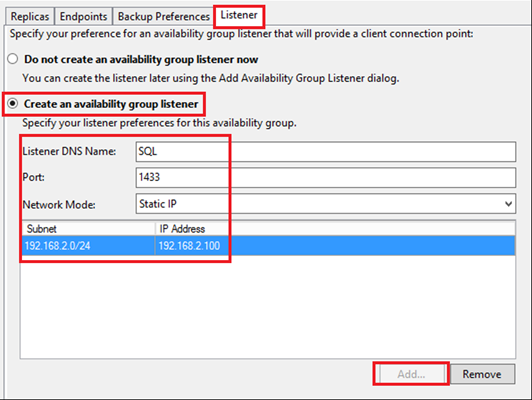
- Click on Listener Tab and select option Create an availability group listener. We need a name that ConfigMgr will use as connection string to connect to any of the SQL server participating in SQL AlwaysOn availability group.
- Add Listener DNS Name, Port 1433 and a Static IP
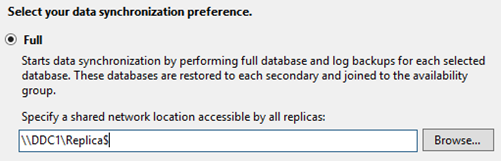
- Click Next to Select Data Synchronization. Keep Full and specify a shared path accessible by all replicas.
This share will be used to save the backup of the ConfigMgr database and for restoring to the replicas.
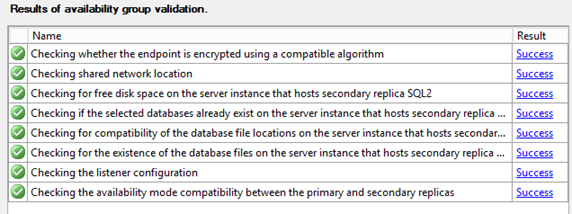
- Click Next to complete the validation.
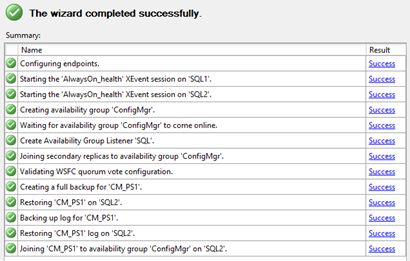
- Confirm selections and click Finish on the wizard

- The automated process is now going to Create Logins, Configure Endpoints, Backup and Restore Primary Site database on each SQL server participating in SQL AlwaysOn availability group.
- Click Close once the operation completes.
- Validate the newly created Availability group via the AlwaysOn Dashboard.
- In SQL Server Mgmt Studio, expand AlwaysOn High Availability node, expand Availability Groups, the group we created ConfigMgr. Right click Show Dashboard.
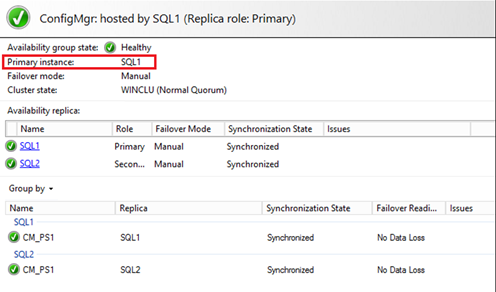
Note the Primary instance is SQL1 and Secondary is SQL2 which is the Replica.
Configure SQL for ConfigMgr DB
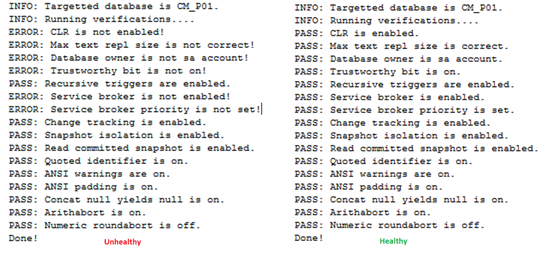
- Run the attached script to validate a healthy ConfigMgr DB configuration. Here's a resultant snapshot of the expected output when you execute the query.

When you perform a backup and restore operation on a new SQL server, it may lose some of the configurations highlighted below -
INFO: Targetted database is CM_P01.
INFO: Running verifications....
ERROR: CLR is not enabled!
ERROR: Max text repl size is not correct!
ERROR: Database owner is not sa account!
ERROR: Trustworthy bit is not on!
PASS: Recursive triggers are enabled.
ERROR: Service broker is not enabled!
ERROR: Service broker priority is not set!
PASS: Change tracking is enabled.
PASS: Snapshot isolation is enabled.
PASS: Read committed snapshot is enabled.
PASS: Quoted identifier is on.
PASS: ANSI warnings are on.
PASS: ANSI padding is on.
PASS: Concat null yields null is on.
PASS: Arithabort is on.
PASS: Numeric roundabort is off.
Done!
- Run the attached script to resolve the above issues -
- You need this DB configuration on each SQL AlwaysOn replica. Before you execute the remediation SQL script, you need to failover the DB to that particular node. Follow the steps below to perform the failover.
Failover
Now we need to manually failover the Primary to a Secondary replica.
- In SQL Server Mgmt Studio, expand AlwaysOn High Availability node, expand Availability Groups, the group we created ConfigMgr. Right click Failover.
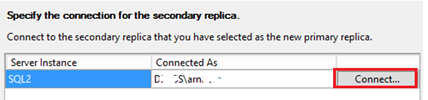
- In the Fail Over Availability Group Wizard select a Secondary Replica Server and click Next

- Click Connect on the Instance and click Next
- Verify the settings and click Finish
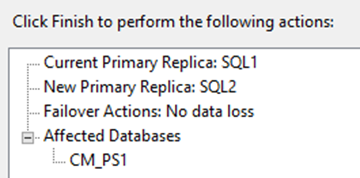
- Verify the successful completion.
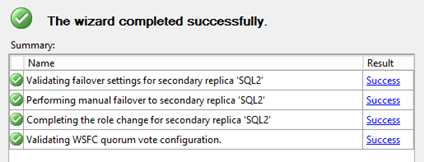
- Open the Availability Dashboard to confirm a successful failover
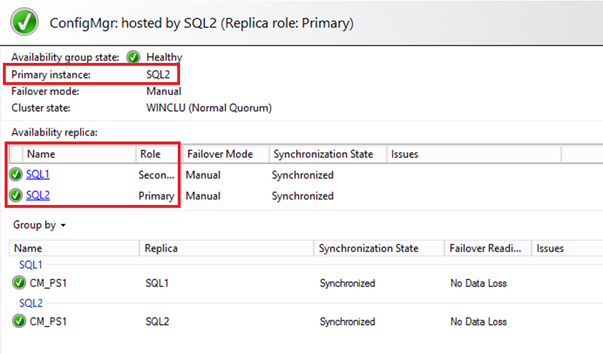
SQL2 is now the Primary Instance and SQL1 is Secondary.
- Don't forget to run the DB reconfiguration remediation script.
Direct ConfigMgr to use SQL AlwaysOn
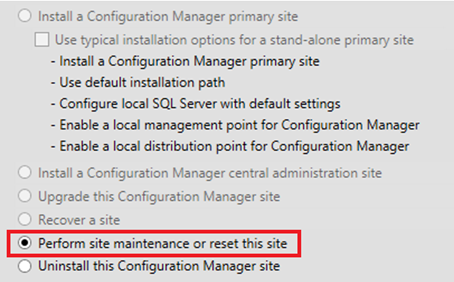
- Run Setup.exe from \Program Files\Microsoft Configuration Manager\bin\X64
- Select the option to Perform Site Maintenance or reset this site and click Next
- Choose the option Modify SQL Server configuration and click Next
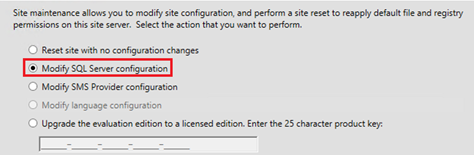
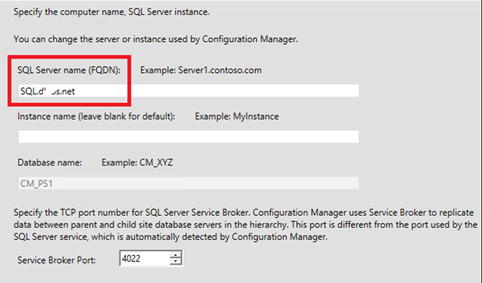
- Change the SQL Server name to Listener DNS name you specified in the AlwaysOn wizard and click Next
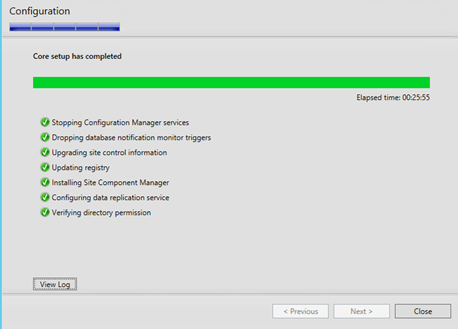
- Validate a successful completion of wizard. Click Close
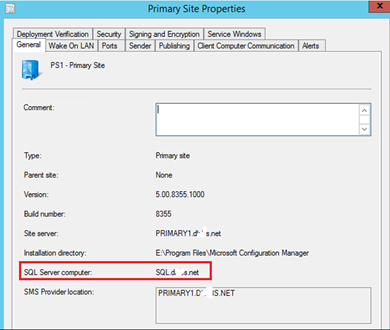
- Launch ConfigMgr Console
- Verify the Site Properties with the new SQL server name.
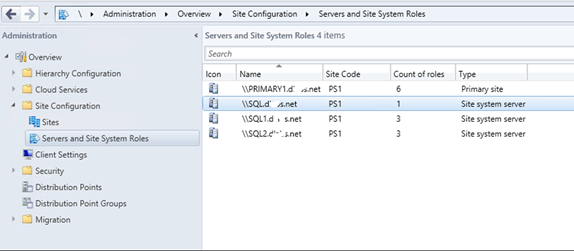
You will note additional Site System Roles for each Replica and the Listener DNS name
Thanks,
Arnab Mitra
Download File - Verify-Database-Settings Download File - Remediate-Database-Settings