Building a Failover Cluster with Server Core Part 2
In my previous post I've talked about how to use base images to quickly deploy new servers in my Hyper-V environment. In this post we will configure the shared storage based on the microsoft iSCSI target software, in a real life environment you could use either a Windows Storage Server or another iSCSI or FC based storage environment.
Before actually digging into the failover clustering installation I want to briefly explain what I have setup so far to be able to build a cluster in the first place.
First I have created a Domain Controller and installed the iSCSI target software to be able to emulate a shared storage environment. I've created two disks one which is 100MB in size and will be used as a witness disk (used to be called Quorum disk) and I have a second disk which is is 1GB of size and will be used as a data disk.
Secondly I have installed two Server Core machines and added the to the domain (read Configuring Windows Server 2008 Server Core or use the Coreconfigurator tool). Make sure your Server core machines have at least two network cards, one for the normal traffic and one for the cluster heartbeat. After having configured all basic things we are now ready to start with the installation and configuration of the clustering software.
Let's do this step by step:
Step 1: Install the Failover Cluster role

Make sure you do this on both Server Core machines
Step 2: Configure and Start the iSCSI initiator service
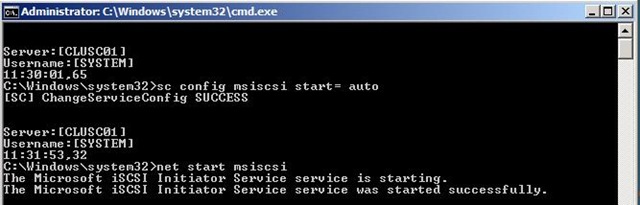
Again perform this on both machines. Now the Microsoft iSCSI initiator service is configured and will start up during boot time.
Step 3: Connecting the Server Core boxes to the iSCSI storage box
Here are all steps you should take on both Server Core boxes to connect to the storage.
iSCSIcli QAddTargetPortal <Storage Box, Portal IP Address>
Required to refresh the new target built,iSCSIcli ListTargets
You should see the iQN of the target created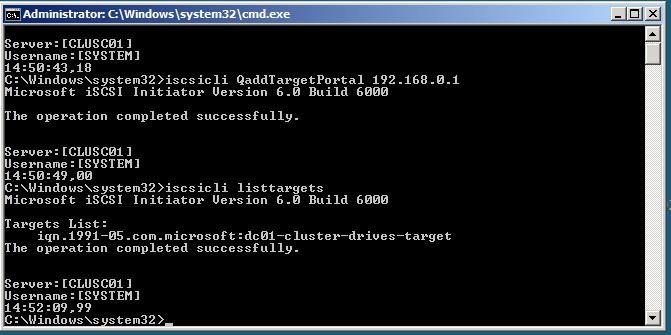
iSCSIcli QloginTarget <Target IQN>
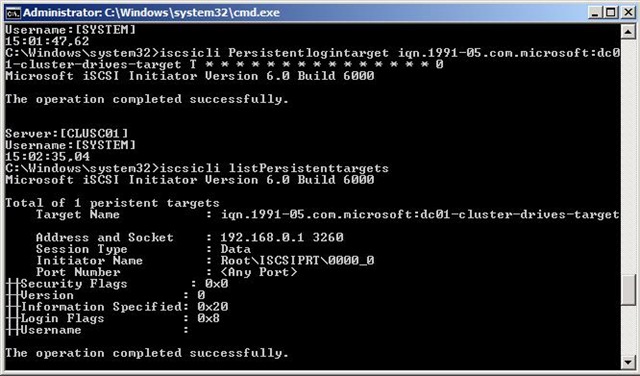
You should see a connection and session idiSCSIcli PersistentLoginTarget <target_iqn> T * * * * * * * * * * * * * * * 0
NOTE: There are 15 “space” + “*”
You do this so you can survive a rebootiSCSIcli ListPersistentTargets
You should see a target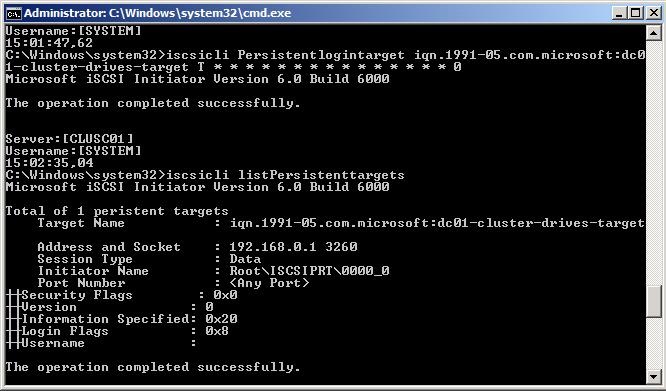
iSCSIcli ReportTargetMappings
You should see the target and a LUN x mapping for every LUN defined in the target
At this stage you have assigned both disks to the server core machines the next step will be to configure the disks
Step 4: Configuring the clustered disks
By being GUI less you need to do this onto the command line.
First list the disks in your boxes by using the diskpart commandline tool:
diskpart
list disk (this will return the disks available in your system in my case I had disk 0, 1 and 2 with 0 being my OS disk and the other two the disks for my cluster)
select disk 1
attribute disk clear readonly
online disk
create part primary
select part 1
assign letter=Q
select disk 2
attribute disk clear readonly
online disk
create part primary
select part 1
assign letter=S
exit

Format each disk by typing format x: /q where X is your drive letter and don't provide any label name.
The servers are now completely configured to form a Windows Failover Cluster, this process will be explained in Part III of this post.
Technorati Tags: Server Core,Windows Failover Clustering,Windows Server 2008