BRANCHCACHE for Exchange 2010 OAB Download How-To:
BRANCHCACHE for Exchange 2010 OAB Download How-To:
Requirements for BranchCache
Following is a list of operating systems that support BranchCache content server or BranchCache client computer functionality. To successfully deploy BranchCache in a test lab environment, you must use operating systems that support BranchCache.
General Requirements to Server and Client
Server and Clients must be able to communicate to each other. Clients must be in the same Subnet (otherwise Discovery of Cached Content will not work). All Machines must be able to resolvable in DNS or WINS.
Operating systems for BranchCache client computer functionality
To perform the steps in this guide, you must have three physical or virtual client computers that are running one of the following operating systems:
- Windows® 7 Enterprise
- Windows® 7 Ultimate
Operating systems for BranchCache content server functionality
To perform the steps in this guide, you must have one physical or virtual server computer to be used as a BranchCache content Web server that is running one of the Windows Server® 2008 R2 family of operating systems, with the following exceptions:
- In Windows Server® 2008 R2 Enterprise Core Install with Hyper-V, BranchCache is not supported.
- In Windows Server® 2008 R2 Datacenter Core Install with Hyper-V, BranchCache is not supported.
Necessary Installation and Configuration Steps for Content-Server:
In our Lab Environment the Content Server should deliver the Exchange OAB. In this case the
existing CAS-Server is responsible for the Content we want to get, so the CAS-Server will be our Content-server. As prerequisite for CAS the IIS-Server is in place so we don’t need to change anything at this point.
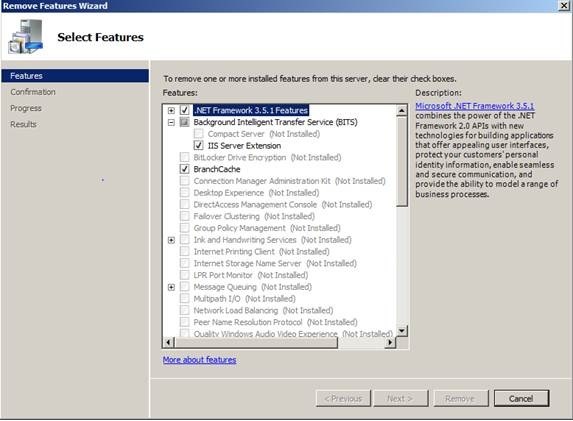
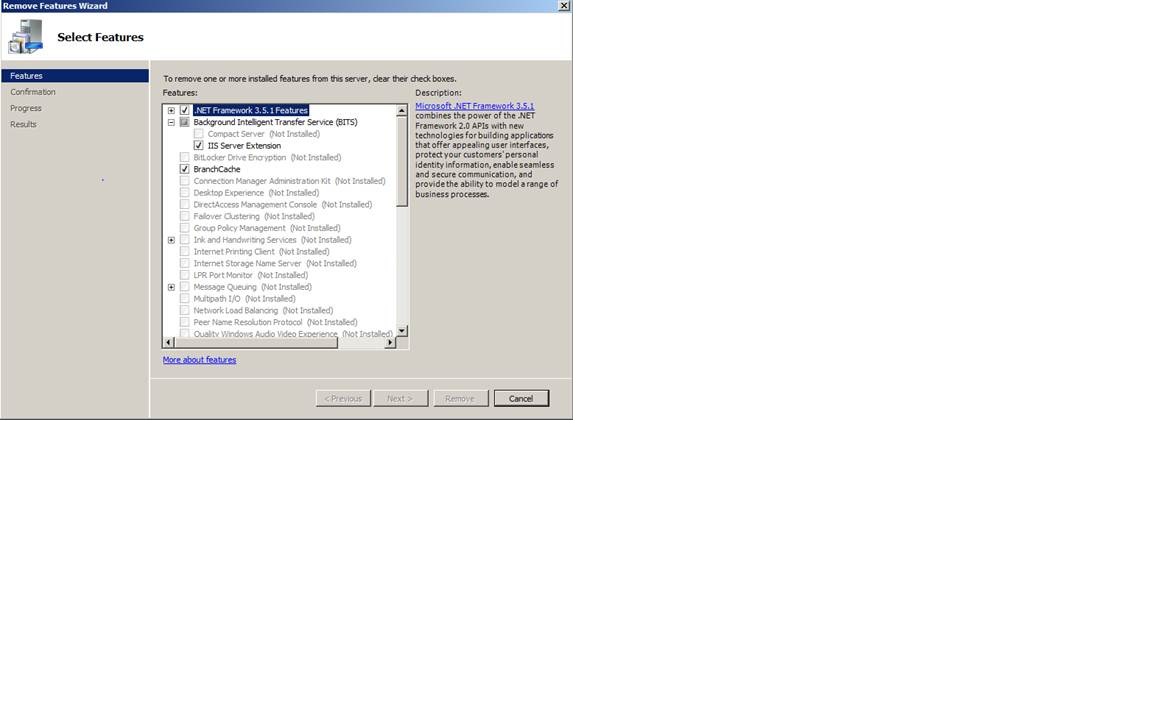
The first neccassary Step is to install the Branchcache Feature from Roles and Features.
After this is done install the B.I.T.S. feature with IIS Extension Subfeature.
At the Server this should be the needed configuration Steps.
Additionaly to verify the functionality you can use Perfmon to Monitor the Branchcache related traffic information.
Configure BranchCache performance counters on the content server
- 1. On CAS with Branchcache installed, click Start, click Search programs and files, and type perfmon. In Search results, in Programs, click perfmon.exe. Windows Performance Monitor opens.
- 2. In Monitoring Tools click Performance Monitor to view the Performance Monitor graph. To change the performance monitor graph to report view, click the graph toolbar icon that displays an arrow to reveal the drop-down list, and then click Report.
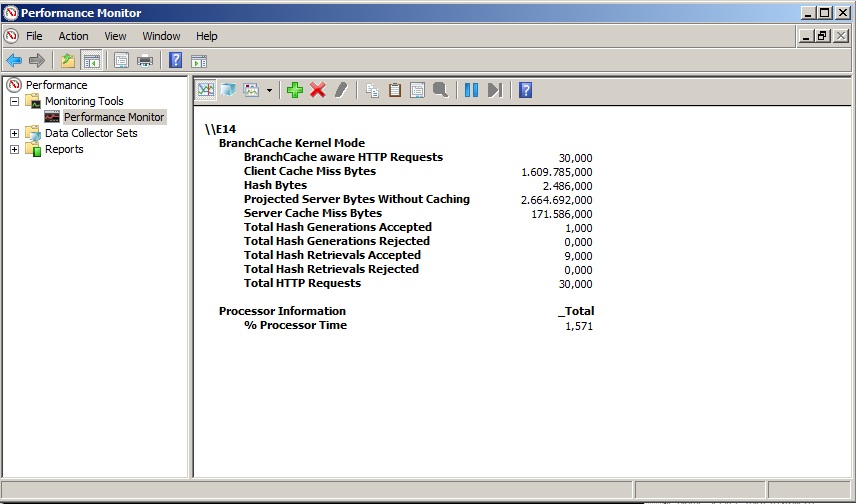
- 3. To add BranchCache counters, click the graph toolbar icon that is a green plus sign (+). The Add Counters dialog box opens. In the left pane, scroll to BranchCache Kernel Mode, and click to expand the list of BranchCache Kernel Mode counters. Click Client Cache Miss Bytes, hold down the Ctrl key, and then click Server Cache Miss Bytes, Hash Bytes, and Projected Server Bytes Without Caching.
- 4. Click Add, and then click OK.
Perfmon Content-Server with working Branchcache
To reset the Branchcache functionallity and the performance counters on the content server use:
Netsh branchcache reset
After the Branchcache reset the Perfmon Counters are reset as well.
Client computer configuration:
Neccessary Installation and Configuration Steps for Client Computers to enable BranchCache distributed cache mode using network shell commands
1. On the BranchCache client computer that you want to configure, click Start, click Search programs and files, and then type command. In search results, under Programs, right-click Command Prompt, and then click Run as Administrator. The command prompt opens with the elevated privileges that are required to run netsh commands.
2. Run the following command: netsh branchcache set service mode=DISTRIBUTED
Suggestion: |
Running the netsh branchcache set service command both configures the client computer for distributed cache mode and automatically configures the client computer firewall with the following inbound exceptions for distributed cache mode: TCP port 80 and UDP port 3702. |
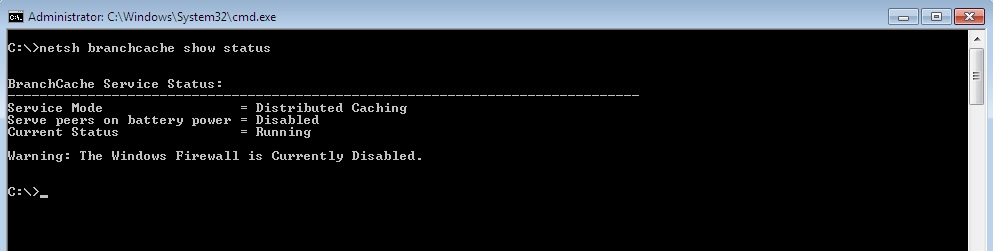
3. To verify that BranchCache distributed cache mode is correctly configured on the client computer, run the following command: netsh branchcache show status. The BranchCache Service Status is displayed in the command prompt window with the following values: Service Mode: Distributed Caching; Serve peers on battery power: Disabled; and Current Status= Running.
To configure BranchCache performance counters on the Client Computers
4. On Client with Branchcache installed, click Start, click Search programs and files, and type perfmon. In Search results, in Programs, click perfmon.exe. Windows Performance Monitor opens.
5. In Monitoring Tools click Performance Monitor to view the Performance Monitor graph. To change the performance monitor graph to report view, click the graph toolbar icon that displays an arrow to reveal the drop-down list, and then click Report.
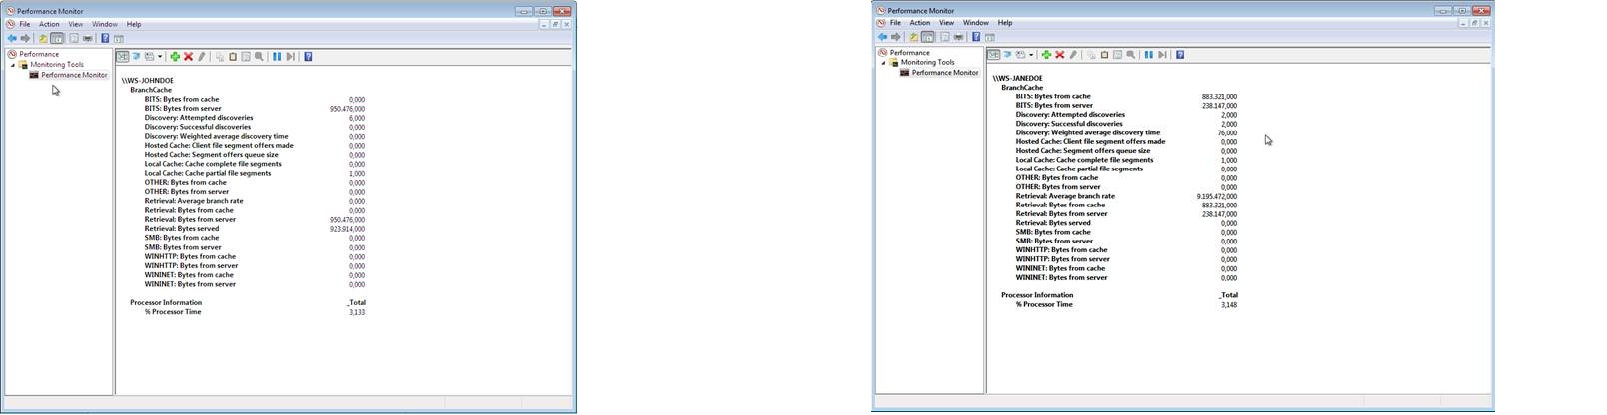
6. To add BranchCache counters, click the graph toolbar icon that is a green plus sign (+). The Add Counters dialog box opens. In the left pane, scroll to BranchCache, and select all underlying counters.
7. Click Add, and then click OK.
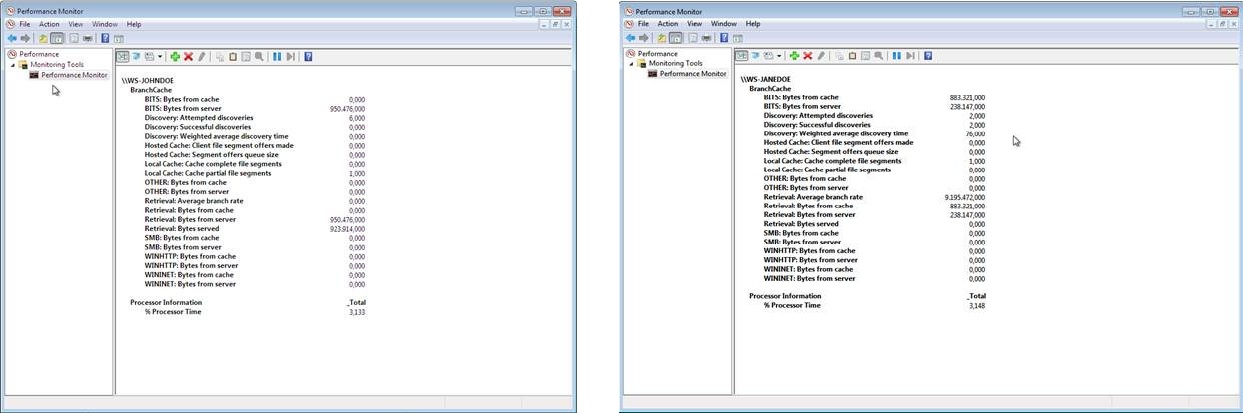
First Windows 7 Client got Data from Server Other Windows 7 Clients got Hashes from Server but Data from Cache of First Client
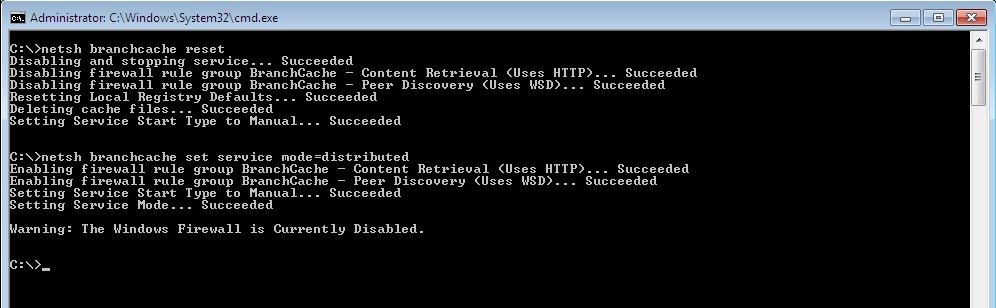
To reset the Branchcache functionallity and the performance counters on the Client machines use:
netsh branchcache reset
and after that
netsh branchcache set service mode=DISTRIBUTED
These are the steps to make OAB Download over Branchcache possible.